Step 1: Begin
In this guide, we provide a simple, three-step path, to quickly get you up and running with your new Juniper Networks® ACX7100-32C Cloud Metro Router. We’ve simplified and shortened the installation and configuration steps, and included how-to videos. You’ll learn how to install an AC-powered ACX7100-32C in a rack, power it up, and configure basic settings. If you need instructions for installing a DC-powered ACX7100-32C, see the ACX7100-32C Hardware Guide.
Meet the ACX7100-32C
The ACX7100-32C Cloud Metro Router is a high-performance router with deep buffer capabilities that address the increasing requirements of traffic growth and latency-dependent applications. Powered by the Junos® OS Evolved operating system, the ACX7100-32C routers offer high port density and MACsec–ready ports, making them ideal for secure and high-end service aggregation and top-of-rack, spine-and-leaf data center applications.
The ACX7100-32C router is a 1-U, fixed-configuration router that provides a throughput of 4.8 Tbps while maintaining a power-efficient footprint. It has 32 QSFP28 ports that operate at 100-Gbps and four QSFP56-DD ports that operate at 400-Gbps.
We ship the ACX7100-32C router with redundant power supplies. You can order it with front-to-back airflow (airflow out or AO), and with AC or DC power supplies.
You can onboard and manage an ACX7100-32C router by using either the Junos OS Evolved CLI or Paragon Automation.

Install the ACX7100-32C
What's in the Box?
-
ACX7100-32C router with six preinstalled fan modules and two preinstalled AC power supplies
-
Two AC power cords appropriate for your geographical location
-
A breakout cable to simultaneously connect to a console and to a time of day (TOD) device
-
Two power cord retainers
-
A four-post rack mounting kit that contains:
-
Two mounting rails for mounting the router flush with the front posts of a rack
-
Twelve flat head Phillips screws for attaching the front mounting rails to the router
-
Two rear mounting blades
-
We no longer include a DB-9 to RJ-45 cable or a DB-9 to RJ-45 adapter with a CAT5E copper cable as part of the device package. If you require a console cable, you can order it separately with the part number JNP-CBL-RJ45-DB9 (DB-9 to RJ-45 adapter with a CAT5E copper cable).
What Else Do I Need?
-
Someone to help you secure the router to the rack
-
A number 2 Phillips (+) screwdriver
-
An electrostatic discharge (ESD) grounding strap
-
A management host such as a laptop or desktop PC
-
A serial-to-USB adapter (if your laptop or desktop PC doesn’t have a serial port)
-
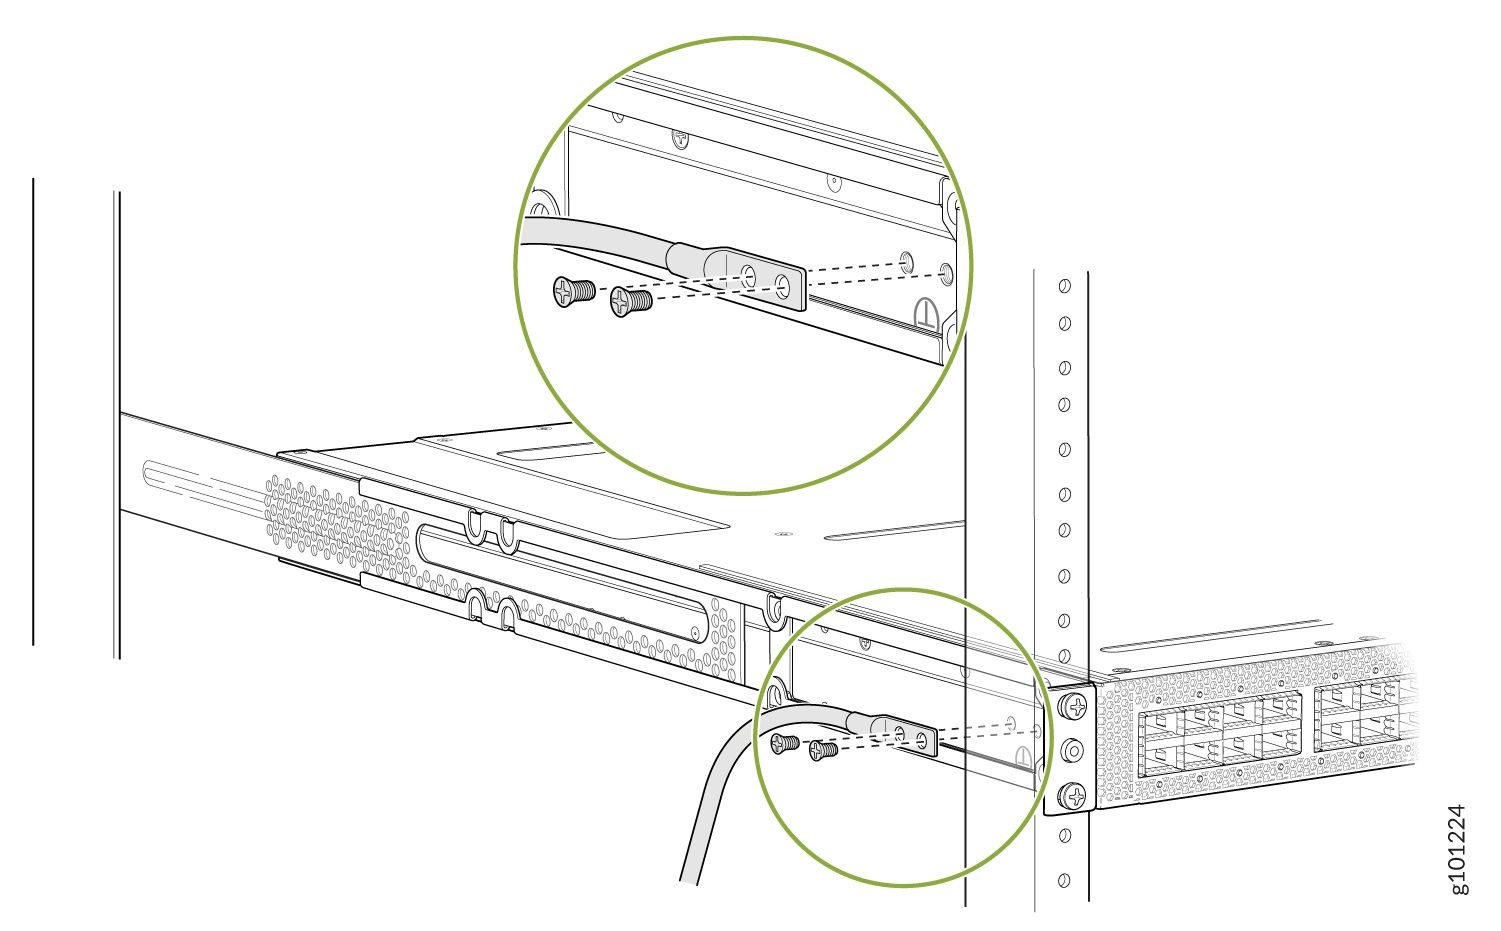
A grounding cable: 14-10 AWG (2-5.3 mm²), stranded wire, or as permitted by the local code, with a Panduit LCD10-10A-L or equivalent lug attached
-
Two #10-32 screws to secure the grounding lug
CAUTION:Ensure that a licensed electrician has attached the appropriate grounding lug to your grounding cable. Using a grounding cable with an incorrectly attached lug can damage the router.
Install the ACX7100-32C in a Rack
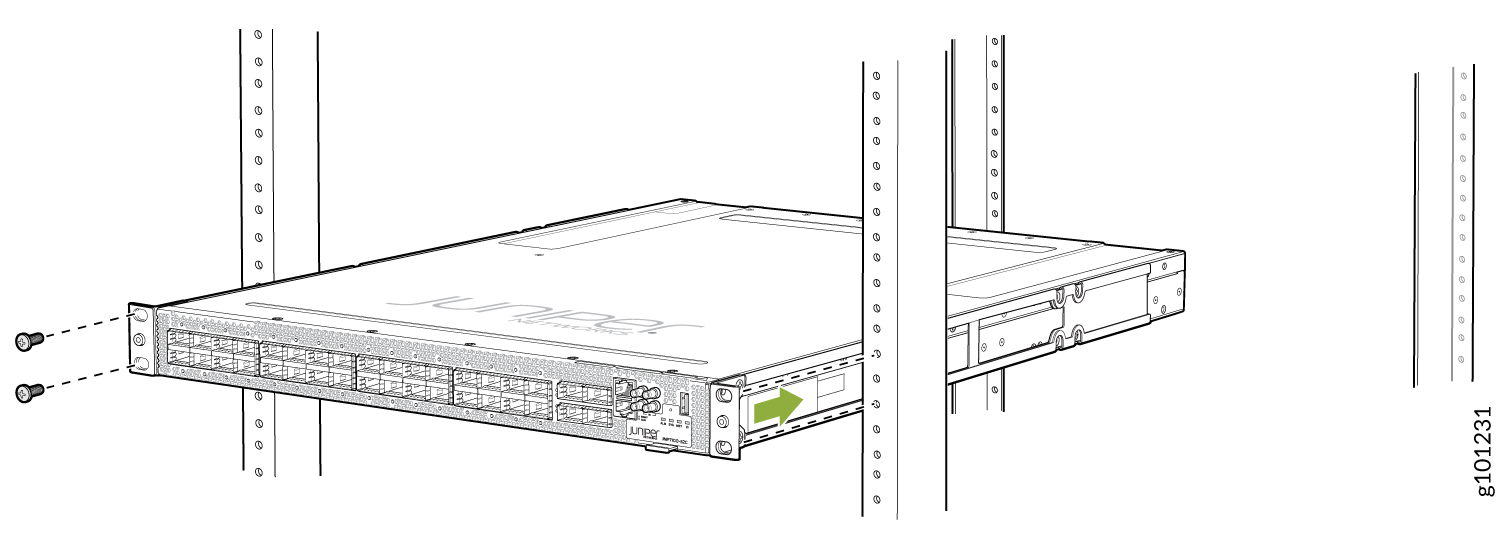
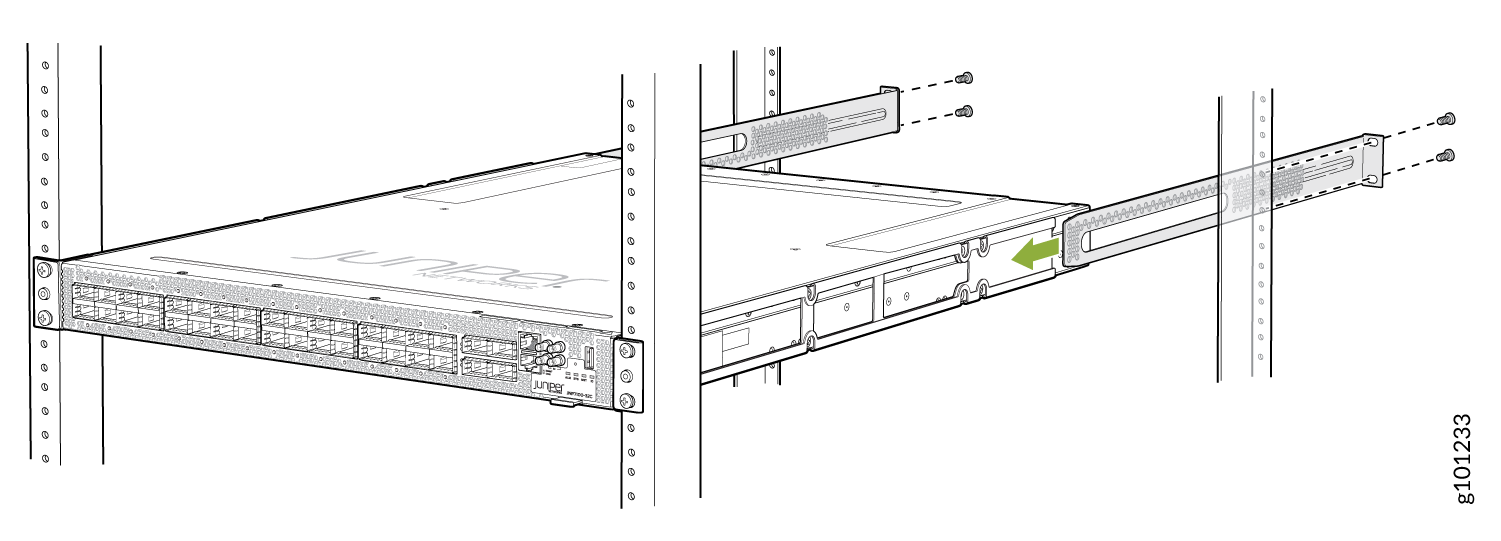
Here’s how to install the ACX7100-32C in a four-post rack:
Power On
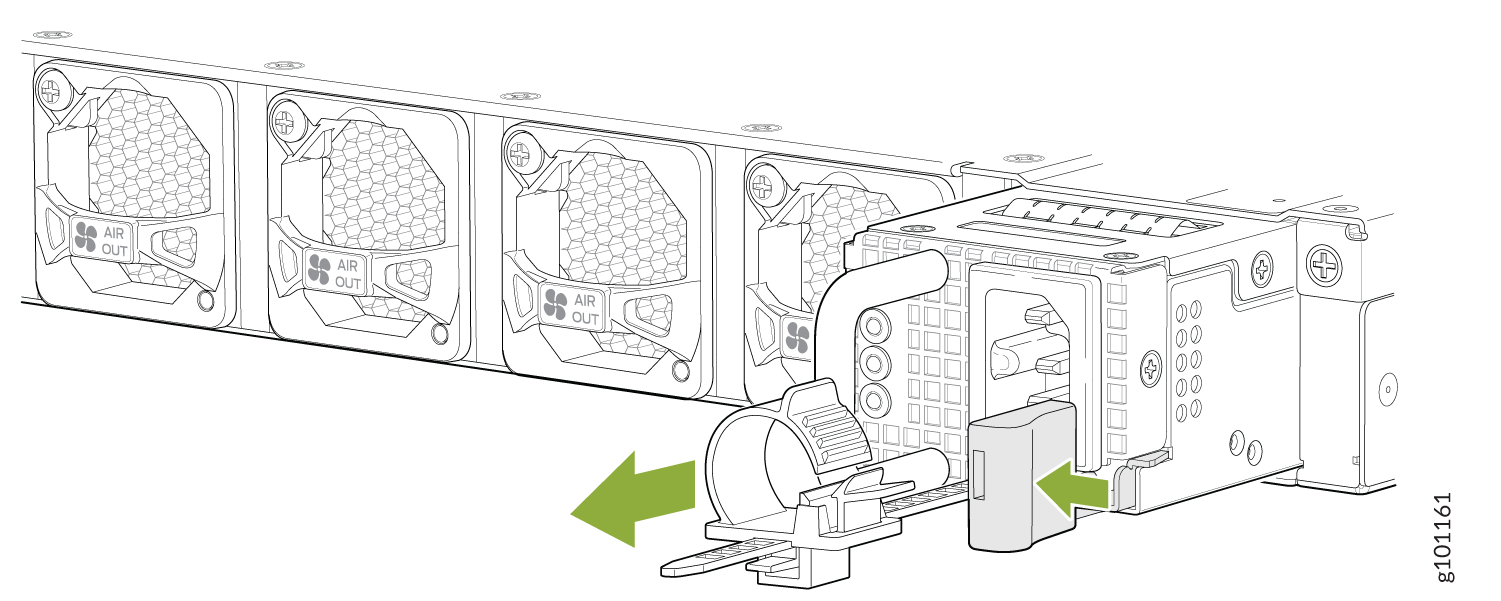
Now that you’ve installed your ACX7100-32C in the rack, you’re ready to connect it to power.
The AC-powered ACX7100-32C comes with two AC power supplies preinstalled on the rear panel.


