Installing or Removing a CTP2000 Series CompactFlash Card
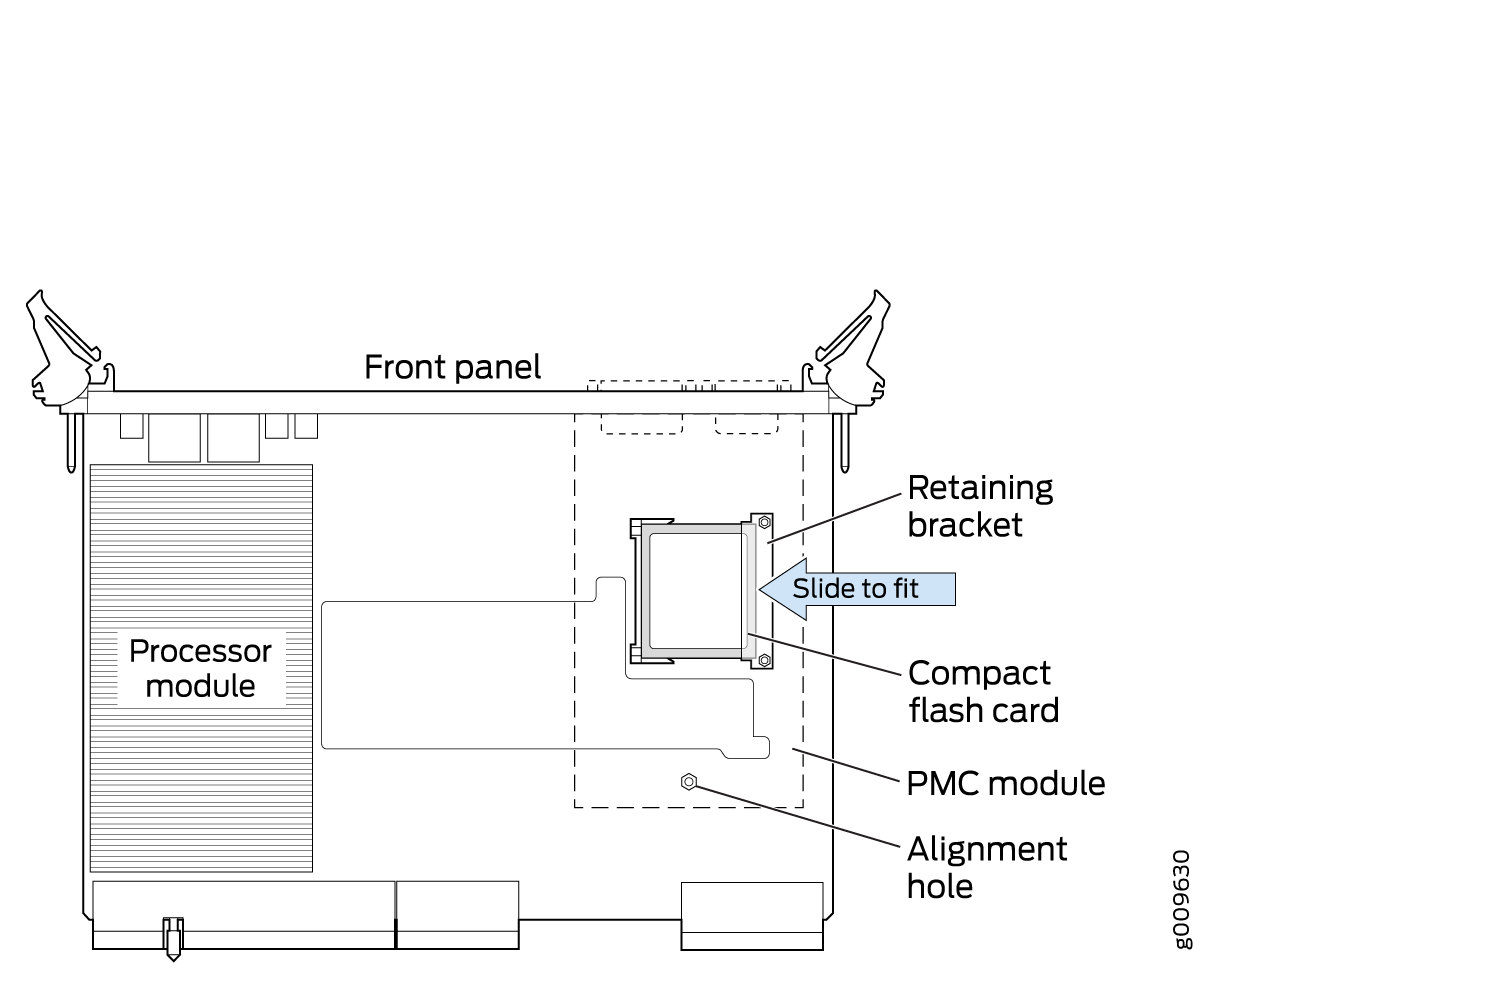
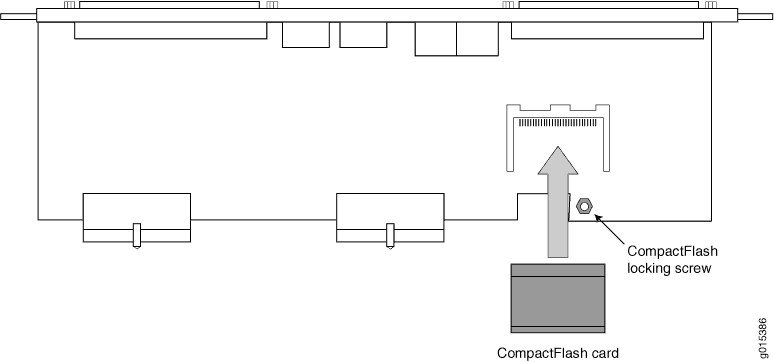
On the CTP2000 series devices with the new PP833 processor, the CompactFlash card is installed on the processor itself (which may be located under an installed PMC card), which prevents insertion or removal of the CompactFlash card until the PMC card is removed. On the CTP2000 series devices with the PP310 and PP332 processors, the CompactFlash card is installed on the processor rear transition module (RTM). Some CTP devices may ship with a CompactFlash card already installed.
To remove or install the CompactFlash card for the CTP2000 series with the new PP833 processor (see Figure 1):
- Power off the unit.
- If installed, remove the PP833 PMC card by unscrewing the retaining screws and pushing the extractors outward with the latching buttons depressed.
- You can then remove or install the CompactFlash card in the flash socket.
- If being used, reinstall the PP833 PMC card into the chassis, and secure the retaining screws.

To remove or install the CompactFlash card for the CTP2000 series with the PP310 and PP332 processors (see Figure 2):
Power off the unit.
Remove the processor RTM by unscrewing the retaining screws and pushing the extractors outward with the latching buttons depressed.
Remove the CompactFlash card retaining screw and nut. You can then remove or install the CompactFlash card in the flash socket (see Figure 2).
Reinstall the CompactFlash card retaining screw and nut.
Reinstall the processor RTM into the chassis, and secure the retaining screws.

To remove or install the SSD card for the CTP2000 series in the new PPF84 processor:
Shutdown and remove the device from the rack.
Place the antistatic bag or the antistatic mat on a flat, stable surface.
Wrap and fasten one end of the ESD grounding strap around your bare wrist, and connect the other.
Place the device on a firm surface such as a workbench or a table.
Remove the top cover screws of the chassis. The SSD is located on the top side of the processor.
Remove the single screw holding the SATA SSD in place and slide the drive out of the plug.
Place the SATA SSD in an electrostatic bag or on an antistatic mat.
Place the top cover of chassis back and tighten the screws.
