Step 2: Up and Running
Now that the JSA7800 is powered on, let’s do some initial configuration to get it up and running on the network.
Plug and Play
The JSA7800 ships with factory-default settings that enable plug-and-play operation. These settings load as soon as you power on the switch.
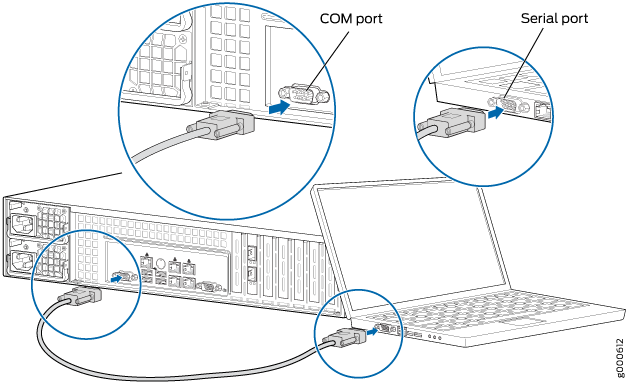
Connect the Management Device
Connect a laptop or desktop PC to the DB-9 serial COM port on the back panel.
Note:If your laptop or PC does not have a DB-9 plug connector pin and you want to connect your laptop or PC directly to the JSA7800, use a combination of a USB to DB-9 plug adapter and a DB-9 F/F cable (not provided).
Verify that the serial port settings for your laptop or desktop PC are set to the default:
Bits per second = 9600
Stop bits =1
Data bits = 8
Parity = None
Configure the JSA7800
When using a laptop or PC to connect to the appliance, you'll need to use a terminal program, such as HyperTerminal to connect to the appliance.
Have this information handy before you begin to configure the JSA7800:
Hostname
IP address
Network Mask
Default gateway IP address
Primary domain name server (DNS)
E-mail server name
(Optional) Secondary DNS and public IP address
- Read the agreement and if you agree, type YES and press
Enter. The Appliance ID selection window displays.
 Note:
Note:Use the up/down arrow keys on your keyboard to choose an option and press the spacebar to select it. Use the left/right arrow keys on your keyboard to select Next, Back or Cancel, then press Enter.
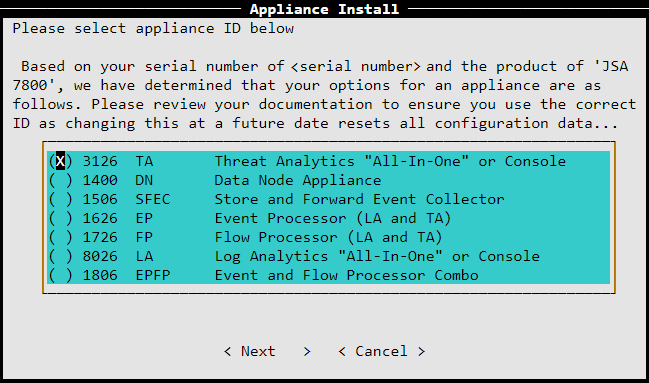
Select an Appliance ID and Tune Your Appliance
Select the appliance ID and then press Enter to select Next.
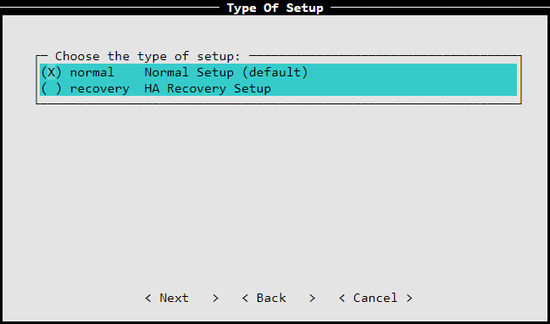
Select the type of setup:
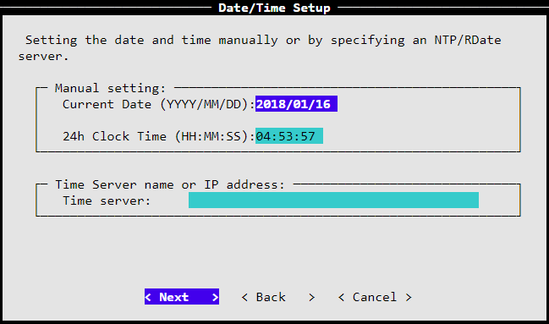
Configure the Date and Time
Select the method you want to use to set the date and time.
Manual— Allows you to manually input the date and time. Select Next.
Server— Allows you to specify your time server. Select Next.
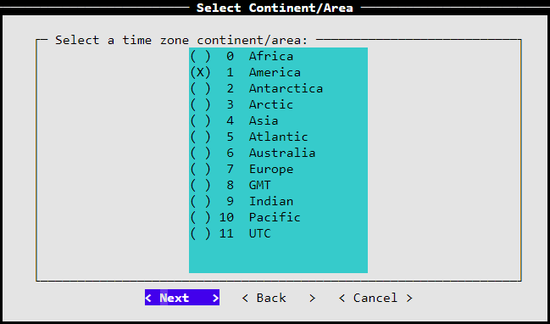
Select your time zone continent or area, and then select Next.
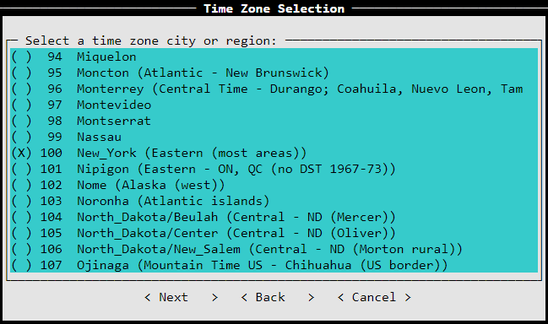
Select your time zone region, and then select Next.
Select the Internet Protocol and Configure Your Appliance
Select one of the Internet protocols, IPv6 or IPv4.
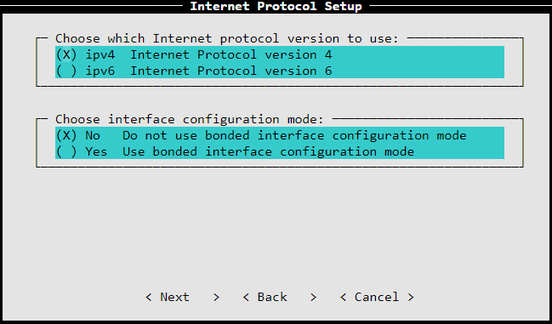
Choose an interface configuration mode (not mandatory). You can bond the interfaces during the JSA installation process, or after installation. For more information about interface configuration modes, see [Juniper Secure Analytics Installation Guide and Juniper Secure Analytics Administration Guide].
Select Next. The Management Interface window displays.
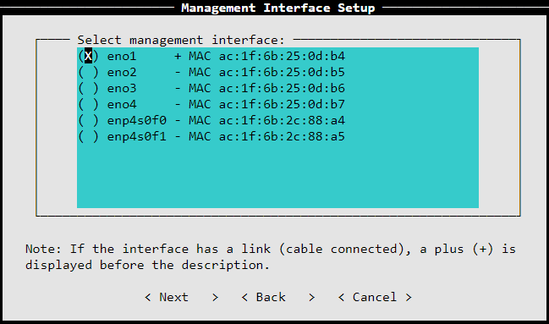
Select the management interface, and then select Next.
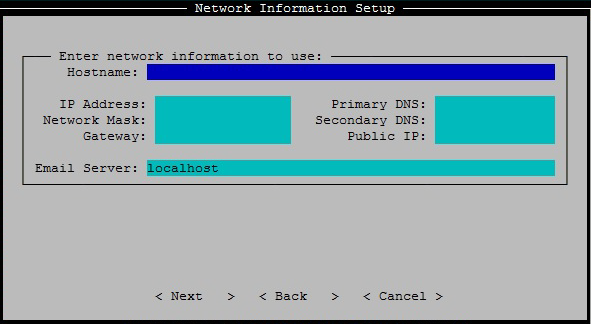
Enter the values for the following parameters:
Hostname— Type a fully qualified domain name as the system hostname
IP Address, Network Mask, Gateway, and Primary DNS
Optional— Secondary DNS and Public IP.
Email server— E-mail server name. If you don’t have an e-mail server, specify the local host in this field.
Enter the new admin password. Re-enter your new admin password to confirm.
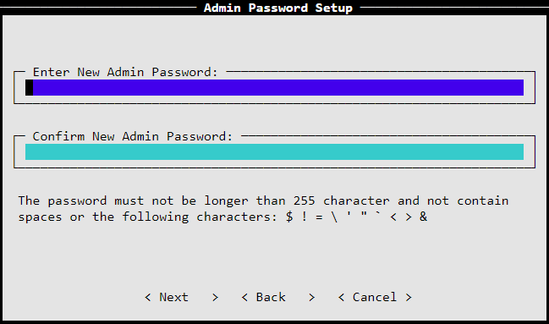 Note:
Note:The Admin Password Setup screen displays only for TA/LA All-In-One or Console installations.
Select Next. The New Root Password window displays.
Enter your new root password. Re-enter your new root password to confirm, and select Finish.

A series of messages are displayed as JSA continues with the installation. Based on the appliance ID you selected, the installation process may take from several minutes to few hours to complete. TA "All-In-One" or Console installation may take up to 2.5 hours. When the JSA installation process is complete, the message window displays.
Verify the Settings
Verify the appliance configuration settings:
Open your Web browser.
Log in to JSA with the username admin and the password <admin password>.
<admin password> is the new admin password that you set during the configuration process.
Click Login.