Replacing the MX960 Cable Manager
To remove the standard cable manager (see Figure 1):
- Attach an ESD grounding strap to your bare wrist, and connect the other end of the strap to an ESD grounding point.
- Using a 7/16-in. (11 mm) nut driver, unscrew the nuts on the corners of the standard cable manager.
- Grasp the bottom of the standard cable manager, and pull it straight out from the studs on the front of the chassis.
Figure 1: Removing the Standard Cable
Manager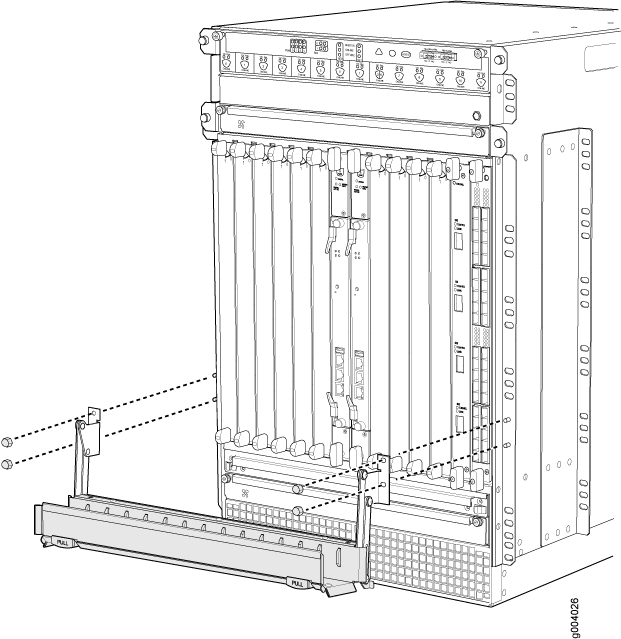
To install the standard cable manager (see Figure 1):
Position the standard cable manager on the studs on the lower front of the chassis.
Insert the nuts on the corners in the standard cable manager onto the studs on the chassis.
Using a 7/16-in. (11 mm) nut driver, tighten the nuts securely.