Step 2: Up and Running
The SSR1500 is onboarded to the Juniper Mist™ Cloud. To provision the SSR1500 with ZTP, log in to your Mist portal and begin the WAN configuration. Configuring your SSR device is made simple through the use of the SSR WAN Edge Templates.
Create a WAN Edge Template
The WAN Edge Templates provide you with the basic network configuration in a single step, and allow for re-usable and consistent configuration for every SSR device you deploy. The template provides device specific, preconfigured WAN interfaces, LAN interfaces, a traffic steering policy, and an application policy.
Create a Template
To create a Template:
-
Select Organization > WAN Edge Templates from the menu on the left.
-
Click Create Template in the upper-right corner of the WAN Edge Templates page.
-
Enter a name for the template.
-
Select Create from Device Model.
Select your SSR device from the Model drop down.
Click Create. Your SSR device template is displayed.
Scroll down through the template to see the preconfigured WAN interfaces, LAN interfaces, TRAFFIC STEERING, and APPLICATION POLICIES.
Great job! You now have a working WAN Edge template you can apply to many sites and devices across your organization.
Assign the Template to a Site
Now that you have set up the template, you need to assign it to the site where your SSR device will be deployed.
-
Click the Assign to Site button, and select the site to which you want to apply the template configuration.
Click Apply.
Great work! All that remains is to associate the SSR1500 with a site.
Assign the SSR1500 to a Site
After the SSR1500 is onboarded to the Mist cloud, you'll need to assign it to a site so you can begin to manage the configuration and gather data in Mist cloud.
-
Select Organization > Inventory. The status of the SSR1500 is shown as Unassigned.
-
Select the SSR1500 and from the More drop-down list, select Assign to Site.
-
Select the site from the Site list.
Note:Under Manage Configuration, do not check the Manage Configuration with Mist checkbox for the SSR1500 if it is using Session Smart Router software version 5.4.4. This allows the SSR1500 to reach out to the conductor IP address specified when the site was created to receive configuration information.
If you are onboarding a Mist-managed appliance using Session Smart Router software version 6.0, select Manage Configuration with Mist. If you do not select Manage Configuration with Mist, the SSR1500 will not be managed by Mist.
-
Click Assign to Site.
The site assignment takes a few minutes. After the site is fully onboarded, use the Mist WAN Edge - Device View to access the SSR1500, and the Insights view to view events and activity.
Install the SSR1500 in a Rack
Install the SSR1500 in a rack and connect it to power. For instructions see the hardware guide on the Juniper Mist Supported Hardware page.
Connect Your SSR1500 to the Mist Cloud
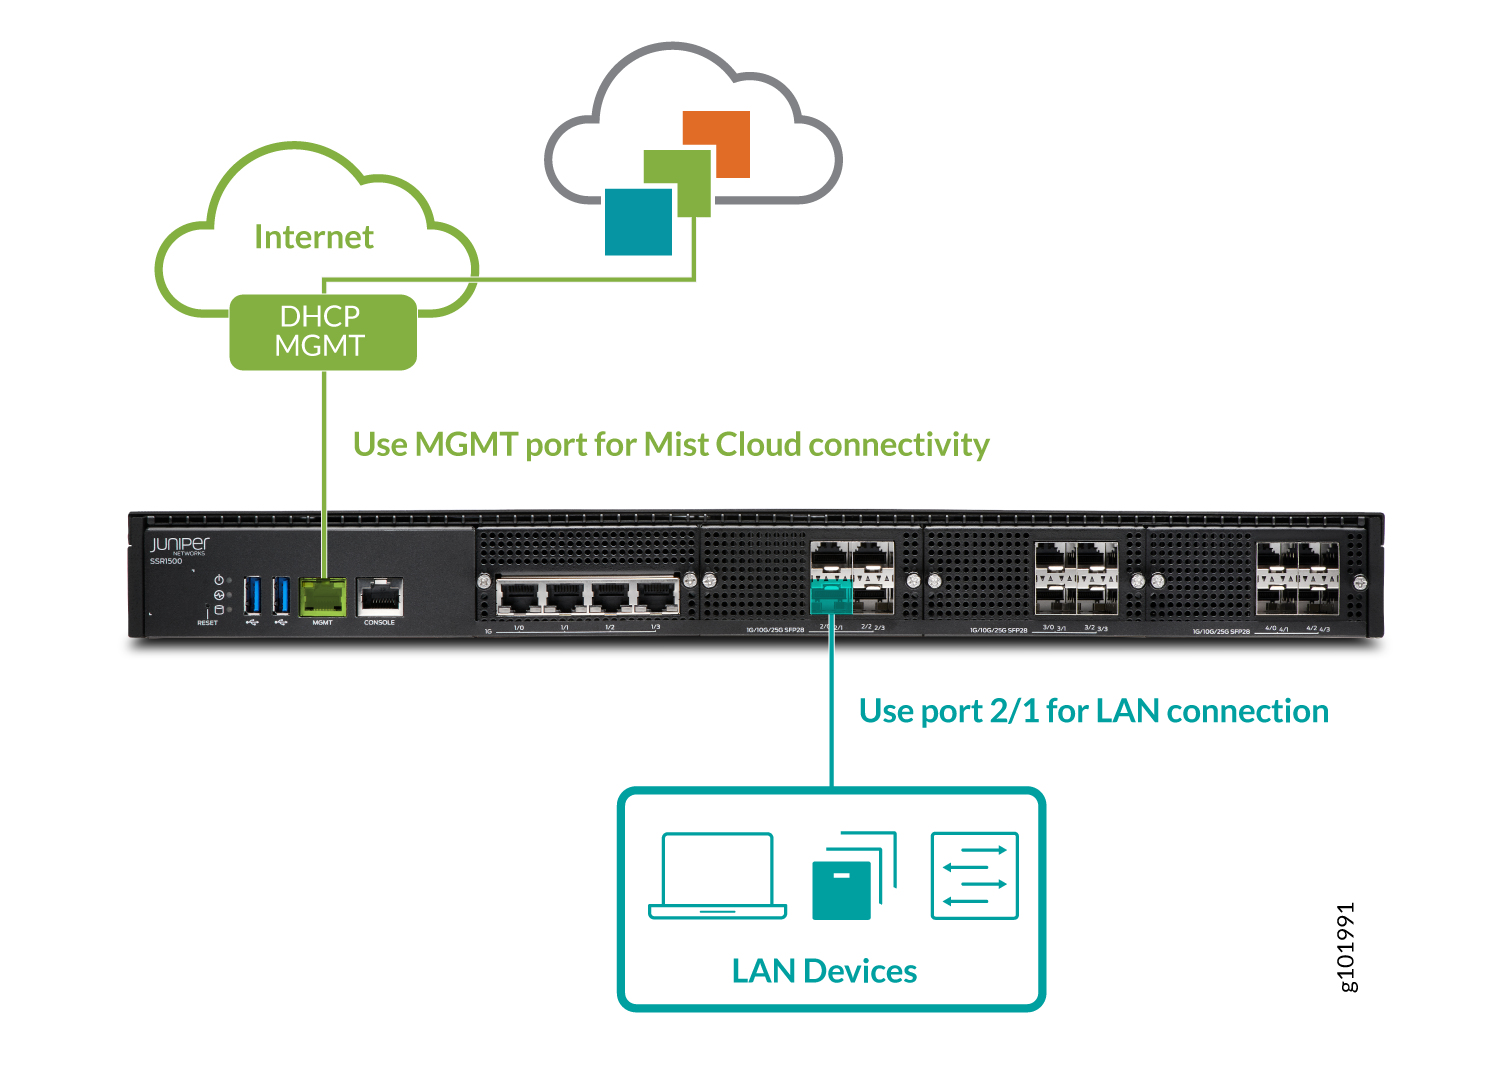
Your SSR1500, uses port labelled MGMT (mgmt-0/0/0) as the default port to contact Mist for zero-touch provisioning (ZTP). It uses port 2/1 (xe-0/2/1) to connect to the LAN.
-
Connect the MGMT port to an Ethernet link that can assign a DHCP address to the SSR1500 and provide connectivity to the Internet and Mist.
Note:For management, you can connect the SSR1500 to Mist using the MGMT port. You can also connect to Mist from one of the WAN ports only when the MGMT port is disconnected, or does not have a valid DHCP leased address and default route.
Do not change the Mist management port once your appliance is powered on and connected to the Mist Cloud instance.
-
Connect port 2/1 to your LAN devices, such as
-
Mist-managed Juniper EX switches
-
Mist APs
-
User devices
-
-
Power on the SSR1500.
Great job! Your SSR1500 is now connected to the Mist cloud! In just a few minutes, Mist will send the template-driven configuration down to your device. Once the configuration has been applied, it will begin forwarding sessions from LAN to WAN as described by your policy.
Go to the WAN Edges menu on the Mist sidebar, select your device, and watch events as the device completes ZTP.
As your client devices connected to the LAN are assigned addresses from the WAN Edge DHCP server and begin sending sessions, telemetry will populate the insights page, and Marvis will start analyzing it on your behalf.