Step 2: Up and Running
Now that the SSR130 is onboarded to the Juniper Mist™ cloud, and you have a working configuration ready to push to the device, let's get that SSR130 mounted and running!
Install the SSR130 Hardware
Your SSR130 installation has specific features that must be installed depending on your use and environment . Refer to the SSR130 Hardware Installation Guide to complete the following procedures:
- Rack, Wall, or Surface Mounting
- LTE Antenna Install
- SIM Card Install
- Connecting Power
Please return here after completing those procedures to complete the network connections.
Connect to the Network
Once the SSR130 has been mounted appropriately and power is connected, it's time to make your network connections!
Connect your SSR130 to the Mist Cloud
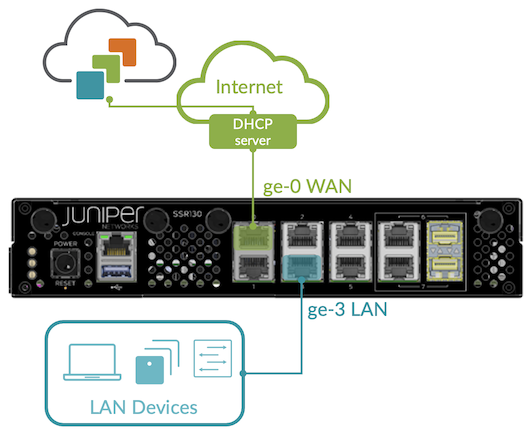
Your SSR130 uses port 0 (ge-0-0) as a default WAN port to
contact Mist for zero-touch provisioning (ZTP). You'll need to set up port 3
(ge-0-3) with a LAN network.
Head over to the WAN Edges menu on the Mist sidebar, select your device, and watch events as the device completes ZTP.
As your client devices connected to the LAN are assigned addresses from the WAN Edge DHCP server and begin sending sessions, telemetry will populate the insights page, and Marvis will start analyzing it on your behalf.
For conductor-managed devices, additional views for Cloud Telemetry are configurable in the SSR GUI and PCLI.

