Step 1: Begin
This guide walks you through the steps required for getting your Juniper data center switches ready to be deployed with the Apstra automation solution. The main tasks are to install device system agents on devices, then bring those devices under Apstra control, either manually, or automatically with Apstra ZTP. We'll cover both methods. Once you've onboarded your devices, they become Managed Devices, ready to be assigned in one of the Apstra server’s blueprints.
Before you begin, you must install and configure the Apstra server. For more information, see the Juniper Apstra Server Quick Start guide.
Apstra automates data center networks of all sizes and complexities. Intent-based networking makes all aspects of operating data center fabrics more simple, reliable, and efficient. A key to achieving such results is how the solution controls each individual device that comprises a managed fabric. The distributed agent architecture is an important component of what makes Apstra a unique and powerful automation solution. Let’s discuss the various elements that comprise the onboarding process.
System Agents
Device system agents manage communication between devices and the Apstra server. They're responsible for performing configuration on the devices. They also facilitate the transfer of device telemetry, a key component of intent-based analytics (IBA). For all these elements to operate smoothly, Juniper puts supported device models and NOS software through a rigorous system of testing. It's imperative that you reference the Qualified Device and NOS versions tables when choosing hardware and software versions for your data center fabric.
You can install agents directly on a switch in the user space in the NOS (onbox), or you can install them in containers within the Apstra cluster (offbox) and communicate with the device that way. You'll select one depending on your scenario. Some NOS types don't support onbox agents. And some network operators don't want to install agent software directly onto network devices. If you elect to use offbox agents, you must make considerations for cluster capacity to accommodate their location.
Device Configuration Stages
For the Apstra server and managed devices to communicate, Apstra uses an out-of-band management network. For them to be able to communicate, the IP address, user credentials and basic configuration parameters must be in-place. This minimal configuration state is called “pristine configuration.” Once it's in-place and the switch and server can communicate, you can install a device agent. Apstra then captures the existing device configuration and saves it as a baseline. See a pristine configuration example below.
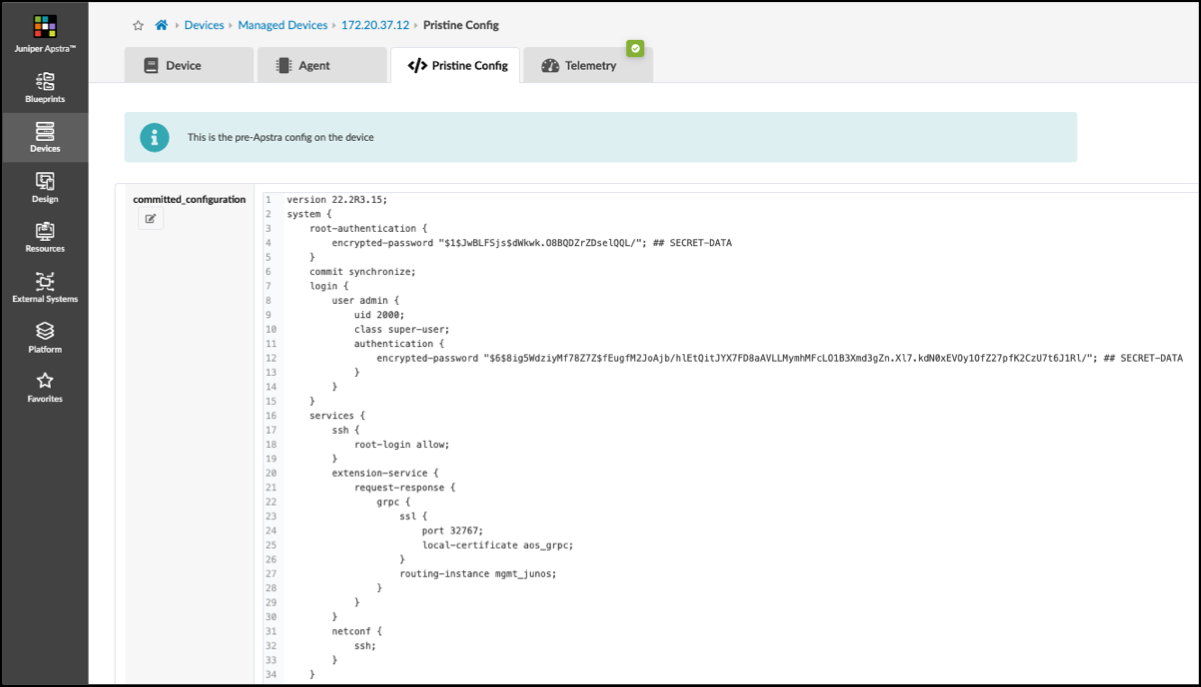
Pristine configuration is the first of several stages that a device can be in when it's under Apstra management. Devices are placed into various configurations as they are moved in-and-out of operation. To appreciate how the solution operates, it's essential to understand these stages. Take time to review the terminology and lifecycle details in the Device Configuration Lifecycle section of the Juniper Apstra User Guide.
Onboarding Manually
The minimum steps needed to manually establish connectivity between the switch and the server are as follows:
Configure the management interface and IP address on the out-of-band management network. Include a default route for the management interface to reach the server.
Set user credentials and password needed for the Apstra server to establish connection with the switch.
Enable the switch's API that's used by the server to configure the device throughout its lifecycle.
The exact commands to perform the above steps vary depending on the selected vendor NOS. Refer to the Juniper Apstra User Guide for details for supported vendors.
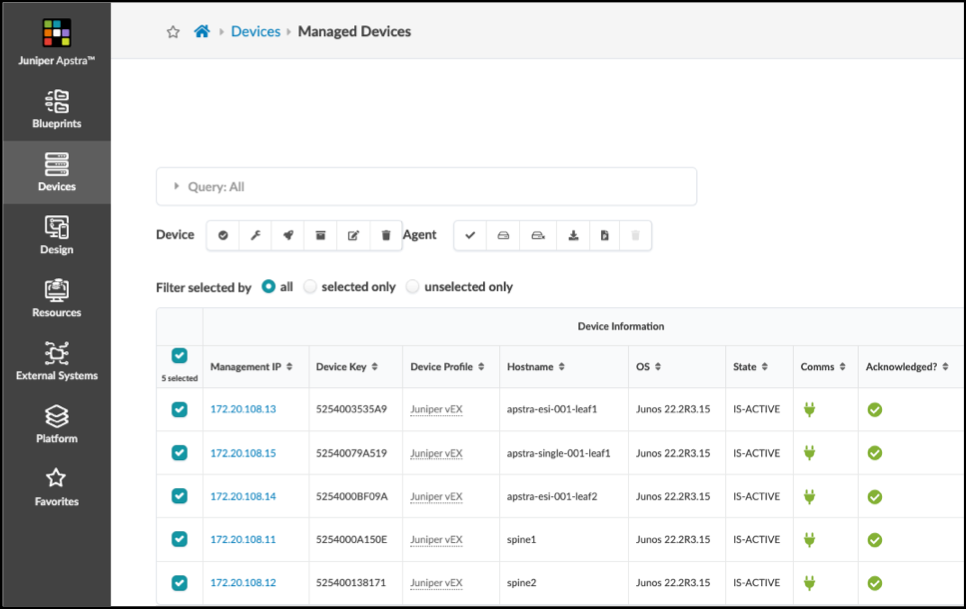
Once the switch can ping the Apstra server, you can use the Device Installer to install the agent. Do this from the Managed Devices view.
To initiate the installer, click either Create Onbox Agent(s) or Create Offbox Agent(s) in the upper right.
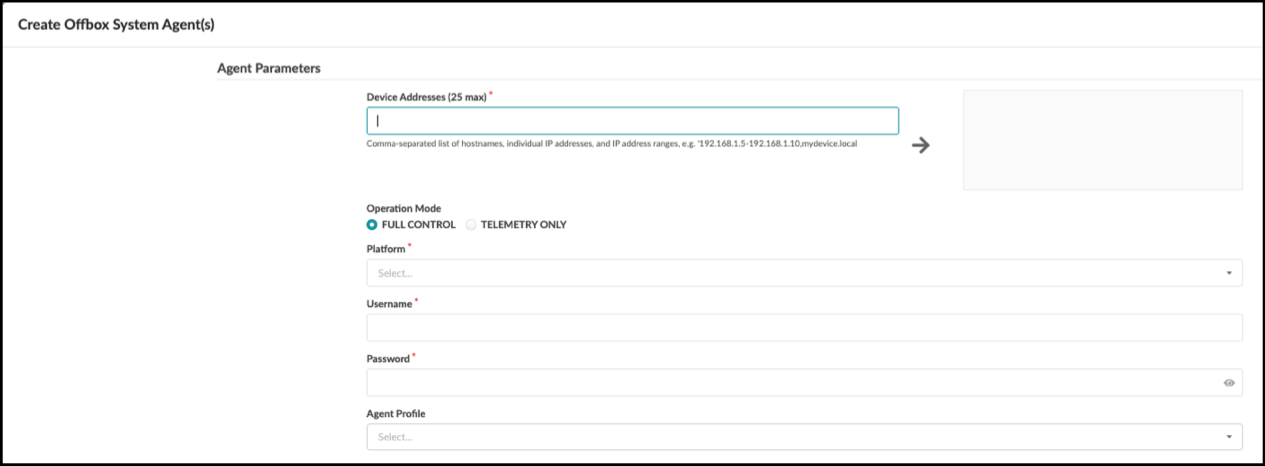
Enter the required information into the Create Agent(s) form that opens, then click the Create button. A bit of time is required for the server to perform the installation. When it's done the device appears in the table view in the quarantined state. There are additional steps that move devices in this state to the OOS-Ready state, where they are available to be assigned into a blueprint.
Use of the Device Installer to bring switches into the Apstra automation platform is shown in detail in the Managed Devices section of the Apstra user guide.
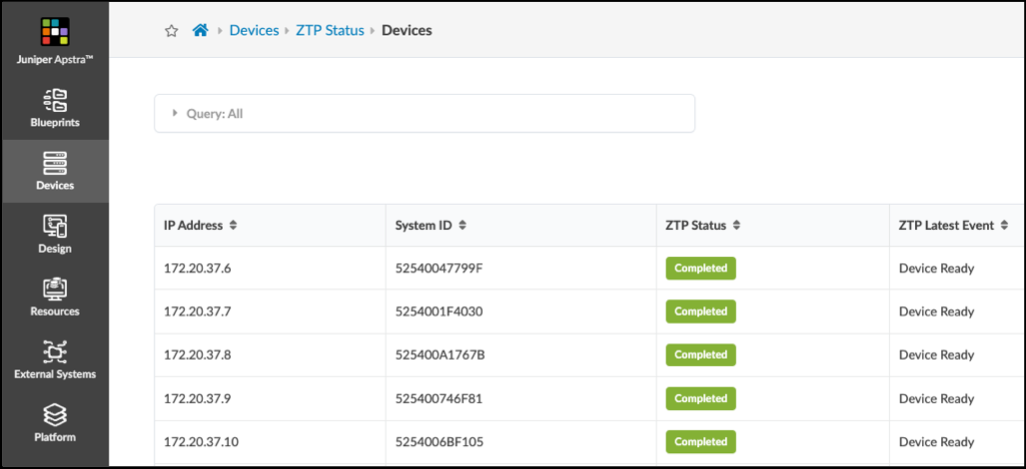
Onboarding with Apstra ZTP
Apstra ZTP resides on its own VM, separate from the Apstra server. It automatically discovers new switches and those that have been reset to factory settings (zeroized). Use the Apstra server GUI to check the state of the ZTP server and management of devices. This provides visibility into all aspects of the process, making it easy to onboard any number of devices quickly and with the desired settings and NOS versions, in-place.
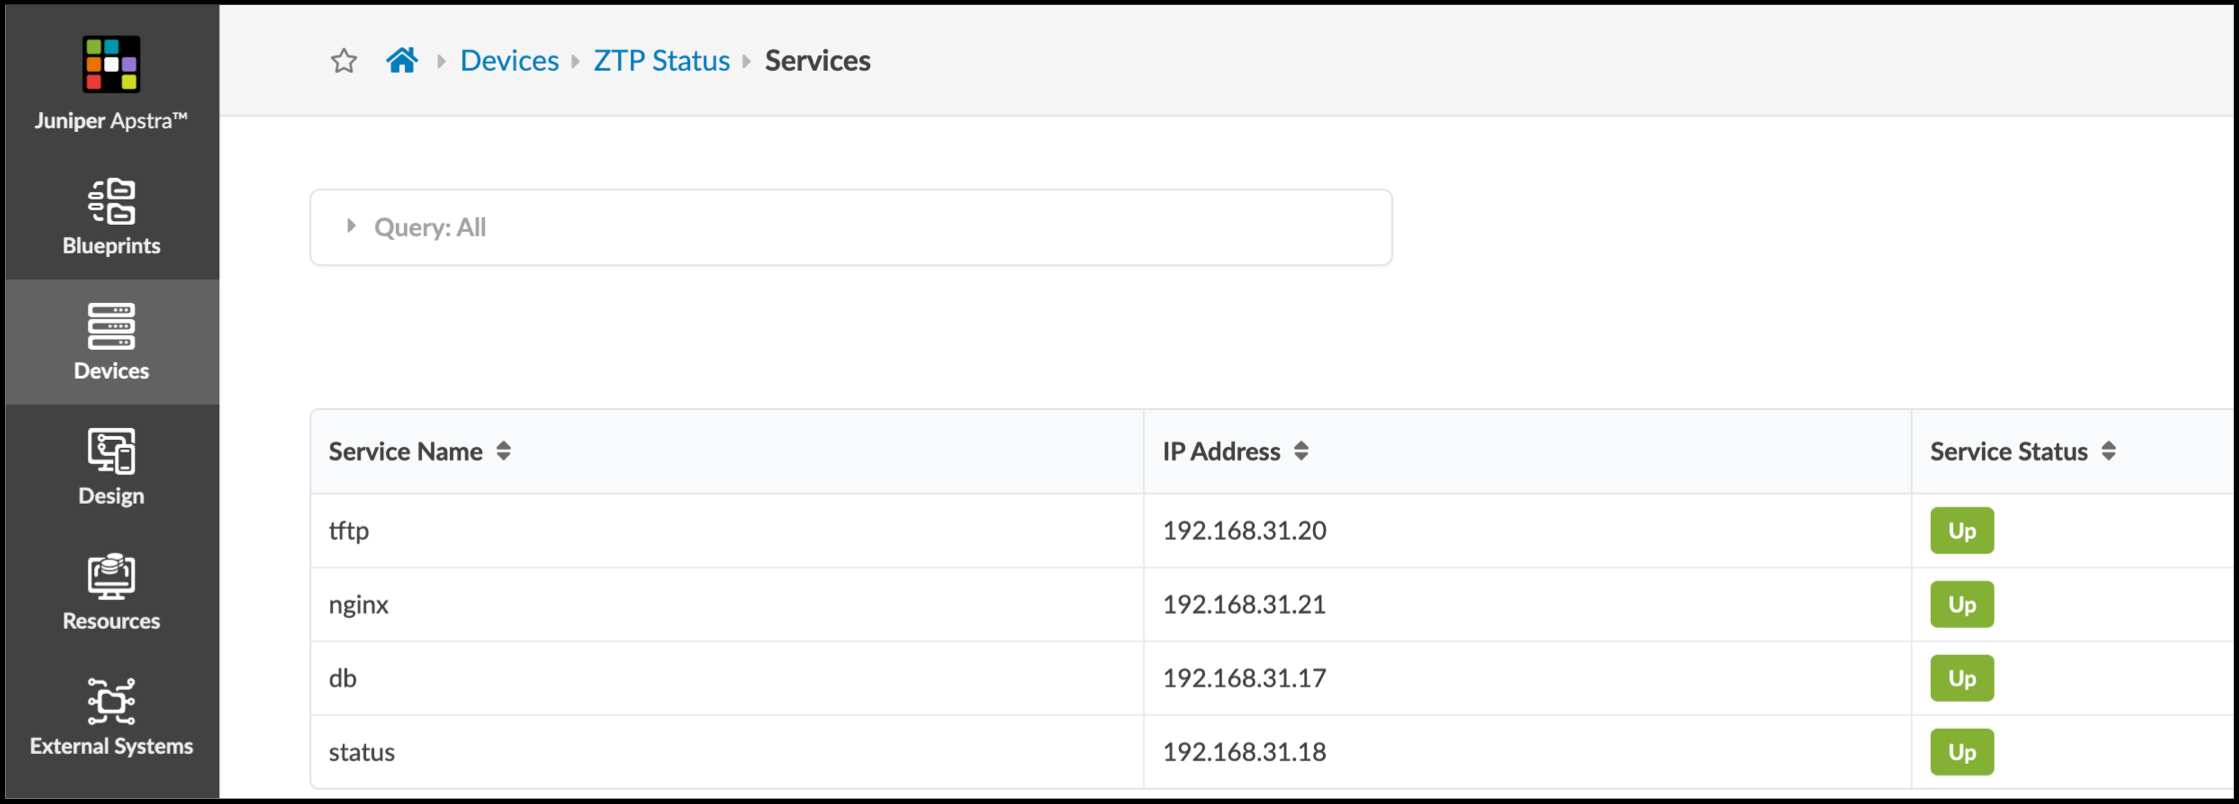
The ZTP service provides DHCP for automatic IP addressing, installation of pristine configurations and the installation of the system agents. Apstra ZTP performs these steps:
DHCP (optional)
The device requests an IP address via DHCP.
The device receives the assigned IP address and a pointer to the specified OS image.
Device Initialization
The device downloads the customizable ZTP script via TFTP.
The device executes script preparing it for management. The OS image is checked and is upgraded, if necessary.
The device admin/root password is set.
System Agent ID is initialized.
Agent Initialization
The ZTP script leverages APIs to initiate the agent installation. It recognized automatically whether onbox or offbox is needed.
The Apstra ZTP service is a comprehensive set of tools that you can customize in various ways to adapt to your specific requirements. Once you have downloaded the server image and performed any customizations, it's ready to simplify bringing switches into the Apstra automation platform.
The Apstra ZTP service requires installation and configuration to adapt to your specific environment. You can find step-by-step instructions for installing and onboarding devices in the Apstra ZTP section of the Juniper Apstra User Guide.
Now we've seen how devices are initialized. Let’s now look at how we move them into an operating network.