Step 1: Begin
In this guide, we provide a simple, three-step path, to quickly get you up and running with Juniper Networks® Advanced Threat Prevention Cloud (Juniper ATP Cloud). We’ve simplified and shortened the configuration procedures and included how-to videos that show you how to obtain your ATP license, how to configure SRX Series Firewalls for Juniper ATP Cloud, and how to use the Juniper ATP Cloud Web Portal to enroll your SRX Series Firewalls and configure basic security policies.
Meet Juniper ATP Cloud
Juniper ATP Cloud is cloud-based threat detection software that protects all hosts in your network against evolving security threats. Juniper ATP Cloud uses a combination of static and dynamic analysis and machine learning to quickly identify unknown threats, either downloaded from the Web or sent through email. It delivers a file verdict and risk score to the SRX Series firewall which blocks the threat at the network level. In addition, Juniper ATP Cloud delivers security intelligence (SecIntel) feeds consisting of malicious domains, URLs, and IP addresses gathered from file analysis, Juniper Threat Labs research, and highly reputable third-party threat feeds. These feeds are collected and distributed to SRX Series firewalls to automatically block command-and-control (C&C) communications.
Want to see how Juniper ATP Cloud works? Watch now:
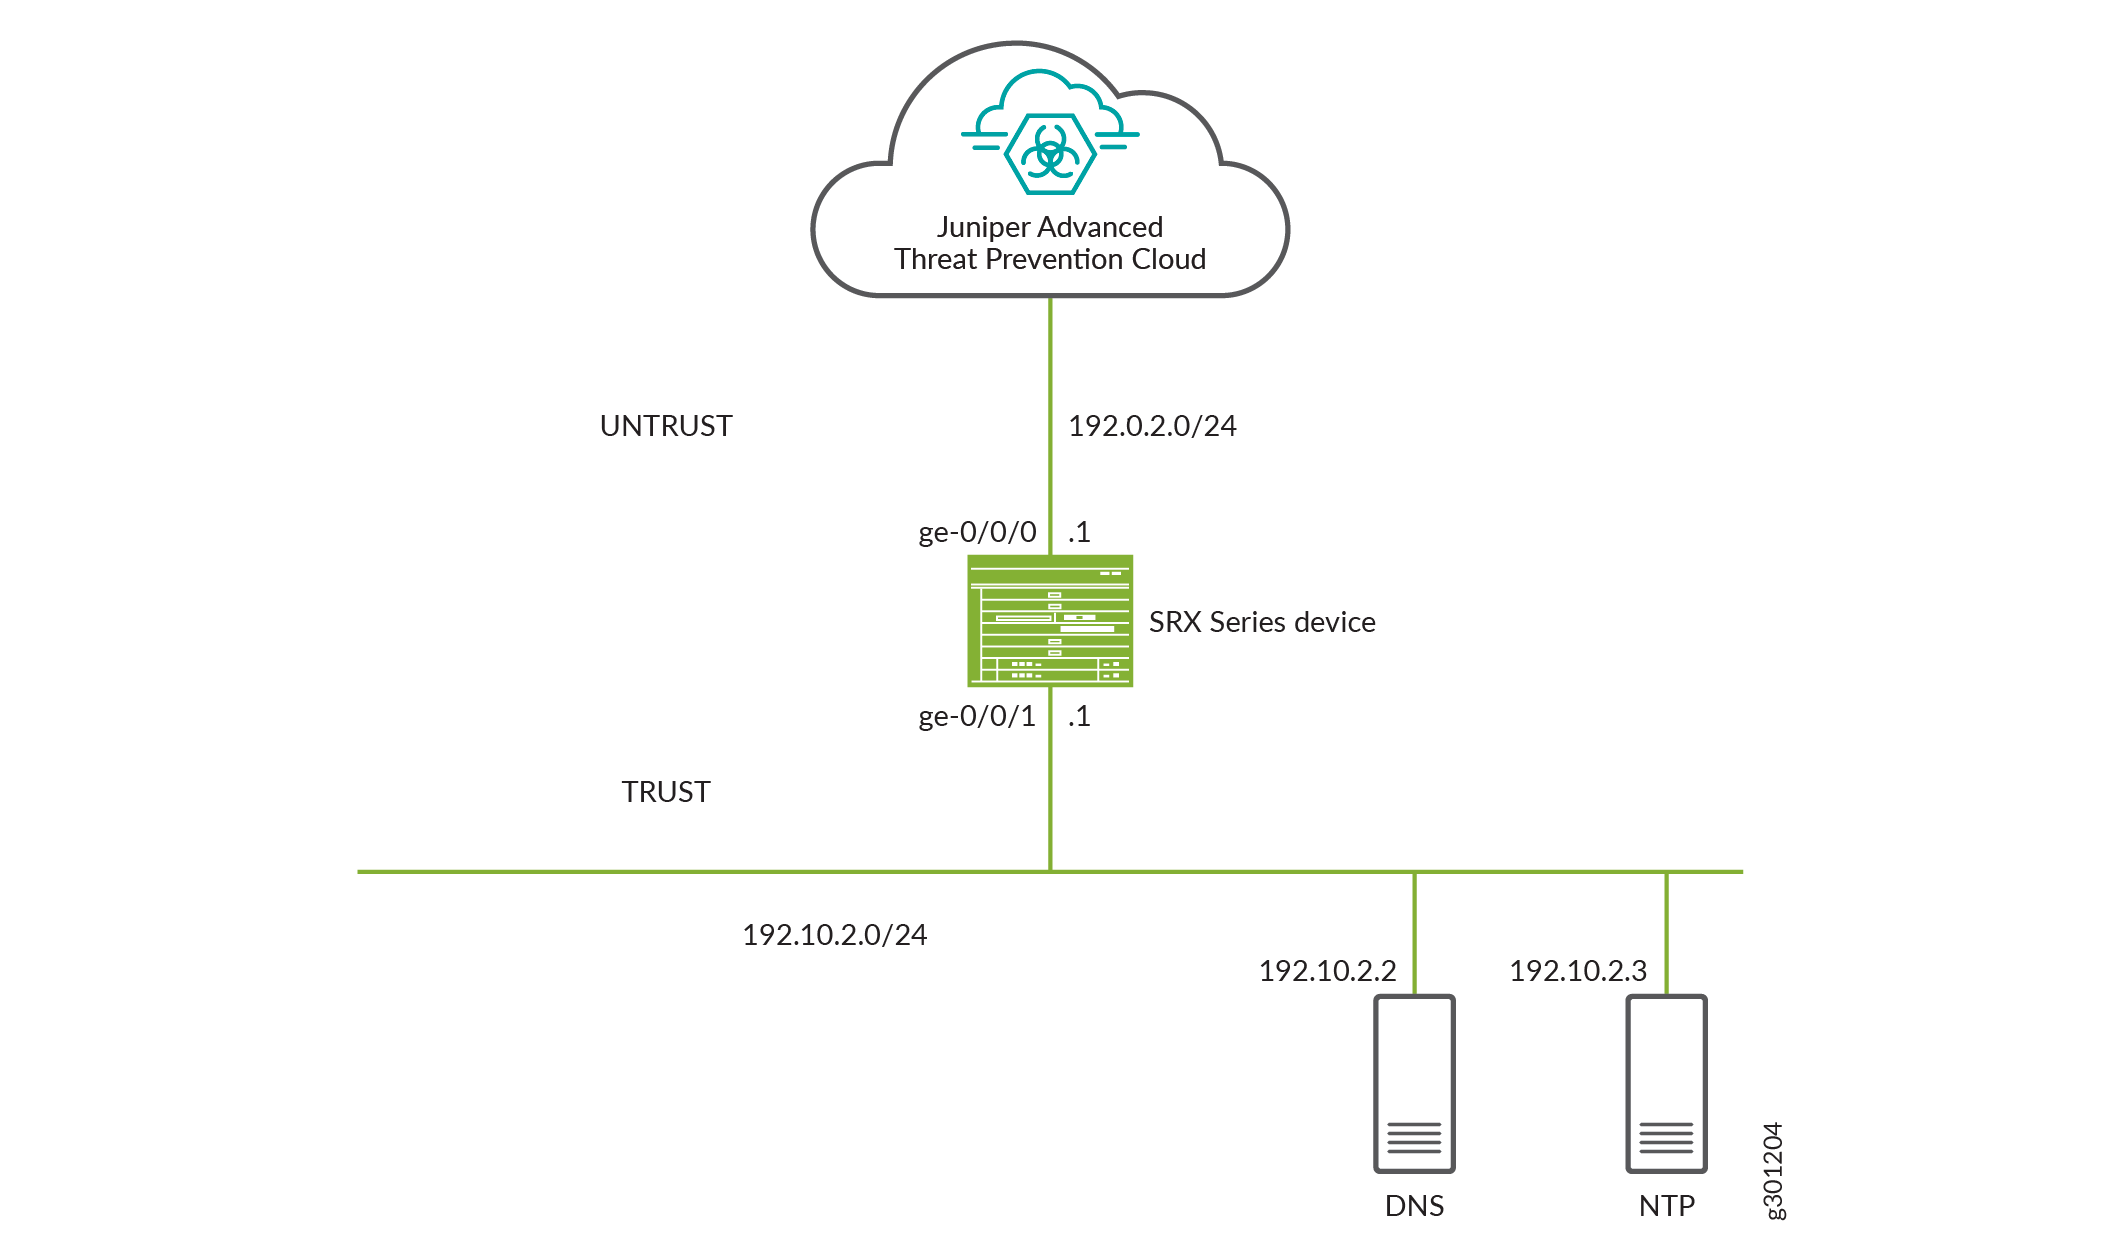
Juniper ATP Cloud Topology
Here’s an example of how you can deploy Juniper ATP Cloud to protect a host in your network against security threats.
Get Your Juniper ATP Cloud License
First things, first. You’ll need to get your Juniper ATP Cloud license before you can
start configuring Juniper ATP Cloud on your firewall device. Juniper ATP Cloud has
three service levels: free, basic, and premium. The free license provides limited
functionality and is included with the base software. Contact your local sales
office or Juniper Networks partner to place an order for a Juniper ATP Cloud premium
or basic license. Once the order is complete, an activation code is sent to you by
email. You’ll use this code in conjunction with your SRX Series Firewall serial
number to generate a premium or basic license entitlement. (Use the show
chassis hardware
CLI command to find the serial number of the SRX
Series Firewall).
To obtain the license:
-
Go to https://license.juniper.net and log in with your Juniper Networks Customer Support Center (CSC) credentials.
-
Select SRX Series Devices or vSRX from the Generate Licenses list.
-
Using your authorization code and SRX Series serial number, follow the instructions to generate your license key.
-
If you are using Juniper ATP Cloud with SRX Series Firewalls, then you don't need to enter the license key because it is automatically transferred to the cloud server. It can take up to 24 hours for your license to be activated.
-
If you are using Juniper ATP Cloud with vSRX Virtual Firewall, the license is not automatically transferred. You'll need to install the license. For more details, see License Management and vSRX Deployments. After the license is generated and applied to a specific vSRX Virtual Firewall device, use the
show system license
CLI command to view the software serial number of the device.
-
Want to see how to obtain a license? Watch this video:
Get Your SRX Series Firewall Ready to Work with Juniper ATP Cloud
After you've obtained a Juniper ATP Cloud license, you’ll need to configure your SRX Series Firewall to communicate with the Juniper ATP Cloud Web Portal. Then you can configure policies on the SRX Series Firewall that use Juniper ATP Cloud cloud-based threat feeds.
This guide assumes that you are already familiar with Junos OS CLI commands and syntax, and have experience with administering SRX Series Firewalls.
Before you begin, make sure you have an SSH connection to an Internet-connected SRX Series Firewall.
These SRX Series Firewalls support Juniper ATP Cloud:
-
SRX300 line of devices
-
SRX550
-
SRX1500
-
SRX1600
-
SRX2300
-
SRX4000 line of devices
-
SRX5000 line of devices
-
vSRX Virtual Firewall
For SRX300, SRX320, SRX340, SRX345, SRX380 and SRX550 firewalls, as part of
initial device configuration, you must run set security
forwarding-process enhanced-services-mode
and reboot the
device.
Let's get started and configure interfaces and security zones.
-
Set root authentication.
user@host# set system root-authentication plain-text-password
New password:
Retype new password:
Note:The password is not displayed on the screen.
-
Set the system hostname.
user@host# set system host-name user@host.example.com
-
Set up interfaces.
user@host# set interfaces ge-0/0/0 unit 0 family inet address 192.0.2.1/24
user@host# set interfaces ge-0/0/1 unit 0 family inet address 192.10.2.1/24
-
Configure security zones.
The SRX Series Firewall is a zone-based firewall. You’ll need to assign each interface to a zone to pass traffic through it. To configure security zones, enter the following commands:
Note:For the untrust or internal security zone, enable only the services required by the infrastructure for each specific service.
user@host# set security zones security-zone untrust interfaces ge-0/0/0.0
user@host# set security zones security-zone trust interfaces ge-0/0/1.0
user@host# set security zones security-zone trust host-inbound-traffic system-services all
user@host# set security zones security-zone trust host-inbound-traffic protocols all
-
Configure DNS.
user@host# set system name-server 192.10.2.2
-
Configure NTP.
user@host# set system processes ntp
user@host# set system ntp boot-server 192.10.2.3
user@host# set system ntp server 192.10.2.3
user@host# commit