Step 1: Begin
Meet Juniper Content Security
The Juniper Networks Content Security solution provides comprehensive protection against malware, viruses, phishing attacks, intrusions, spam and other threats for SRX Series Firewalls. By consolidating security features and services into one device or service, Juniper Content Security streamlines the installation and management of Juniper’s expansive security solutions.
Most Juniper Content Security features are available as a subscription service and require a license. In this guide, we walk you through how to activate your subscription and generate license keys, and how to install the license keys on your SRX Series Firewalls. We also show you how to enable a default Avira Antivirus profile.
Juniper Content Security Features
Here’s a summary of the Juniper Content Security features and which ones require licenses.
Content Security Feature |
Requires License |
Description |
|---|---|---|
Antispam Filtering |
Yes |
Antispam filtering allows you to tag or block unwanted email traffic by scanning inbound and outbound SMTP e-mail traffic. Antispam filtering allows you to use both a third-party server-based spam block list (SBL) and to optionally create your own local allowlists and blocklists for filtering against email messages. The antispam feature is not meant to replace your antispam server, but to complement it. To learn more about Antispam filtering, see Antispam Filtering Overview. |
Antivirus |
Yes |
There are two types of Juniper Content Security Antivirus features: Sophos and Avira. Sophos antivirus is an in-the-cloud antivirus solution which offers decoding support for application layer protocols such as HTTP, HTTPS, FTP, SMTP, POP3, and IMAP. To learn more about the content security Sophos antivirus features, see Sophos Antivirus Protection. Avira antivirus is an on-device scan engine which scans network traffic for infected files, trojans, worms, spyware, and other malicious data, and immediately blocks the content. To learn more about the content security Avira antivirus features, see On-Device Avira Antivirus. |
Content Filtering |
No |
Content filtering blocks or permits certain types of traffic based on the MIME type, file extension, and protocol command. The content filter controls file transfers across the gateway by checking traffic against filter lists. To learn more aboutcontent filtering, see Content Filtering Overview. |
Web Filtering |
Varies |
The Web filtering module lets you manage Internet usage by preventing access to inappropriate Web content. There are three types of Web filtering: redirect Web filtering, local Web filtering, and enhanced Web filtering. Redirect and local Web filtering do not require a subscription license. To learn more about content security Web filtering, see Web Filtering Overview. |
Activate and Install Juniper Content Security Subscriptions and Licenses
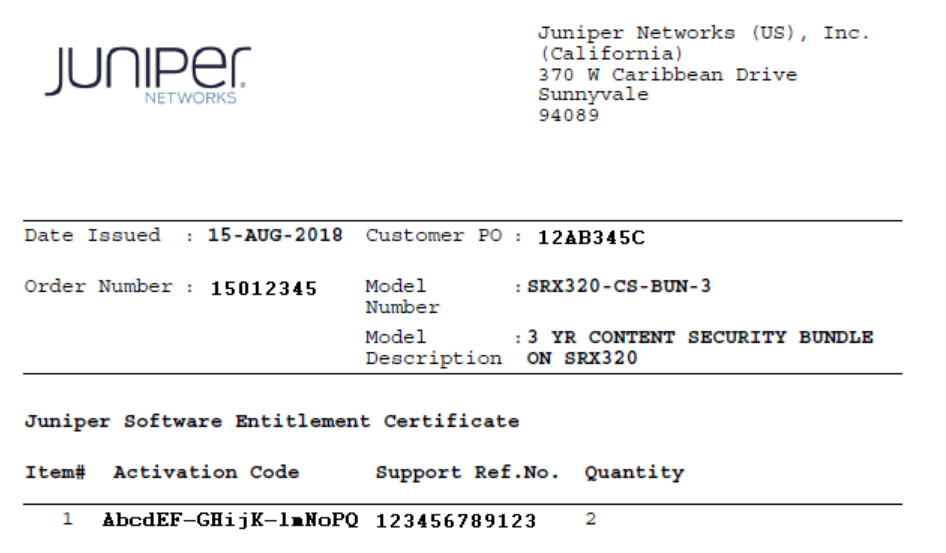
Once you’ve purchased your Juniper Content Security subscription license(s), we’ll send you a Juniper Software Entitlement Certificate by email that contains an authorization code and Software Support Reference Number (SSRN). You’ll need these to activate your subscription and generate license keys for installing the subscription licenses on your SRX Series Firewalls.
Check out this link for more information about Juniper licensing: Juniper Licensing User Guide.
Before You Begin
Install your SRX Series Firewalls and verify you have network access. The quickest and easiest way to do this is to follow the three-step instructions in the Quick Start guide for your SRX Series Firewall model. See Quick Start
Set up a Juniper Networks user account to access the Customer Support Center or Partner Center. If you don’t already have one, see Account Setup. If you need help with account registration, see Login Assistance.
(For hardware devices only), have the product serial number handy.
You can find the product serial number by running the
show chassis hardwareVerify that you’ve received the Juniper Software Entitlement Certificate we sent you in email. The certificate contains a 17-character activation code (sometimes referred to as authorization code or security key) and the SSRN.
Note:You can also find the activation code by running the
show system licenseNote:The activation code expires in three days.
Here’s an example of the Juniper Software Entitlement Certificate.
Activate Your Subscription
Here are a few things to note about activating a subscription:
The Entitlements section in the Juniper Agile Licensing portal lists the activation codes that are linked to your Juniper Networks company account and awaiting activation.
You use the Juniper Networks Agile Licensing Portal to activate perpetual and subscription software licenses.
During the activation process, the Juniper Networks Agile Licensing Portal also registers the products to your company.
Install the Subscription License on an SRX Series Firewall
Now that you've activated yourJuniper Content Security subscription and have your license keys, you’re ready to install the subscription license on your SRX Series Firewall.
For SRX300, SRX320, SRX340, SRX345, and SRX550M firewalls, reboot the device after you install the license(s). The SRX Series Firewall reserves additional memory for Juniper Content Security features. This decreases the session capacity.
For SRX4600, SRX5600 and SRX5800 firewalls, run the following command to manually reallocate the memory for content security features:
user@host> set security forwarding-process application-services enable-utm-memory
Reboot the device for the configuration to take effect.
SRX1500, SRX4100 and SRX4200 firewalls have enough memory for Juniper Content Security. You don’t need to allocate memory for these devices.
You’ll need to reinstall the license after installing or upgrading to a new Junos OS Release version. Unlicensed features, such as Juniper Content Security blocklists and allowlists, will continue to function without a license.

