Getting Started with the REST API
Installing and Configuring the REST API
How to download the REST API, how to install it on the Control Center server, and how to configure it for use is described in the Paragon Active Assurance Installation Guide. Please refer to this document.
It is vital to set the SITE_URL parameter correctly in
/etc/netrounds/netrounds.conf. This is to provide a public URL at which
the REST API can be accessed.
Configuring the Lifetime of REST Authorization Tokens
The lifetime of REST API authorization tokens is limited and is 10 years by default. This
is governed by the parameter REST_TOKEN_LIFETIME in the file
/etc/netrounds/netrounds.conf.
When you intend to use the REST API, you need to change the value of this parameter to whatever is required.
Obtaining an Authorization Token
Before you can start using the REST API, you need to create an authorization token for it.
This can be done either in the Control Center web GUI or from the command line using the
ncc command. See below.
You will need to include this token in all code calling the REST API; see this code snippet for an example.
Obtaining an Authorization Token in the Web GUI
- In the webapp, click the Paragon Active Assurance user name in the top right corner, and select Edit profile from the pop-up menu.
- Select the API tokens tab.
- Click the button Add API Token.
- A new token is generated and added to the list (multiple tokens can be defined). Name it as desired in the Name column.
The value of the API token is visible only at creation time. Therefore you must note it down to be able to use the token later on.
Creating and Managing Authorization Tokens from the Command Line
You can create an API token with the following command:
ncc rest-create-token --email <user email> [--accounts <list of accounts>] [--full-access] [--name <name of token>] [--force]
Note that only account Admins and Superusers are allowed to create API tokens.
Either --accounts <list of accounts> or --full-access
must be provided.
The --accounts option specifies what accounts the token should have access
to. The token will only have access to the specified accounts.
If you instead specify --full-access, then:
- if your user is an account Admin, the token will work for all accounts you have access to and have the Admin permission in;
- if your user is Superuser, the token will have access to the entire system. This means all accounts, even if the user is not an explicit member of them all.
The --full-access option gives the token access to all accounts.
You are prompted to confirm this. Use the --force option to skip
confirmation.
The --name option lets you name the token. This is optional.
You can list all API tokens with
ncc rest-list-tokens
You can delete an API token with
ncc rest-delete-token [--id <token id>] [--name <token name>]
where the id is obtained by listing the tokens.
Note that the API tokens created in the GUI are always tied to a single account by default.
You must use the ncc command line tool to create tokens with more extensive
access.
Accessing the REST API Browser
Once you have installed and configured the REST API, you can access an API browser for the
REST API at SITE_URL/rest/ (where SITE_URL is defined in
/etc/netrounds/netrounds.conf). The API browser is interactive and
enables you to try out the REST API operations manually. It also provides documentation of
the REST API features. Furthermore, it links to a JSON schema which exhaustively describes
the REST API (/rest/apispec_1.json). See the image below. The REST API
browser itself was generated from this schema, and it is possible to generate client code
based on it.
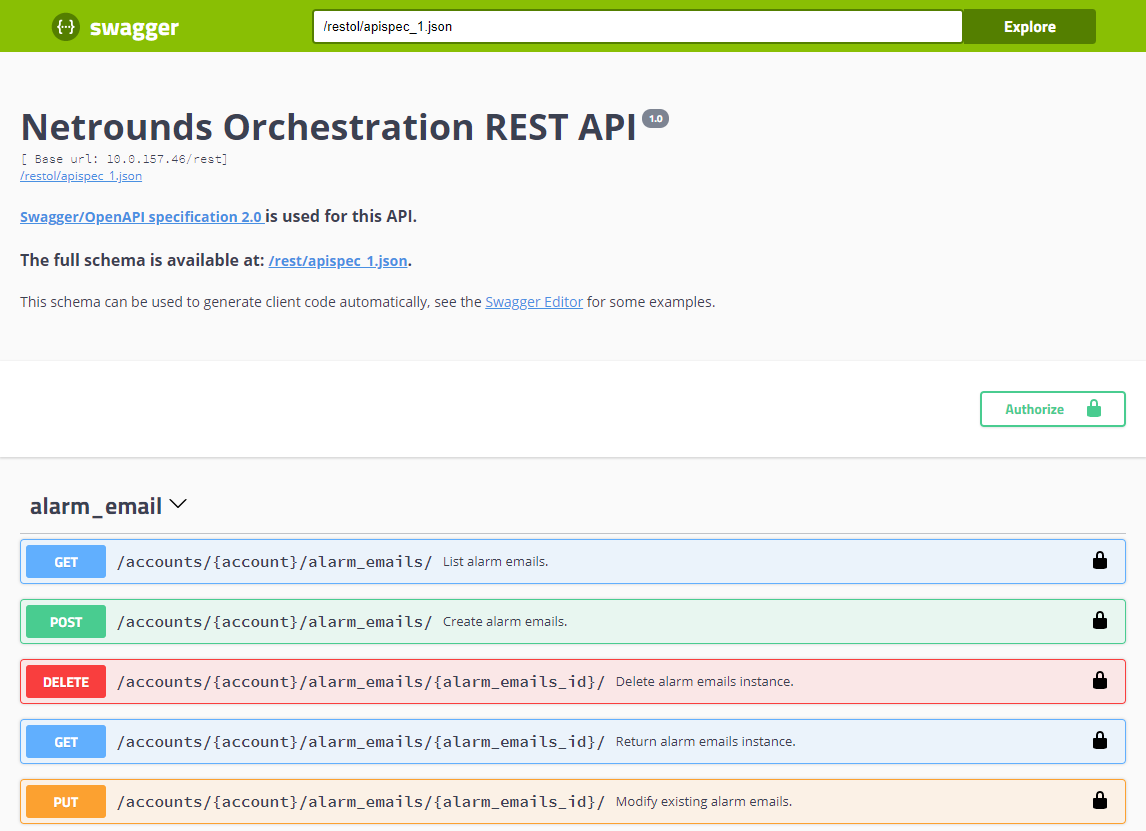
Before you can call the REST API from the API browser, you need to authorize such actions by providing the authorization token you have obtained (as explained in the section Obtaining an Authorization Token).
- Click the Authorize button.
- In the dialog that opens, enter your authorization token under Value and click the Authorize button in the dialog. Then close the dialog.
You can now perform REST API operations repeatedly from this web page. However, if you reload the page in your browser, you will need to repeat the above authorization procedure.
In practice, calls to the REST API will usually be scripted from an orchestrator. In this document, the orchestrator is mostly represented by Python code calling the REST API. However, it should be emphasized that any applicable language can be used. The authorization token needs to be included in any code making calls to the REST API.