User roles specify permissions for working in the different
areas of the Apstra environment. They can be blueprint-specific or more general in nature. To
customize a user's access and edit capability you'll assign roles to user profiles. Start by
creating roles based on the permissions you want to control.
-
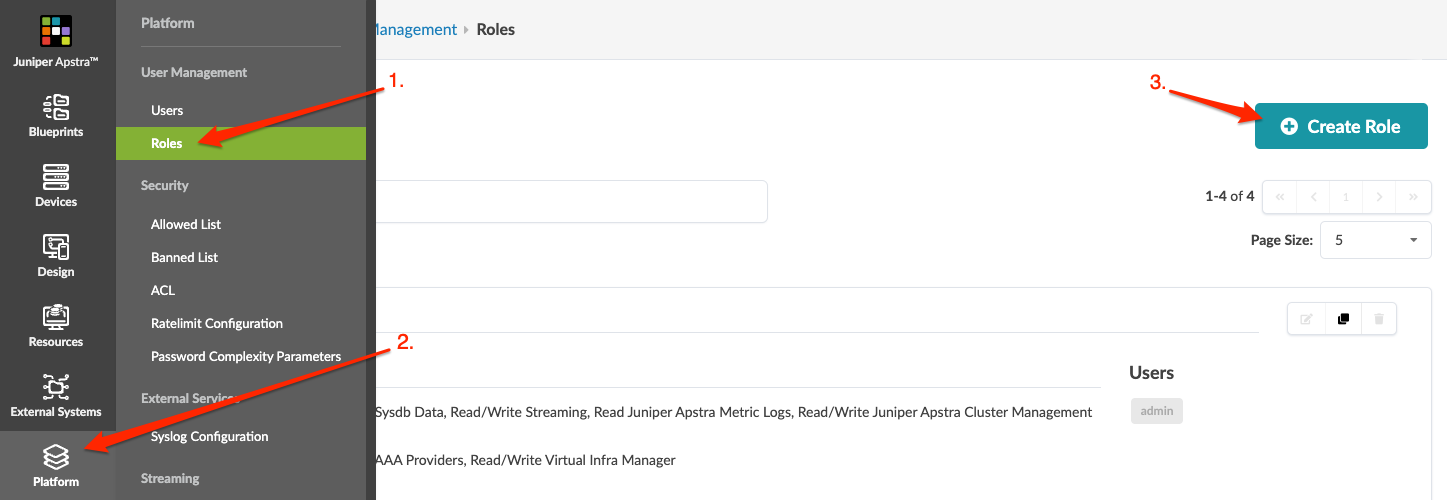
From the left navigation menu of the Apstra GUI, navigate to Platform >
User Management > Roles and click Create
Role.
-
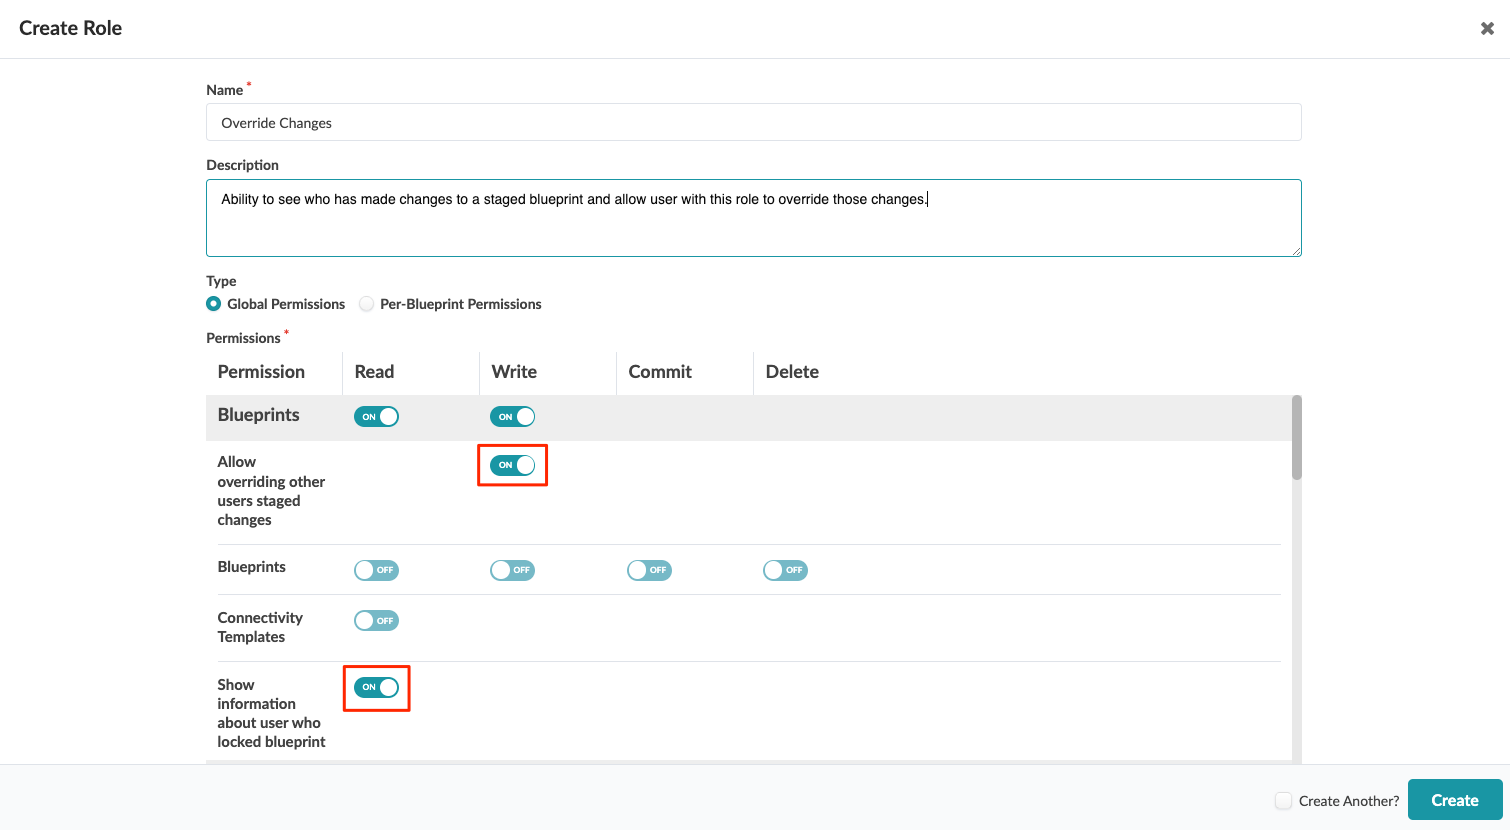
Enter a name and description.
-
Note:
Roles are either global or per-blueprint, they can't be both. Be careful. If you select
permissions in one type, then click the radio button for the other type, you'll lose the
permissions you already set.
Global Permissions pertain to Apstra details other than
blueprint details. They include general blueprint read, write, commit and delete
permissions as well as permissions for platform, external systems, resources, design,
devices, and more. To add global permissions, select Global
Permissions and select one or more permissions.
For example, if another user has staged changes in a blueprint, that blueprint is
locked for additional changes until that (unidentified) user commits or reverts the
changes (as of Apstra version 4.2.0). You can create and assign a role that allows a user
to see who made the changes and/or allow them to override those changes, as shown below.
(The admin role already has these permissions by default.)
-
To grant permissions pertaining to blueprint details instead, select
Per-Blueprint Permissions, select either specific blueprints or
All bluprints, then select one or more permissions that are
datacenter-specific, freeform-specific or common to all blueprints.
-
Click Create to create the role and return to the Roles
view.


