Help us improve your experience.

Let us know what you think.

Do you have time for a two-minute survey?

Announcement: Try the Ask AI chatbot for answers to your technical questions about Juniper products and solutions.

close
header-navigation
keyboard_arrow_up
close
keyboard_arrow_left
Juniper Apstra 5.1.0 User Guide
Table of Contents Expand all
list Table of Contents
file_download PDF
{ "lLangCode": "en", "lName": "English", "lCountryCode": "us", "transcode": "en_US" }
English
keyboard_arrow_right

Change Superspine Hostname/Name

Release: Juniper Apstra 5.1
{}
Change Release
date_range 21-Mar-25

You can change the hostname and/or name of a single superspine or of multiple superspines simultaneously.

Change the Hostname and/or Name of a Single Superspine

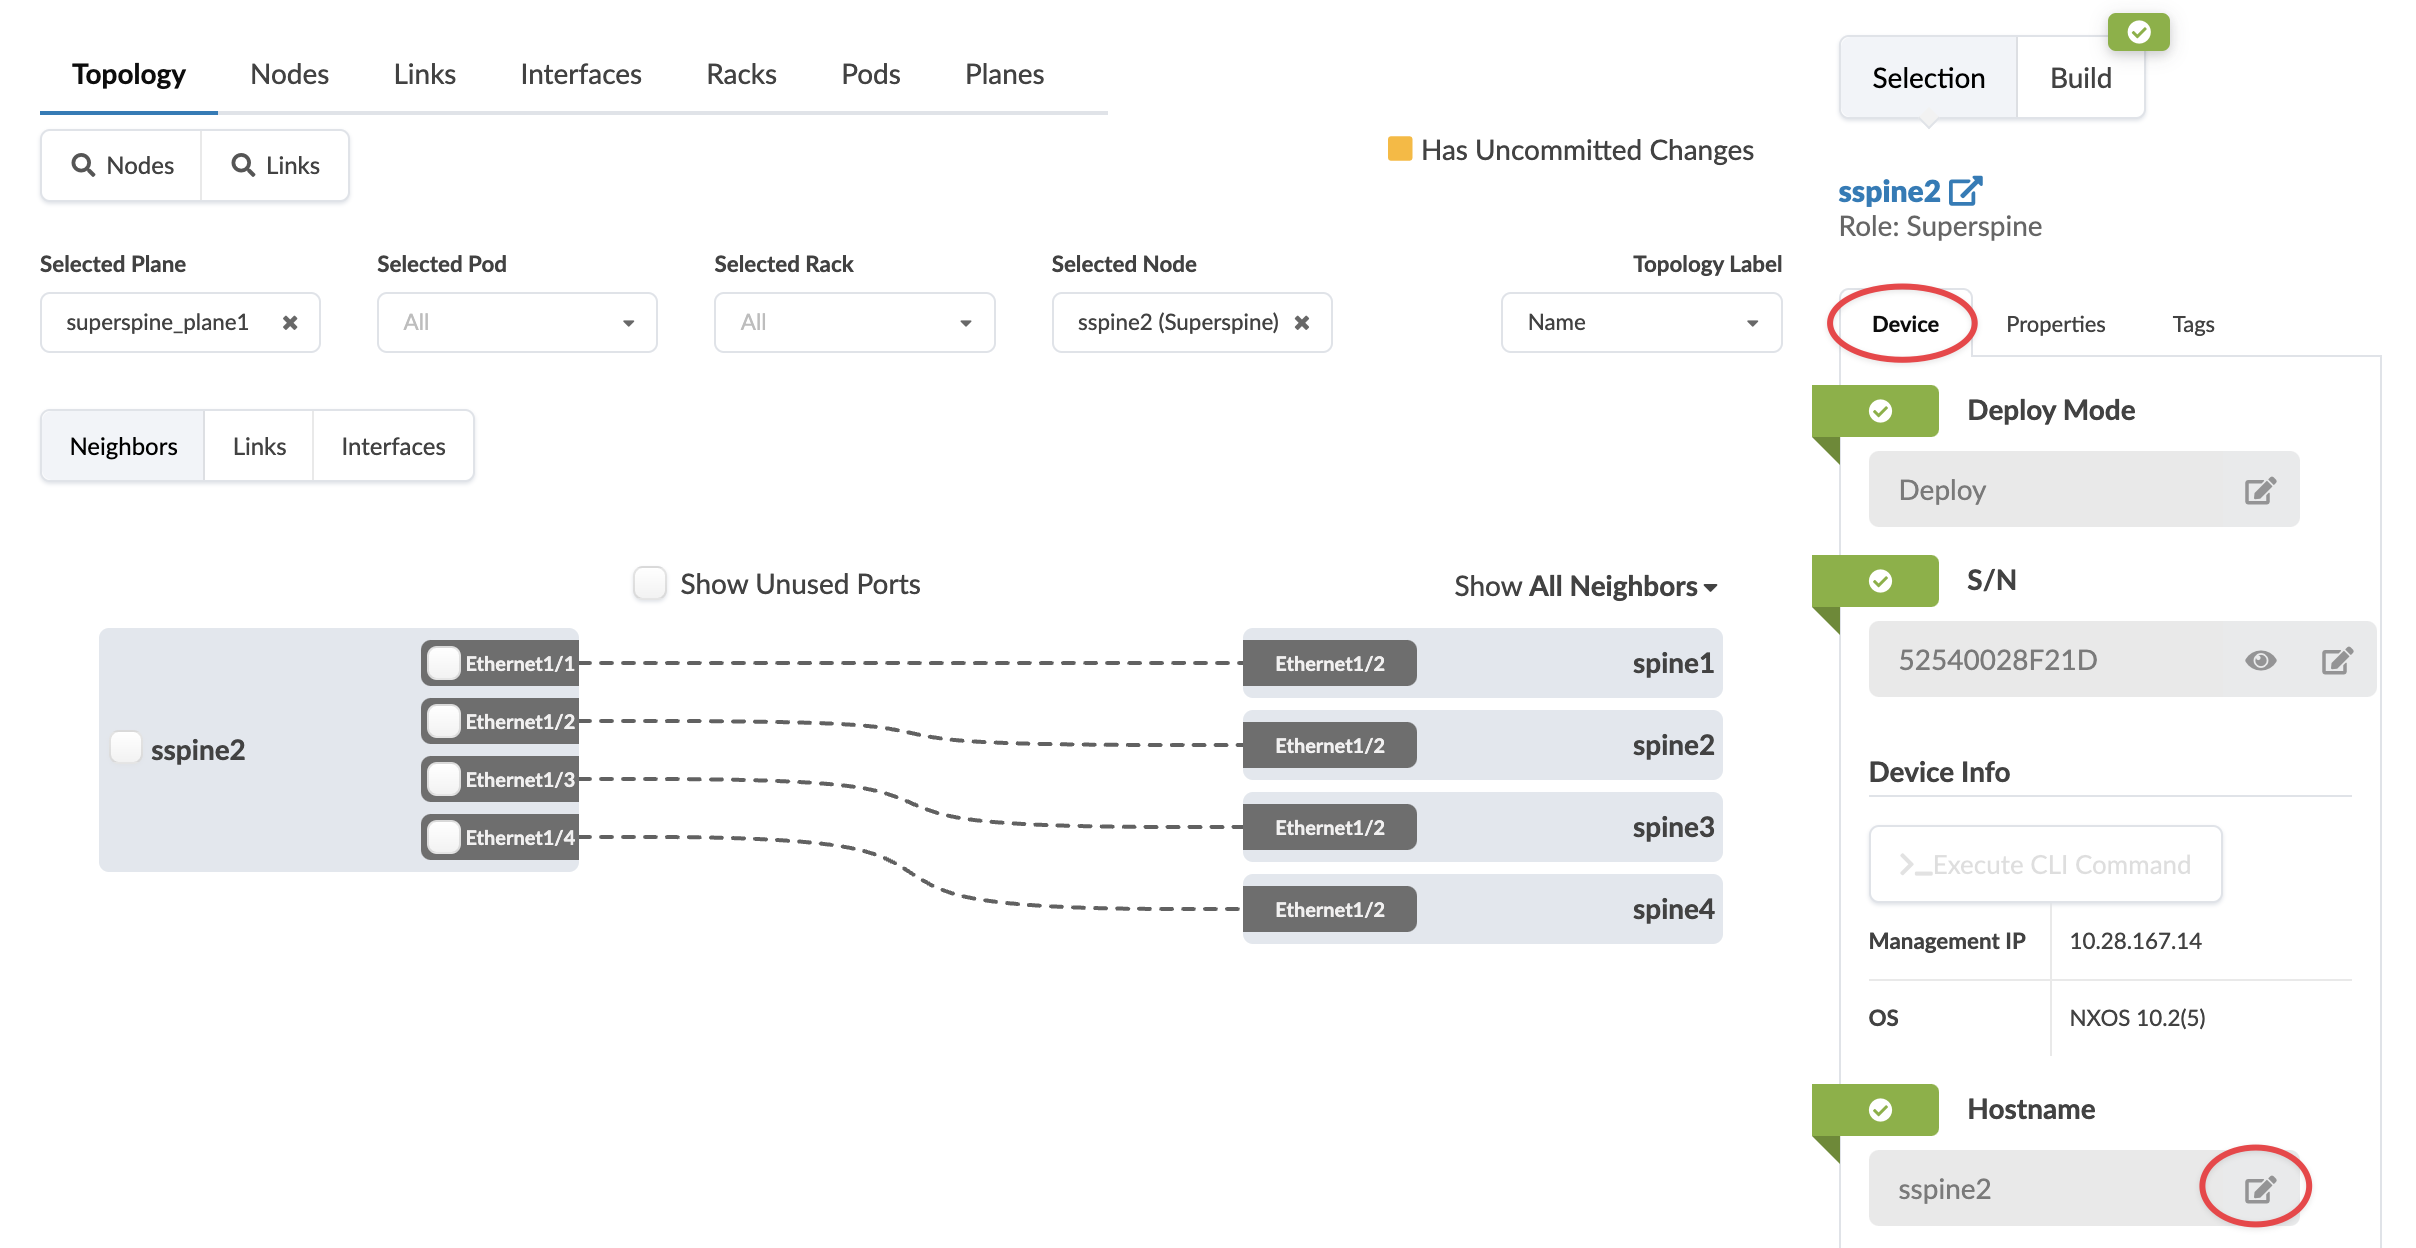
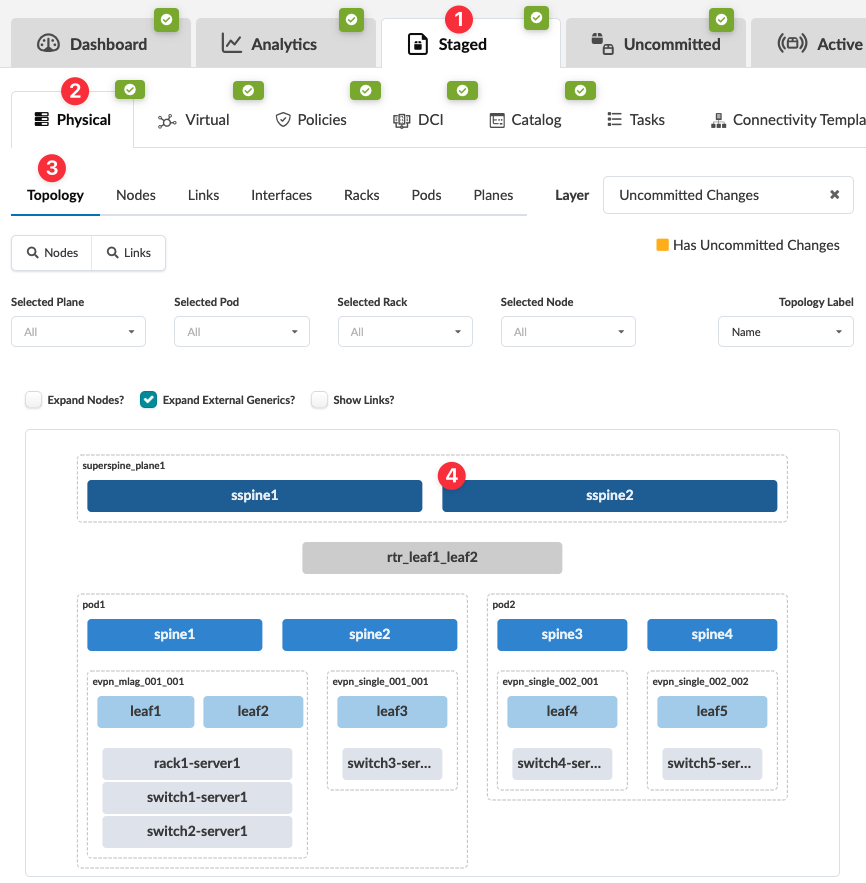
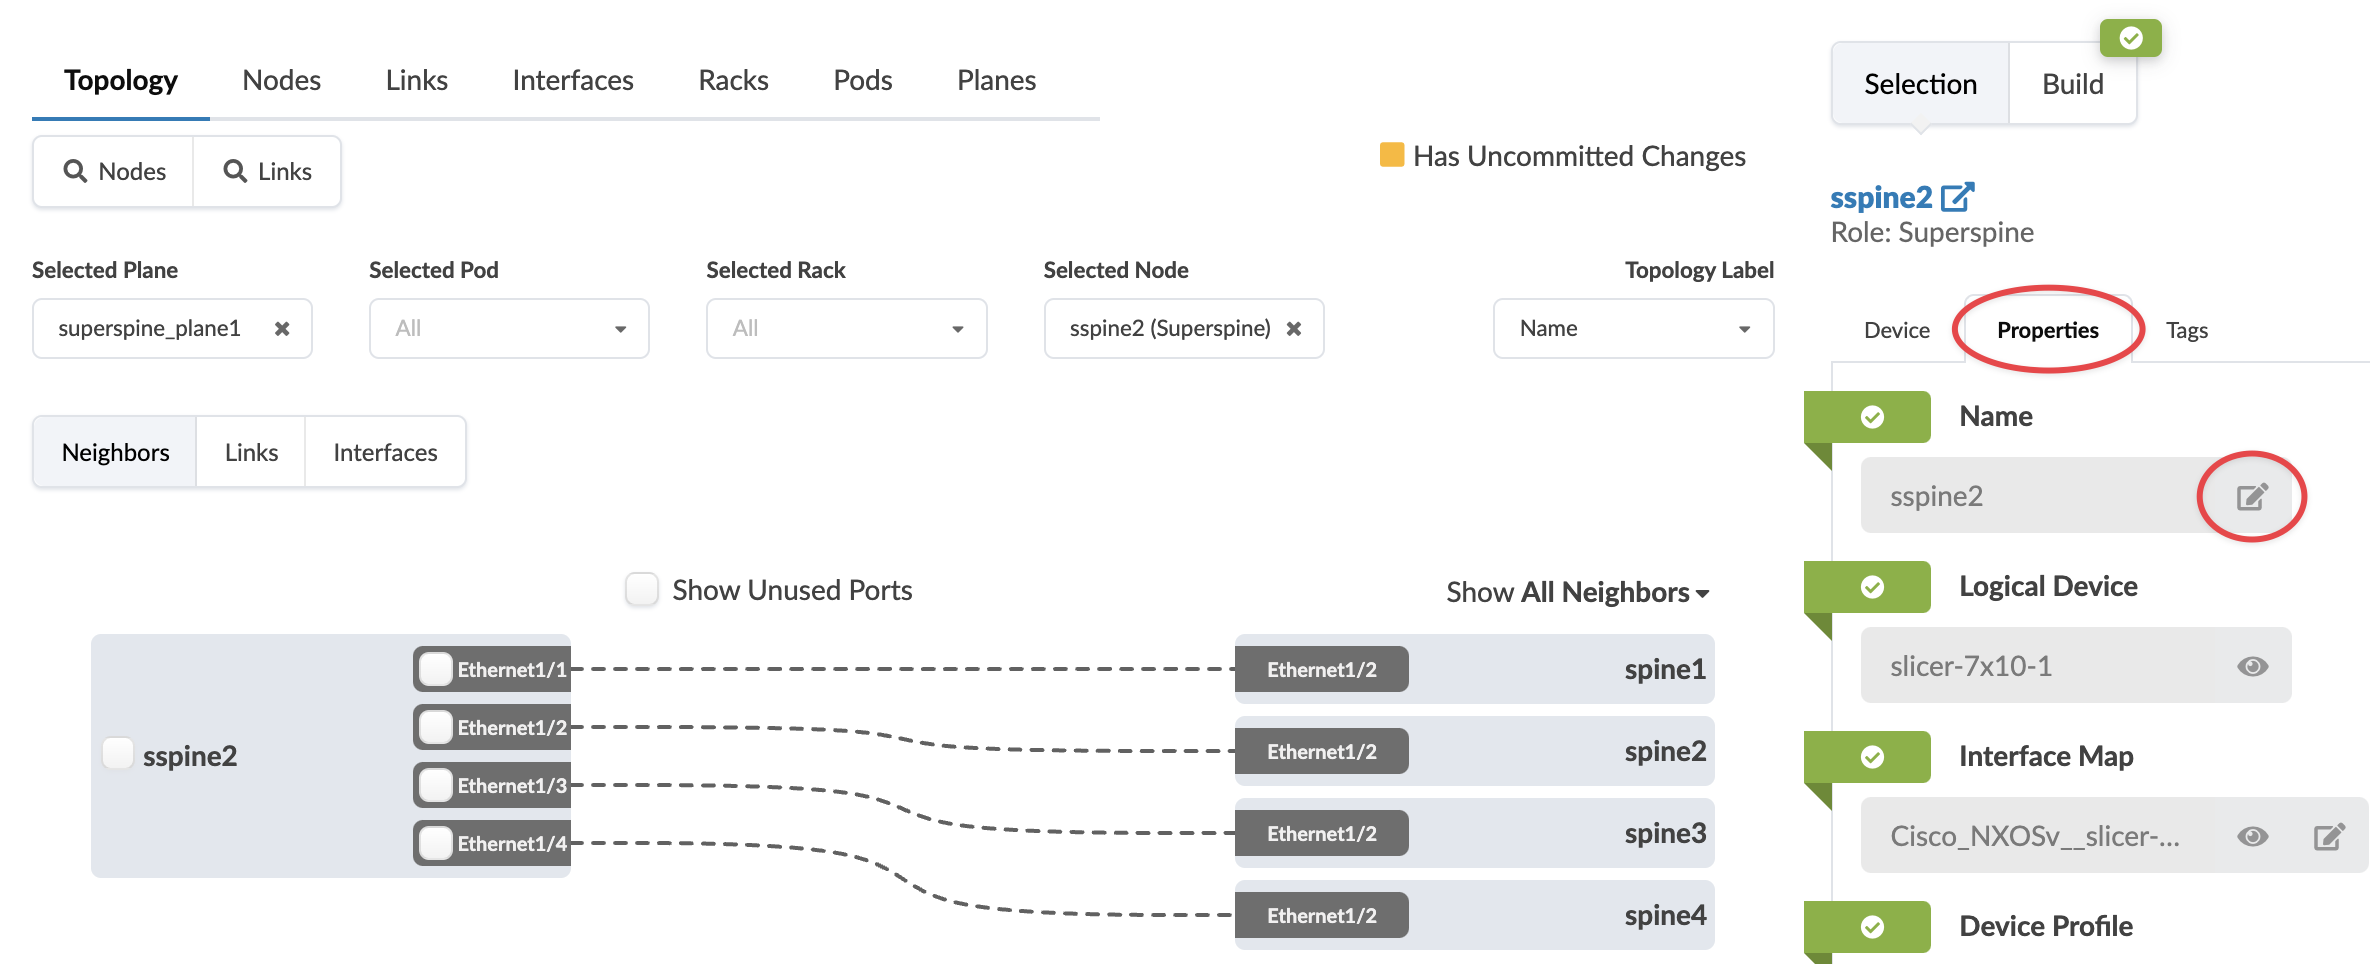
  1. From the blueprint, navigate to Staged > Physical > Topology and select the applicable superspine.
    The Selection panel opens (on the right).
    Note:

    You can also get to the Selection panel by clicking the name of the superspine in the Nodes table (Staged > Physical > Nodes).

  2. To change the superspine name - From the Properties tab in the Selection panel, click the Edit button for Name, change the name accordingly, then click the Save button. (Notice you can change other various parameter values from the Properties tab.)
  3. To change the superspine hostname - click the Device tab in the Selection panel, click the Edit button for Hostname, change the hostname accordingly, then click the Save button. (Notice you can change other various parameter values from the Device tab.)

When you're ready to activate your changes, go to the Uncommitted tab to review and commit (or discard) your changes.

Change Hostnames and/or Names of Multiple Superspines

New feature in Apstra version 5.0.0.

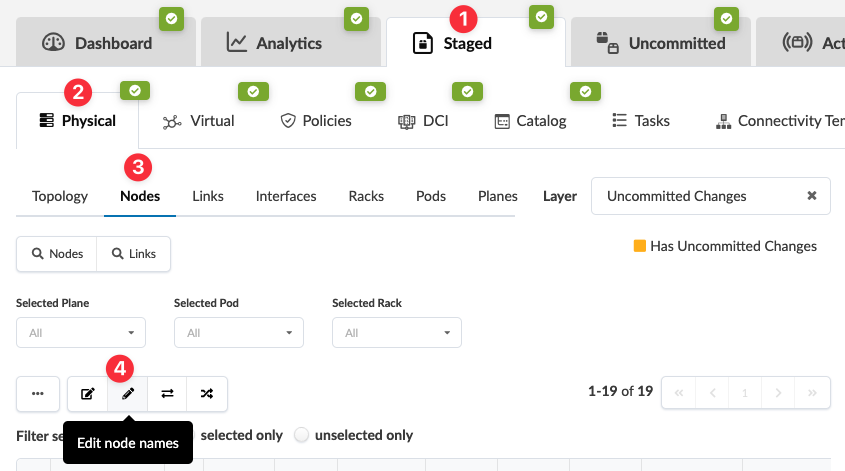
  1. From the blueprint, navigate to Staged > Physical > Nodes and click the Edit Node Names button, above the table.
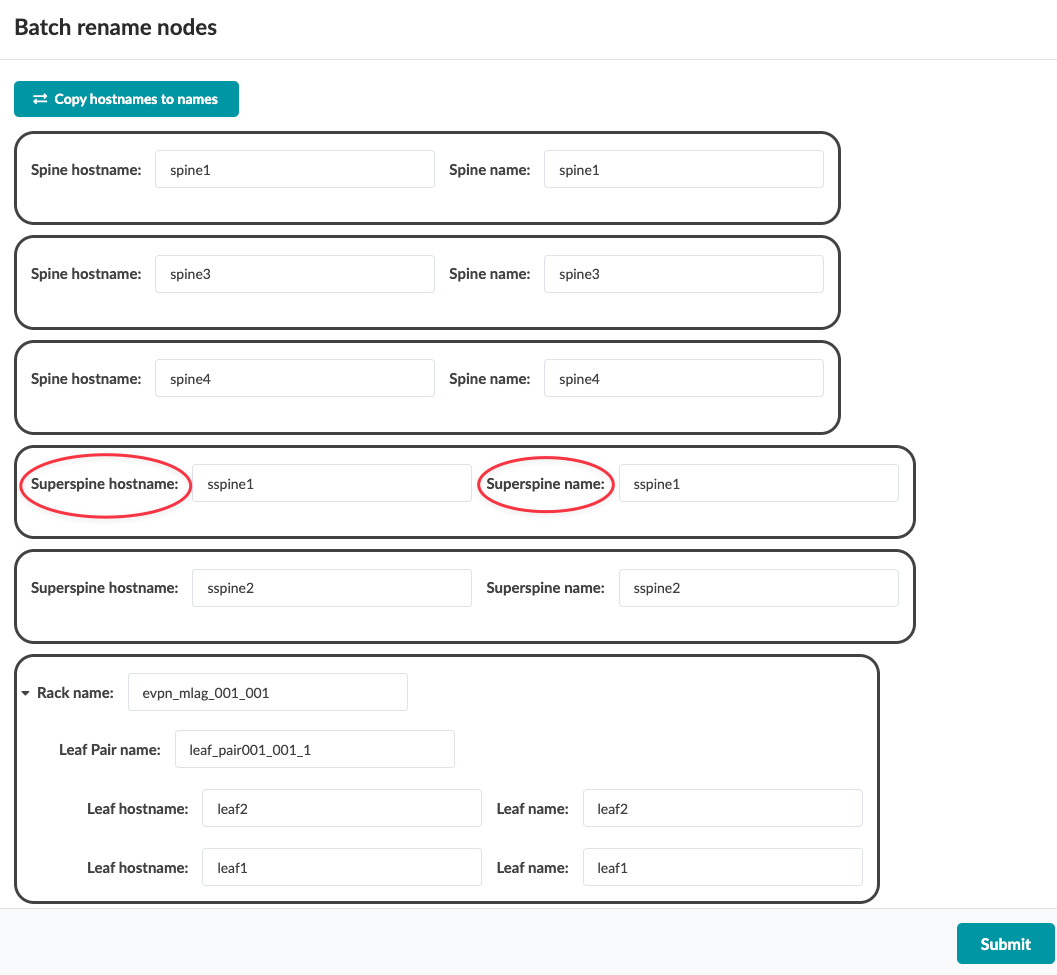
    The Batch rename nodes dialog opens.
  2. Change superspine hostnames and/or names. (Notice that you can change other various hostnames and names from this dialog as well.) To efficiently change the names to match the hostnames, after you've changed the hostnames click Copy hostnames to names. All names in the dialog change to match the hostnames.
  3. Click Submit to stage the changes and return to the Nodes table.

When you're ready to activate your changes, go to the Uncommitted tab to review and commit (or discard) your changes.
footer-navigation