How to Install Contrail Networking within an Amazon Elastic Kubernetes Service (EKS) Environment in AWS
This topic covers Contrail Networking in Kubernetes-orchestrated environments that are using Contrail Networking Release 20-based releases.
Starting in Release 22.1, Contrail Networking evolved into Cloud-Native Contrail Networking. Cloud-Native Contrail Networking offers significant enhancements to optimize networking performance in Kubernetes-orchestrated environments. We recommend using Cloud-Native Contrail for networking for most use cases in Kubernetes-orchestrated environments.
For general information about Cloud-Native Contrail, see the Cloud-Native Contrail Networking Techlibrary homepage.
The Elastic Kubernetes Service (EKS) runs Kubernetes-orchestrated environments within Amazon Web Services (AWS).
Kubernetes supports a pluggable framework—called the Container Networking Interface (CNI)—for networking. See Pod networking (CNI) from AWS for information on how the CNI framework is implemented by EKS.
Contrail Networking is supported as a custom CNI in Kubernetes-orchestrated environments. This document show you how to install Contrail Networking as the CNI when a Kubernetes environment is running in EKS on AWS.
It includes the following sections:
When to Use This Procedure
Use this procedure to enable Contrail Networking as the CNI in a Kubernetes-orchestrated environment running on AWS. Contrail Networking is used in this procedure to enable an MPLS data plane and a BGP control plane within the environment.
The procedure in this document was validated for Contrail Networking 2008 running in EKS 1.16. This procedure should work in EKS 1.16 and all later EKS releases.
Prerequisites
This procedure makes the following assumptions about your environment:
A Kubernetes client is installed.
The aws-iam-authenticator is installed to allow authentication into your EKS cluster. See Installing aws-iam-authenticator from AWS.
AWS CLI is installed. See Installing the AWS CLI from AWS.
You have obtained the login credentials to the Juniper Networks Contrail docker private secure registry at hub.juniper.net. If you need to obtain these credentials, email mailto:contrail-registry@juniper.net.
Install Contrail Networking as the CNI for EKS
This procedure installs Contrail Networking as the CNI in a Kubernetes orchestrated environment in the EKS service within AWS.
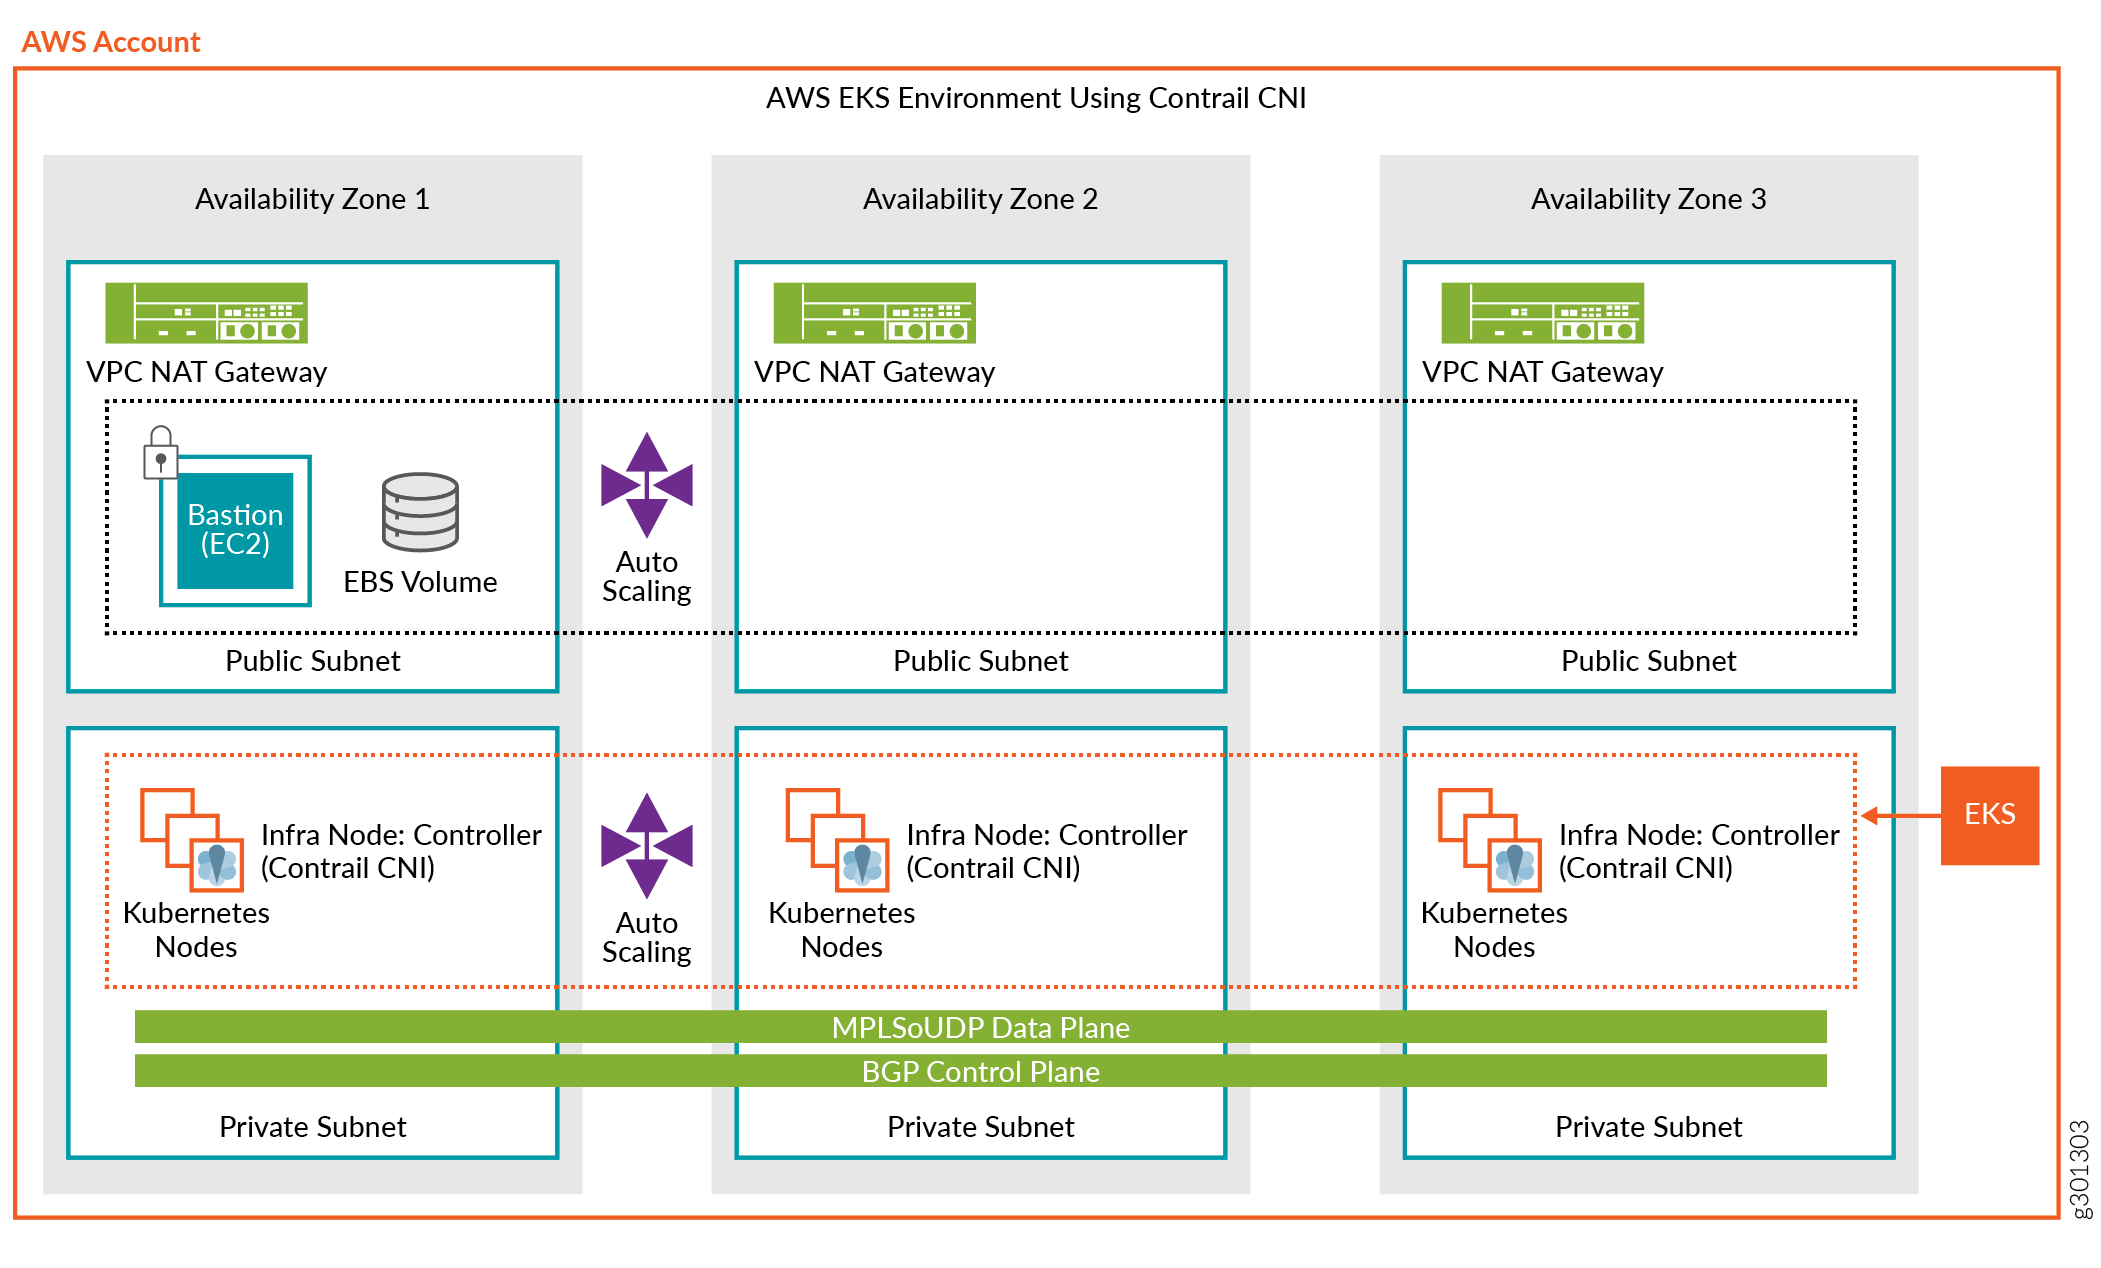
The procedure uses the following sample topology:
To install Contrail Networking as the CNI in a Kubernetes-orchestrated environment running in EKS:
- (Recommended) Review the video procedure of this installation. See the Deep Dive: Contrail SDN and AWS EKS channel on Youtube.
- Download the EKS deployer:
wget https://s3-eu-central-1.amazonaws.com/contrail-one-click-deployers/EKS-Scripts.zip -O EKS-Scripts.zip
unzip EKS-Scripts.zip
cd contrail-as-the-cni-for-aws-eks/
We recommend running this procedure in the eu-central-1 default region during your first attempt.
The procedure supports most AWS regions. You can run the procedure in other regions by updating the variables.sh file after familiarizing yourself with the steps.
- Modify the variables.sh file to fit
your environment.
The following fields must be updated:
CLOUDFORMATIONREGION—the AWS region that your client is configured to use. Cloudformation deploys EKS into this region using the quickstart. The default region is eu-west-1.
JUNIPERREPONAME—username to access the Contrail repository. You can email mailto:contrail-registry@juniper.net to obtain your username and password credentials, if needed.
JUNIPERREPOPASS—password to access the Contrail repository. You can email mailto:contrail-registry@juniper.net to obtain your username and password credentials, if needed.
RELEASE—Contrail Networking Release container tag. The container tag is used to identify images in the Contrail repository. The container tag for any Contrail Release 20xx image can be found in README Access to Contrail Registry 20XX.
EC2KEYNAME—an existing keyname in your specified AWS region.
BASTIONSSHKEYPATH—the local path, which is usually the path on your PC, to the private key file for the AWS EC2 key.
Example file:
###############################################################################
#complete the below variables for your setup and run the script
###############################################################################
#this is the aws region you are connected to and want to deploy EKS and Contrail into
export CLOUDFORMATIONREGION="eu-west-1"
#this is the region for my quickstart, only change if you plan to deploy your own quickstart
export S3QUICKSTARTREGION="eu-west-1"
export LOGLEVEL="SYS_NOTICE"
#example Juniper docker login, change to yours
export JUNIPERREPONAME="JNPR-FieldUserxxx"
export JUNIPERREPOPASS="Exxxxxxxxxxu"
export RELEASE="2008.121"
export K8SAPIPORT="443"
export PODSN="10.20.0.0/24"
export SERVICESN="10.100.0.0/16"
export FABRICSN="10.20.2.0/24"
export ASN="64513"
export MYEMAIL="example@mail.com"
#example key, change these two to your existing ec2 ssh key name and private key file for the region
#also don't forget to chmod 0400 [your private key]
export EC2KEYNAME="ContrailKey"
export BASTIONSSHKEYPATH="/Users/user1/Downloads/ContrailKey-1.pem"
- Deploy the cloudformation-resources.sh file:
. ./cloudformation-resources.sh
This step is needed to prepare the environment in some AWS regions.
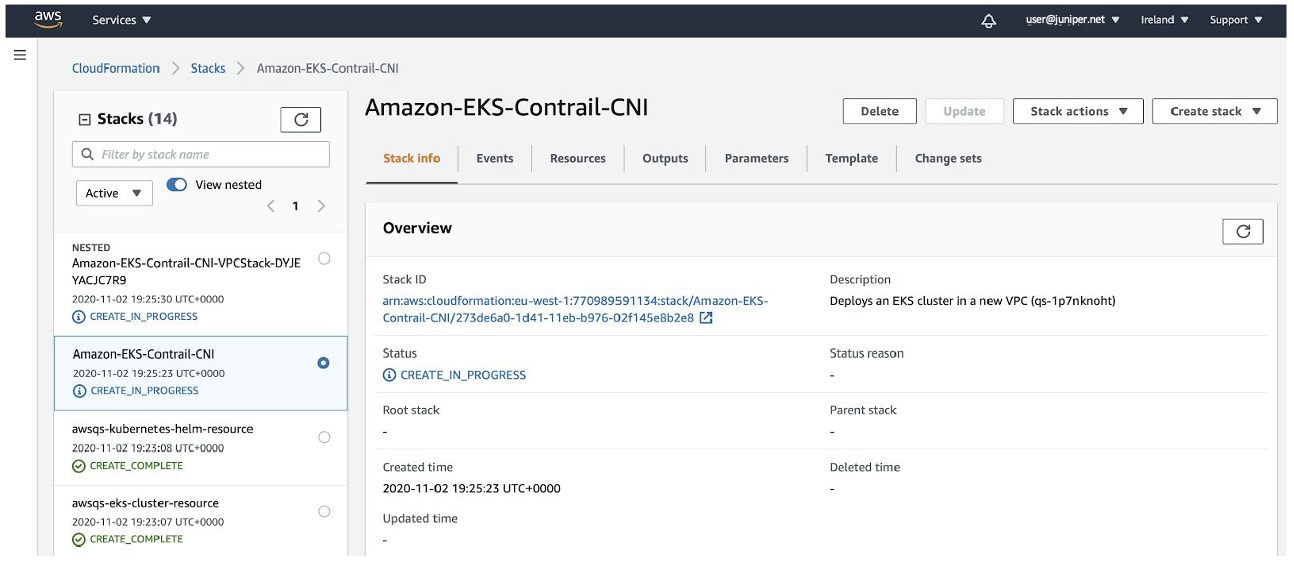
- From the AWS CLI, deploy the EKS quickstart stack:
. ./eks-ubuntu.sh
This step can take 45 minutes or longer to deploy.
Note:You can also use the Cloudformation user interface to deploy this stack. You will have to manually complete all parameters if you use the Cloudformation user interface. See this document from AWS.
You can monitor the status of the deployment using this command:
aws cloudformation describe-stacks --stack-name Amazon-EKS-Contrail-CNI --output table | grep StackStatus
||  StackStatus                  |  CREATE_COMPLETE
- Return to your PC.
Install the aws-iam-authenticator and the register:
aws sts get-caller-identity export CLUSTER=$(aws eks list-clusters --output text | awk -F ' ' '{print $2}') export REGION=$CLOUDFORMATIONREGION aws eks --region $REGION update-kubeconfig --name $CLUSTER - From the Kubernetes CLI, verify your cluster parameters:
$ kubectl get nodes
NAME                                         STATUS   ROLES   AGE   VERSION
ip-100-72-0-19.eu-west-1.compute.internal    Ready    (none)  19m   v1.14.8
ip-100-72-0-210.eu-west-1.compute.internal   Ready    (none)  19m   v1.14.8
ip-100-72-0-44.eu-west-1.compute.internal    Ready    (none)  19m   v1.14.8
ip-100-72-1-124.eu-west-1.compute.internal   Ready    (none)  19m   v1.14.8
ip-100-72-1-53.eu-west-1.compute.internal    Ready    (none)  19m   v1.14.8

$ kubectl get pods -A -o wide
NAMESPACE    NAME                      READY   STATUS    AGE  IP            NODE
kube-system  aws-node-7gh94            1/1     Running   21m  100.72.1.124  ip-100-72-1-124.eu-west-1.compute.internal
kube-system  aws-node-bq2x9            1/1     Running   21m  100.72.1.53   ip-100-72-1-53.eu-west-1.compute.internal
kube-system  aws-node-gtdz7            1/1     Running   21m  100.72.0.44   ip-100-72-0-44.eu-west-1.compute.internal
kube-system  aws-node-jr4gn            1/1     Running   21m  100.72.0.19   ip-100-72-0-19.eu-west-1.compute.internal
kube-system  aws-node-zlrbj            1/1     Running   21m  100.72.0.210  ip-100-72-0-210.eu-west-1.compute.internal
kube-system  coredns-6987776bbd-ggsjt  1/1     Running   33m  100.72.0.5    ip-100-72-0-44.eu-west-1.compute.internal
kube-system  coredns-6987776bbd-v7ckc  1/1     Running   33m  100.72.1.77   ip-100-72-1-53.eu-west-1.compute.internal
kube-system  kube-proxy-k6hdc          1/1     Running   21m  100.72.0.210  ip-100-72-0-210.eu-west-1.compute.internal
kube-system  kube-proxy-m59sb          1/1     Running   21m  100.72.0.44   ip-100-72-0-44.eu-west-1.compute.internal
kube-system  kube-proxy-qrrqn          1/1     Running   21m  100.72.0.19   ip-100-72-0-19.eu-west-1.compute.internal
kube-system  kube-proxy-r2vqw          1/1     Running   21m  100.72.1.53   ip-100-72-1-53.eu-west-1.compute.internal
kube-system  kube-proxy-vzkcd          1/1     Running   21m  100.72.1.124  ip-100-72-1-124.eu-west-1.compute.internal
Note:Some command output fields removed for readability.
- Upgrade the worker nodes to the latest EKS version:
kubectl apply -f upgrade-nodes.yaml
After a few minutes, confirm that the EKS version has updated on all nodes.
In this sample output, the EKS version was updated to 1.16.15.
$ kubectl get nodes
NAME                                       STATUS AGE VERSION
ip-100-72-0-174.eu-west-1.compute.internal Ready  19m v1.16.15
ip-100-72-0-93.eu-west-1.compute.internal  Ready  19m v1.16.15
ip-100-72-0-95.eu-west-1.compute.internal  Ready  19m v1.16.15
ip-100-72-1-23.eu-west-1.compute.internal  Ready  19m v1.16.15
ip-100-72-1-85.eu-west-1.compute.internal  Ready  19m v1.16.15
Note:Command output slightly modified for readability.
After confirming that the EKS version is updated on all nodes, delete the upgrade pods:
kubectl delete -f upgrade-nodes.yaml
- Apply the OS fixes for the EC2 worker nodes for Contrail
Networking:
kubectl apply -f cni-patches.yaml
- Deploy Contrail Networking as the CNI for EKS:
. ./deploy-me.sh
This step typically takes about 5 minutes to complete.
- Deploy the setup bastion to provide SSH access for worker
nodes:
. ./setup-bastion.sh
- Run the Contrail setup file to provide a base Contrail
Networking configuration:
. ./setup-contrail.sh
- Check Contrail status:
$ . ./contrail-status.sh ************************************** ******node is 100.72.0.19 ************************************** ############################################################################### # ___ ______ ___ _ _ ____ _ _ # # / \ \ / / ___| / _ \ _ _(_) ___| | __ / ___|| |_ __ _ _ __| |_ # # / _ \ \ /\ / /\___ \ | | | | | | | |/ __| |/ / \___ \| __/ _` | '__| __| # # / ___ \ V V / ___) | | |_| | |_| | | (__| < ___) | || (_| | | | |_ # # /_/ \_\_/\_/ |____/ \__\_\\__,_|_|\___|_|\_\ |____/ \__\__,_|_| \__| # #-----------------------------------------------------------------------------# # Amazon EKS Quick Start bastion host # # https://docs.aws.amazon.com/quickstart/latest/amazon-eks-architecture/ # ############################################################################### Unable to find image 'hub.juniper.net/contrail/contrail-status:2008.121' locally 2008.121: Pulling from contrail/contrail-status f34b00c7da20: Already exists 5a390a7d68be: Already exists 07ca884ff4ba: Already exists 0d7531696e74: Already exists eda9dec1319f: Already exists c52247bf208e: Already exists a5dc1d3a1a1f: Already exists 0297580c16ad: Already exists e341bea3e3e5: Pulling fs layer 12584a95f49f: Pulling fs layer 367eed12f241: Pulling fs layer 367eed12f241: Download complete 12584a95f49f: Download complete e341bea3e3e5: Verifying Checksum e341bea3e3e5: Download complete e341bea3e3e5: Pull complete 12584a95f49f: Pull complete 367eed12f241: Pull complete Digest: sha256:54ba0b280811a45f846d673addd38d4495eec0e7c3a7156e5c0cd556448138a7 Status: Downloaded newer image for hub.juniper.net/contrail/contrail-status:2008.121 Pod Service Original Name Original Version State Id Status redis contrail-external-redis 2008-121 running bf3a68e58446 Up 9 minutes analytics api contrail-analytics-api 2008-121 running 4d394a8fa343 Up 9 minutes analytics collector contrail-analytics-collector 2008-121 running 1772e258b8b4 Up 9 minutes analytics nodemgr contrail-nodemgr 2008-121 running f7cb3d64ff2d Up 9 minutes analytics provisioner contrail-provisioner 2008-121 running 4f73934a4744 Up 7 minutes analytics-alarm alarm-gen contrail-analytics-alarm-gen 2008-121 running 472b5d2fd7dd Up 9 minutes analytics-alarm kafka contrail-external-kafka 2008-121 running 88641415d540 Up 9 minutes analytics-alarm nodemgr contrail-nodemgr 2008-121 running 35e75ddd5b6e Up 9 minutes analytics-alarm provisioner contrail-provisioner 2008-121 running e82526c4d835 Up 7 minutes analytics-snmp nodemgr contrail-nodemgr 2008-121 running 6883986527fa Up 9 minutes analytics-snmp provisioner contrail-provisioner 2008-121 running 91c7be2f4ac9 Up 7 minutes analytics-snmp snmp-collector contrail-analytics-snmp-collector 2008-121 running 342a11ca471e Up 9 minutes analytics-snmp topology contrail-analytics-snmp-topology 2008-121 running f4fa7aa0d980 Up 9 minutes config api contrail-controller-config-api 2008-121 running 17093d75ec93 Up 9 minutes config device-manager contrail-controller-config-devicemgr 2008-121 running f2c11a305851 Up 6 minutes config nodemgr contrail-nodemgr 2008-121 running 8322869eaf34 Up 9 minutes config provisioner contrail-provisioner 2008-121 running 3d2618f9a20b Up 7 minutes config schema contrail-controller-config-schema 2008-121 running e3b7cbff4ef7 Up 6 minutes config svc-monitor contrail-controller-config-svcmonitor 2008-121 running 49c3a0f44466 Up 6 minutes config-database cassandra contrail-external-cassandra 2008-121 running 0eb7d5c56612 Up 9 minutes config-database nodemgr contrail-nodemgr 2008-121 running 8f1bb252f002 Up 9 minutes config-database provisioner contrail-provisioner 2008-121 running 4b23ff9ad2bc Up 7 minutes config-database rabbitmq contrail-external-rabbitmq 2008-121 running 22ab5777e1fa Up 9 minutes config-database zookeeper contrail-external-zookeeper 2008-121 running 5d1e33e545ae Up 9 minutes control control contrail-controller-control-control 2008-121 running 05e3ac0e4de3 Up 9 minutes control dns contrail-controller-control-dns 2008-121 running ea24d045f221 Up 9 minutes control named contrail-controller-control-named 2008-121 running 977ddeb4a636 Up 9 minutes control nodemgr contrail-nodemgr 2008-121 running 248ae2888c15 Up 9 minutes control provisioner contrail-provisioner 2008-121 running c666bd178d29 Up 9 minutes database cassandra contrail-external-cassandra 2008-121 running 9e840c1a5034 Up 9 minutes database nodemgr contrail-nodemgr 2008-121 running 355984d1689c Up 9 minutes database provisioner contrail-provisioner 2008-121 running 60d472efb042 Up 7 minutes database query-engine contrail-analytics-query-engine 2008-121 running fa56e2c7c765 Up 9 minutes kubernetes kube-manager contrail-kubernetes-kube-manager 2008-121 running 584013153ef8 Up 9 minutes vrouter agent contrail-vrouter-agent 2008-121 running 7bc5b164ed44 Up 8 minutes vrouter nodemgr contrail-nodemgr 2008-121 running 5c9201f4308e Up 8 minutes vrouter provisioner contrail-provisioner 2008-121 running ce9d14aaba89 Up 8 minutes webui job contrail-controller-webui-job 2008-121 running d92079688dda Up 9 minutes webui web contrail-controller-webui-web 2008-121 running 8efed46b98d6 Up 9 minutes vrouter kernel module is PRESENT == Contrail control == control: active nodemgr: active named: active dns: active == Contrail analytics-alarm == nodemgr: active kafka: active alarm-gen: active == Contrail kubernetes == kube-manager: active == Contrail database == nodemgr: active query-engine: active cassandra: active == Contrail analytics == nodemgr: active api: active collector: active == Contrail config-database == nodemgr: active zookeeper: active rabbitmq: active cassandra: active == Contrail webui == web: active job: active == Contrail vrouter == nodemgr: active agent: timeout == Contrail analytics-snmp == snmp-collector: active nodemgr: active topology: active == Contrail config == svc-monitor: backup nodemgr: active device-manager: backup api: active schema: backupNote:A vRouter agent timeout might appear in the output. In most cases, the vRouter is working fine and this is a cosmetic issue.
- Confirm that the pods are running:
$ kubectl get pods -A -o wide
NAMESPACE     NAME                                READY   STATUS    RESTARTS   AGE     IP             NODE
kube-system   cni-patches-dgjnc                   1/1     Running   0          44s     100.72.0.210   ip-100-72-0-210.eu-west-1.compute.internal
kube-system   cni-patches-krss8                   1/1     Running   0          44s     100.72.1.53    ip-100-72-1-53.eu-west-1.compute.internal
kube-system   cni-patches-r9vgj                   1/1     Running   0          44s     100.72.1.124   ip-100-72-1-124.eu-west-1.compute.internal
kube-system   cni-patches-wcc9p                   1/1     Running   0          44s     100.72.0.44    ip-100-72-0-44.eu-west-1.compute.internal
kube-system   cni-patches-xqrw8                   1/1     Running   0          44s     100.72.0.19    ip-100-72-0-19.eu-west-1.compute.internal
kube-system   config-zookeeper-2mspv              1/1     Running   0          16m     100.72.0.19    ip-100-72-0-19.eu-west-1.compute.internal
kube-system   config-zookeeper-k65hk              1/1     Running   0          16m     100.72.0.210   ip-100-72-0-210.eu-west-1.compute.internal
kube-system   config-zookeeper-nj2qb              1/1     Running   0          16m     100.72.0.44    ip-100-72-0-44.eu-west-1.compute.internal
kube-system   contrail-agent-2cqbz                3/3     Running   0          16m     100.72.0.44    ip-100-72-0-44.eu-west-1.compute.internal
kube-system   contrail-agent-kbd7v                3/3     Running   0          16m     100.72.1.53    ip-100-72-1-53.eu-west-1.compute.internal
kube-system   contrail-agent-kc4gk                3/3     Running   0          16m     100.72.0.210   ip-100-72-0-210.eu-west-1.compute.internal
kube-system   contrail-agent-n7shj                3/3     Running   0          16m     100.72.0.19    ip-100-72-0-19.eu-west-1.compute.internal
kube-system   contrail-agent-vckdh                3/3     Running   0          16m     100.72.1.124   ip-100-72-1-124.eu-west-1.compute.internal
kube-system   contrail-analytics-9llmv            4/4     Running   1          16m     100.72.0.19    ip-100-72-0-19.eu-west-1.compute.internal
kube-system   contrail-analytics-alarm-27x47      4/4     Running   1          16m     100.72.0.210   ip-100-72-0-210.eu-west-1.compute.internal
kube-system   contrail-analytics-alarm-rzxgv      4/4     Running   1          16m     100.72.0.44    ip-100-72-0-44.eu-west-1.compute.internal
kube-system   contrail-analytics-alarm-z6w9k      4/4     Running   1          16m     100.72.0.19    ip-100-72-0-19.eu-west-1.compute.internal
kube-system   contrail-analytics-jmjzk            4/4     Running   1          16m     100.72.0.44    ip-100-72-0-44.eu-west-1.compute.internal
kube-system   contrail-analytics-snmp-4prpn       4/4     Running   1          16m     100.72.0.44    ip-100-72-0-44.eu-west-1.compute.internal
kube-system   contrail-analytics-snmp-s4r4g       4/4     Running   1          16m     100.72.0.19    ip-100-72-0-19.eu-west-1.compute.internal
kube-system   contrail-analytics-snmp-z8gxh       4/4     Running   1          16m     100.72.0.210   ip-100-72-0-210.eu-west-1.compute.internal
kube-system   contrail-analytics-xbbfz            4/4     Running   1          16m     100.72.0.210   ip-100-72-0-210.eu-west-1.compute.internal
kube-system   contrail-analyticsdb-gkcnw          4/4     Running   1          16m     100.72.0.210   ip-100-72-0-210.eu-west-1.compute.internal
kube-system   contrail-analyticsdb-k89fl          4/4     Running   1          16m     100.72.0.19    ip-100-72-0-19.eu-west-1.compute.internal
kube-system   contrail-analyticsdb-txkb4          4/4     Running   1          16m     100.72.0.44    ip-100-72-0-44.eu-west-1.compute.internal
kube-system   contrail-configdb-6hp6v             3/3     Running   1          16m     100.72.0.44    ip-100-72-0-44.eu-west-1.compute.internal
kube-system   contrail-configdb-w7sf8             3/3     Running   1          16m     100.72.0.19    ip-100-72-0-19.eu-west-1.compute.internal
kube-system   contrail-configdb-wkcpp             3/3     Running   1          16m     100.72.0.210   ip-100-72-0-210.eu-west-1.compute.internal
kube-system   contrail-controller-config-h4g7l    6/6     Running   4          16m     100.72.0.19    ip-100-72-0-19.eu-west-1.compute.internal
kube-system   contrail-controller-config-pmlcb    6/6     Running   3          16m     100.72.0.210   ip-100-72-0-210.eu-west-1.compute.internal
kube-system   contrail-controller-config-vvklq    6/6     Running   3          16m     100.72.0.44    ip-100-72-0-44.eu-west-1.compute.internal
kube-system   contrail-controller-control-56d46   5/5     Running   0          16m     100.72.0.210   ip-100-72-0-210.eu-west-1.compute.internal
kube-system   contrail-controller-control-t4mrf   5/5     Running   0          16m     100.72.0.19    ip-100-72-0-19.eu-west-1.compute.internal
kube-system   contrail-controller-control-wlhzq   5/5     Running   0          16m     100.72.0.44    ip-100-72-0-44.eu-west-1.compute.internal
kube-system   contrail-controller-webui-t4bzd     2/2     Running   0          16m     100.72.0.19    ip-100-72-0-19.eu-west-1.compute.internal
kube-system   contrail-controller-webui-wkqzz     2/2     Running   0          16m     100.72.0.44    ip-100-72-0-44.eu-west-1.compute.internal
kube-system   contrail-controller-webui-wnf4z     2/2     Running   0          16m     100.72.0.210   ip-100-72-0-210.eu-west-1.compute.internal
kube-system   contrail-kube-manager-fd6mr         1/1     Running   0          3m23s   100.72.0.44    ip-100-72-0-44.eu-west-1.compute.internal
kube-system   contrail-kube-manager-jhl2l         1/1     Running   0          3m33s   100.72.0.210   ip-100-72-0-210.eu-west-1.compute.internal
kube-system   contrail-kube-manager-wnmxt         1/1     Running   0          3m23s   100.72.0.19    ip-100-72-0-19.eu-west-1.compute.internal
kube-system   coredns-6987776bbd-8vzv9            1/1     Running   0          12m     10.20.0.250    ip-100-72-0-19.eu-west-1.compute.internal
kube-system   coredns-6987776bbd-w8h8d            1/1     Running   0          12m     10.20.0.249    ip-100-72-1-124.eu-west-1.compute.internal
kube-system   kube-proxy-k6hdc                    1/1     Running   1          50m     100.72.0.210   ip-100-72-0-210.eu-west-1.compute.internal
kube-system   kube-proxy-m59sb                    1/1     Running   1          50m     100.72.0.44    ip-100-72-0-44.eu-west-1.compute.internal
kube-system   kube-proxy-qrrqn                    1/1     Running   1          50m     100.72.0.19    ip-100-72-0-19.eu-west-1.compute.internal
kube-system   kube-proxy-r2vqw                    1/1     Running   1          50m     100.72.1.53    ip-100-72-1-53.eu-west-1.compute.internal
kube-system   kube-proxy-vzkcd                    1/1     Running   1          50m     100.72.1.124   ip-100-72-1-124.eu-west-1.compute.internal
kube-system   rabbitmq-754b8                      1/1     Running   0          16m     100.72.0.44    ip-100-72-0-44.eu-west-1.compute.internal
kube-system   rabbitmq-bclkx                      1/1     Running   0          16m     100.72.0.210   ip-100-72-0-210.eu-west-1.compute.internal
kube-system   rabbitmq-mk76f                      1/1     Running   0          16m     100.72.0.19    ip-100-72-0-19.eu-west-1.compute.internal
kube-system   redis-8wr29                         1/1     Running   0          16m     100.72.0.19    ip-100-72-0-19.eu-west-1.compute.internal
kube-system   redis-kbtmd                         1/1     Running   0          16m     100.72.0.44    ip-100-72-0-44.eu-west-1.compute.internal
kube-system   redis-rmr8h                         1/1     Running   0          16m     100.72.0.210   ip-100-72-0-210.eu-west-1.compute.internal
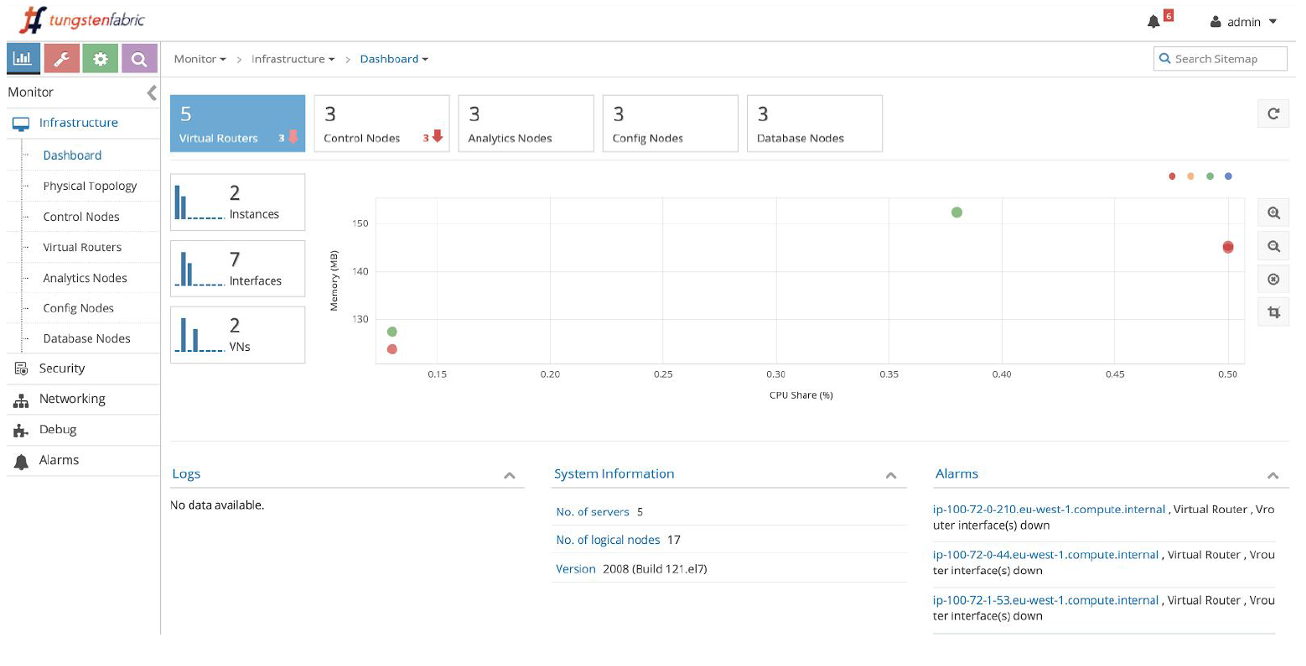
- Setup Contrail user interface access.
. ./setup-contrail-ui.sh
To view the Contrail user interface after performing this step:
-
In your web browser, enter
https://bastion-public-ip-address:8143 as the
address.
- Enter your credentials.
The default credentials use admin as the user and contrail123 as the password. We recommend changing these credentials to maximize security.
Note:You may get some BGP alarm messages upon login. These messages occur because sample BGP peering relationships are established with gateway devices and federated clusters. Delete the BGP peers in your environment if you want to clear the alarms.
-
In your web browser, enter
https://bastion-public-ip-address:8143 as the
address.
- Modify the auto scaling groups so that you can stop instances
that are not in use.
export SCALINGGROUPS=( $(aws autoscaling describe-auto-scaling-groups --query "AutoScalingGroups[].AutoScalingGroupName" --output text) ) aws autoscaling suspend-processes --auto-scaling-group-name ${SCALINGGROUPS[0]} aws autoscaling suspend-processes --auto-scaling-group-name ${SCALINGGROUPS[1]}Note:If you plan on deleting stacks at a later time, you will have to reset this configuration and use the resume-processes option before deleting the primary stack:
export SCALINGGROUPS=( $(aws autoscaling describe-auto-scaling-groups --query "AutoScalingGroups[].AutoScalingGroupName" --output text) ) aws autoscaling resume-processes --auto-scaling-group-name ${SCALINGGROUPS[0]} aws autoscaling resume-processes --auto-scaling-group-name ${SCALINGGROUPS[1]} - (Optional) If you have a public network that you’d
like to use for ingress via a gateway, perform the following configuration
steps:
- Enter https://bastion-public-ip-address:8143 to connect to the web user interface.
- Navigate to Configure > Networks > k8s-default > networks (left side of page) > Add network (+)
- In the Add network box, enter the following parameters:
Name: k8s-public
Subnet: Select ipv4, then enter the IP address of your public service network.
Leave all other fields in subnet as default.
advanced: External=tick
advanced: Share-tick
route target: Click +. Enter a route target for your public network. For example, 64512:1000.
Click Save.
- Deploy a test application on each node:
cd TestDaemonSet
./Create.sh
kubectl get pods -A -o wide
- Deploy a multitier test application:
cd ../TestApp
./Create.sh
kubectl get deployments -n justlikenetflix
kubectl get pods -o wide -n justlikenetflix
kubectl get services -n justlikenetflix
kubectl get ingress -n justlikenetflix