Help us improve your experience.

Let us know what you think.

Do you have time for a two-minute survey?


Assigning a Role to a User

  1. Log in to the Google Admin Console, and then click Users to access the Users page.
    Figure 1: Google Admin Users Google Admin console Users section showing users Test 1, Test 2, Test 3 with email example.page. All active with 0 GB usage. Options to add, upload, download, filter users.
  2. Click the name of the user that you want to grant access to.
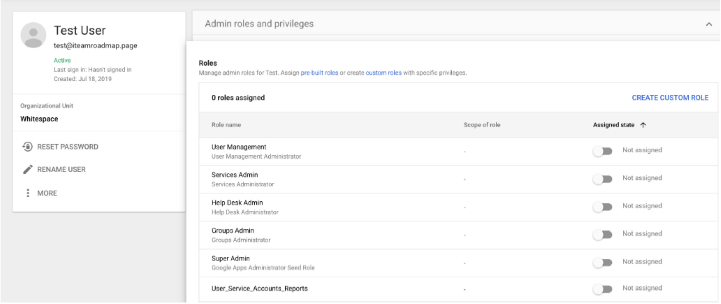
  3. Click in the Admin roles and privileges section to open the Admin roles and privileges page, and then click Edit to assign a role that includes reports access for the selected user.
    Figure 2: Admin Roles and Previleges User management interface showing Test User's details and email test@itamaroadmap.page. No admin roles assigned; available roles include User Management, Services Admin, Help Desk Admin, Group Admin, Super Admin, User_Service_Accounts_Reports. Option to create custom role.
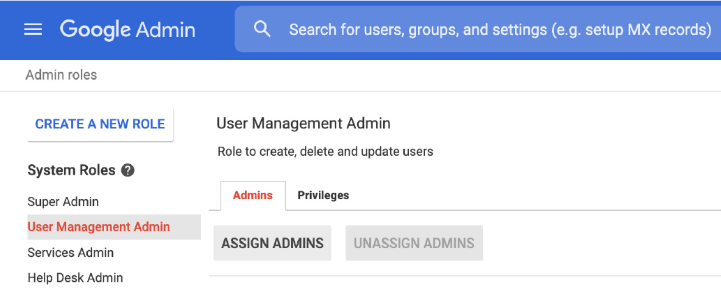
  4. Optional: If the Super Admin role was not used in Step 3, create a new role that has reports access. By default, the Super Admin role has this privilege.
    1. Click CREATE CUSTOM ROLE.
    2. On the Admin roles page, click CREATE A NEW ROLE.
      Figure 3: Create a New Role Google Admin console showing Admin roles section with User Management Admin role highlighted, enabling user creation, deletion, and updates.
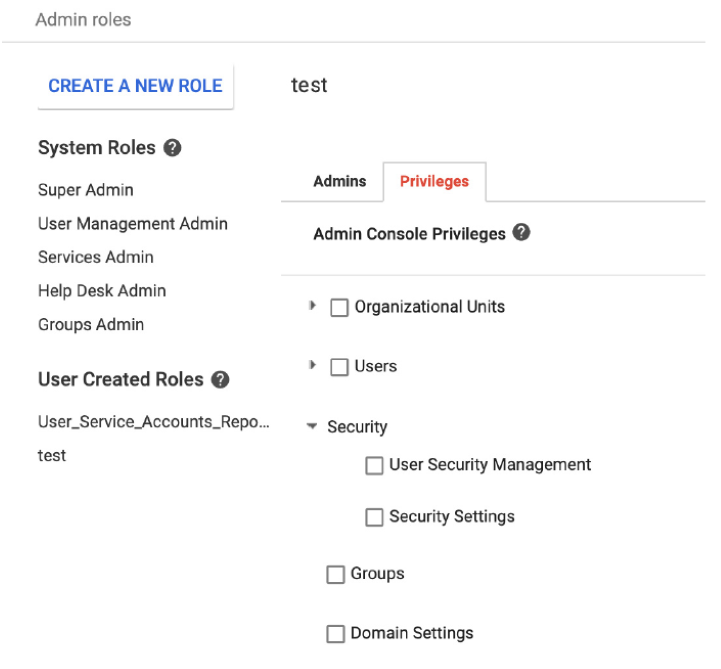
    3. On the Privileges tab, select the Reports check box, and then click Save.
      Figure 4: New Role Previleges Admin console interface for managing roles and privileges. Includes Admin Roles section with CREATE A NEW ROLE button, System Roles like Super Admin, and User Created Roles like test. Role Details for test role show Privileges tab with options like Organizational Units and Security.

      This role appears in the roles section as an option when you assign a role to a user.