Configure Network Settings through JSI Shell
This section provides information on the JSI Shell.
JSI Shell Overview
The JSI Shell is an SSH menu system for the vLWC. It allows you to view the current network settings and network status through an SSH login. You can use the JSI Shell as an alternate option to configure network settings. You can interact with the JSI Shell menu system through the keyboard. See Table 1.
|
Login to JSI Shell
You can access the JSI Shell using one of the following ways:
-
SSH to the configured IP address of the management (cap) interface.
-
Through the VMWare console, if networking has not been setup successfully on the management (cap) interface.
To login to the console, click ggc-lnx VM under the vLWC vApp and click either Launch Web Console or Launch Remote Console in the Summary tab to open the login prompt for the vLWC.
Use jsiuser and the default password to log into the JSI Shell.
Note:To obtain the default password to log into the Web console, see KB77944.
Change the default login password and set a new password after you log in to the Web console. See Change JSI Shell Login Password.
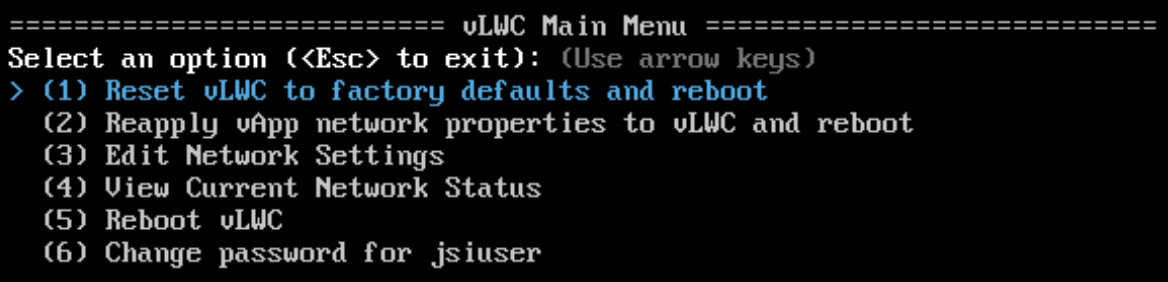
On successful login, the vLWC Main Menu (JSI Shell) screen appears. See Figure 1.
Change JSI Shell Login Password
You can change the login password for jsiuser from the JSI Shell Main Menu screen. To change the password, select Change password for jsiuser from the vLWC Main Menu screen (using the arrow key or pressing 6 on the keyboard), press Enter, and follow the prompts to specify the new password.
Configure Network Settings
You can configure the following network settings from the JSI Shell:
-
Interfaces—Internal (int), External (ext), Management (cap)
Note:While configuring the internal, external, and management interfaces, you must ensure that the subnet of the IP address assigned to the internal network port, external network port, and captive portal are different from each other.
Note:You must connect to the captive portal from a local IP address. Connection to the captive portal from the browser will fail if the connection request originates from a non-local network.
-
Active proxy
Follow the steps below to configure the network settings:
-
Select Edit Network Settings (using the arrow key or
pressing 3 on the keyboard) from the vLWC Main Menu screen.
The vLWC Edit Network Settings Menu screen appears. See Figure 2.Figure 2: vLWC Edit Network Settings Menu

-
To change the various interface settings:
-
Select the appropriate options from the series of menus presented
after which a vLWC Edit interface Settings Menu
screen appears for the interface you selected.
The upper half of the display lists the current network settings.
The following image provides an example of the vLWC Edit interface Settings Menu screen for a cap interface with IPv4 address:
Figure 3: vLWC Edit Menu (JSI Shell)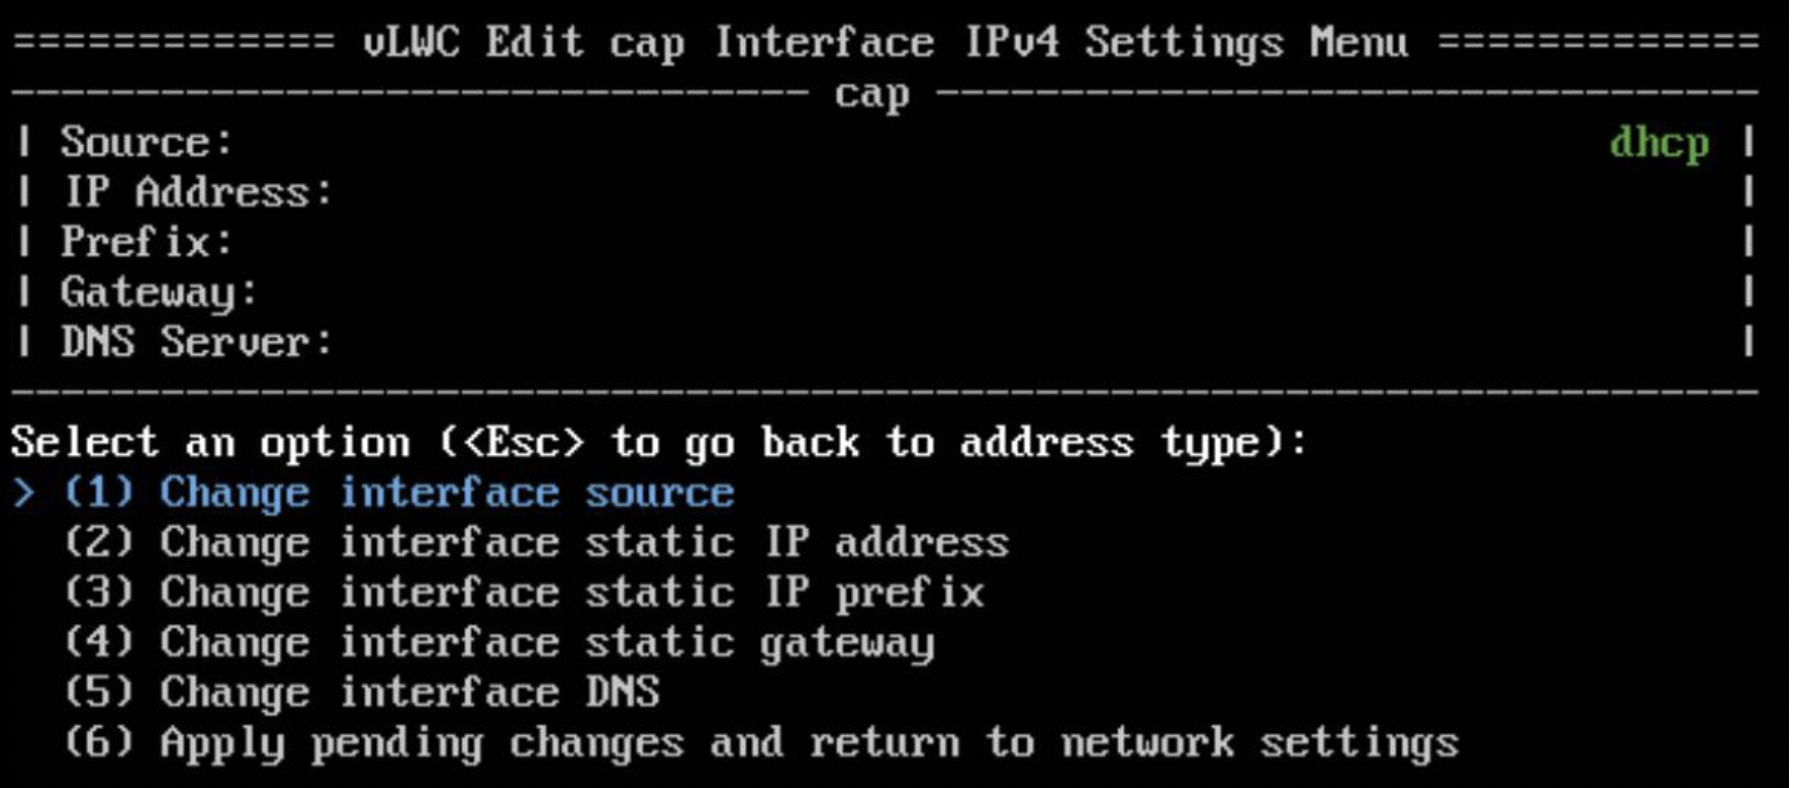
-
Select the appropriate options from the series of menus presented
after which a vLWC Edit interface Settings Menu
screen appears for the interface you selected.
-
To change the active proxy settings:
-
Select Change active proxy (using the arrow key or pressing
4 on the keyboard) from the vLWC Edit Network Settings Menu
screen.
The vLWC Edit Active Proxy Settings Menu screen appears. The upper half of the display lists the current active proxy settings. See Figure 4.Figure 4: vLWC Edit Active Proxy Settings Menu
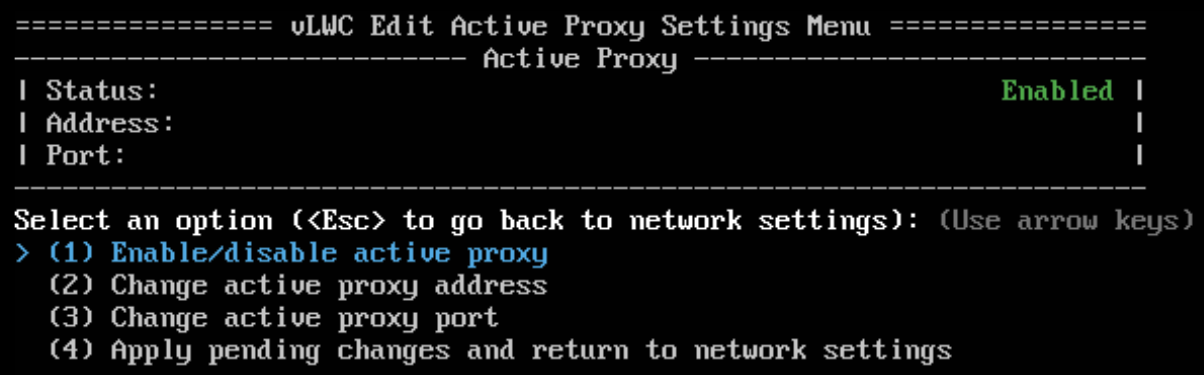
Note:The vLWC's external interface must be able to reach the URL, or IP address and port used for the active proxy.
Note:If you choose to use an active proxy, ensure that it forwards all the traffic from the vLWC to the AWS cloud proxy (see Outbound Connectivity Requirements for information on the AWS cloud proxy URL and ports). Juniper cloud services blocks all the inbound traffic coming through any path other than the AWS cloud proxy.
-
Select Change active proxy (using the arrow key or pressing
4 on the keyboard) from the vLWC Edit Network Settings Menu
screen.
After applying changes, if the network does not work as intended, reboot the vLWC.