Enable Guest Portal Social Login with Microsoft® Azure
Use this information if you've enabled a guest portal and want to integrate with Microsoft Azure® for user authorization.
The Guest Portal Social Login feature allows guests to log into the wireless network using their social network logins such as Google, Facebook, and Amazon accounts.
To enable Guest Portal Social Login with Microsoft® Azure:
Create Registration in Microsoft® Azure
-
On your Azure portal, select Microsoft Entra ID.
-
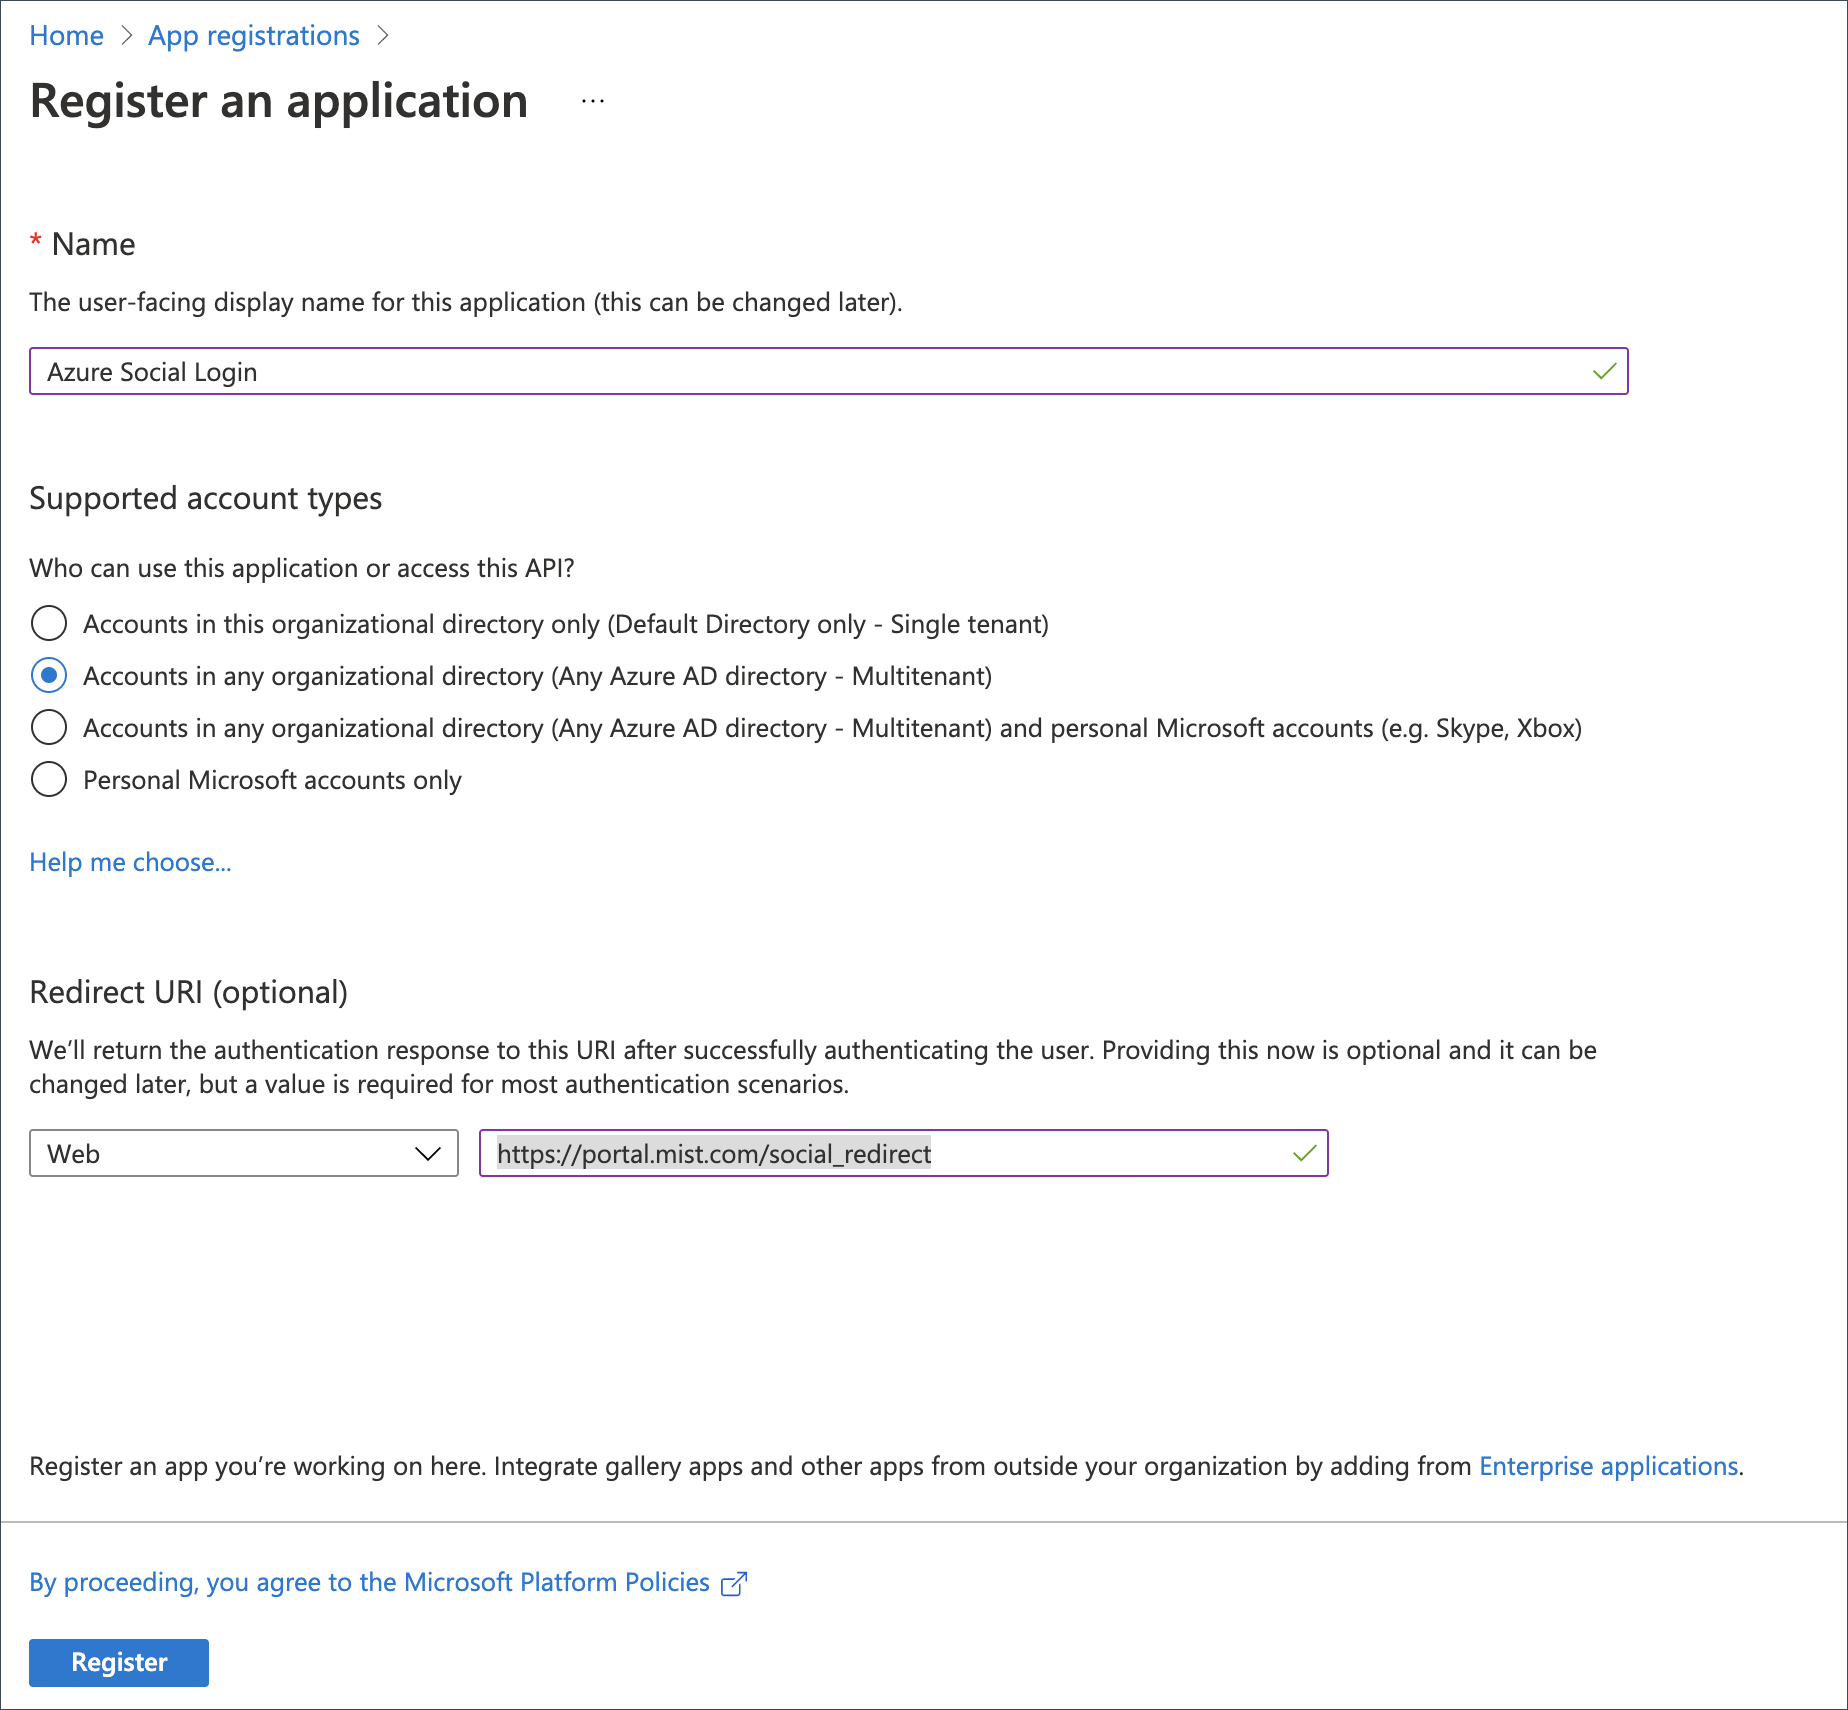
Select New Registration. See Register an Application.

-
Under Redirect URI select Web. The web address you enter should be the
web address that is listed in the Guest Wi-Fi Portal row for your global region in Juniper Mist Firewall Ports and IP Addresses for Firewall Configuration, followed by
/social_redirect.
Note: The following image lists https://portal.mist.com/social_redirect as an example, which includes the guest Wi-Fi portal address for the Global 01 region.
-
Click Register.
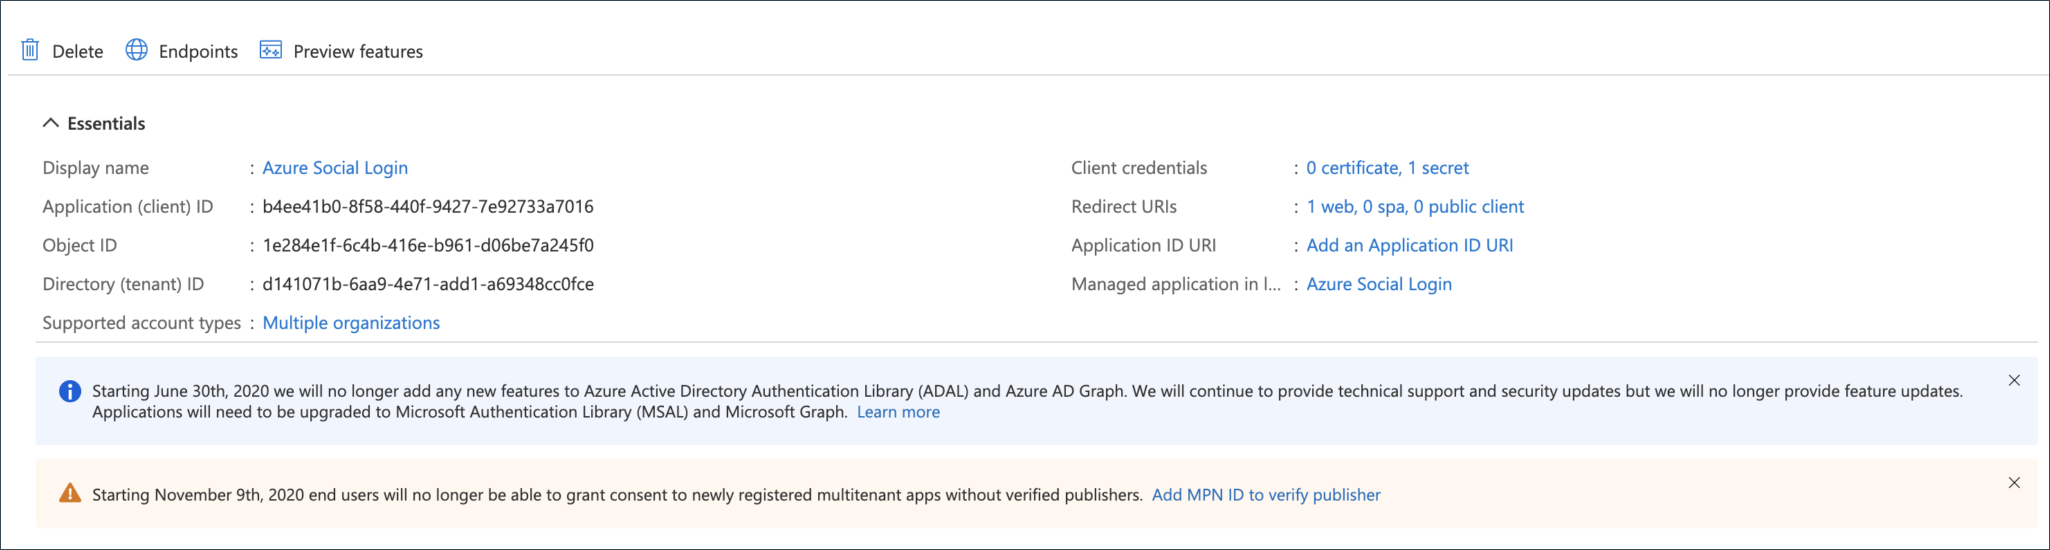
Once the registration is complete, the following page is displayed:
Examples:
-
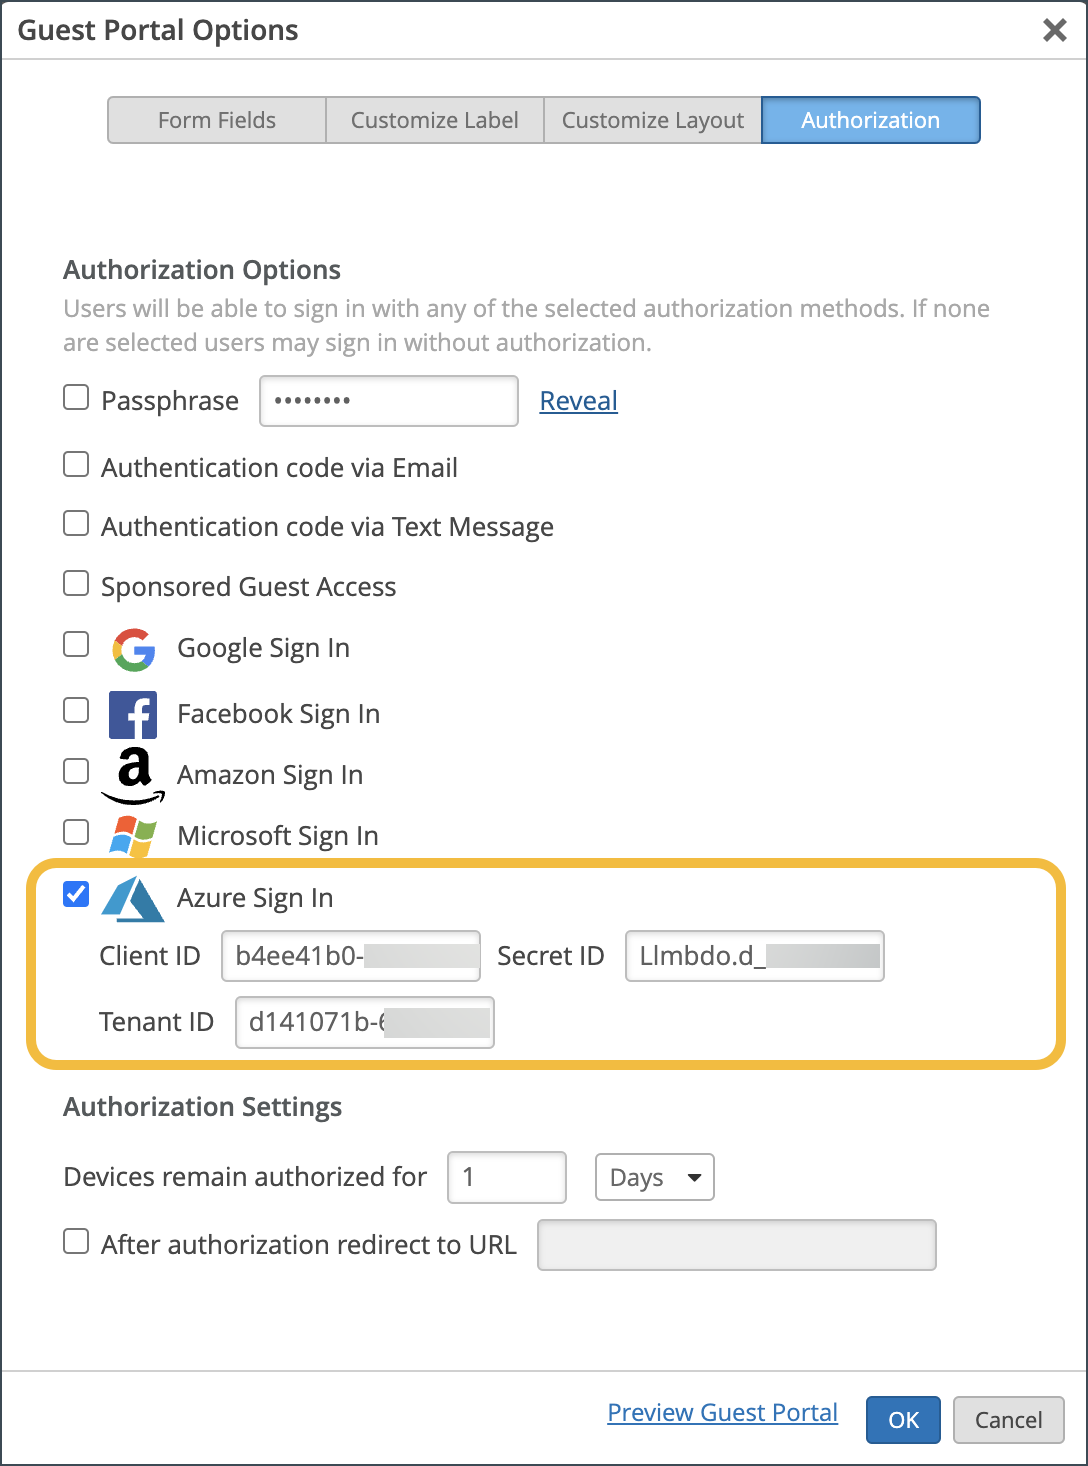
Application (client) ID — b4ee41b0-8f58-440f-9427-7e92733a7016
-
Directory (tenant) ID — d141071b-6aa9-4e71-add1-a69348cc0fce
Copy and save the Application (client) ID and the Directory (tenant) ID. These will be entered into the Guest Portal Options window of the Juniper Mist portal in a few moments.
-
Enter Information About the Mist Portal
-
Next, to generate the Secret ID, click on Certificates &
secrets.
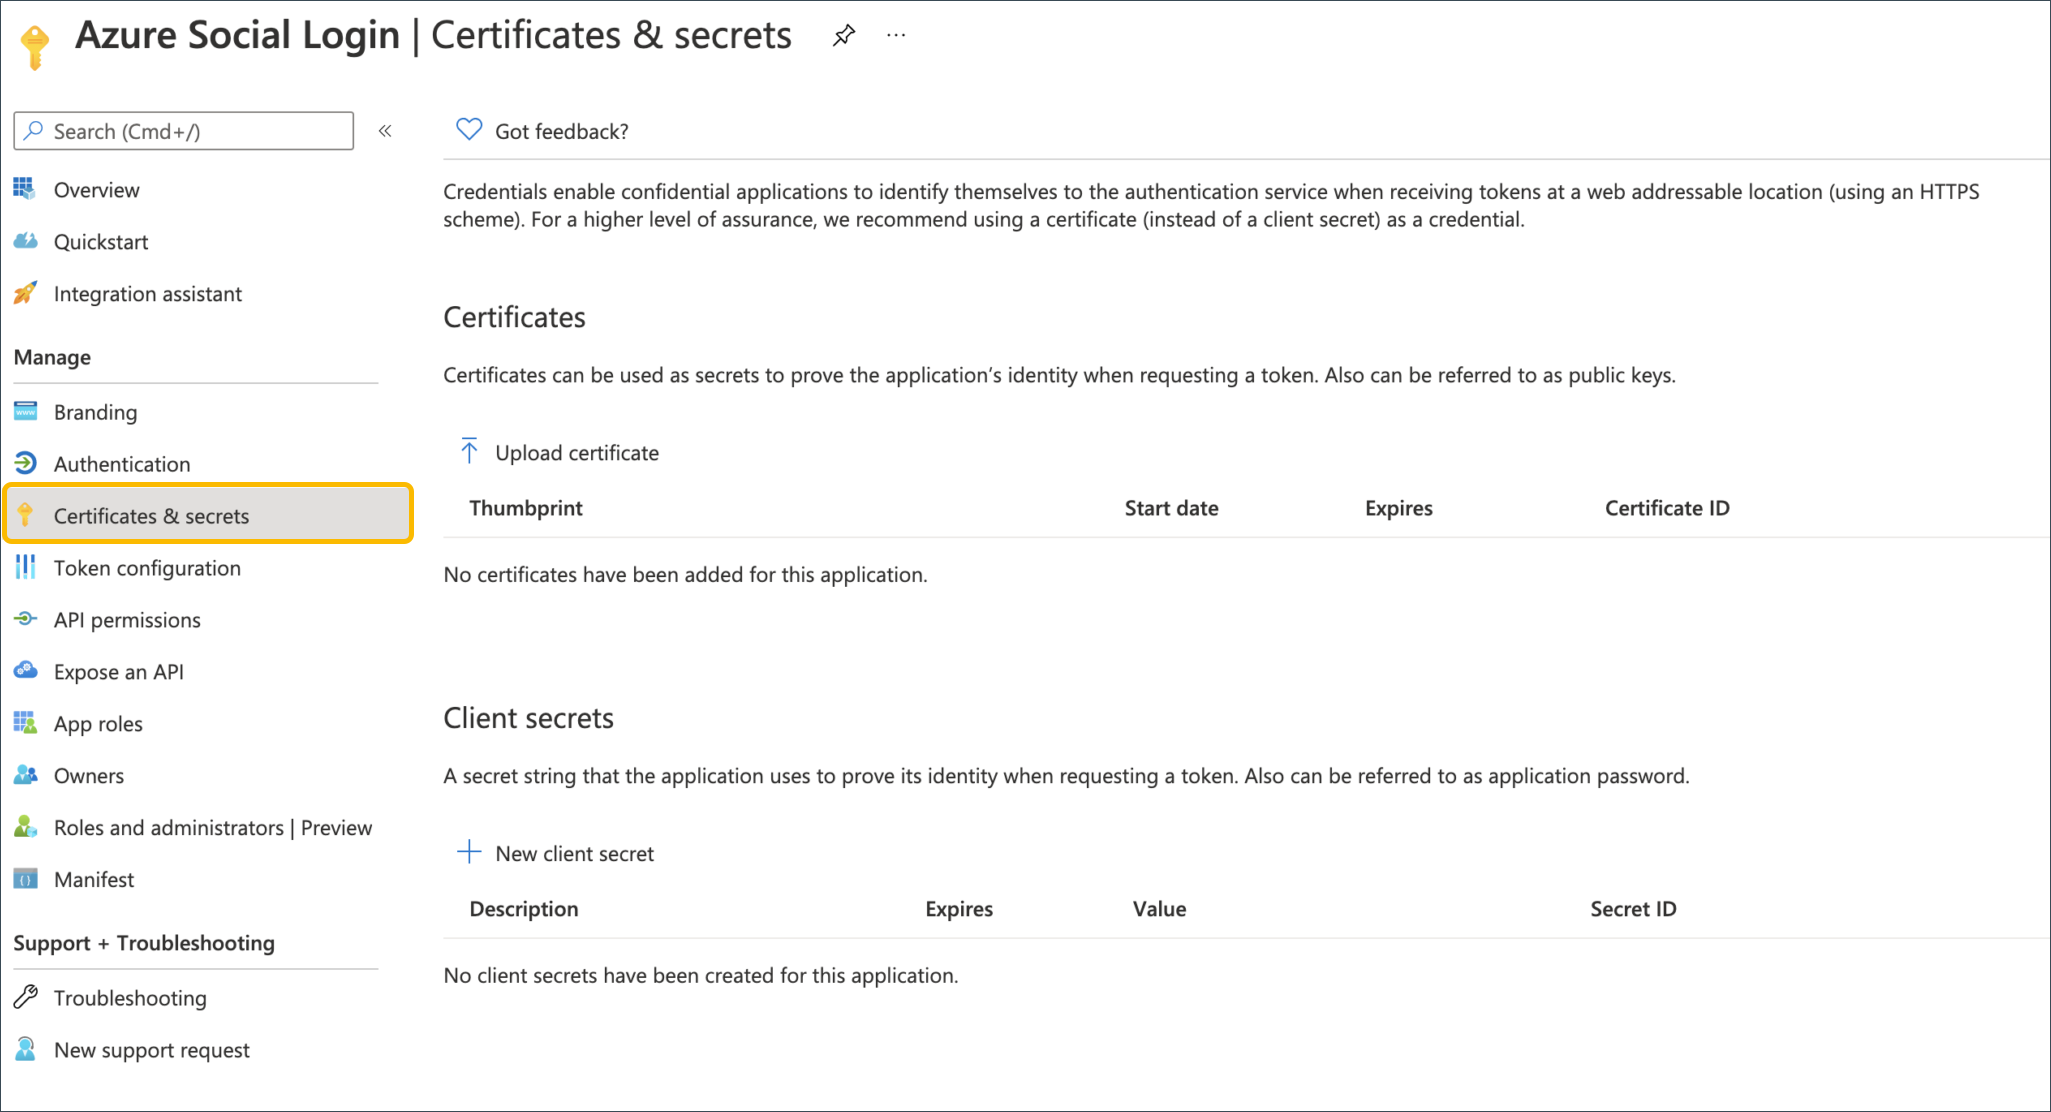
-
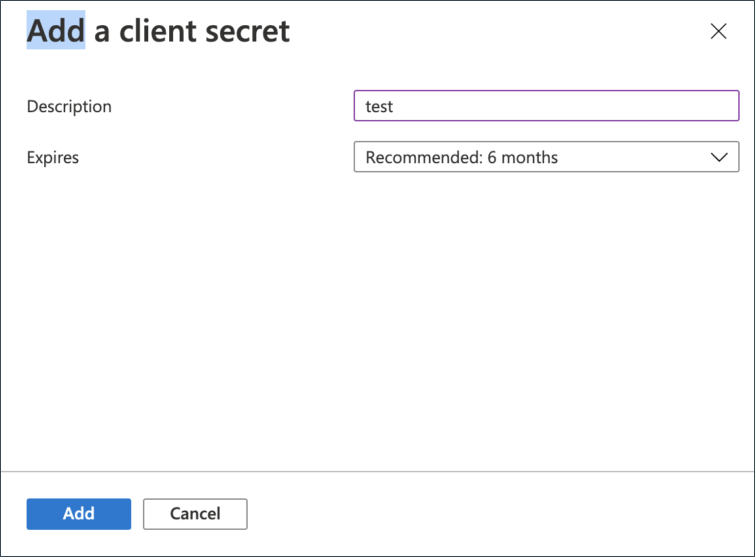
Click New client secret and enter the Description and Expire
time.
-
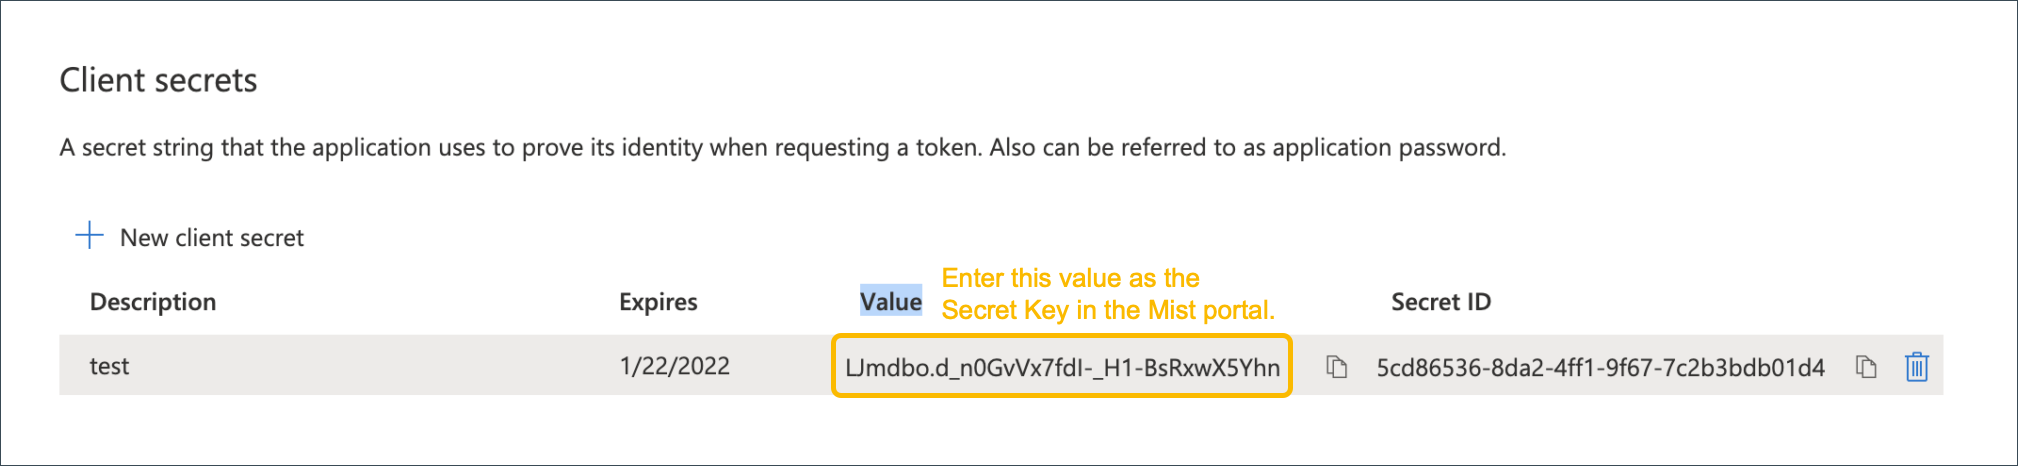
Click Add and a secret key will be generated.
Note:
You must copy the contents of the Value field and use that as the secret ID for the Mist Portal configuration. Do not use the secret ID.
-
For the Home page URL, enter https://portal.mist.com
and for the Terms of service URL, enter
https://portal.mist.com/tos.
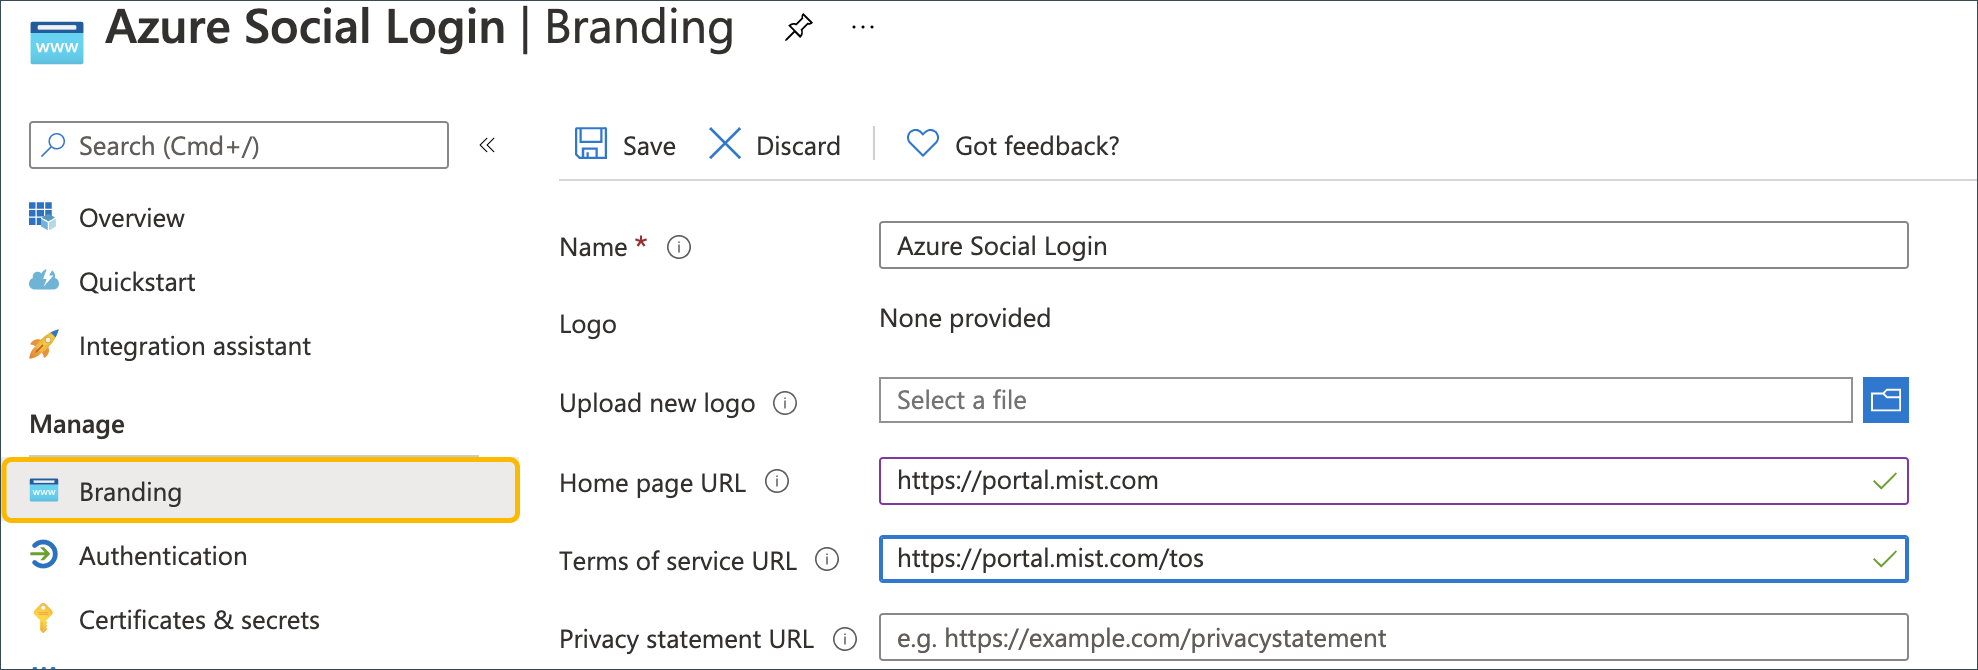 Note:
Note:portal.mist.com is the URL for organizations in the Global 01 region. To find the correct Guest Wi-Fi Portal URL for the cloud instance used by your portal, see Juniper Mist Firewall Ports and IP Addresses for Firewall Configuration.
Navigate to the Mist Portal to Set Up the Social Login for your WLAN
Next, navigate to the Mist portal where you will paste the Application (client) ID, Secret ID (Value), and Directory (tenant) ID that you obtained previously. You need these values to set up the social login for your WLAN.
-
Select Azure Sign In, and then enter the Client
ID, Secret ID (copied from the Value field in
Azure), and Tenant ID that you obtained from the Azure
portal.
-
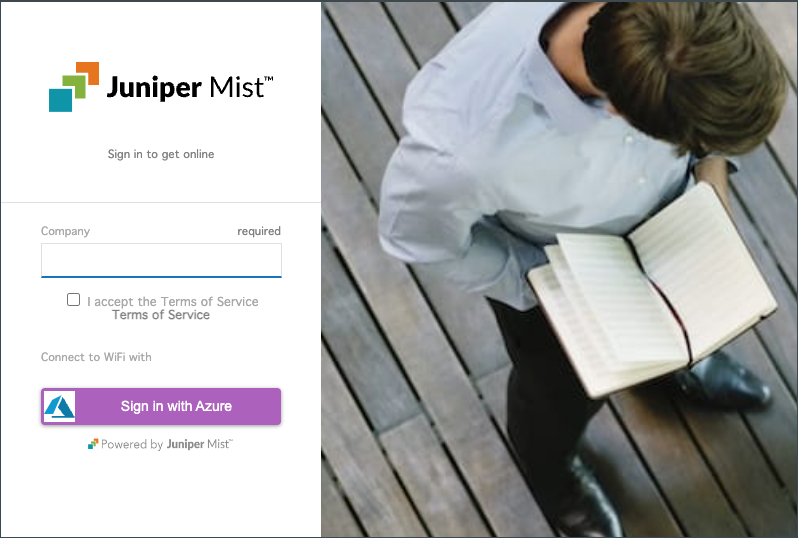
You will see this pop up when connecting to the wireless network. Enter your
Company name to assist with authentication, accept the terms and
conditions, and then select Sign in with Azure.Once credentials are
validated, click Done.
Add a New Guest User in Azure
If you receive an error similar to "User account 'abc@mist.com' from identity provider doesn’t exist in the tenant 'Microsoft services'", this means you need to add the user in your Azure portal. This section explains how to achieve this. The following section explains how to then assign an application to the guest user.
-
Click New user.

Assign an Application to the Guest User
Next, assign an application to the guest user. For example, you can add the Salesforce app to your test tenant and assign the test guest user to the app.
-
Select application, then in the Add from the gallery section, search
for Social Login, and then select it.