Configure Alerts and Email Notifications
SUMMARY Enable the alerts that you want to see on the Alerts dashboard. Optionally, enable email notifications for issues that you want to monitor closely.
Video Overview
This video provides an overview of the procedure for configuring alerts.
The one thing I wanted to show is the alert framework. We get asked a lot in terms of, hey, what can we do in terms of the different alerts that the system is looking at? So you can see here I have my information turned off. I'm going to turn that on.
But real quickly, I wanted to go through, we have this alert framework. And you can look at alerts based on a per site basis. You can look at alerts based on an entire organization.
You can look at alerts just like if you want to get granular on client insight capabilities, the network rewind stuff. So we do the same thing with alerts. You can look at alerts for today. You can look at them for the last 60 minutes. You can do custom dates and ranges and things like that to see what's been going on if something gets reported. Or you just want to look at the current status from an alert perspective.
You can go through, and you can actually sort on different alert types. So if I wanted to just click on security, for example, now I'm looking at the security alerts. I can look at any type. And then I can actually turn them off. So if I didn't want to look at informational alerts, I just click on that box and turn them off. OK, so just that's a quick at-a-glance alerts.
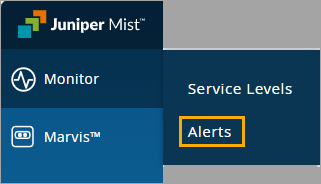
Now, how do you configure these things? What types of alerts are in there? So if you go over here and click on alert configuration, I'll click on this. So what you can do is that you can set up different alert templates. You can set it up for an entire organization.
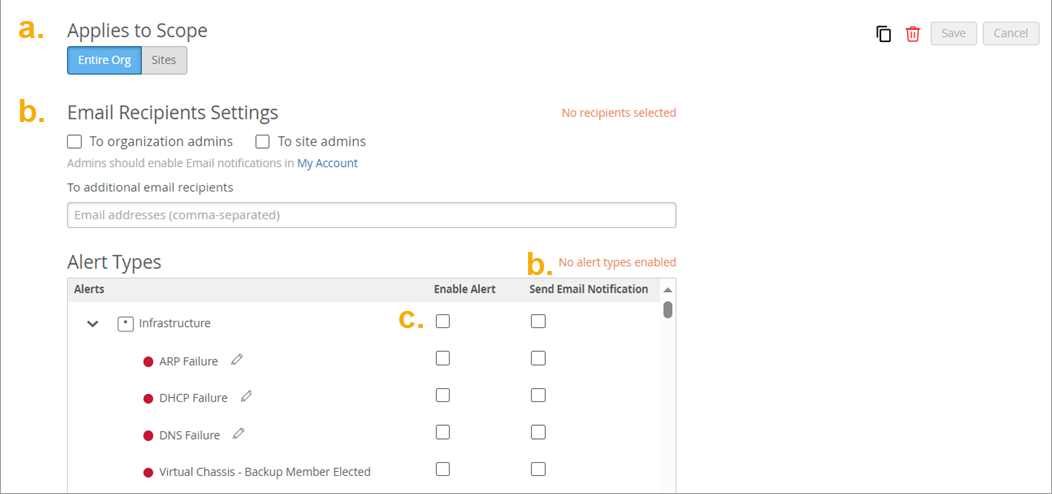
You can set it up for an individual site. And you can actually mix them. So maybe you wanted to have specific alerts for an entire organization that you have out there. But for a specific site or specific sites, maybe you wanted to get some additional learning information out there for different reasons. So you actually have the ability to do that. So right now, you can see here that this applies to scope, for example, my entire organization.
If I wanted to do a particular site, I can do that, click plus, and then add a site to this if that's something I wanted to do. The other thing that you can do is over here, I can click on this button. And what it would do is that it would actually clone or provide a copy of this current template.
You can rename that and configure it and then apply it to something else if that's something that you wanted to do. So you can actually clone templates as well. The other thing that you could do is, what it will do is that it will send alerts, send these alerts to the admins of the organization. Or you can actually say, just send it to the site admins. And then you could actually add additional recipients. So maybe you have folks on the security team, for example.
So you wanted to set up a template that was specific to security alerts. And when those security alerts got triggered, for example, like a rogue AP, maybe you want to send an email to somebody on the security team. That's just an example of something that you could do.
So if you look at the alert types, we have these, they're kind of segmented into a few different categories. You have the infrastructure side where if devices are online or offline, you can actually enable an alert. There's kind of two columns here. You can enable the alert, it will show up in the dashboard. And then you could also click on this box to send an email notification. So you can configure it that way as well.
And then if you scroll down in here, you got the infrastructure alerts, you got Marvis alerts. I'll show you what a non-compliant AP is as well. You got different, like all the stuff that's available from a Marvis actions perspective.
AP is authentication, DHCP, DNS, switches, gateways, things like that. If there's stuff going on with those devices, you could actually have alerts configured to be sent on those. And then on the security side, maybe you want to know, hey, if a rogue AP pops up, I want to make sure I have an alert.
And then I want to send an email to someone in IT or security or both that I have that. So I encourage you all to kind of go in here and check out all the different alert types that we have and what you can actually set this thing up to alert on. Okay, so that's alerts.
And just wanted to point that out. Like I said, I encourage you all to go in there, check it out, play with it, test it, do all that fun stuff and see how it works for you.
Procedure
To configure alerts:


