Manage Layouts
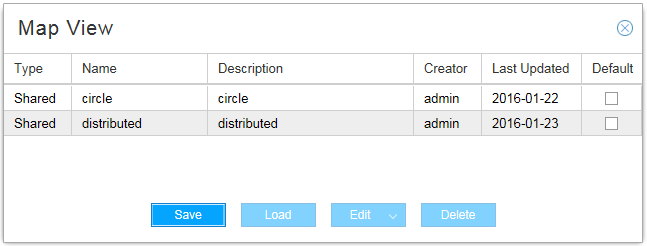
To save a layout so you can quickly load it into the topology map pane at any time, click the share icon in the Topology Menu bar in the upper right corner. The Map View window is displayed as shown in Figure 1.
Click Save. The Save Map window is displayed as shown in Figure 2.
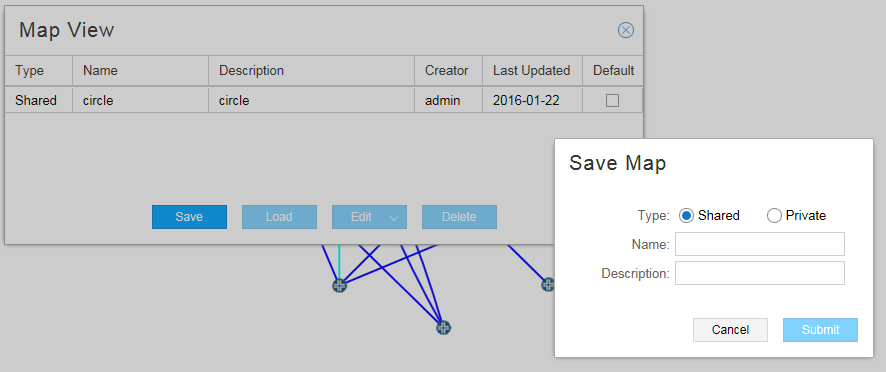
Enter a name and description for the current layout and specify whether the saved layout is to be shared by all operators (shared) or is to be available only to you (private). Click Submit.
From the Map View window, where all your saved layouts are listed, you can click the check box beside the layout you want as your default. The default layout is displayed initially whenever you log in to NorthStar Controller.
You can also right-click a blank part of the topology map pane and select Save Default Map Layout to save the current layout as your default. This action saves the current layout as your default, but does not change the name of the default in the Manage Layouts window.
Select a layout and use the buttons at the bottom of the window to perform the functions listed in Table 1.
Button |
Function |
|---|---|
Save |
Save a new layout or update an existing layout. Note:
If you select an existing layout and click Save, the existing layout is replaced by the new layout, without changing the name of the layout in the Manage Layouts window. |
Load |
Load the layout into the map pane. |
Edit |
Edit the name or description of the selected layout. |
Delete |
Delete the selected layout from your saved layouts. |