Overview of NorthStar Controller Installation in an OpenStack Environment
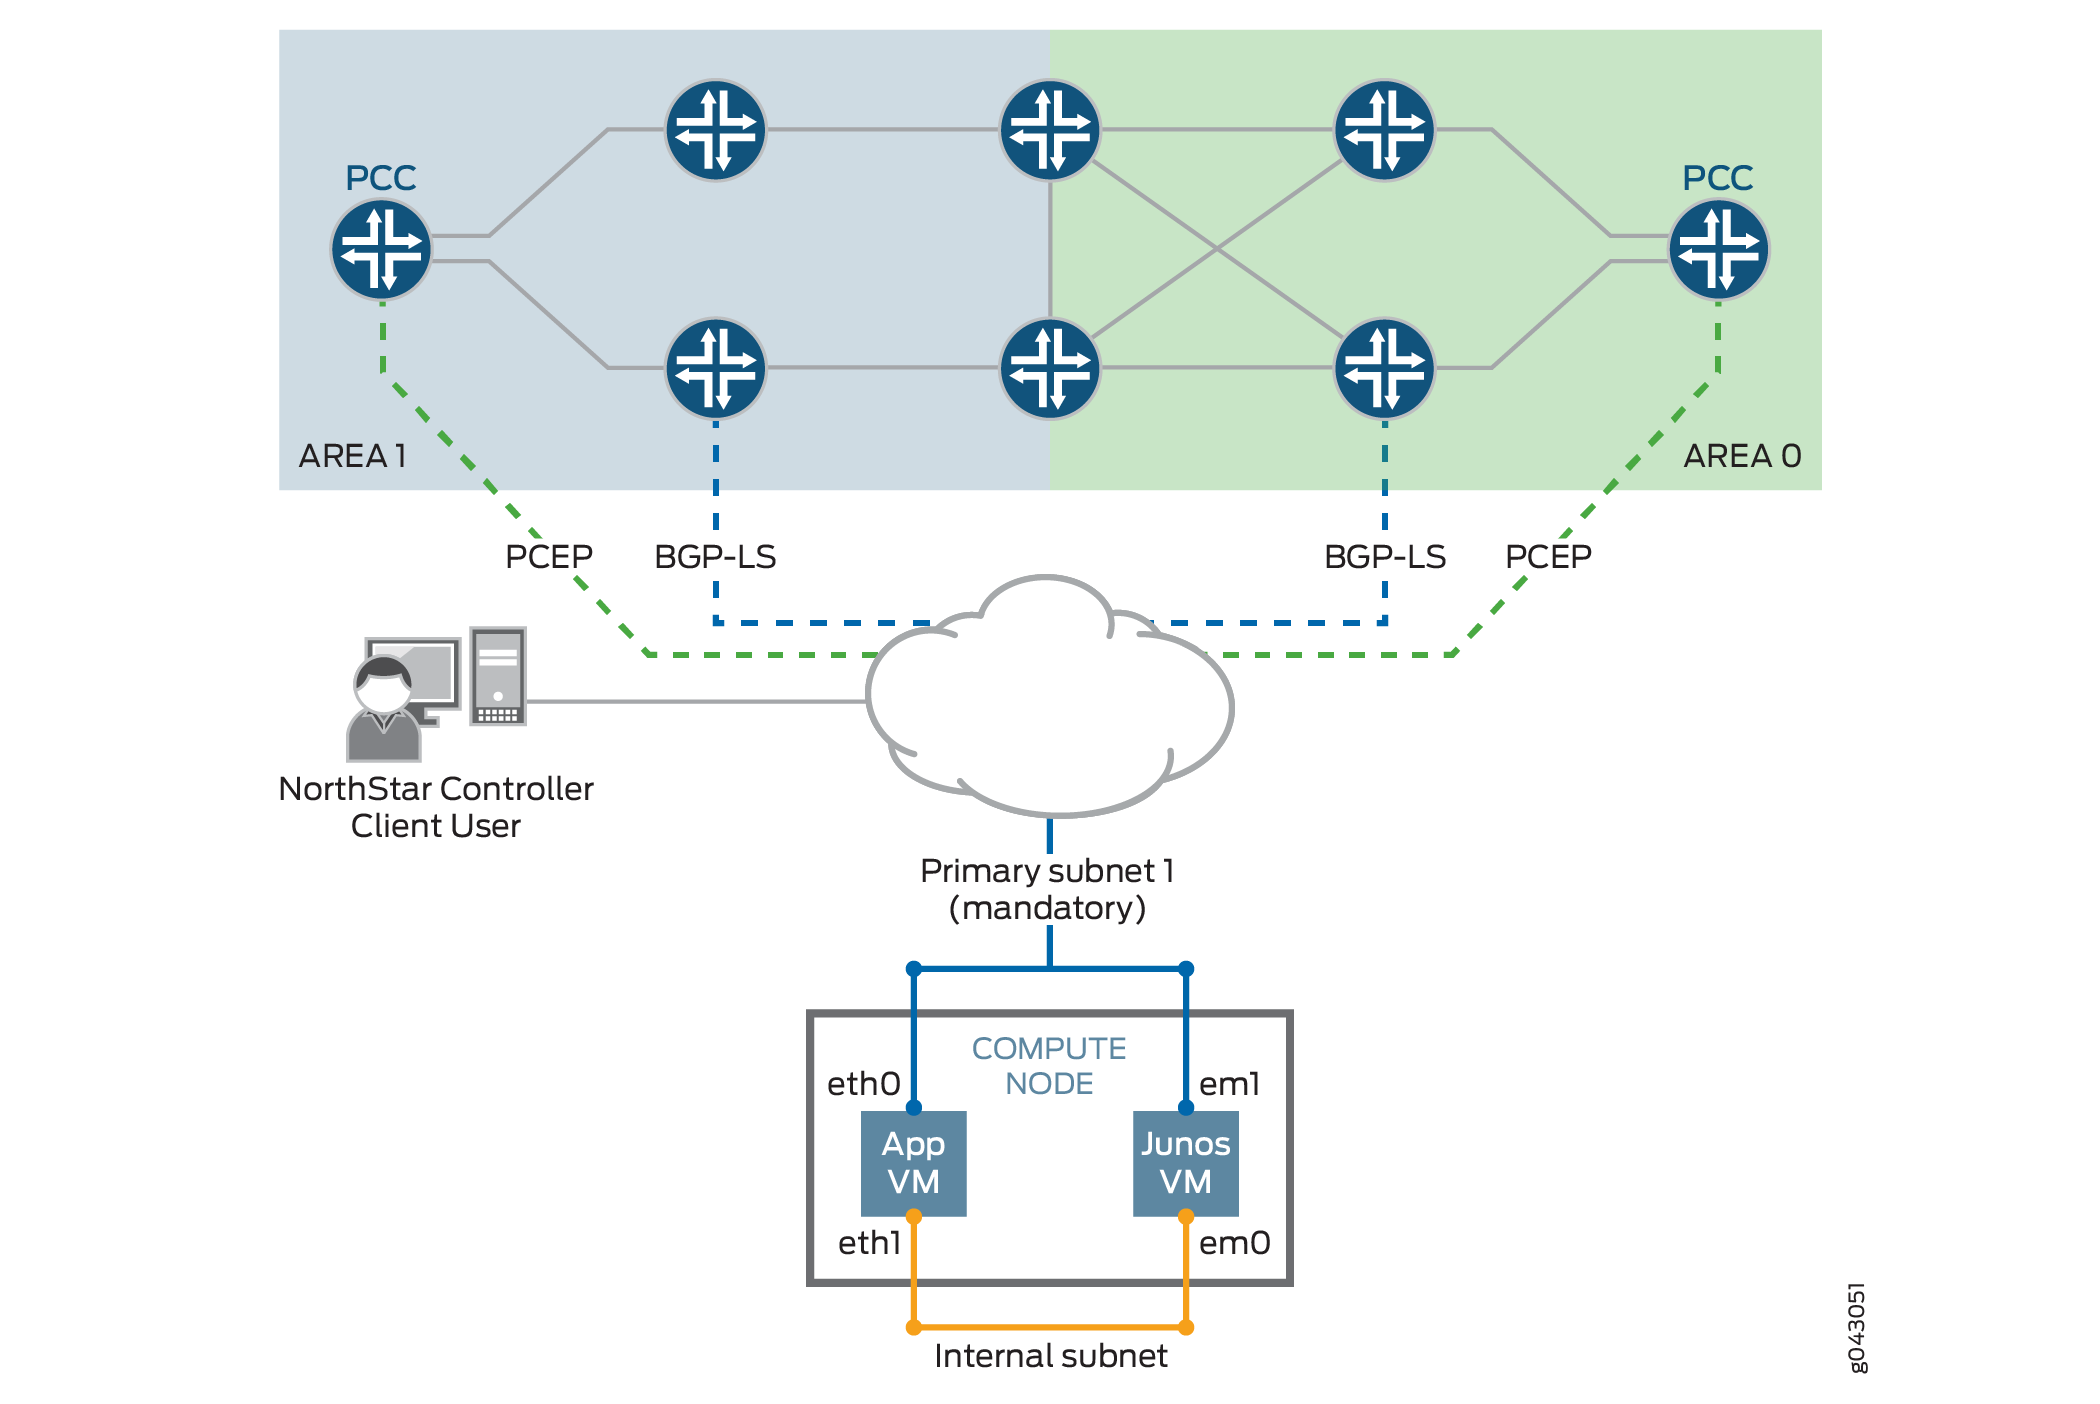
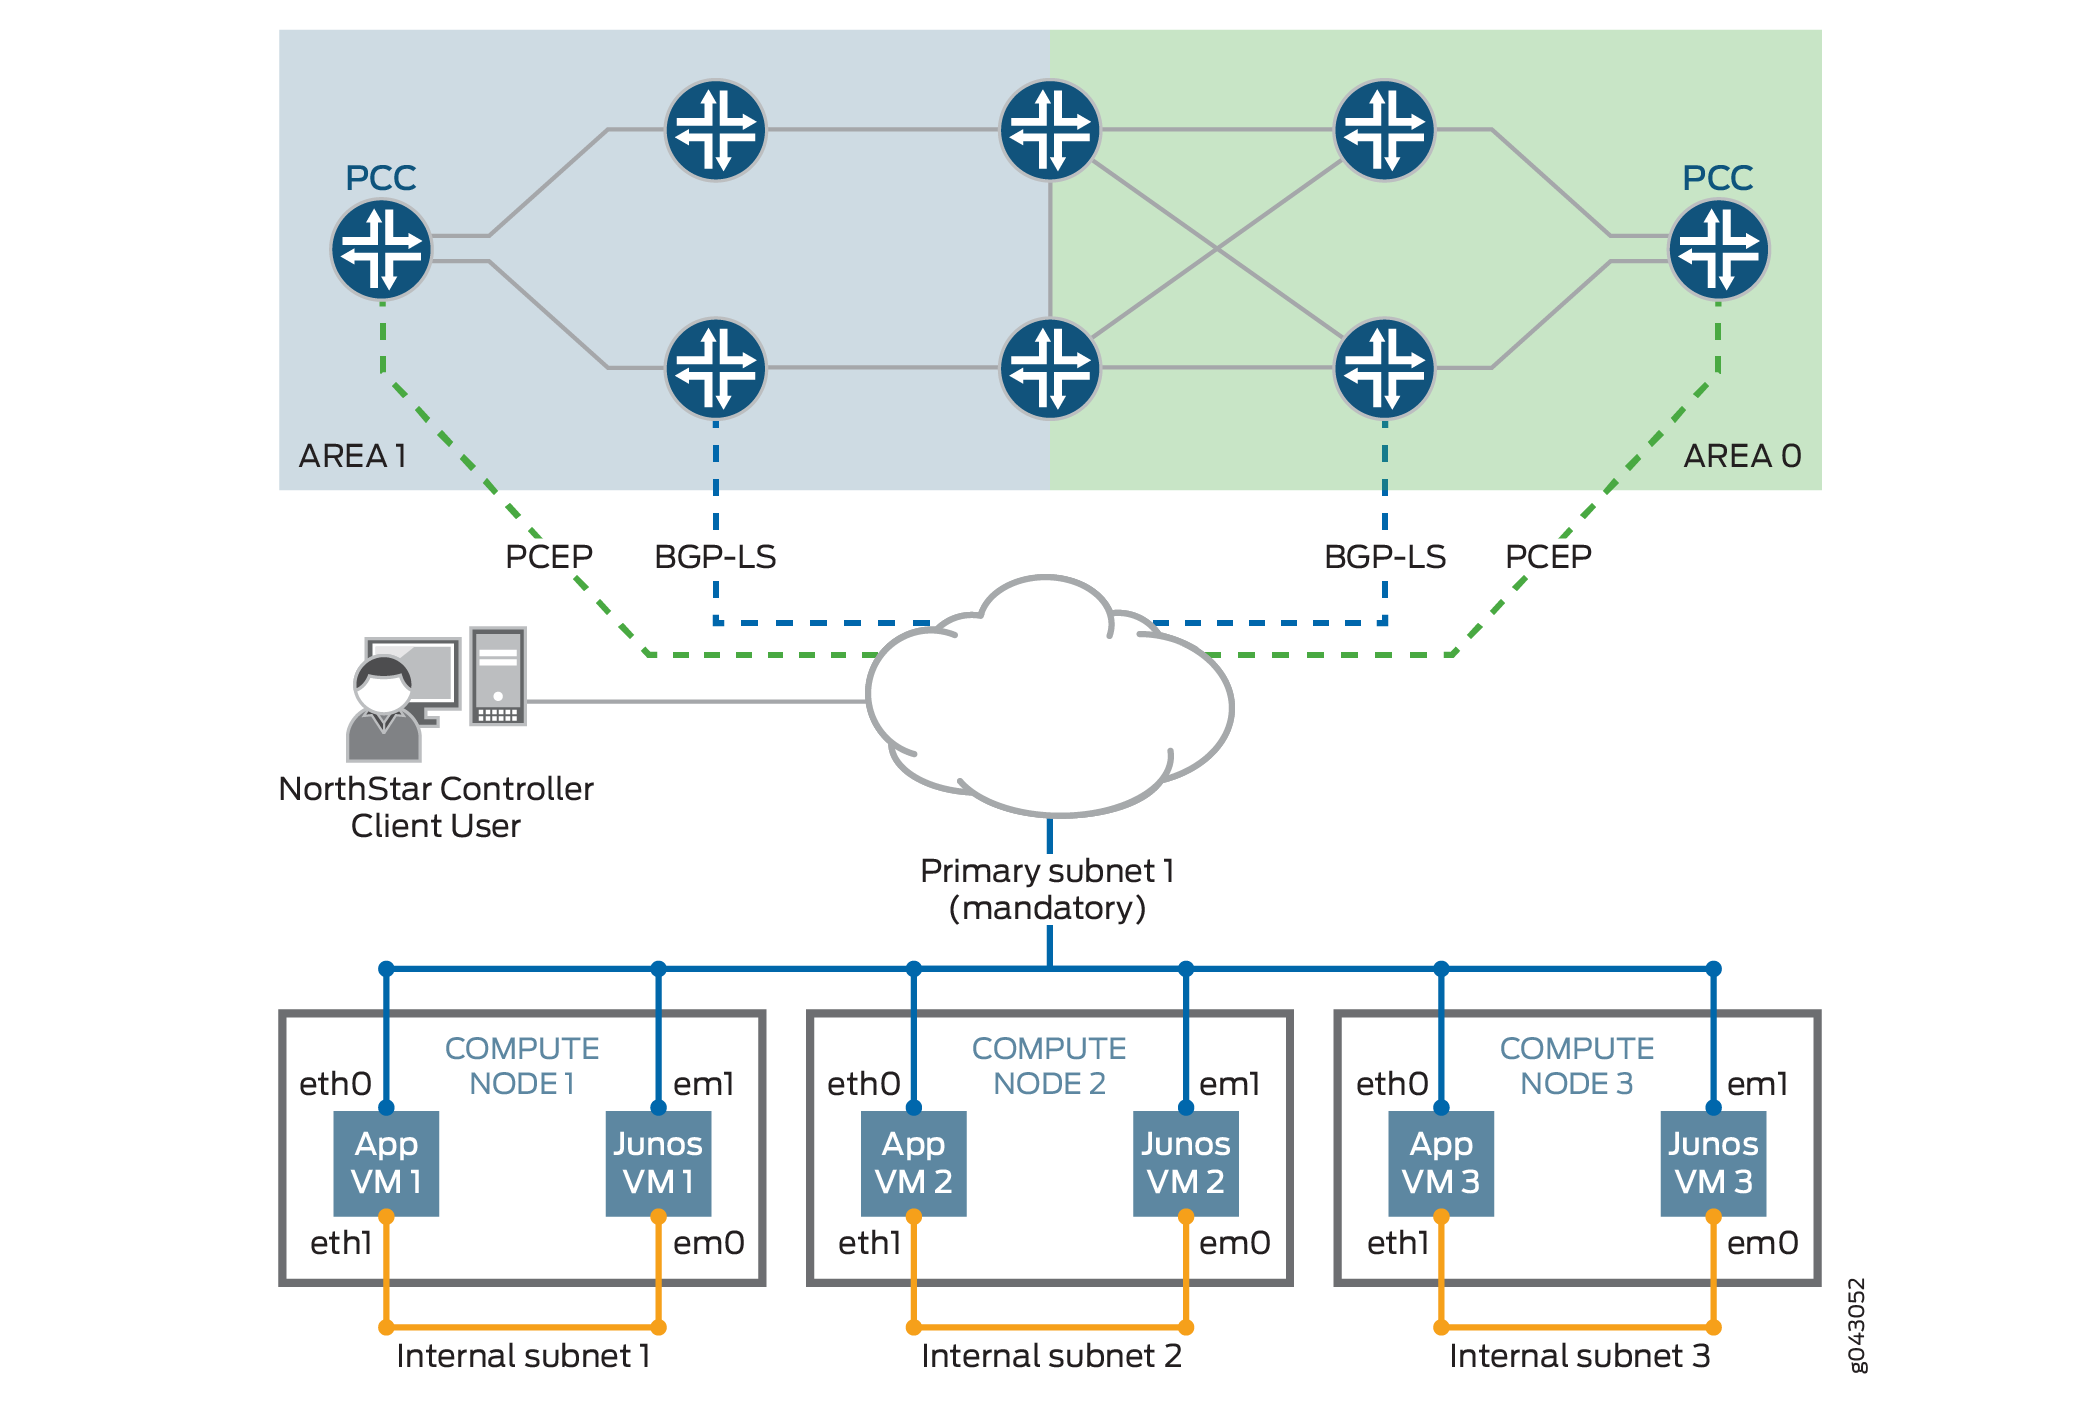
The NorthStar Controller can be installed in an OpenStack environment in either standalone or cluster mode. Figure 1 illustrates standalone mode. Figure 2 illustrates cluster mode. Note that in both cases, each node has one NorthStar Controller application VM and one JunosVM.


Testing Environment
The Juniper Networks NorthStar Controller testing environment included the following OpenStack configurations:
OpenStack Kilo with Open vSwitch (OVS) as Neutron ML2 plugins on Red Hat 7 Host
OpenStack Juno with Contrail as Neutron ML2 plugins on Ubuntu 14.04 Host
OpenStack Liberty with Contrail 3.0.2
Networking Scenarios
There are two common networking scenarios for using VMs on OpenStack:
The VM is connected to a private network, and it uses a floating IP address to communicate with the external network.
A limitation to this scenario is that direct OSPF or IS-IS adjacency does not work behind NAT. You should, therefore, use BGP-LS between the JunosVM and the network devices for topology acquisition.
The VM is connected or bridged directly to the provider network (flat networking).
In some deployments, a VM with flat networking is not able to access OpenStack metadata services. In that case, the official CentOS cloud image used for the NorthStar Controller application VM cannot install the SSH key or post-launch script, and you might not be able to access the VM.
One workaround is to access metadata services from outside the DHCP namespace using the following procedure:
CAUTION:This procedure interrupts traffic on the OpenStack system. We recommend that you consult with your OpenStack administrator before proceeding.
Edit the /etc/neutron/dhcp_agent.ini file to change “enable_isolated_metadata = False” to “enable_isolated_metadata = True”.
Stop all neutron agents on the network node.
Stop any dnsmasq processes on network node or on the node that serves the flat network subnet.
Restart all neutron agents on the network node.
HEAT Templates
The following HEAT templates are provided with the NorthStar Controller software:
northstar310.heat (standalone installation) and northstar310.3instances.heat (cluster installation)
These templates can be appropriate when the NorthStar Controller application VM and the JunosVM are to be connected to a virtual network that is directly accessible from outside OpenStack, without requiring NAT. Typical scenarios include a VM that uses flat networking, or an existing OpenStack system that uses Contrail as the Neutron plugin, advertising the VM subnet to the MX Series Gateway device.
northstar310.floating.heat (standalone installation) and northstar310.3instances.floating.heat (cluster installation)
These templates can be appropriate if the NorthStar Controller application VM and the JunosVM are to be connected to a private network behind NAT, and require a floating IP address for one-to-one NAT.
We recommend that you begin with a HEAT template rather than manually creating and configuring all of your resources from scratch. You might still need to modify the template to suit your individual environment.
HEAT Template Input Values
The provided HEAT templates require the input values described in Table 1.
Parameter |
Default |
Notes |
|---|---|---|
customer_name |
(empty) |
User-selected name to identify the NorthStar stack |
app_image |
CentOS-6-x86_64-GenericCloud.qcow2 |
Modify this variable with the Centos 6 cloud image name that is available in Glance |
junosvm_image |
northstar-junosvm |
Modify this variable with the JunosVM image name that is available in Glance |
app_flavor |
m1.large |
Instance flavor for the NorthStar Controller VM with a minimum 40 GB disk and 8 GB RAM |
junosvm_flavor |
m1.small |
Instance flavor for the JunosVM with a minimum of a 20 GB disk and 2GB of RAM |
public_network |
(empty) |
UUID of the public-facing network, mainly for managing the server |
asn |
11 |
AS number of the backbone routers for BGP-LS peering |
rootpassword |
northstar |
Root password |
availability_zone |
nova |
Availability zone for spawning the VMs |
key_name |
(empty) |
Your ssh-key must be uploaded in advance |
Known Limitations
The following limitations apply to installing and using the NorthStar Controller in a virtualized environment.
- Virtual IP Limitations from ARP Proxy Being Enabled
- Hostname Changes if DHCP is Used Rather than a Static IP Address
- Disk Resizing Limitations
Virtual IP Limitations from ARP Proxy Being Enabled
In some OpenStack implementations, ARP proxy is enabled, so virtual switch forwarding tables are not able to learn packet destinations (no ARP snooping). Instead, ARP learning is based on the hypervisor configuration.
This can prevent the virtual switch from learning that the virtual IP address has been moved to a new active node as a result of a high availability (HA) switchover.
There is currently no workaround for this issue other than disabling ARP proxy on the network where the NorthStar VM is connected. This is not always possible or allowed.
Hostname Changes if DHCP is Used Rather than a Static IP Address
If you are using DHCP to assign IP addresses for the NorthStar application VM (or NorthStar on a physical server), you should never change the hostname manually.
Also if you are using DHCP, you should not use net_setup.py for host configuration.
Disk Resizing Limitations
OpenStack with cloud-init support is supposed to resize the VM disk image according to the version you select. Unfortunately, the CentOS 6 official cloud image does not auto-resize due to an issue within the cloud-init agent inside the VM.
The only known workaround at this time is to manually resize the partition to match the allocated disk size after the VM is booted for the first time. A helper script for resizing the disk (/opt/northstar/utils/resize_vm.sh) is included as part of the NorthStar Controller RPM bundle.
