BGP Neighbor
View Neighbor Information
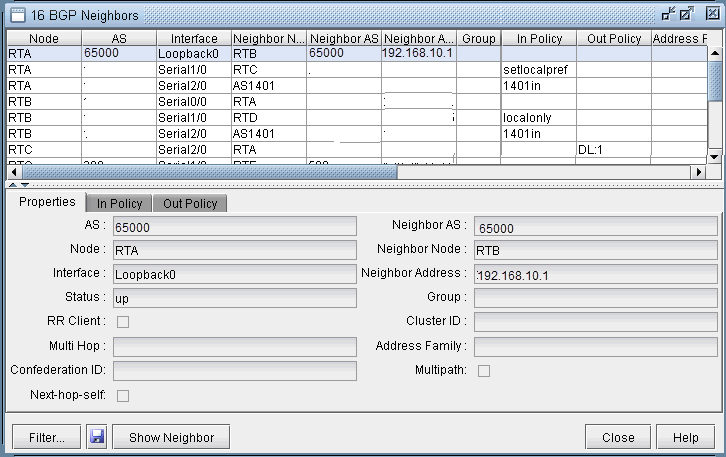
BGP neighbors are routers that communicate BGP routing information to one another. You can query for a BGP neighbor relationship from the Network > Protocols > BGP > BGP Neighbor menu. Alternatively, you can right-click a particular node in the Network Info table and select BGP Neighbors at Node... (Standard map) or View Neighbors at Node (BGP map).
Properties Tab
The Properties tab has the following fields:
Field |
Description |
|---|---|
AS |
The node AS. |
Neighbor AS |
The neighbor node AS. |
Interface |
The interface that is used to connect to the neighbor. |
Node |
The name of the node (BGP speaker). |
Status |
Status of the neighbor. It is either up or down. |
Group |
The name of the peer group if it is applicable. |
Multihop |
The optional TTL (Time to Live) number from the IOS command: neighbor {ip-address | peer-group-name} ebgp-multihop [ttl] |
VRF |
The virtual routing and forwarding instance name. |
Neighbor Address |
The IP address of the neighbor. |
Neighbor Node |
The name of the neighbor. |
RR Client |
Indicates whether the neighbor is a route reflector client or not. |
Cluster ID |
The cluster ID if it is applicable. |
Address Family |
Indicates if an address family such as VPNv4 or Inet-VPN is used. |
Confederation ID |
Indicates the BGP Confederation ID that the AS belongs to, if any. |
Multipath |
Indicates if BGP multipath has been configured for load balancing purposes. |
Next-hop self |
Indicates if the router is configured as the next hop for the BGP neighbor. “ |
In and Out Policies Tabs
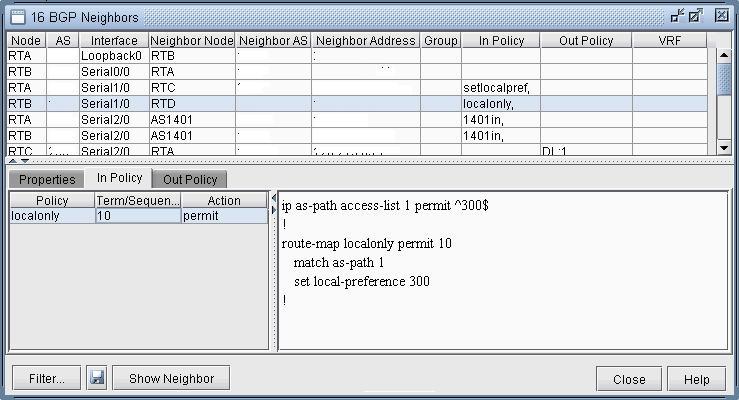
The In Policy tab shows all policies that are applied to incoming routes to the node from the highlighted neighbor. The Out Policy tab shows all policies that are applied to outgoing routes from the node. (Note that different literature may refer to in/out policy as import/export policy; they are equivalent.)
You should have more than one AS in your network in order to see policies.
For Cisco routers, the routing policies may specify route filtering and attribute manipulation, which use route maps, access lists, AS_path access lists, community lists, distribute lists, and filter lists.
For Juniper routers, policy statements and community lists are used. When either the In Policy tab or the Out Policy tab is selected, the policy window has the following fields:
Field |
Description |
|---|---|
Policy |
Name of the policy |
Term/Sequence |
The term number is used in the policy statement for Juniper. The sequence number is applicable to the route map for Cisco. |
Action |
Permit or deny |

When a particular policy in either the In Policy or Out Policy tab is selected, the lower right pane displays the relevant statements for that policy. For instance, the in policy localonly for router RTB is shown in the figure above.
Add BGP Peering relationship
NorthStar Planner offers two ways to add BGP peering relationships; you can use either the Network > Protocols > BGP > BGP Neighbor... menu or the Network > Protocols > BGP > Add Multiple BGP Neighbors... menu.
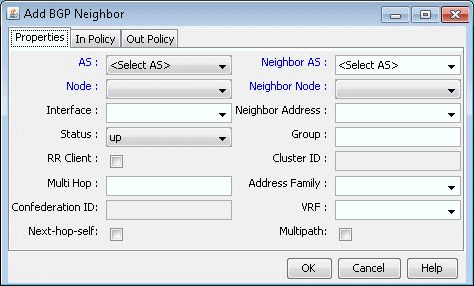
To define a BGP peering relationship from a node to its neighbor node, bring up the BGP Neighbors window via the Network> Protocols > BGP > BGP Neighbor menu. Then click on the Add button to bring up the Add BGP Neighbors window as shown in the following figure.
Figure 3: Add BGP Neighbor Window
Choose the AS number and Node from the AS and Node dropdown menus. Similarly, choose the Neighbor AS number and the Neighbor Node from the Neighbor AS and Neighbor Node dropdown menus. Clicking OK results in a BGP peer being established from the Node to the Neighbor Node. To establish a BGP peering relationship in the opposite direction, simply perform the same steps but swap the AS and Node selections with the Neighbor AS and the Neighbor Node selections. Note that if you are adding a bgp neighboring relationship from a route reflector to its client, be sure to check the RR Client box and specify the Cluster ID.
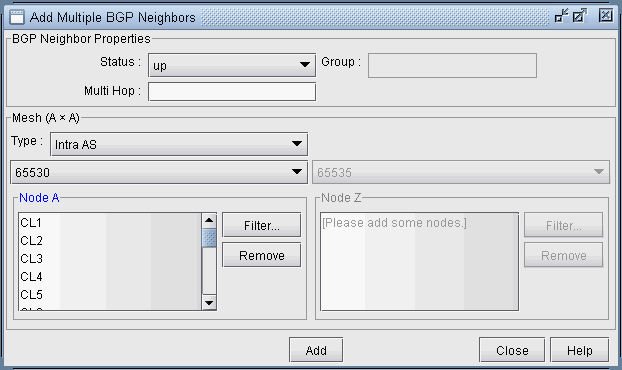
To add multiple BGP peering relationships between a node and it neighbor, use the Network > Protocols > BGP > Add Multiple BGP Neighbors... menu to bring up the Add Multiple BGP Neighbors window. The Type dropdown menu includes Intra AS and Inter AS options. The following figure shows how the Add Multiple BGP Neighbors window with Type selected as Intra AS is used to create a full mesh of IBGP neighboring relationships within the AS. Note that balanced neighbors (neighboring relationships established in both directions) are created.
Figure 4: Add Multiple BGP neighbors window

