Creating Conformance Templates
The next step is to create the compliance assessment test cases or rules using the CAT template. The templates will be used to load in the test cases or rules for the CAT scan.
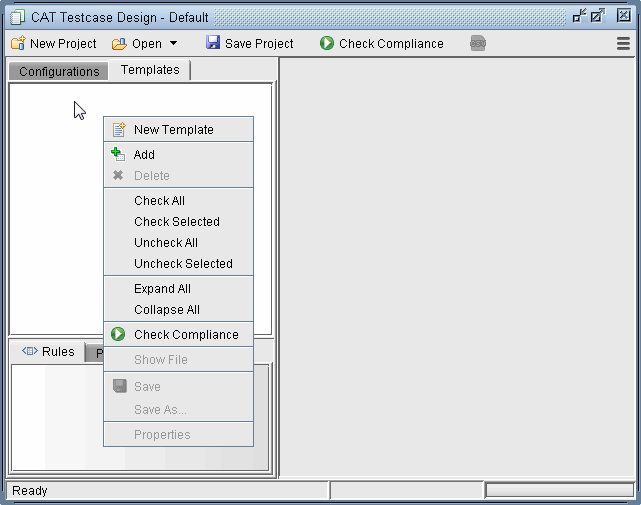
To create a new template, select the Templates tab. Right-click in the left panel and select New Template.
Figure 1: Creating a New Template
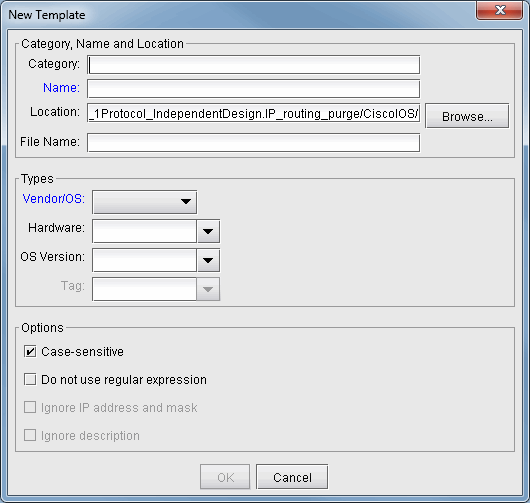
A New Template window will open as shown below
Figure 2: New Conformance Template window
Category, Name, and Location : Are identification properties of the template.
Category : This field is to help organize or group templates into categories.
Name : Enter the name of the template.
Location : Type in the location on the server where the file will be saved or use the Browse button.
File Name : The template file extension is .tpl. You can change the default naming here.
Types : Are device vendor properties of the template.
Vendor/OS : Select the configuration file type: “Cisco IOS”, “Cisco IOS-XR”, “Juniper JUNOS”, “ALU TiMOS”, “Huawei”, “Redback”, “Tellabs” or “ZTE.”. Note that Cisco-IOS based templates can only be used to check compliance on Cisco configuration files, Juniper JUNOS templates on Juniper configuration files, and so forth.
Hardware : The hardware type is derived from the network model. Using this field means only the specified hardware type can be used by the template. If the field is blank, then any hardware type can be used.
OS Version : The OS version is derived from the configuration file. Using this field means only the specified OS version can be used by the template. If the field is blank, then any OS version can be used. A range of OS versions can be specified using the following syntax: +, -, *
12.2+ means version newer (higher number value) than 12.2 including 12.2
12.2- means version older (lower number value) than 12.2 including 12.2
12.2* means any version starting with 12.2
Options : Select the basic option(s) that will be applied to this template.
Case-sensitive : If checked, upper and lower case must be matched in the compliance assessment.
Do not use regular expression : By default regular expression syntax is supported in the template. If this option is checked, then regular expression syntax such as wildcards “*” and “?” can be not used. See <Link>More on Regular Expressions for more information.
When using regular expressions, the “#conform ignore escchars” statement can be used to indicate which characters to be treated as is, and not as special regular expression characters. Without this line, you would need to precede those text characters with a backslash ‘\’ to avoid interpretation of the character as a regular expression.
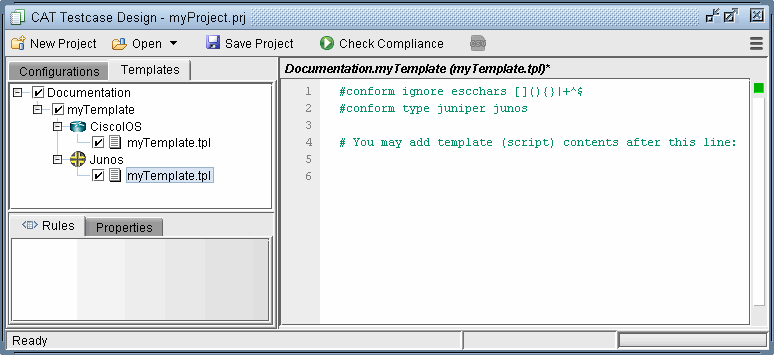
Click OK when you are done. The new template will appear in the Templates tab. A checkbox will be displayed to the left of each file for selecting particular configuration files/templates to be used for the compliance assessment.
Double-clicking an entry will open the template file in the right panel and the template can be directly edited.
Figure 3: Initial Template
The options that were selected from the previous window can be seen listed in the first few lines after the reserved directive, or keyword, “#conform,” and will be applied when compliance is checked. By default, anything else following the pound sign “#” that does not start with “conform” denotes a comment and is ignored.
Advanced users whom are familiar with the template syntax can create the template via a text editor on the server (or the File Manager) and then import it into CAT by right-clicking the Templates left panel and selecting Add.
Once the template is created, test cases or rules must be written using template syntax.
Editing the Conformance Template
