ON THIS PAGE
Traffic Menu: Trending
The Trending feature takes as input several periods of traffic data or other data. It then performs a “trending” by extrapolating future growth of the data based on a number of user-supplied parameters such as the type of regression to use, the number of points to extrapolate, and so on. The Trending data input file can be any one of four different Network Files. Alternatively, you can specify a separate input file by choosing Trending > Other Files. The file formats for all these input files are described briefly below.
Network Files
Interface Traffic (Ingress or Egress)
To use NorthStar Planner interface files as the trending input, select Traffic > Trending > Network Files > Interface Traffic (Ingress) or Interface Traffic (Egress). These files list period-by-period ingress or egress traffic per interface.
In order to use these files, they must first have been loaded into your network project. To do so, select File > Load Network Files, select the Traffic tab, and press the ingress or egress buttons, respectively. Typically a user only specify one of these.
The file format is as follows:
NodeID Interface Direction - Period1 Period2 ... PeriodN
MYNODE1 POS0/1 A2Z 0 100200112 100601536 100400624 100601536
An alternative file format for interface traffic is:
LinkName Direction - Period1 Period2 ... PeriodN
MYLINK1 A2Z - 100200112 100601536 100400624 100601536
MYLINK1 Z2A - 5003683 5003822 5284499 683344
The units for the period data should be in bits per second.
The NodeID must match the ID or name of one of the nodes in the muxloc file.
Trafficload (Demand, NCP, ...)
To use NorthStar Planner trafficload files as the trending input, select Traffic > Trending > Network Files > Demand Trafficload. These files list period-by-period traffic per demand.
In order to use these files, they must first have been loaded into your network project. To do so, select File > Load Network Files, Traffic tab, and press the “trafficload” button.
The file format is as follows:
DemandID Direction - Period1 Period2 etc…
MYDMD A2Z - 100200112 100601536 100400624 100601536

Or, for those with Node-Card-Port (NCP) data:

FromNodeCardPort Direction - Period1 Period2 etc…
ToNodeCardPort Direction - Period1 Period2 etc…
MYNODE.P3C5 A2Z - 100200112 100601536 100400624 100601536
Tunnel Trafficload (IP/MPLS only)
To use NorthStar Planner tunnel trafficload files as the trending input, select Traffic > Trending > Network Files > Tunnel Trafficload. These files list period-by-period traffic per LSP tunnel.
In order to use these files, they must first have been loaded into your network project. To do so, select File > Load Network Files, Device Specific tab, and press the trafficload button.
The file format is as follows:
NodeID:TunnelName Direction - Period1 Period2 etc…
MYNODE1:MYTUNNEL290 A2Z - 100200112 100601536 100400624 100601536
Peak Link Traffic
To use peak link traffic load files as the trending input, run an exhaustive single element failure from Simulation > Predefined Scenarios on a network with a trafficload file, which contains the period-by-period traffic per demand. For example, the sample fish network (/u/wandl/sample/IP/fish/spec.mpls-fish) could be used to generate a peak link traffic load since the specification file references a trafficload file with the period-by-period traffic per demand. After the failure simulation is complete, a file named PeakLinkLoad.< runcode> is created, which indicates for a particular link and a particular period, what was the worst link load experienced for that link, taking into consideration all of the single element failure simulations that were simulated on the network.
The file format is as follows:
Node,Interface,Dir,Peak_1,Peak_2,Peak_3,Peak_4,Peak_5,Peak_6,Peak_7,Peak_8,Peak_9,Peak_10,
ATL,LINK1,A2Z,25952066,31141680,36327296,36327296,41518908,46707684,46707684,36327296,31141680,25952066,
Load the file using Traffic > Trending > Network Files > Peak Link Traffic.
Other Files
You can also load trending input from any file, as long as the file has the proper file format. To load this file, select Traffic > Trending > Other Files. You are prompted to specify the location of the trending file. The recommended name for this file is trending.trending.<runcode>..The file should contain the <COLUMN>, <START>, and </START> tags and have the following comma-separated format:
<COLUMN>
TextColName1,TextColName2,...,TextColNameN,DataColName1,DataColName2,...,DataCol
NameM
<START>
MYDATUM1,Chicago,100200112,100601536,100400624,100601536
MYDATUM2,Jersey,20045634,20135645,22411224,21044335 # This is a comment
</START>
Files in this comma-separated format can be opened automatically in Report Viewer. Go to the File Manager window, right-click on the file, and choose “Open in Report Viewer” from the drop-down menu. The <COLUMN>, <START>, and </START> tags enable the file to be read by the Report Viewer.
Trending Window
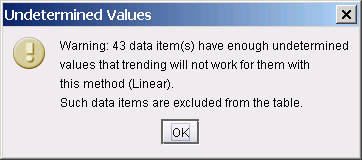
Once the data is read in, NorthStar Planner will filter out any entries with too many “Undetermined Values” such as negative numbers. How many undetermined values is too many? In NorthStar Planner, for a polynomial of degree k, the data should have no more than k undetermined values. For linear or exponential, the data should have no more than one undetermined value. Otherwise, the data is omitted from the analysis.
For traffic files generated by the NorthStar Planner, a “-1” is often used for a period lacking traffic data. In Trending, a “0” zero value is also ignored so that the projection from the non-zero values are more accurate.


Column |
Description |
|---|---|
Node, Intf (gray) |
The node and interface to which the traffic data points and trending data points in that row correspond. Link indicates the corresponding link name and Type indicates the trunk type. Note that other fields may be present in this gray section, depending on the.input data. |
Pdn (white) |
These columns contain the period data based on your NorthStar Planner data file or trending.<runcode> input file. |
Pdntrend (red) |
These columns contain the forecasted data. The number of trending data points is based on the specified # to Forecast. |
RSq (green) |
The coefficient of determination. It is a value between 0 and 1, where 1 indicates that the curve fitting matched the data perfectly. |
GoodDataCt (blue) |
The number of good data points included in the trending analysis. Bad data points (typically values of ”-1” or “0”) are automatically omitted. |

Field |
Description |
|---|---|
# to Forecast |
TThe number of data points to forecast. Press <Enter> after specifying a value. The trending table will then automatically update. |
Linear / Exponential / Polynomial |
The type of regression to be performed. |
Data |
Data can be viewed and processed in two forms: either Raw (raw traffic data numbers) or Util (Raw/BW) (the traffic utilization on each trunk). The Util view is the more useful and interesting. |
Moving Average |
This number is used to “smooth out” any outliers in the data. If the value is set to “3”, then each data point is the arithmetic average of the traffic value in the previous, current and next time interval of the original data. If the value is set to “5”, then each data point is the average of the values of the two previous, the current, and the two following time intervals in the original data. |
Adv Filter |
Allows you to display only selected rows in the table. For example,
if your Data value is set to |
Show Chart |
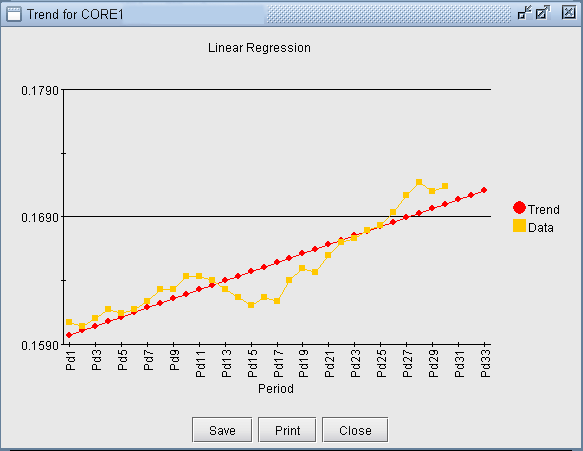
Displays a line chart of the raw and trending data points corresponding to the selected row in the trending table. See Figure 3 . |
Highlight All |
Highlights all entries on the Map. Highlight all nodes in the table, all nodes and links in the table, or all links in the table along with their end nodes. |
Exclude Pds |
Allows you to exclude selected periods of data from the regression. |
Save |
Saves the current table into a TRENDING.<runcode> file. |
Save as bblink |
Creates a link file (in bblink format), called TRENDING_BBLINK.<runcode>, from the rows currently displayed in the table. |
To Traffic Matrix |
Generates the corresponding traffic matrix input file, TRENDING_TMATRIX.<runcode>, for the specified trending period. Use this file as an input to the Traffic Matrix feature, accessible via Design > T-Solve in a multitude of traffic engineering studies. For more information on this feature, see Traffic Menu: Growth. |
