Import Network Wizard
The Network Data Import Wizard is accessed from the main menu File > Import Network Wizard. This feature allows you to import different types of network configuration data into the software. In the process, a corresponding network project specification file is created, saved into the user-specified output directory and automatically loaded into the program.
Introduction
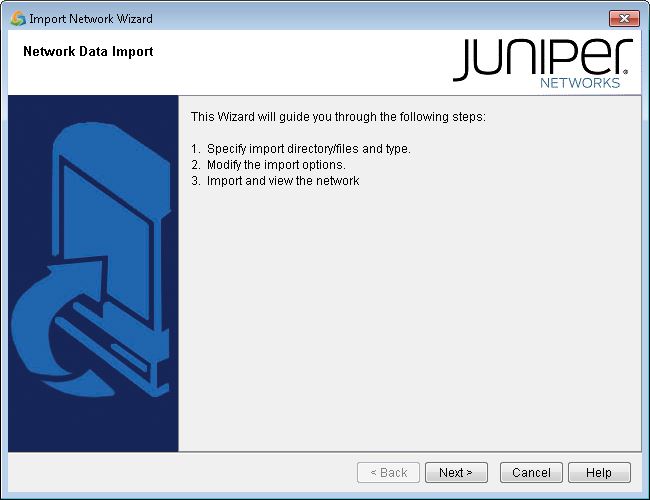
Import Network Wizard shows the initial Import Network Wizard window.

The following buttons apply to most pages of the import wizard.
Function |
Description |
|---|---|
< Back |
Goes back to the previous page of the wizard. |
Next > |
Goes to the next page of the wizard. |
Cancel |
Cancels the import action and closes the wizard without saving. |
Help |
Accesses the reference page of this window in the help document. |
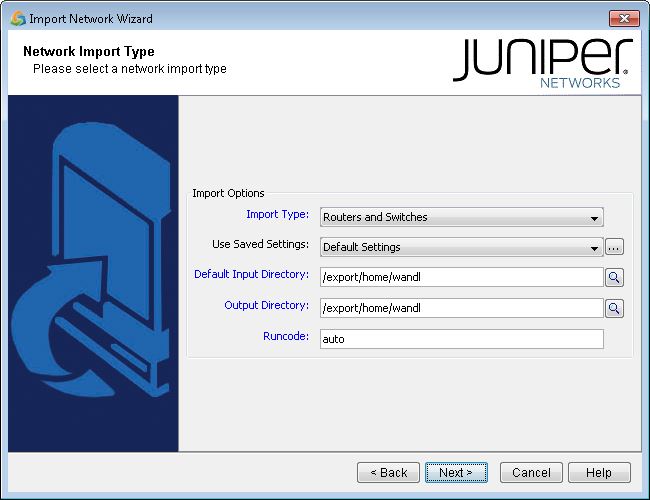
Select the type of the data you want to import and the directory where the data files are stored.

Function |
Description |
|---|---|
Import Type |
Click to see the drop-down selection box to select the appropriate data type for import and conversion. |
Use Saved Settings |
This allows user to load an import template to automatically map fields and settings based on previous import runs. |
Default Input Directory |
The directory shown here displays the current import directory source. This field should specify the directory in which data files are stored. For certain import types, this field is used to indicate an import file instead of a directory. |
Output Directory |
Select where the NorthStar Planner specification file are created |
Runcode |
Specify a file name extension for the specification file and related project files |
Depending on which data type is being imported, the next pages of the wizard will guide you through a different set of tabs and required parameters to be entered.
The Data Import feature supports the data file types described in the sections that follow.
Routers and Switches (IP/MPLS only)
This section only provides a high-level summary of the router config import. See the NorthStar Planner Feature Guide for details on importing router configuration files.
| Default Tab | This tab provides additional import options to the standard Configuration files. You can import Interface, VLAN Discovery, Switch CLI, Tunnel Path, Transit Tunnel, Equipment CLI, and Equipment SNMP files. |
| Bandwidth Options | This tab provides options for deriving the interface bandwidth. You can specify supplementary sources such as the MPLS Topology file or rules to use to derive the bandwidth. |
| Network Options | This tab allows you to specify an already-defined network file that should be preserved during the import. Additionally, you can specify VPN and BGP options. |
| Misc Options | Miscellaneous options are provided here, such as ignoring the private IP address. |
NorthStar Planner Config File
You may create and import your own user-defined configuration file using NorthStar Planner Config file format. Using any text editor, save your file extension as .cfg and follow the syntax example below:
## WANDL CONFIG
HOSTNAME=ROUTER01
HWTYPE=JUNIPER
IP=1.2.3.4
INTERFACE=ge-1/0/0.1 IP=1.2.3.4/30 BW=1G
The keyword ## WANDL CONFIG must
be in the file to identify it as a NorthStar Planner configuration
file. Select Import Type>Routers and Switches to import
these configuration files.
OSPF Database
The OSPF Database import supports Cisco, Juniper Networks, and Alcatel-Lucent and accepts a file with output from the following commands. In case more than one commands are mandatory, combine the outputs in the same file.
Cisco IOS
show ip ospf database router(mandatory)show ip ospf database network(mandatory)show ip ospf database opaque-area(optional for RSVP TE information)show ip ospf database summary(optional to create virtual link between ABR and node in another area -- Only available in text mode using -igpsummary)
Cisco IOS-XR
show ospf database router(mandatory)show ospf database network(mandatory)show ospf database opaque-area(optional for RSVP TE information)show ospf database summary(optional to create virtual link between ABR and node in another area -- Only available in text mode using -igpsummary)
Juniper Networks Junos OS
show ospf database extensive(includes both ospf and TE)
Alcatel-Lucent
show router ospf database detail(mandatory)show router ospf opaque-database detail(optional for RSVP TE information)
Options
DNS Lookup or /etc/hosts Lookup: Use the text mode -igpdns flag
Import Multiple Files: Use the text mode -ospfdir flag instead of -ospf
Only Import Links of Specified Area: -igparea <a.b.c.d> : If specified, only bblink with the specified area are reported, and the igpsummary are disabled.</a.b.c.d>
ISIS Database
ISIS Database import supports Cisco and Juniper Networks and accepts files with output from the following commands:
Cisco IOS and IOS-XR
show isis database verbose
Juniper Networks Junos OS
show isis database extensive
Options
DNS Lookup or /etc/hosts Lookup: Use the text mode -igpdns flag
Import Multiple Files: Use the text mode -isisdir flag instead of -isis
Marconi CLI
The Default Tab provides the following:
Select Output Directory: Select where the NorthStar Planner specification file is created
Specify Runcode: Specify a file name extension for the specification file and related project files
Specify Old Runcode: Specify the runcode of the original specification file, if any
The Advanced Tab provides the following:
Option |
Description |
|---|---|
Select External Link File |
This option allows you to select a link file to include in the import to complete the topology. These links are typically WAN links connecting through an external carrier's ATM backbone. |
Generate psuedo nodes |
If selected, the import will generate pseudo nodes for all unknown link destination addresses. |
Match paths |
The import program will attempt an ad-hoc virtual path matching algorithm to generate link and demand connectivity. This should only be used in cases where either PNNI info is missing, signaling has been turned off on the ports, or encryptors exist between links. |
Suppress logical links |
This is another option that should only be used when there are encryptors between links that short-circuit the topology. |
Nortel PND
The Default Tab provides the following:
Select Output Directory: Select where the NorthStar Planner specification file is created
Specify Runcode: Specify a file name extension for the specification file and related project files
Specify Old Runcode: Specify the runcode of the original specification file, if any
The Advanced Tab provides the following:
Select EPIC SPVC Data File: The PND extracted data does not include SPVC info. This info, along with UNI addresses should be queried and logged via EPIC. This options allows you to specify the file that contains the additional EPIC data.
Nortel Virtual Router
The Nortel Virtual Router import type has the same option tabs as Router Configuration, but it is tailored for importing Nortel passport configuration files to extract virtual router information. As with Router Configuration import, the Nortel VR import uses getipconf on the backend, so it can accept multi-vendor router configs. Refer to the NorthStar Planner Feature Guide for more details.
Tunnel Path Extraction
The tunnel path extraction feature shows the exact network view of tunnel paths. It helps to simulate the impact of tunnel set up on IGP routing by taking into account Explicit Tunnel Routing, Affinity and Trunk attributes. This is useful if the LSPs can be dynamic (as opposed to explicit). NorthStar Planner displays the current status and routing of the LSP tunnels within the defined network.
The MPLS Tunnel Extraction feature retrieves the actual placement of the tunnel and the status (up or down) of the LSP paths by parsing the output of the following Juniper Networks Junos OS command:
show mpls lsp statistics extensive
The same is true for the following Cisco IOS command:
show mpls traffic-eng tunnels
To use this feature, you must have a network open and then specify a directory that contains the output of these commands. There should be one file per router. On the second page of the Import Wizard, select Tunnel Path in the Import Type selection box. Then click on the Browse button above to open the Import Directory Chooser window.
Navigate to the directory that contains the files and press Select. Click.Next > to continue.
This should generate an NorthStar Planner format file of the tunnel paths and status called tunnelpath.runcode, where runcode is the file extension used for your network model. This will automatically be loaded into the network model.
