Help us improve your experience.

Let us know what you think.

Do you have time for a two-minute survey?


Update Device Profile Assignment (Freeform)

SUMMARY You can change Freeform device profile assignments from the Topology or Systems view.

The device profile may need to change for various reasons, such as the following:

  • If you need to update the selector during NOS upgrade

  • If you need an RMA

  • If Juniper Support provides you with a new device profile to resolve an issue

Update Device Profile Assignment (from Topology)

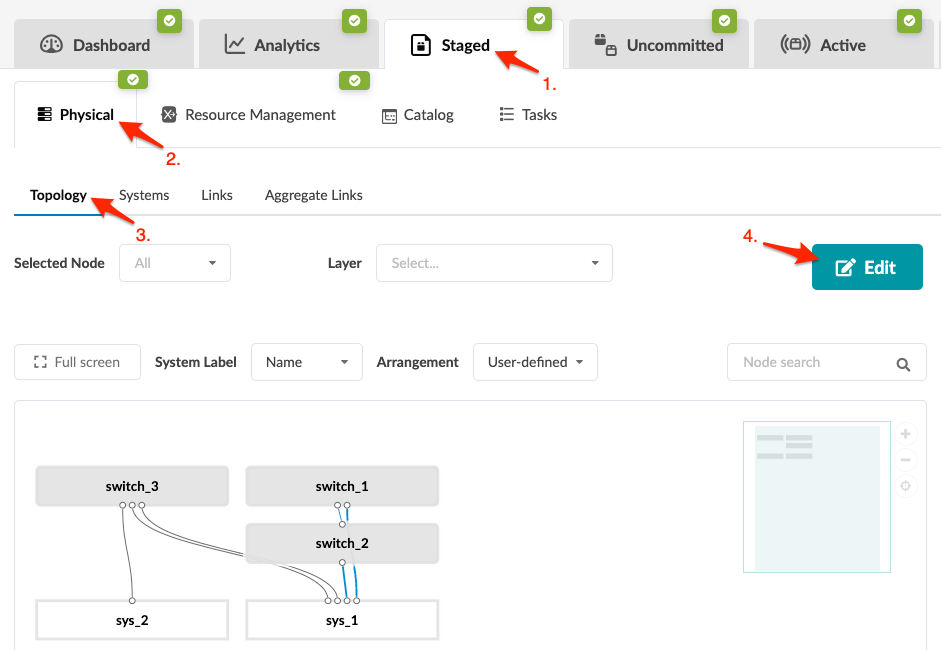
  1. From the blueprint, navigate to Staged > Physical > Topology and click Edit to open the topology editor.
    CAUTION:

    Be careful. If you click away from the topology editor after making changes without clicking Save, your changes are discarded.

  2. In the topology editor, select one or more systems to change to the same device profile, then click the Manage selected nodes properties button that becomes available. (You can also open the same dialog by clicking the settings button for a selected system. It's the gear at the top-right of the system.)
  3. Select the new device profile from the Device Profile drop-down list.

    Device profiles come from the blueprint catalog. If you don't see the one you need, import it.

  4. To close the dialog, click anywhere on the canvas outside of the dialog.
  5. Click Save to stage your changes, exit the topology editor and return to the Topology view. (If you leave the page without saving, your changes are discarded.)
When you're ready to activate your changes, commit them from the Uncommitted tab.

Update Device Profile Assignment (from Systems)

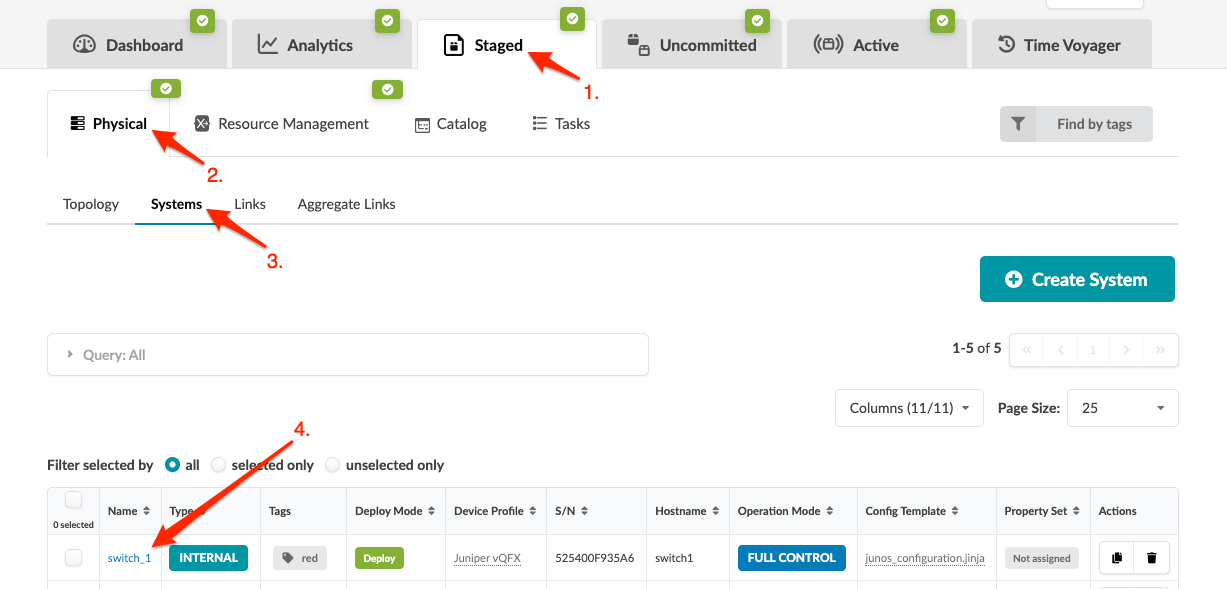
  1. From the blueprint, navigate to Staged > Physical > Systems and click the system name to go to details for that system.
    Note:

    You can also get to the Systems details page from the Topology view. From the blueprint, navigate to Staged > Physical > Topology and select the system to update.

  2. In the panel on the right, click the Properties tab, then click the Edit button for the Device Profile field.
  3. Select the new device profile from the Device Profile drop-down list, then click the Save button. (Or, to cancel the change, click the gray discard button.)
    The panel shows the value for the active blueprint and the staged value
When you're ready to activate your changes, commit them from the Uncommitted tab.
Update One or More Device Profile Assignments (from Systems)

  1. From the blueprint, navigate to Staged > Physical > Systems and select the check boxes for one or more systems, then click the Update Device Profile button that becomes available above the table.
  2. In the dialog that opens, select the new device profile from the Device Profile drop-down list.
  3. Click Update to stage the changes and return to the Systems view.