ON THIS PAGE
Installing Standalone Kubernetes Contrail Cluster using the Contrail Command UI
This topic covers Contrail Networking in Kubernetes-orchestrated environments that are using Contrail Networking Release 21-based releases.
Starting in Release 22.1, Contrail Networking evolved into Cloud-Native Contrail Networking. Cloud-Native Contrail Networking offers significant enhancements to optimize networking performance in Kubernetes-orchestrated environments. We recommend using Cloud-Native Contrail for networking in most Kubernetes-orchestrated environments.
For general information about Cloud-Native Contrail, see the Cloud-Native Contrail Networking Techlibrary homepage.
Starting with Contrail Release 5.1, you can use Contrail Command to initiate Kubernetes Contrail cluster deployment. This example topic describes how to use the Contrail Command User interface (UI) to deploy a standalone Kubernetes Contrail cluster.
Requirements
Contrail Controller — 8 vCPU, 64G memory, 300G storage.
Contrail Server Node (CSN) — 4 vCPU, 16G memory, 100G storage.
Compute nodes— Dependent on the workloads.
Overview
You can use Contrail Command to initiate a standalone Kubernetes
Contrail cluster deployment. You must install the controller and compute
nodes first. When the host nodes are operational, Contrail Command
uses the underlying Ansible deployer to install a standalone Kubernetes
Contrail cluster. Contrail Command supports the management and provisioning
of Contrail components. To provision Kubernetes resources, such as
pods, services, and so on, use the Kubernetes API server or the kubectl CLI on the Kubernetes master node.
Configuration
Deploying a Kubernetes Contrail Cluster
Step-by-Step Procedure
To deploy a Kubernetes Contrail cluster using Contrail Command, perform the following steps.
Click the Create button on the Setup > Servers tab to add physical servers. The Create Server page is displayed. You can add a server in the following ways:
Express
Detailed
Bulk Import (csv)
Note:Create server login credentials before adding the servers.
Figure 1: Create Server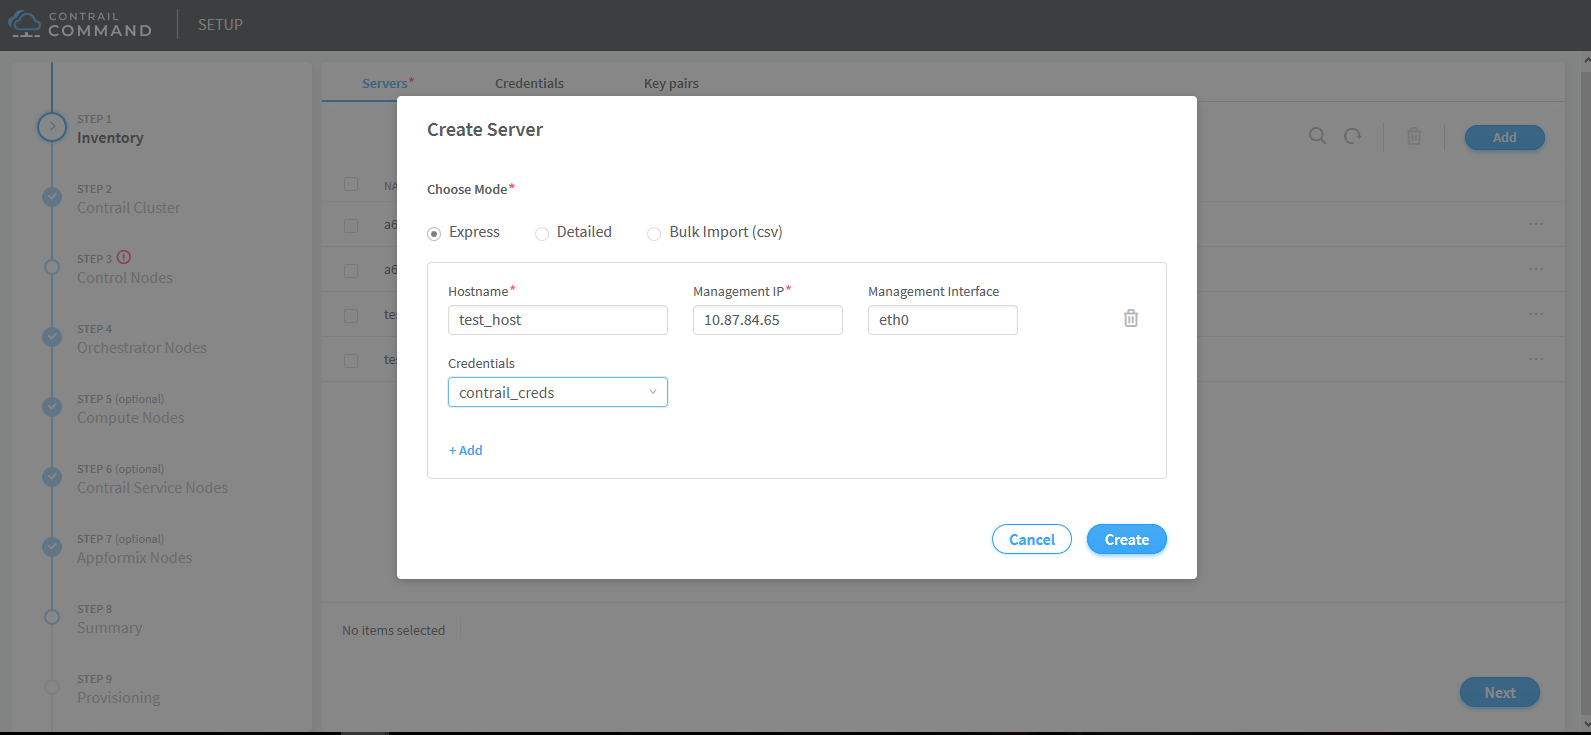
Click Create to create the server. The list of servers is displayed in the Inventory page. Click Next to continue creating a cluster. The Contrail Cluster page appears.
Create a Contrail cluster.
If Container registry = hub.juniper.net/contrail . This registry is secure. Unselect the Insecure box. Also, Contrail version = contrail_container_tag for your release of Contrail as listed in README Access to Contrail Registry 20XX.
Default vRouter Gateway = Default gateway for the compute nodes. If any one of the compute nodes has a different default gateway than the one provided here, enter that gateway in 5 and 6 for service nodes.
Set the order of Encapsulation Priority for the EVPN supported methods - MPLS over UDP, MPLS over GRE And VxLAN.
VXLAN, MPLSoUDP, MPLSoGRE
Figure 2: Contrail Cluster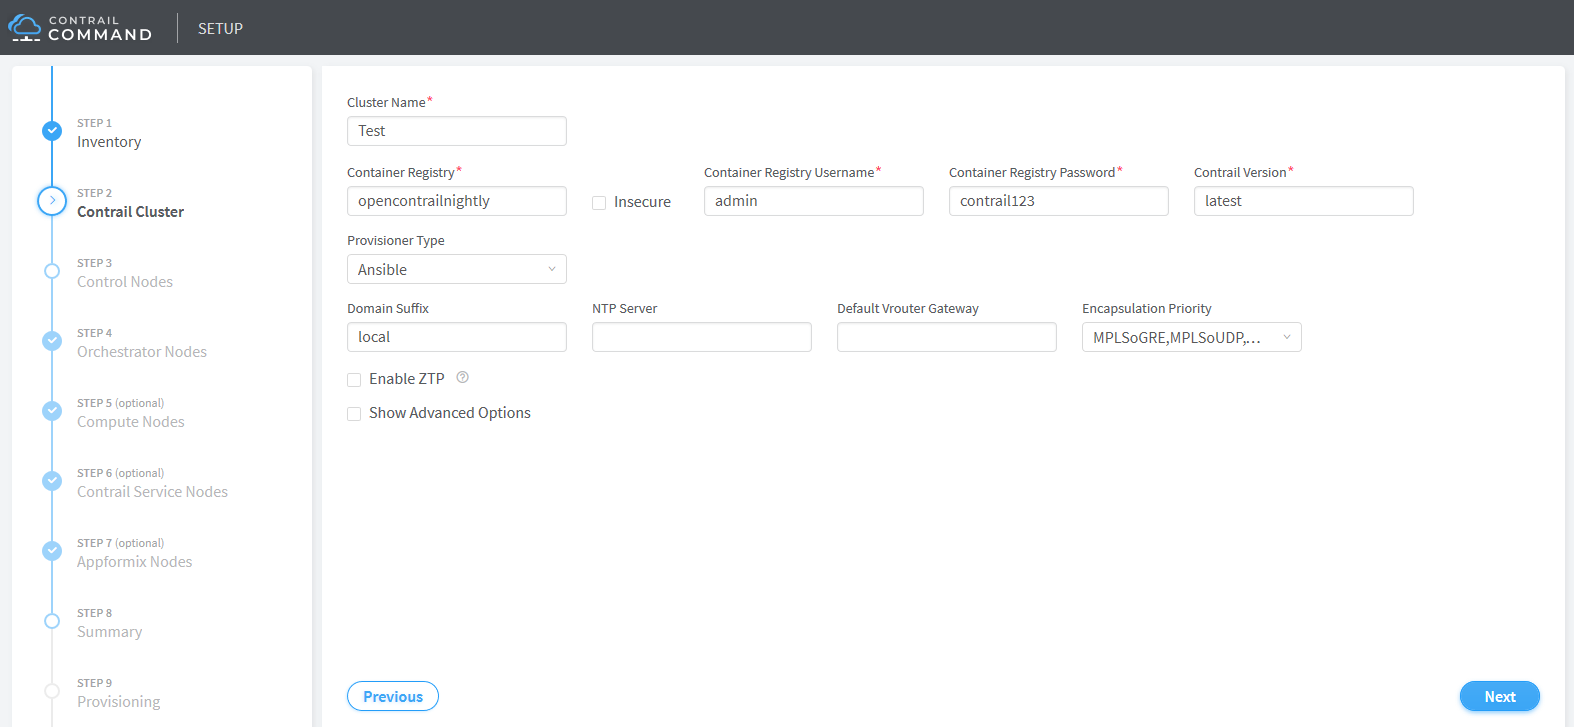
Click Next. The Control Nodes page appears.
Select the Contrail control nodes.
Figure 3: Control Nodes
Click Next. The Orchestrator Nodes page appears.
Select the Kubernetes orchestration type.
Select the Kubernetes nodes from the list of available servers.
Select the Kubernetes nodes from the list of available servers and assign corresponding roles to the servers. By default , the Kubernetes nodes are assigned the kubernetes_master_node, kubernetes_kubemanager_node, and kubernetes_node roles.
Figure 4: Orchestrator Nodes

Click Next. The Compute Nodes page appears.
Select the compute node associated with the kunernetes_node role from the list of available servers, .
Figure 5: Compute Nodes
Click Next. The Contrail Service Nodes page appears.
(Optional) Select the Contrail service nodes from the list of available servers.
Figure 6: Contrail Service Nodes
Click Next. The Appformix Nodes page appears.
(Optional) Select the Contrail Insights nodes from the list of available nodes.
Figure 7: Contrail Insights Nodes
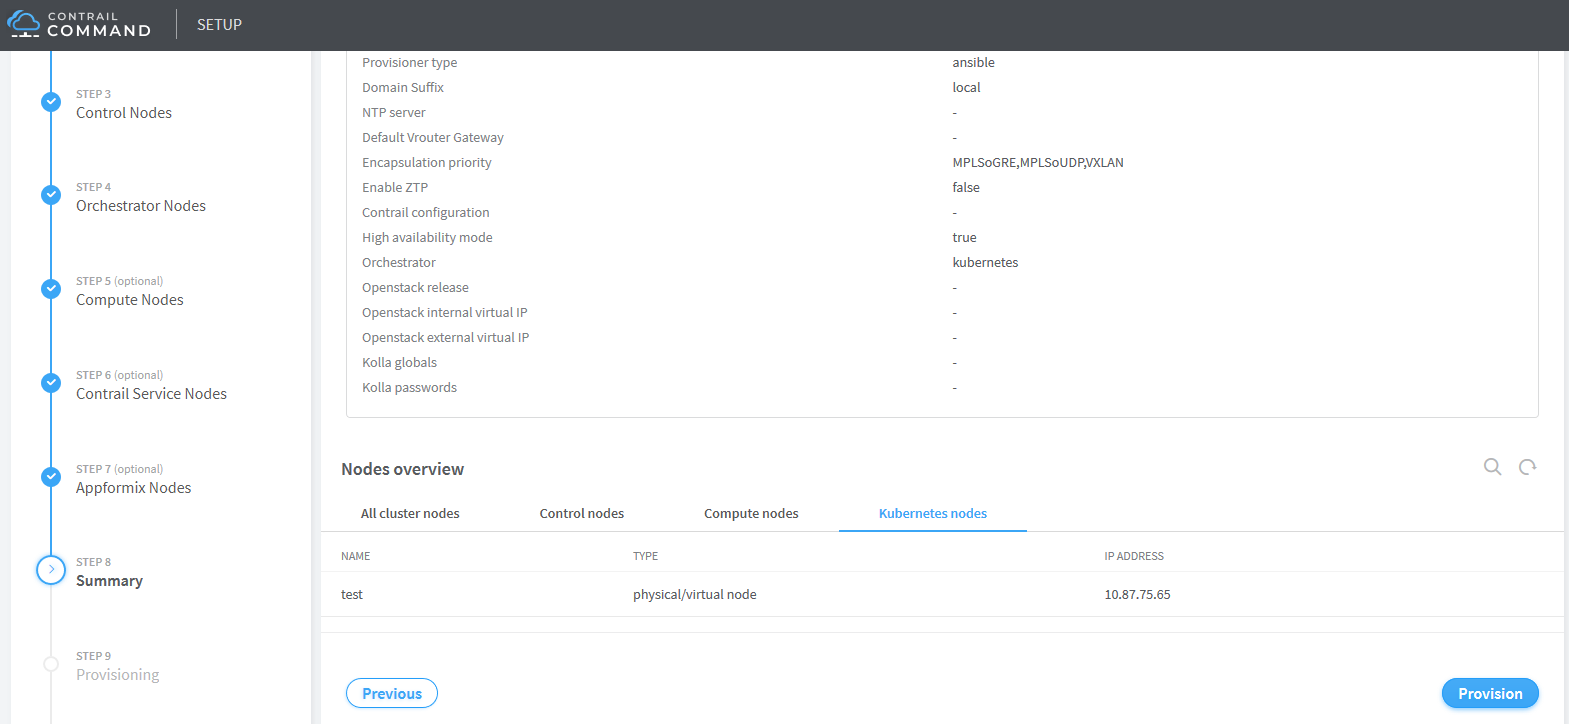
Click Next. The Summary page appears.
The summary page displays the cluster details as well as the node details. Verify the summary of your cluster configuration and click Provision.
Figure 8: Summary - Cluster Overview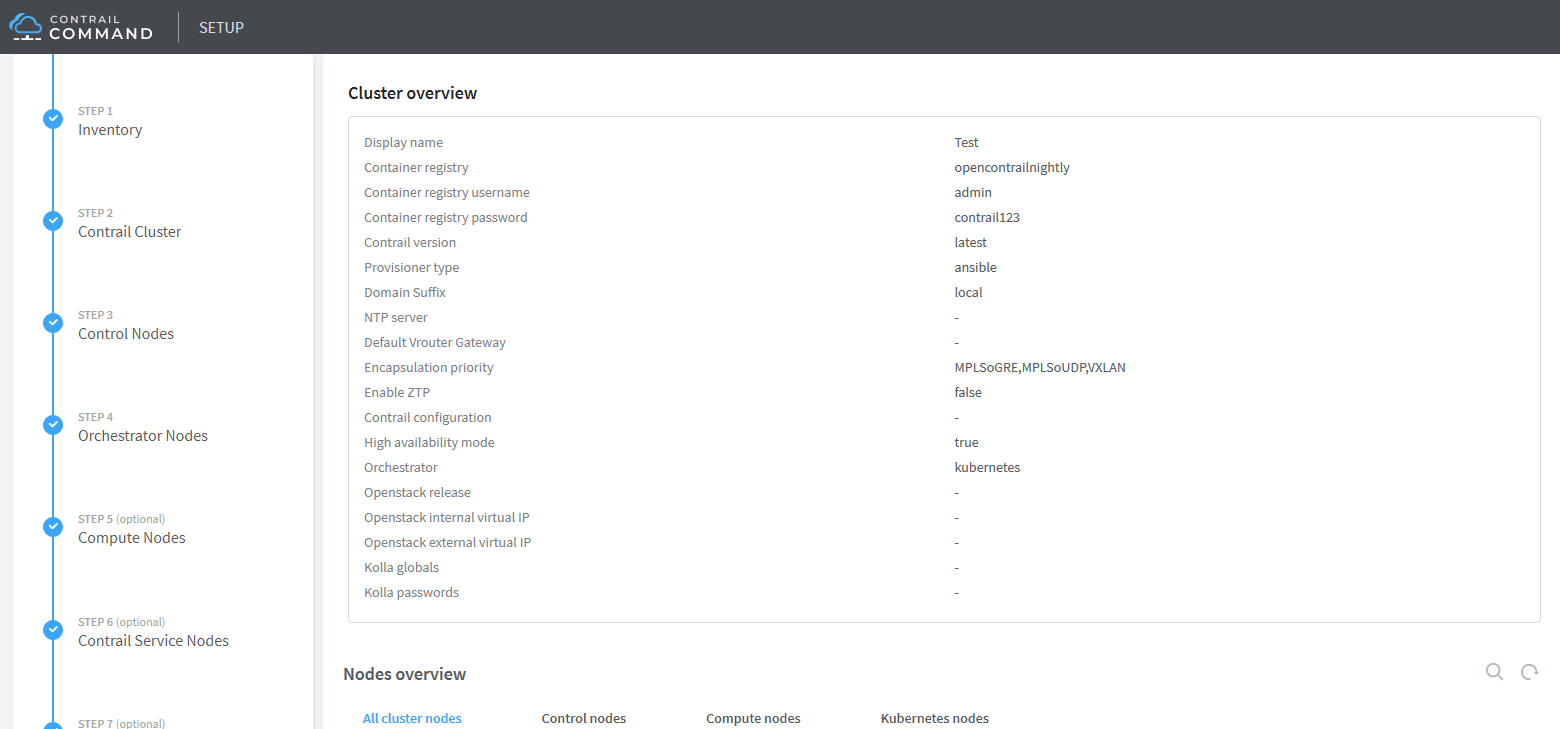 Figure 9: Summary - Nodes Overview