Add Third-Party Beacons to a Floorplan
If you've installed battery-operated beacons to extend your BLE coverage, follow these steps to add them to your floorplan.
Access point (AP) installation can be challenging in certain types of buildings or structures. One example is an atrium, where cabling might interfere with aesthetics. In this case, you can use third-party, battery-operated beacons to help provide coverage.
-
To ensure location accuracy, always use Juniper Mist™ APs. Third-party beacons are not meant as a replacement for Juniper Mist APs. Third-party beacons can supplement Juniper Mist APs in Mist SDK-enabled wayfinding deployments where AP placement proves difficult.
-
Don't confuse third-party beacons with Juniper Mist's virtual beacons. Third-party beacons are physical, battery-operated beacons that exist onsite. You can deploy them to help provide coverage. Juniper Mist's virtual beacons, on the other hand, do not provide coverage. For more information about virtual beacons, see Add Virtual Beacons to a Floorplan.
To add third-party beacons to a floorplan:
-
To ensure that the floorplan displays beacons:
-
Click the Settings button (near the top right corner of the
page).

-
Select the Show 3rd Party Beacons check box.

-
Click the Settings button (near the top right corner of the
page).
-
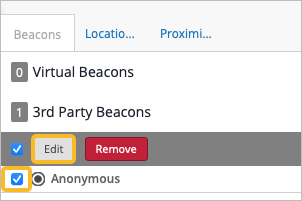
Click Beacons and Zones (above the map).

-
Click Add Beacon (above the map).
 The third-party beacon appears at the center of the floorplan. The icon is a black-and-white circle. Above the icon is the default name, Anonymous.
-
Click Edit.
-
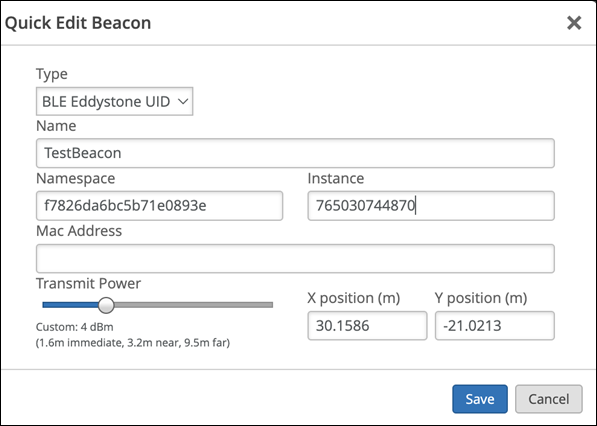
Enter the information about the beacon:
-
For Type, select BLE Eddystone UID (required).
-
Enter a unique Name so that you can easily identify the various beacons that you add.
-
Ensure that the Namespace, Instance, and Mac Address fields contain the correct information.
-
Drag the Transmit Power slider left or right so that it shows the transmission power that is configured on the physical beacon.
-
Ensure that the X position and the Y position match the physical location of the beacon.
 Note:
Note:Juniper Mist will neither manage the beacon nor detect its health.
-
-
Click Save.
Your third-party beacon is visible on the floorplan.
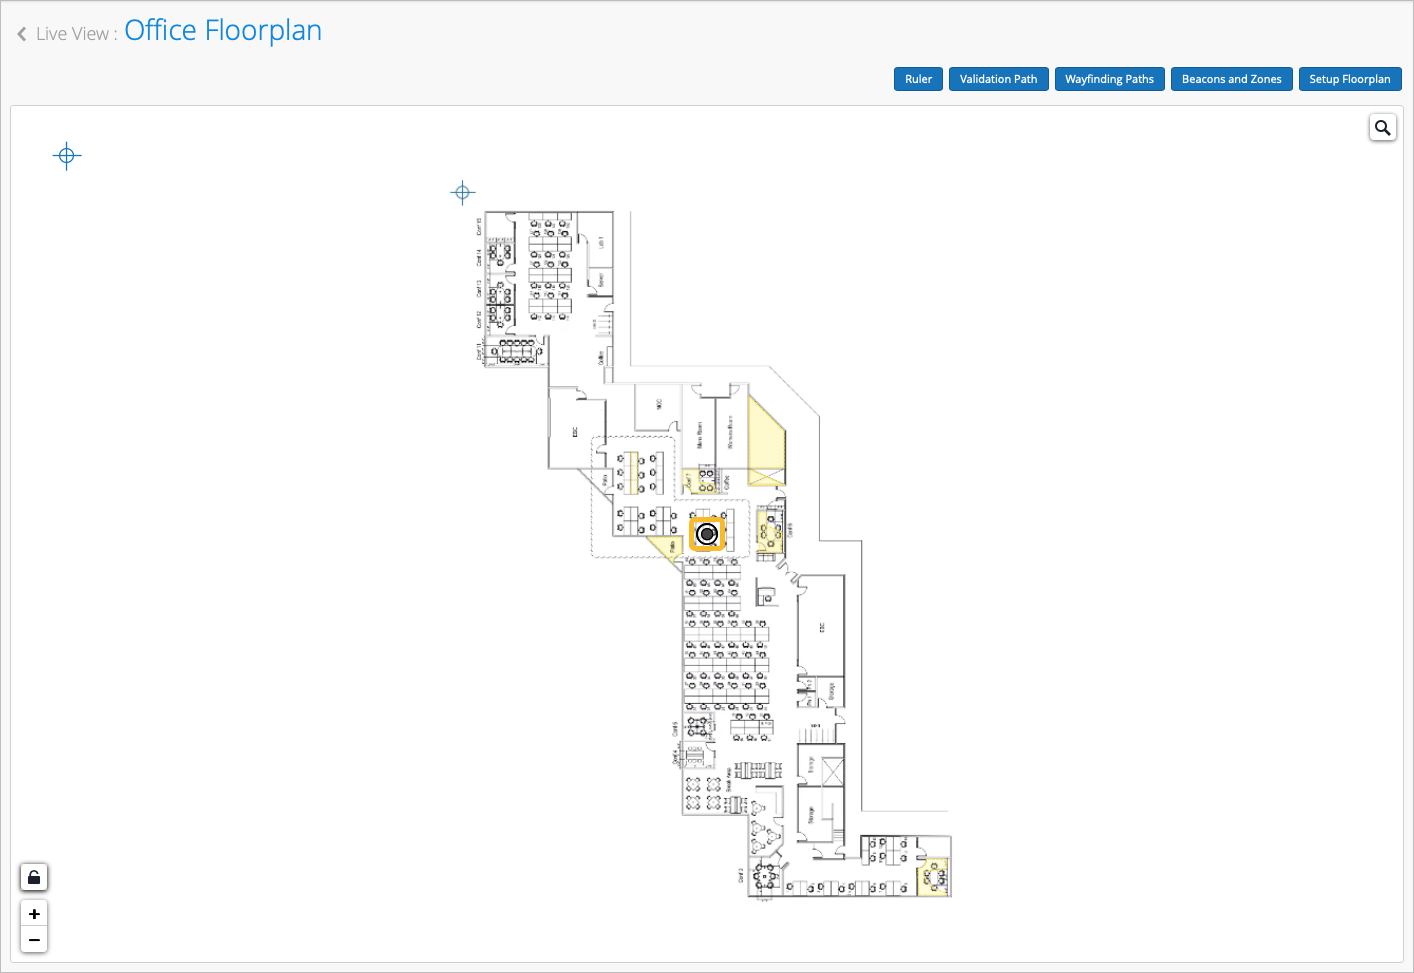
The AI engine adds the beacon to the beams received. The engine uses the X,Y coordinates and transmission power to help calculate beacon location.