RRM Usage Examples
Dual band technology allows a single radio to transmit on either 2.4 or 5-GHz. Mist RRM can turn off surplus 2.4-GHz radios and configure the radio to transmit on 5-GHz instead, which is especially useful for high-density environments. See Radio Resource Management (RRM).
The following use cases can help illustrate how RRM works.
Carpeted Enterprise
Let's consider a typical, carpeted enterprise, where the goal is to provide 5 GHz WiFi for the high capacity it provides.
The first thing you can do is go to the Mist portal and select the Site > Radio Management page, where you can see co-channel and density metrics.

The APs have an average of 2.6 co-channel neighbors, which means that more than 2 neighboring APs are using the same 2.4 GHz channel, which can cause co-channel interference. The AP Density metric is 1.0, which means the APs are uniformly distributed across the site. We can conclude that this site is a great candidate for Mist RRM to auto cancellation or auto conversion.
To enable auto cancellation for the 2.4-GHz radio:
-
In the menu, select Organization > Wireless > RF Templates.
-
Choose an existing template or create a new one using the Create Template button.
-
In the 2.4 GHz Settings section, under Band Enabled, select Auto.
This enables auto cancellation for all APs in the site. -
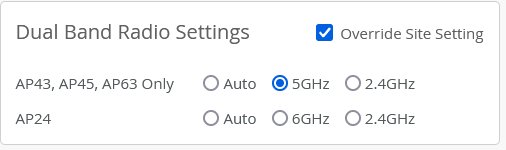
In the Dual Band Radio Settings section select Auto.
This enables auto conversion for dual-band radio equipped APs in the site.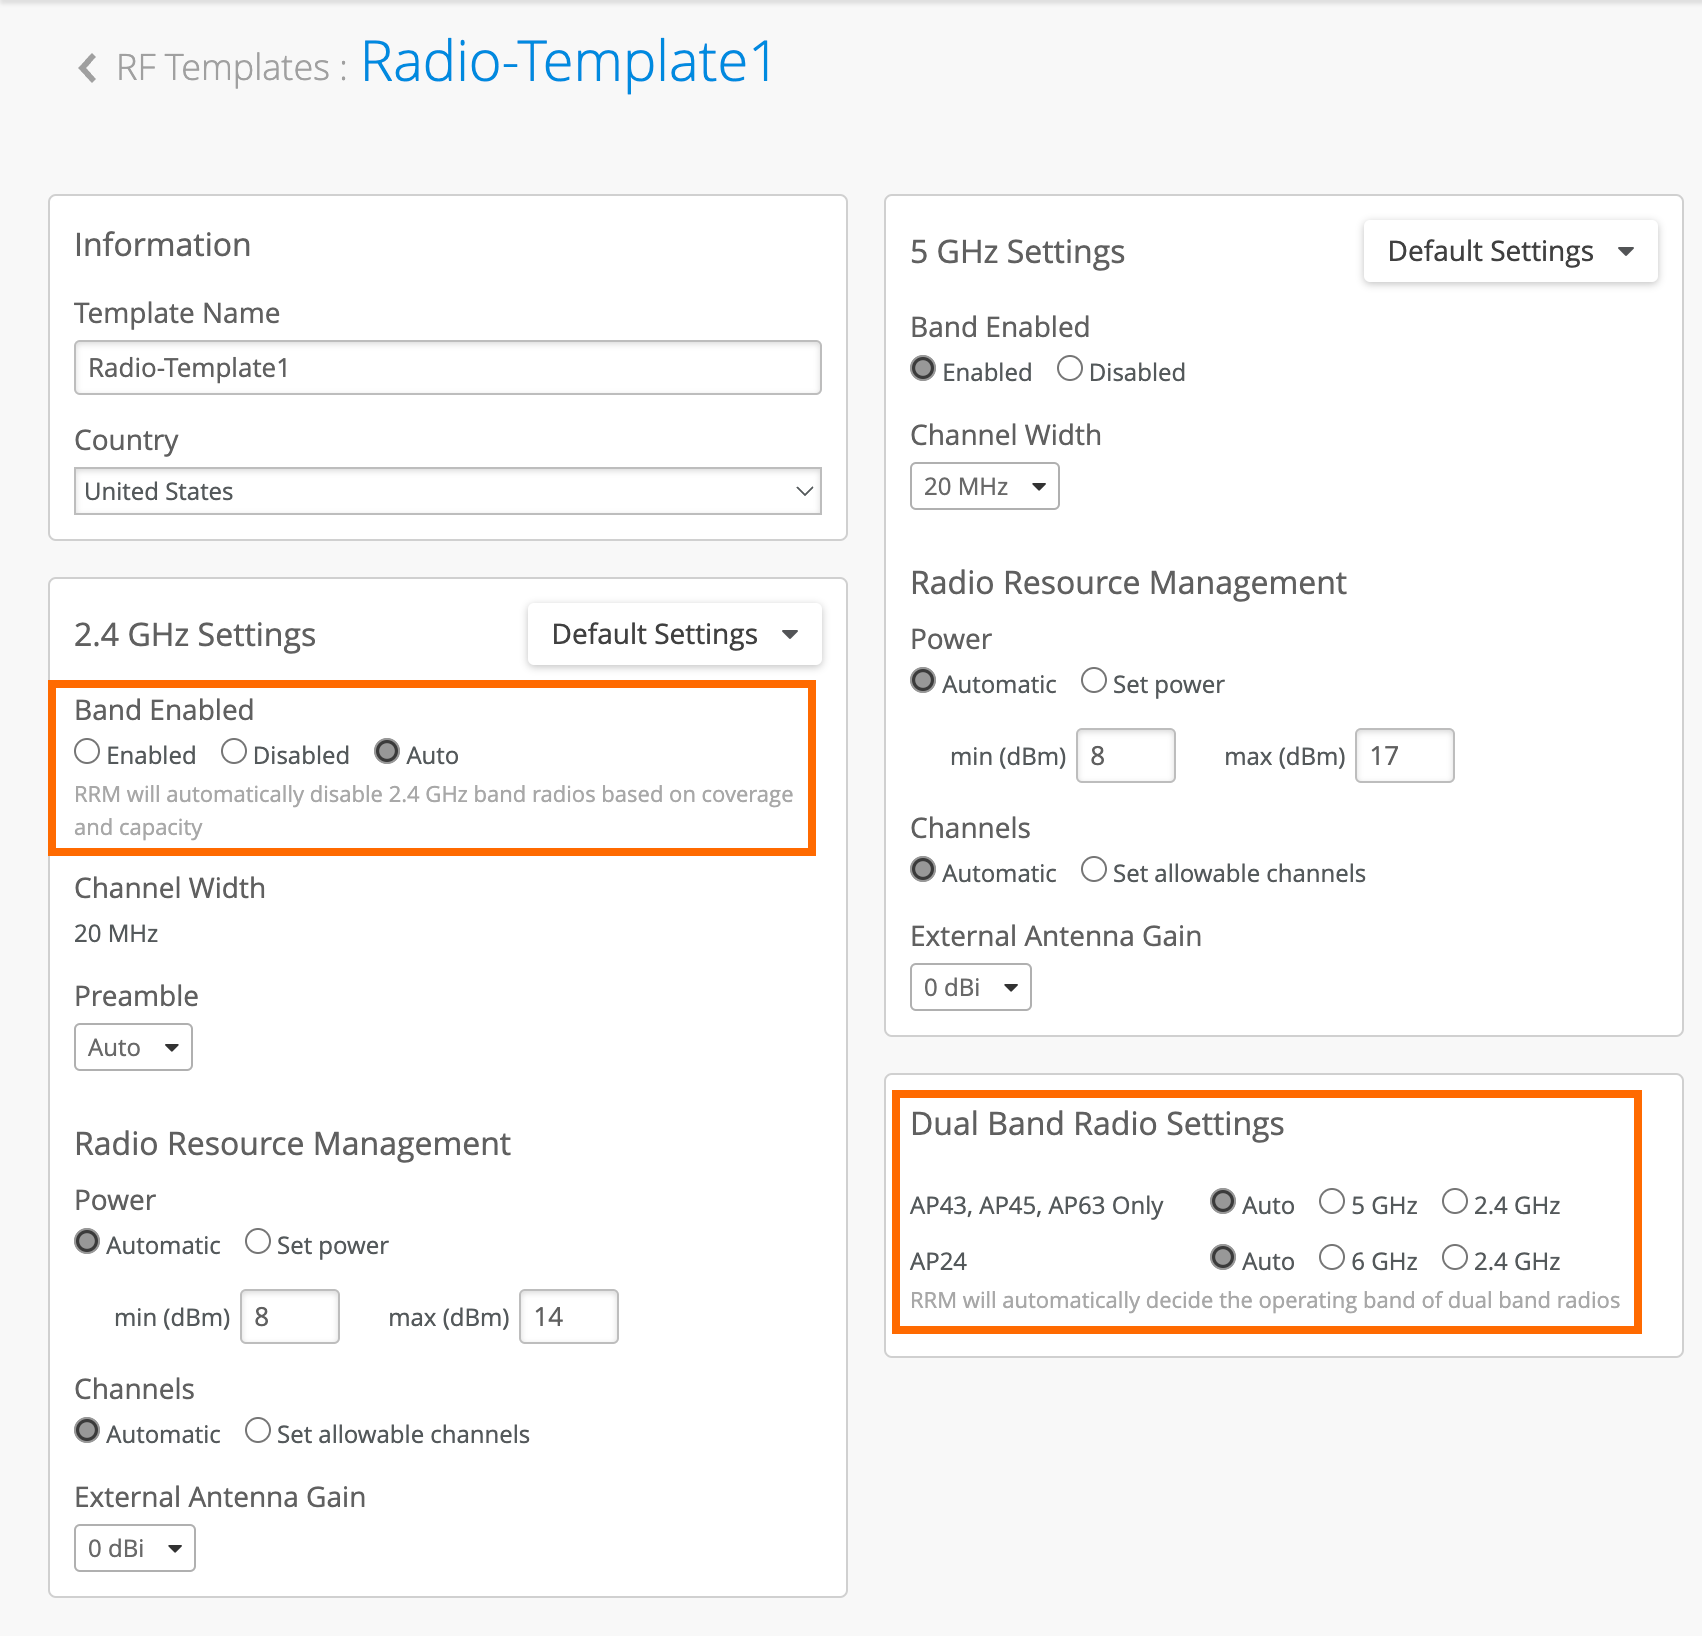
-
Click Save to apply your changes.
When you apply this template to a site, RRM will be able to perform both auto cancellation and auto conversion for APs in the site.
College Dormitories
College dormitories are also a good use case for RRM auto-management. Individual rooms typically have their own AP and are considered the primary means of coverage for residents. Dormitory hallways often use a different AP model with different radio settings and are considered secondary for coverage. Juniper AP12s are common in dorm rooms, while AP33s or AP43s are common in the halls.
You can use the same RF template to cover both AP models. For the hallway APs, say you want RRM to be able to use auto cancellation on the 2.4-GHz radios. And for the dorm rooms, you want to prevent auto cancellation.
To configure these settings in the same template:
-
In the Mist menu, select Organization > Wireless > RF Templates.
-
Choose an existing template or create a new one with the Create Template button.
-
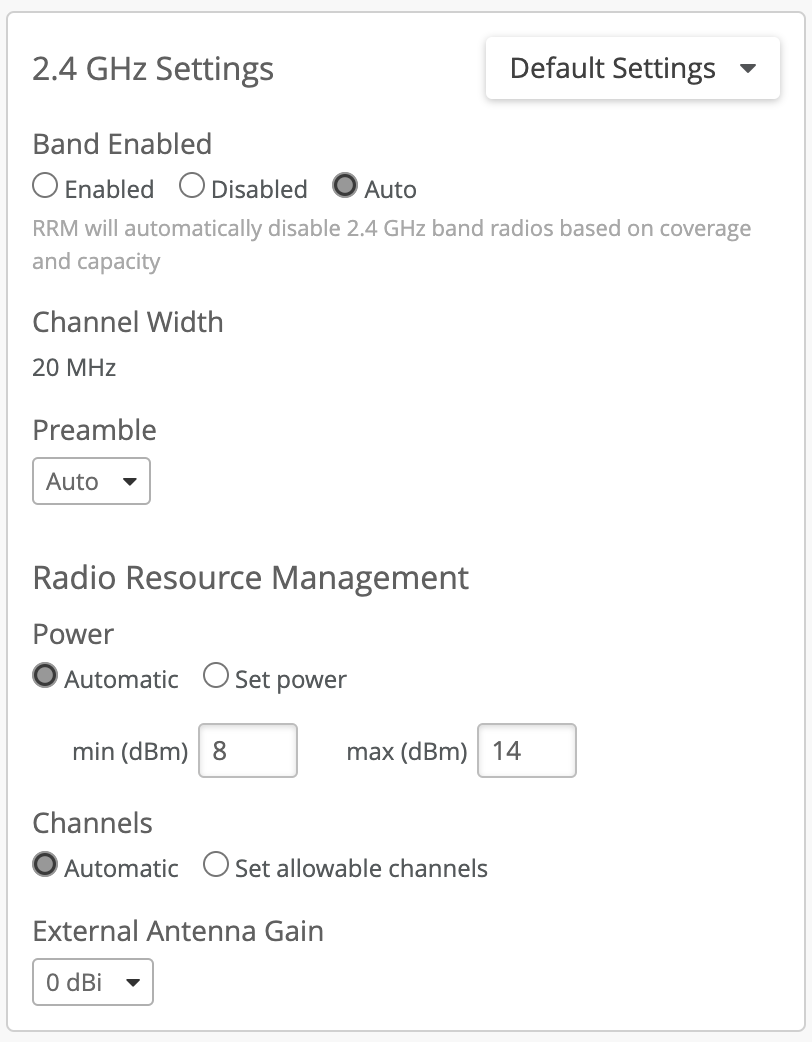
In the 2.4 GHz Settings section, under Band Enabled, select Auto.
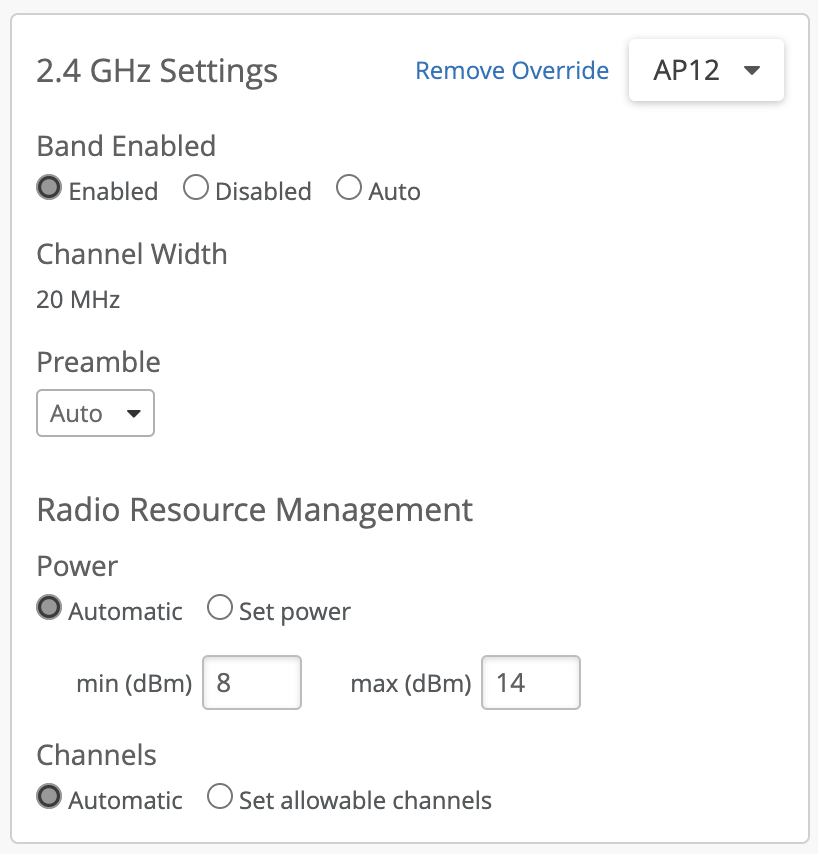
In the same 2.4 GHz Settings section, click the Default Settings pull-down menu and select AP12
.
-
Click Save to apply your changes.
When you set Band Enabled to Auto while leaving the Default Settings alone, you allow auto cancellation on all APs in the site. When you also set Band Enabled to Enabled with Default Settings set to AP12, you prevent auto cancellation on the AP12s in the site.
Conference Rooms and Auditoriums
For areas where high client density is expected, you may want to control certain APs explicitly, for example, to enable dual band 5 GHz. For other areas, you may want to broadcast both 2.4-GHz and 5-GHz. You can use device profiles to accomplish both goals.
To configure dual-band settings for selected APs:
-
In the Mist menu, select Organization > Wireless > Device Profiles.
-
In the profiles page that appears, click Create Profile.
-
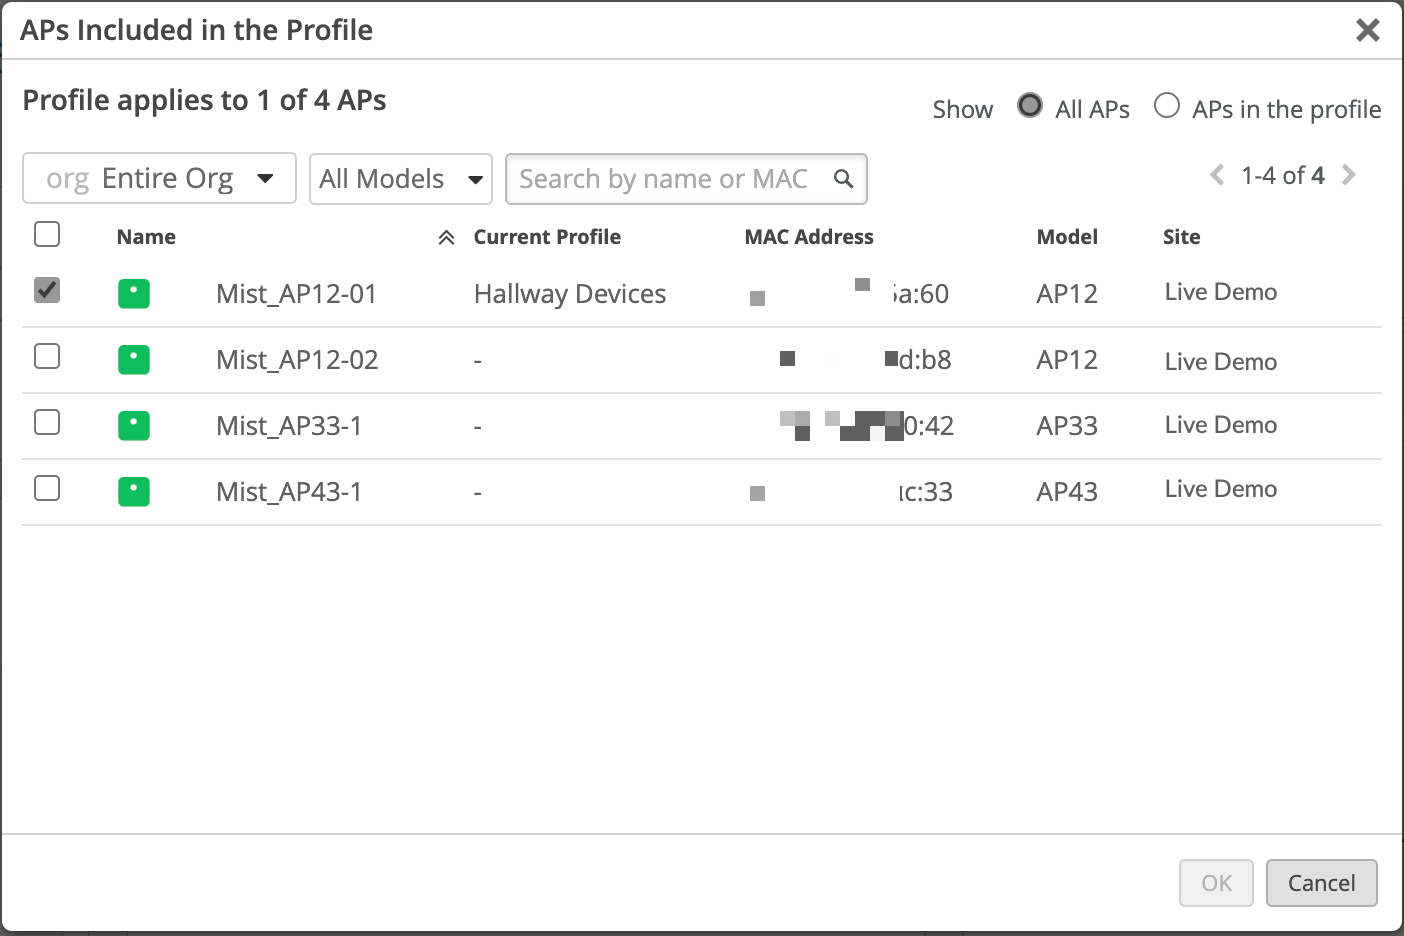
Give the profile a name, and then click the Access Points link under Applies To.
In the pop-up window, select the APs on which you want to allow auto conversion. You can select from all APs in the org, site, or by name or MAC address.
-
Click OK to close the window.
-
In the Dual Band Radio Settings section select 5GHz.
-
Click Create to save the Device Profile and apply the settings to the selected APs.
Set Power for all APs in a Site
There are use cases where it is necessary to configure a custom power range for your APs. For example, in environments where walls need to be penetrated and max coverage must be ensured. On the other hand, there are environments that a specific power level works well for, and with RRM you can set your APs to that specified power level.
In either case, you could configure power settings under Radio Resource Management at the RF Template level, for example, to apply the power settings to all APs in a site. When you apply the RF Template to a site, RRM will ensure that all APs in the site inherit that power setting.
When the Power setting under Radio Resource Management is set to Automatic (which is the default), this gives you the option to adjust the minimum and maximum power values to set a custom power range. This can be configured in either the 2.4 GHz, 5 GHz, or 6 GHz Settings sections.
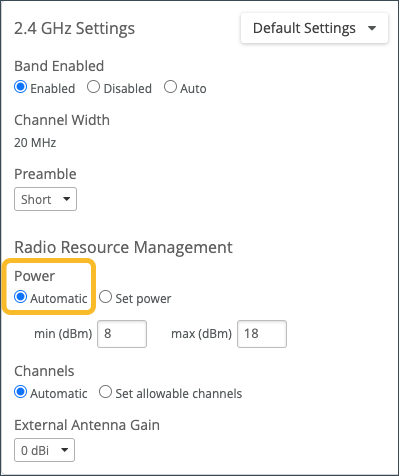
There are also certain environments where it is useful to set the power to a particular level. In this case, you would choose the Set power option, then select the power level from the dropdown menu. This can be configured in either the 2.4 GHz, 5 GHz, or 6 GHz Settings sections

Setting the RRM configuration at the RF template level applies the power setting to all APs in the assigned site (unless overridden with a device profile or direct device configuration). As always when configuring RRM, make note of the Configuration Hierarchy.
Also see RRM Configuration Options