Rogue, Neighbor, and Honeypot Access Points
Understand the threat posed by unauthorized access points on or near your site. Learn how to view the list of detected APs, and take action to address these threats.
What are Rogue, Neighbor, and Honeypot Access Points?
Rogue, neighbor, and honeypot access points (APs) are unauthorized devices operating on or near your network, often with the goal of fooling users into connecting to the "false" access point in order to steal data or monitor communications.
-
Rogue APs are any wireless APs installed on your wired network without authorization. Typically, this AP is connected to the LAN through an Ethernet cable. The intent of rogues can be malicious, such as to gain illicit access to the network, or benign, such as an employee setting up their own Wi-Fi hotspot to cover a perceived deadspot. Rogue clients are users who've connected to the rogue AP.
-
Neighbor APs are not connected to your network, but Juniper Mist detects them in the vicinity. Because these nearby APs typically have a strong signal, clients might connect to the neighbor AP, assuming that it's yours and is secure. Neighbor APs can also be a way for users in your facility to get around security restrictions on your network, such as streaming music or accessing blocked sites, or to avoid paying for services. Nonmalicious neighbor APs are SSIDs from another organization. In other words, legitimate SSIDs belonging to one organization will also be listed as neighbors for another organization.
-
Honeypots, also known as Evil Twins, are unauthorized APs that advertise your SSID, typically with the goal of capturing client login credentials. Here, a bad actor may copy or approximate your Wi-Fi hotspot, spoof your organization's login screen, and then collect the username and password of unsuspecting users as they try to login to "your" network. The bad actor can then use the credentials to log in to your actual network and wreak whatever havoc they have in mind. Non-malicious Honeypots are SSIDs from another organization that are broadcasting the same WLAN.
Dectection of Anomalous Devices
Juniper APs include a dedicated scanning radio to detect and potentially malicious APs and their clients. The dedicated scanning radios operate on 2.4, 5 and 6 GHz Wi-Fi bands. They provide data for real-time performance adjustments on the AP, as well as streaming telemetry that Juniper Mist uses for site-wide optimizations.
In the Juniper Mist portal, the Site > Wireless> Security page provides a list of all the anomalous APs that have been detected. You can drill down on any item to find the physical location, Ethernet connection, and rogue clients connected to the AP. Click on non-zero entries in No. of Clients column to open a Rogue Clients List pop-up for clients associated with that device.
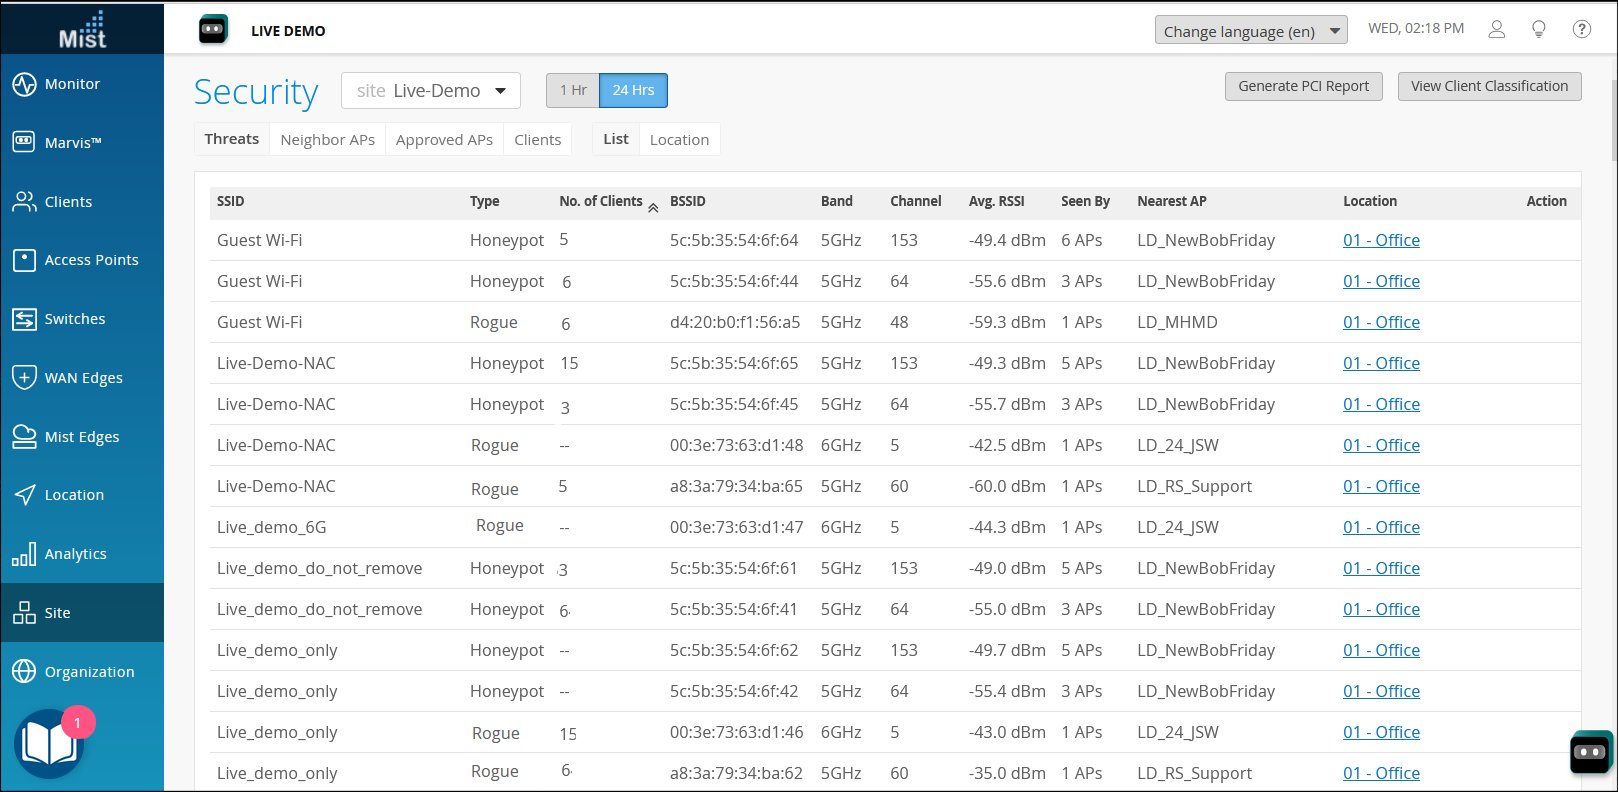
The Threats tab on the Security page shows a list of Rogue and Honeypot APs. You can see the lists of Neighbor APs, Approved APs, and Clients by clicking on the appropriate tab above the list.
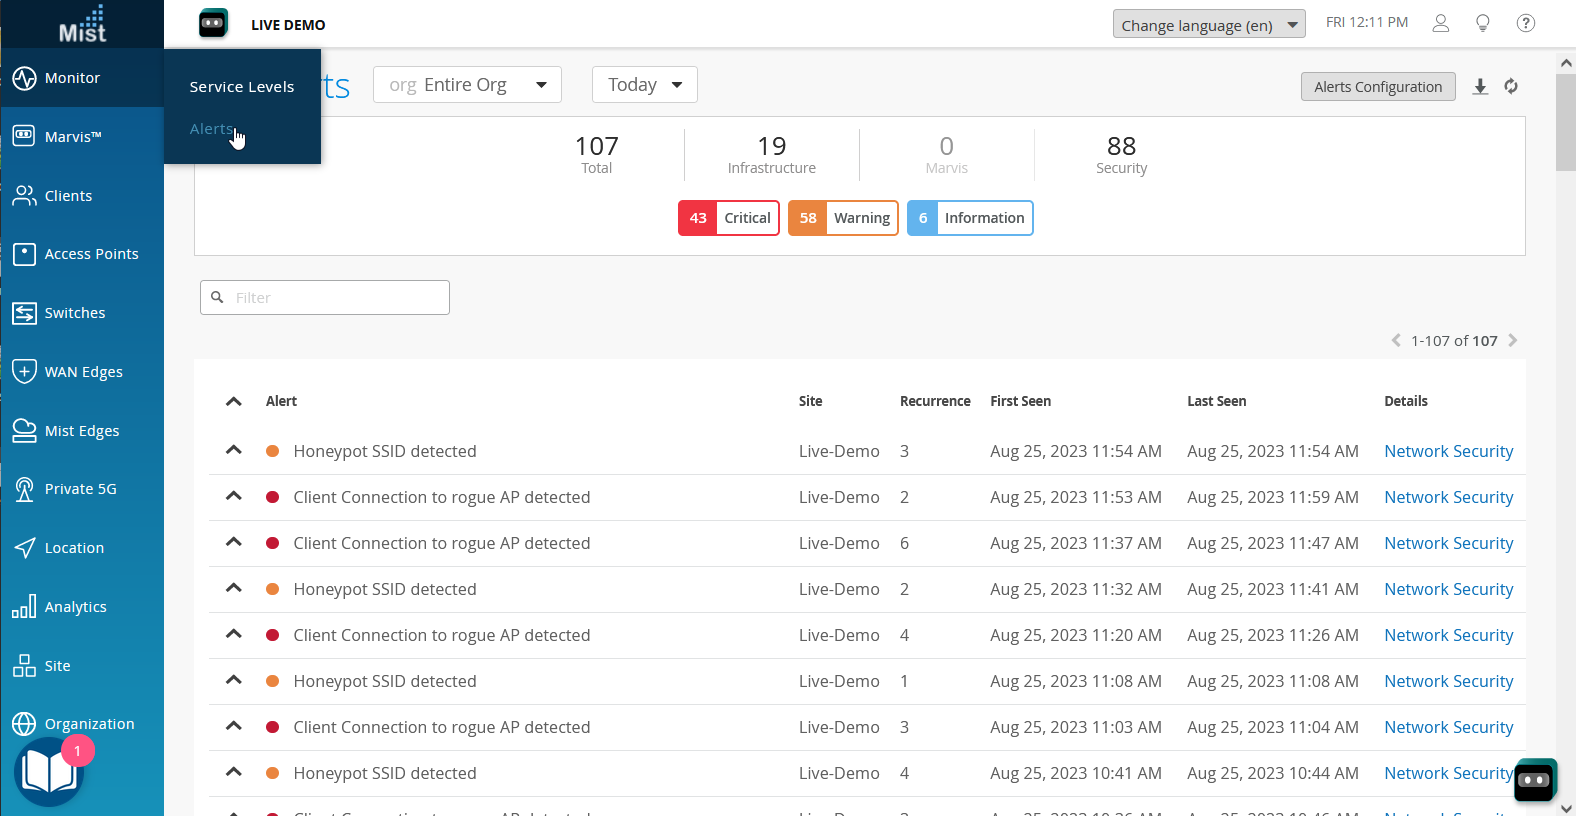
To see this information on this page, you must configure alerts for honeypot and rogue APs for the site or the entire organization.
Configure AP Threat Protection
In your site settings, you can enable or disable detection of rogue, neighbor, and honeypot APs. You also can adjust the settings to prevent known APs from being misclassified as threats.
To configure AP threat protection:
-
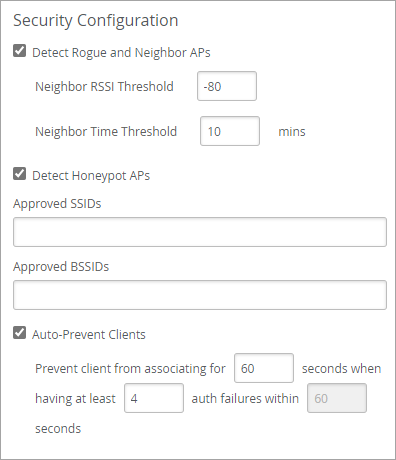
Under Security Configuration, adjust the settings as
needed.
-
Detect Rogue and Neighbor APsSelect this option to enable Rogue and Neighbour detection. You can then configure alerts by going to Monitor > Alerts and selecting the required alert types.
You can adjust the detection thresholds:
-
Neighbor RSSI Threshold—This threshold is based on the strength of the AP signal. For example, with the default threshold of -80 dBm, Juniper Mist ignores APs with RSSI of -80 or above. The supported range is -40 dBm to -100 dBm.
-
Neighbor Time Threshold—This threshold is based on the duration of the AP signal. For example, if you notice neighbor APs constantly appearing and disappearing from the Monitor > Alerts page as the signal waxes and wanes, you can set a longer time threshold. Then only APs with enduring signals are detected as potential threats.
-
-
Detect Honeypot APs—Select this option to enable detection of honeypot APs (option is selected by default). To configure alerts for detected honeypots, go to Monitor > Alerts and select the alerts that you want to receive.
-
Approved SSIDs and Approved BSSIDs—To prevent unnecessary detection of known APs in your vicinity, enter their SSIDs or BSSIDs, separated with a comma (no space).
You can use wildcards in these fields. This feature is useful if you want to allow multiple SSIDs that have similar names, as you might see when your users connect through Wi-Fi Direct to printers or TVs. For example, if you enter direct* in the Approved SSIDs list, Juniper Mist ignores SSIDs such as DIRECT-roku-123-44AABB and DIRECT-printer9999. Likewise, the Approved BSSIDs field supports partial matching, for example "cc-73-*".
-
Auto-Prevent Clients—Select this option to prevent connections from clients with multiple authorization failures. The Alerts page will include alerts such as 802.11 Auth Denied and as Blocked: Repeated Authorization Failure.
Adjust the settings as needed:
-
Set the number of seconds that the client is prevented from associating with the WLAN. For example, with the default setting of 60 seconds, a client is banned for 60 seconds.
-
Set the number of auth failures that trigger the auto-prevent action. For example, with the default setting of 4, a client is banned after failing four times.
-
-
Find and Remove Rogues
You can discover and remove rogue clients from your network on the Site > Wireless > Security page of the Juniper Mist™ portal.
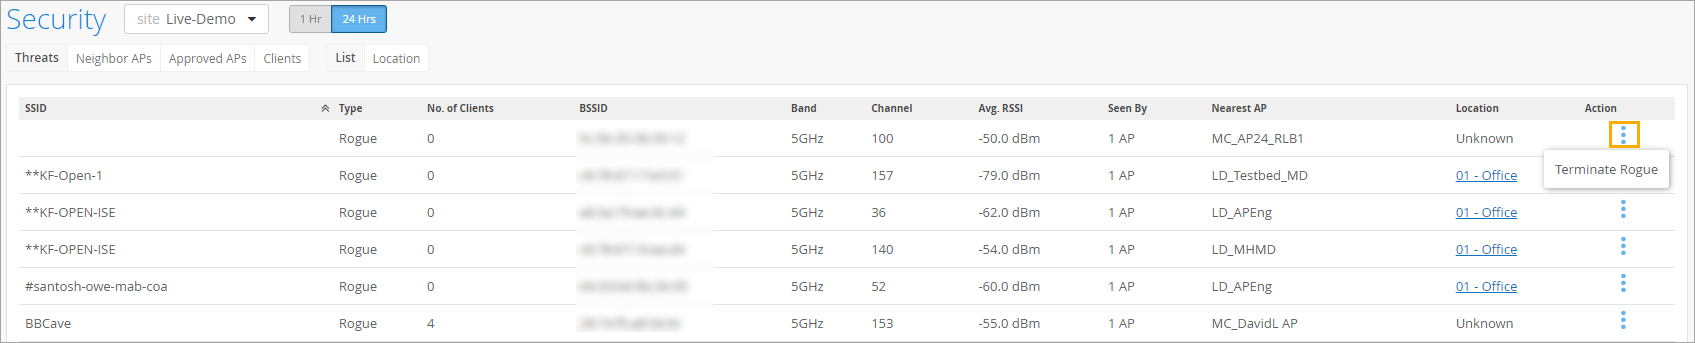
The following animation shows how to find rogue APs and remove them. Basically, when you click the Terminate button, nearby Juniper APs will send deauthentication frames to the rogue clients, which are identified by their MAC addresses through their association with the rogue AP. The deauthentication frame is a notification, not a request, and the rogue client will be dropped.
If you want to prevent these rogue clients from rejoining the network, you can classify them as banned, and they will not be re-authenticated by any AP in the site. Conversely, to allow certain terminated clients back on the network, you can classify them as approved, and the APs will not reject the authentication attempt. For help, see Classify, Approve, and Ban Designated Wireless Clients.
To find and remove rogue APs:
-
In the Action column, click the action button, and then
click Terminate Rogue.
Classify, Approve, and Ban Designated Wireless Clients
To protect your network, use this feature to allow or ban access points based on their MAC addresses.
To simplify wireless security and control, you can identify wireless clients that you want to ban or approve.
With AP firmware version 0.9.x or later, clients can be banned or approved from a specific site or from the entire organization.
Classification limitations:
-
Firmware version 0.14.x and later—Up to 512 client classifications for a given SSID can be stored locally, on the relevant APs, (Any more than 512 are stored only on the cloud.)
-
Earlier firmware versions—Client classifications are stored on the Mist cloud. The AP must be connected to the cloud to reference and enforce the classification.
-
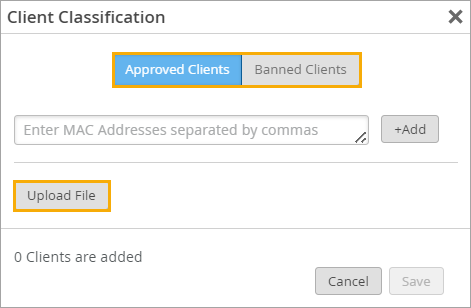
Enter the MAC address(es):
-
To enter addresses individually, paste or type a MAC address into the field and then click +Add. Repeat this step if needed. The addresses appear in a list at the bottom of the pop-up window. When finished, click Save.
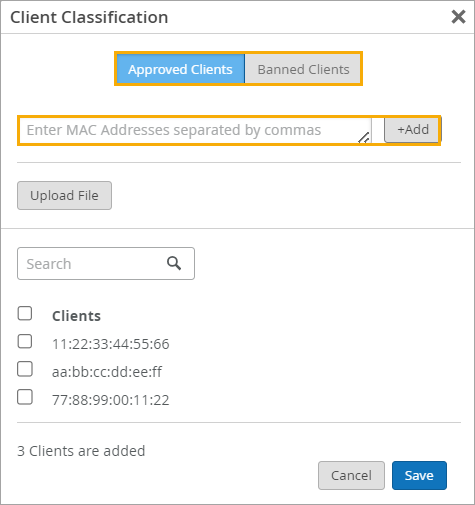
-
Addresses in a CSV File—Click Upload File, select or drag-and-drop the file, and then click Upload.
-
-
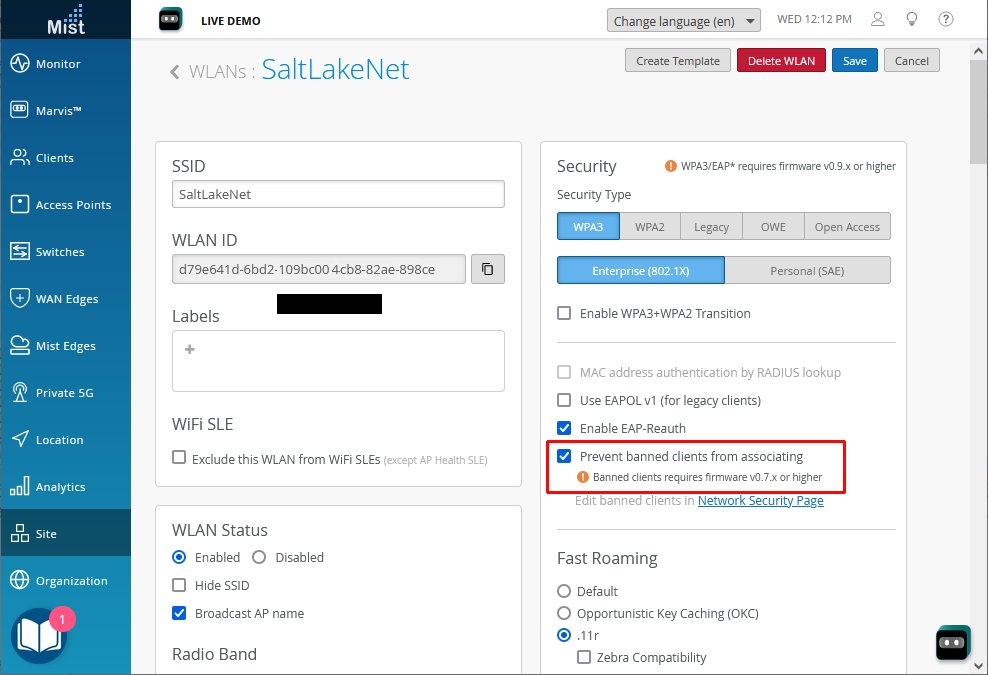
If you entered a list of banned clients, also complete these steps to prevent
them from associating with your APs.
-
Click Save at the bottom of the Edit WLAN
window.
CAUTION:Banning rogue clients from an SSID should be considered in the larger context of client blocking. Consult applicable regulations, such as the U.S. Federal Communications Commission prohibition against Wi-Fi blocking.
-
Click Save at the bottom of the Edit WLAN
window.