WxLAN Access Policies
Create WxLAN access control policies to specify who can and can't access resources on your network. After you add these policies to your site or WLAN template, users who connect through the specified WLANs are subject to these rules. Read this topic to learn about the requirements and options so that you can create WxLAN access policies for your use cases.
Introduction
Use access policies for a variety of use cases:
- Network segmentation
- Role based policies
- Micro-segmentation
- Least privilege
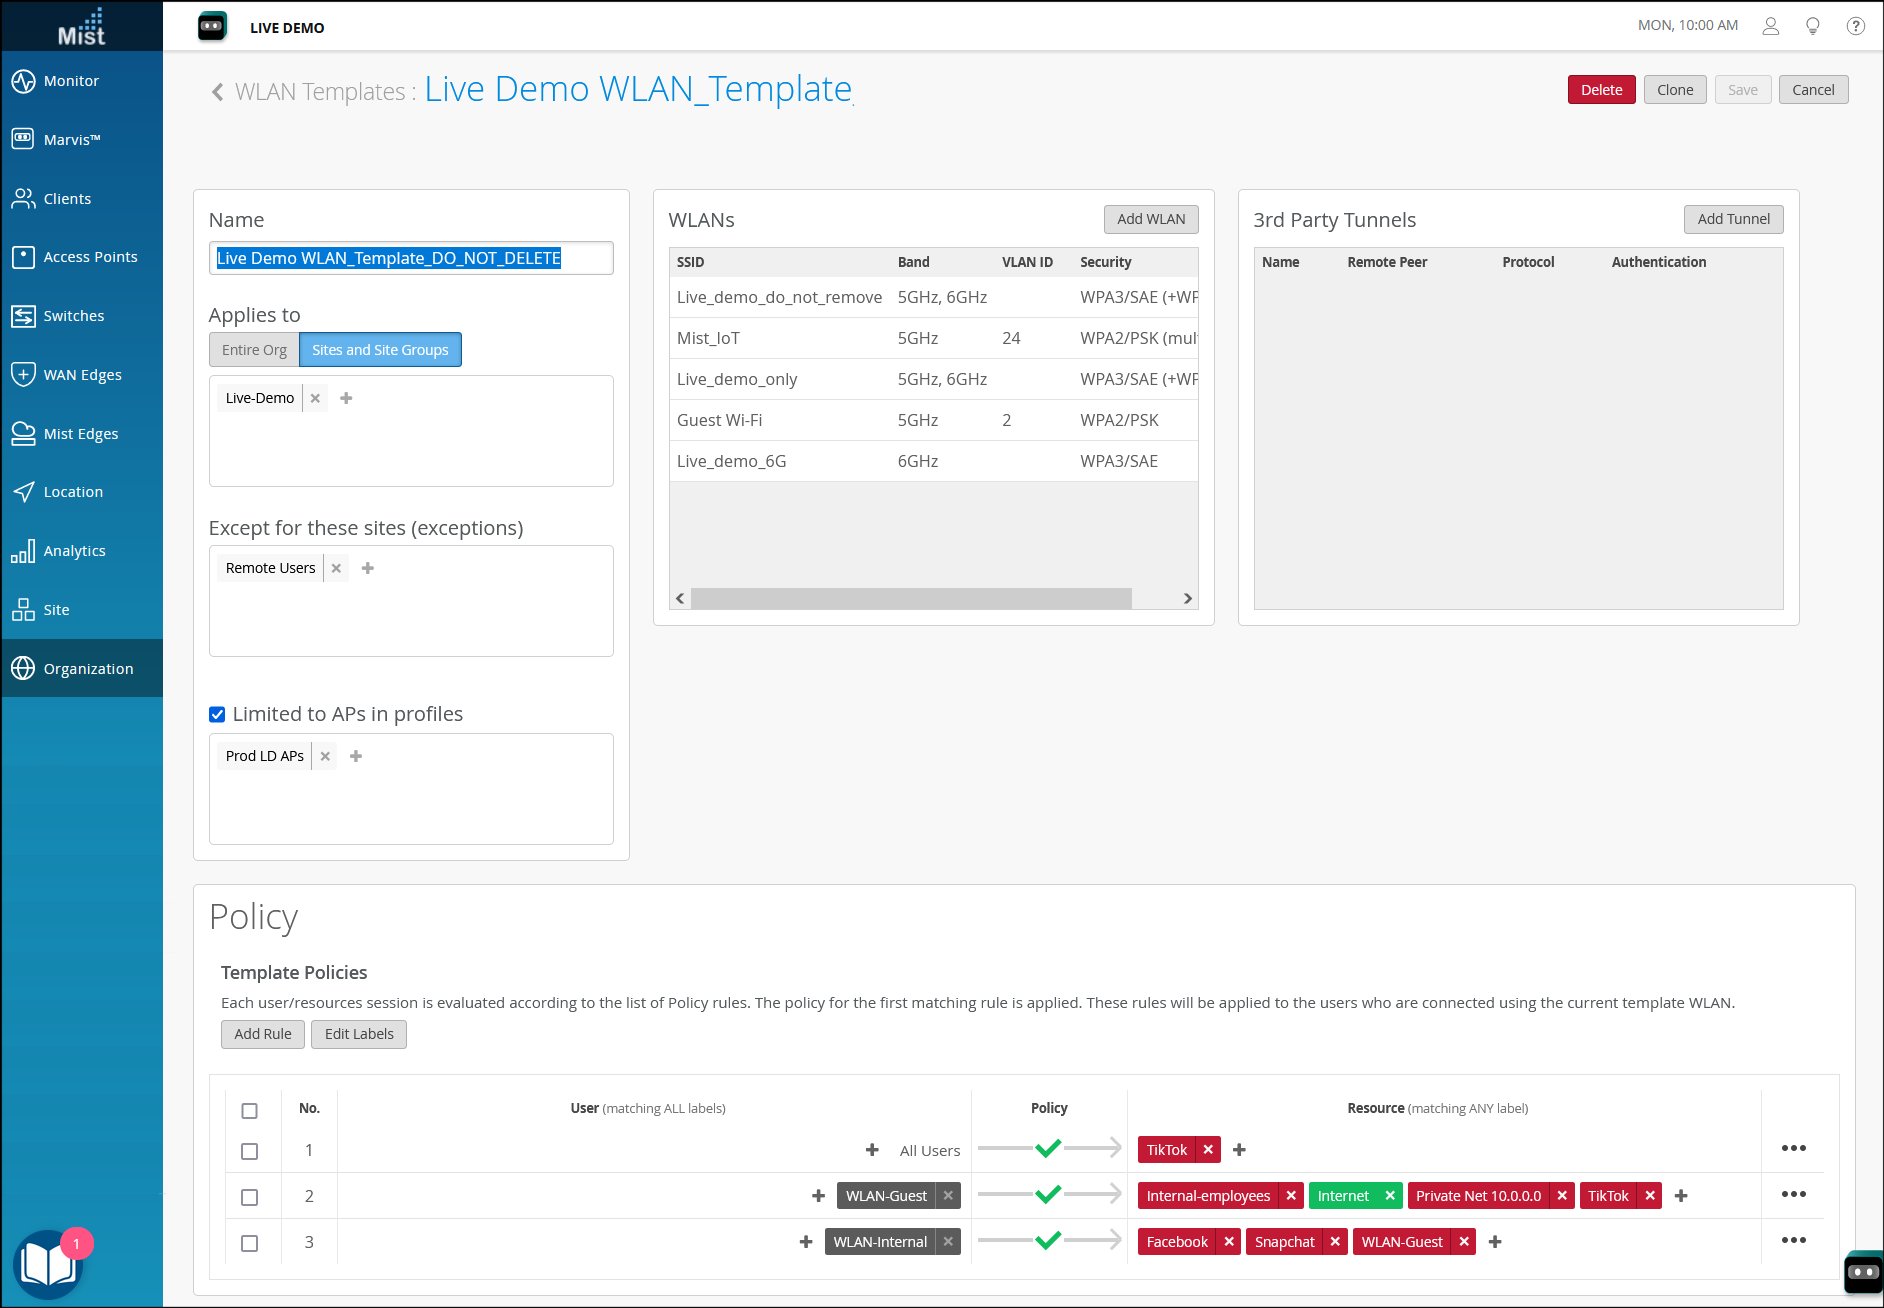
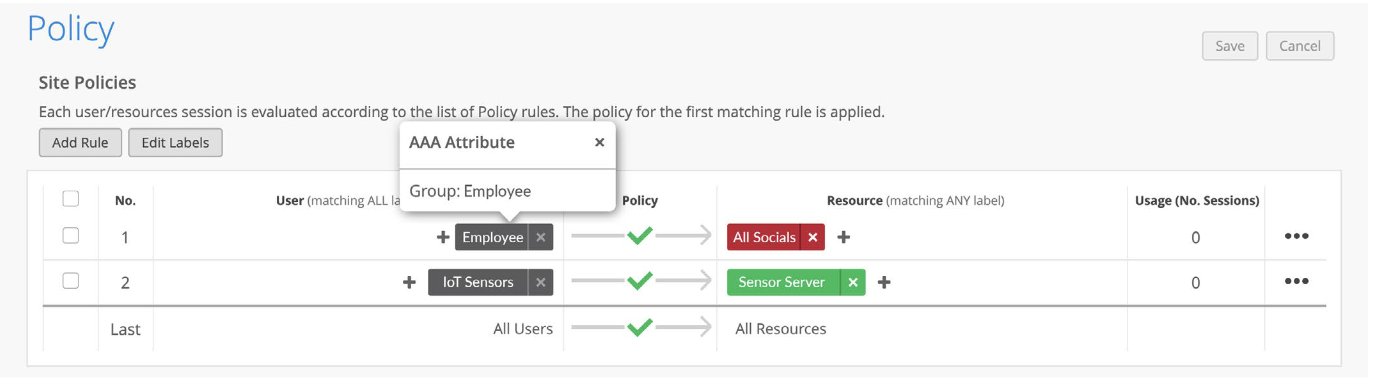
To get started with policies, you'll first create labels to group and identify users and resources. When you create a policy, you'll match users to the resources that they can or cannot access. The following example shows how easy it is to set up your rules. As shown here, you define users on the left and the resources on the right. Color coding shows which resources are blocked (red) or allowed (green).
Watch this video to explore a simple use case. Here, the policy allows a user to access the Internet, a printer, and a television on the network, but no other resources.
Welcome to Mist WxLAN demo. This is about user-centric access control. Mist is about connecting devices and users to things and the Internet. In this case we'll show you my MacBook Air which has a default route of 10.2 1.1 on a network with printers and Apple TV type devices. So here's my MacBook Aire. You could see I could on the left I'm pinging the default gateway and I'm also pinging the Internet via Google. Create a label label is going to be called the Internet and what I'm going to do is define it as not our corporate network and not our guest network. So there's the corporate there's the guest and there we have a label.
Now the policy. I'm going to add a new rule and say this rule applies to guest users, in this case that's just me but could be a group of users and let's see what the network is already found. It's a couple found a couple printers so I'm going to get access to this HP printer. I'm going to get access to this Apple TV wannabe device and I'm also going to get access to you see down there there's the label for the internet. I'm going to click then not. So you'll see as this rule is applied immediately I do not have access to my default gateway as it's on my network but I could see the internet. We disabled I command I go back to having full access so let's re-enable it and this is our Guest configuration.
How Policy Rules Are Processed
-
When you create an access policy in your WLAN template (an organization-level policy), any user who connects through one of the specified WLANs is first evaluated for the policies in the template. If a user does not satisfy any of these rules, then the user is evaluated for site-level policies.
- The various sets of rules are read from top to bottom in the policy.
- Each rule in a set of rules is read left to right.
- If any policy is applied then for any connecting user, it starts reading from the first rule whether that client satisfies all the user labels or not.
- It keeps reading each rule top to bottom until it finds a rule where all user labels are satisfied for that user.
- It then checks which resources are allowed or blocked for this type of user.
- For each rule, operator is set to allow but resources can either be allowed or denied.
- At the bottom of a site-level policy, there is a final default row that is setup for all users and all resources. It can be either blocked or allowed. Any user not falling under any of the policy rules will fall under this row and either all resources will be allowed or blocked for this user based on applied operation.
- If a rule consists of only allow resources, then only that resource is allowed for the user and everything else is denied.
- If a rule consists of only deny resources, then only that resource is denied for the user and everything else is allowed.
- If a rule consists of allow and deny resources, then you must explicitly define all allowed and denied resources. There's no default "deny all other traffic" unless you add a rule such as deny 0.0.0.0/0.
- Resources on the right side are displayed alphabetically and applied most specific in the event of overlapping resources. If multiple labels are created for the same host and applied as resources in the same rule, it is suggested to use the ip/port/protocol label type
Create a Label to Use in a WxLAN Policy
Optionally, you can use labels to streamline the process of setting up WxLAN policies.
In Juniper Mist™, labels represent a collection of users or resources. (You might compare Mist labels to tags or groups in some other applications.) By using one simple label to represent several related items, you avoid having to specify each item individually when you set up an access policy.
You can create a label at the organization level or the site level. The main difference is where you use these labels. You can use organization-level labels in the policies for WLAN templates. You can use site-level labels in site-level policies.
-
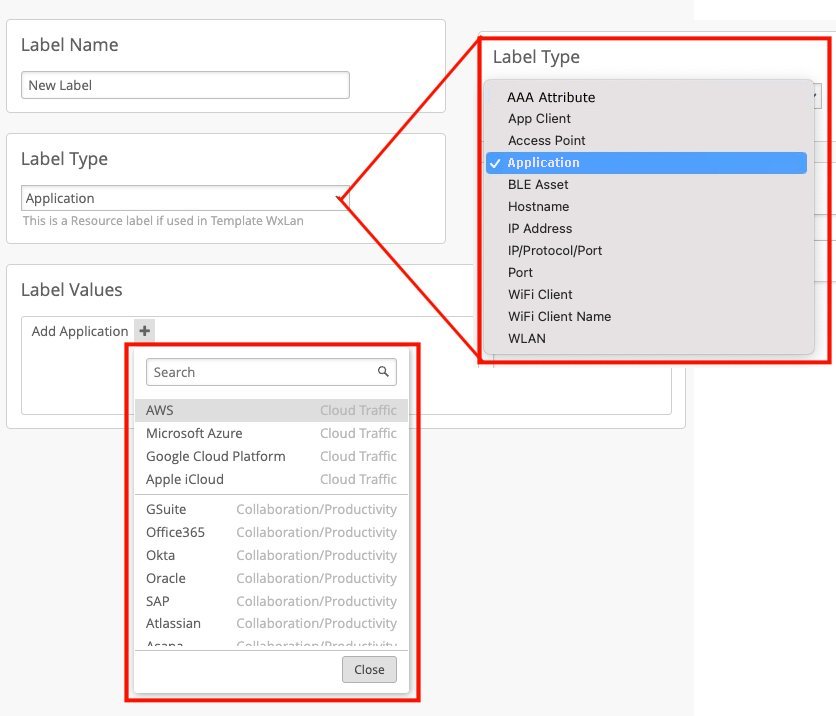
Select a Label Type.
 Note:
Note:Certain label types can only be used for users or resources in WxLAN policies.
-
User types—AAA Attribute, Access Point, WiFi Client, WLAN
-
Resource types—Application, Hostname, IP Address, Port
-
Example: Creating and Applying Labels for Bonjour Filtering
You can use user labels in conjunction with a Bonjour gateway to prevent or allow access to Bonjour services that are available on a different VLAN than the WLAN or user.
The following RADIUS attributes, present in access-accept AAA message type, are supported for user labels: Filter-Id, aruba-user-role, and Airespace-ACL-Name.
To create a user label for Bonjour filtering:
In the Juniper Mist portal, click Organization > Admin > Labels.
Click Add Label.
Enter a name and define your label:
Label Type—Select AAA Attribute.
Label Values—Select User Group.
User Group Values—Enter the RADIUS attribute value that you want to connect this user role to.
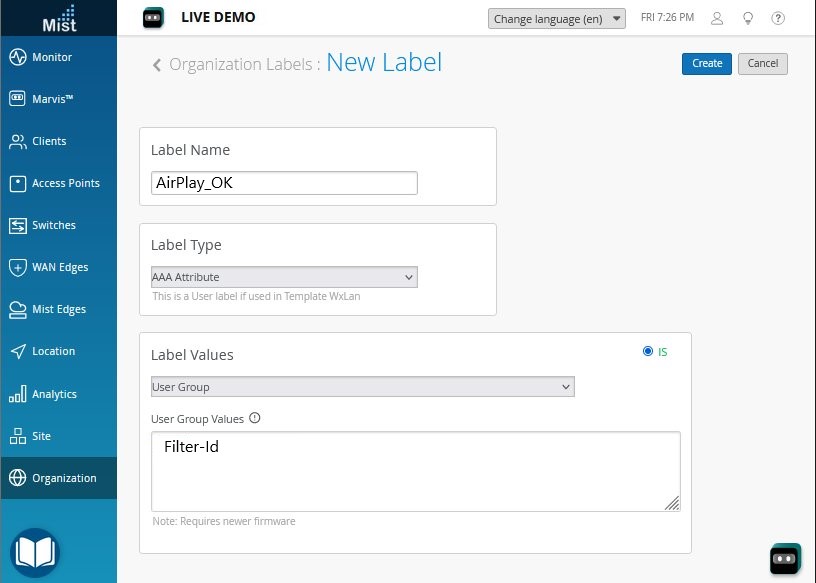
Click Create at the top of the page.
Identify the clients to associate with this label.
In this animated GIF, you see how to select the clients on the WiFi Clients page and edit the client properties to assign a label that you created earlier.
To replay the animation, right-click, and open it in a new tab. Use the refresh button to replay it as needed.
Your labels will now be available in the drop-down list when you're selecting Users or Resources for an WxLAN policy.
Create a User Access Policy
Before you begin: If you don't already have user and resource labels for the organization, you need to create them. For more information, see Create a Label to Use in a WxLAN Policy.
To create a WLAN access policy:
-
Click the add icon (+) in the
Resources column and select one or more predefined
applications from the list. You can also define a new resource if you prefer,
and these will appear at the top of the list.
Note:
For help creating resource labels, see .
In this example, you see a policy with multiple rules and rules with multiple resources.