Web Planner Top Menu Bar
The left side of the top menu bar in the NorthStar Planner web UI (all views) displays the main menu icon at the far left (horizontal bars), the name of the currently open network, the protocol the network is using, the currently selected layer (Tunnel Layer or Layer 3), and a drop-down menu for selecting either Design or Simulation mode. The right side of the top menu bar displays icons that provide viewing and administrative functions. See Figure 1.
Many of these options are only available when you have an active session.
Click the network icon (world) for a drop-down list of saving and closing options:
Save Network
Saves your work to the NorthStar data directory. This option is only available when you open a network from the My Networks tab. To save one of the other network types, use the Save As option.
Save Network As
Saves a network to the NorthStar data directory. The Save As window prompts you for a network name and an optional description. The saved network is then available to you from the My Networks tab.
Note:Spaces and most special characters are not allowed in network names. Hyphens and underscores are allowed. These restrictions do not apply to descriptions.
Load Network File
Loads one of the many files that comprise the current model. You can use the Load option to modify the current model since a direct Modify function is not yet available. The workflow is to download a file, modify it, save it, and then upload the edited version, refreshing the model. See Loading Network Files for the procedure.
Restore Network
Overwrites the current network with the last auto-saved network. A dialog box is displayed listing the timestamp of the current data and the timestamp of the last auto-saved data, so you can compare and be sure of which data you want to keep.
Warning:Proceeding with this option from the dialog box (by clicking RESTORE) means the current data would be lost and you would not be able to undo the action.
Detach Current Network
Detaches the network from your current working session.
Close Network
Closes the network you currently have open. The name of the open network disappears from the upper right corner of the Planner window. If you are in any main view other than Network Browser when you close the network, the display returns to Network Browser where you can select a network to open.
It’s completely fine to log out of Planner or close your browser without explicitly closing your session; the session will be available for you to resume your work when you log back in because it is still active on the server. This can save you considerable loading time when you start work again. However, we do recommend that you save the session periodically and before you leave it for a period of time (overnight, for example).
Note:Remember that if you explicitly close a network without saving it, your work is not preserved.
You can have multiple sessions active on the server, but be aware that each one consumes one Planner license. Also, although you can have multiple sessions active on the server, your browser can be connected to only one at a time. If you have one open in your browser and you open another, it will replace the first.
Click the Layers icon (stacked squares) to select either Layer 3 or Tunnel Layer for display and simulations. Layer 3 is the default. You can always see which layer is currently selected by looking on the left side of the upper menu bar.
The Update Network icon (clock and arrow) updates the network with changes from the server. NorthStar Planner does not have a way to listen for server changes, but it does get messages from the server when there have been changes. When Planner receives update messages, it changes the color of the Update Network icon to indicate that updates are pending. You can then choose a convenient time to click the Update Network icon and refresh the display.
Click the user icon (initial in a colored circle) to view your account settings or to log out of NorthStar Planner. The account settings window allows you to change your password, update your contact information, and select time and date related preferences.
Click the More Items icon (vertical dots) to select one of the following options:
Browse Files
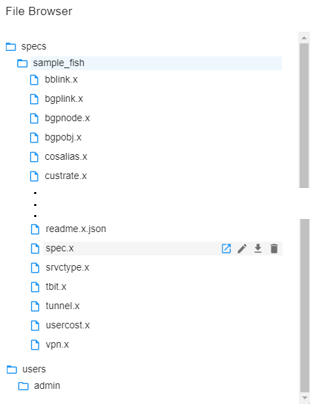
This option opens the File Browser window displaying the available spec and user files. Mouse over any file to see which of the following functions are available for that file: open the file, edit the file name, download the file, delete the file. Figure 2 shows an example of the File Browser window.
View Active Users
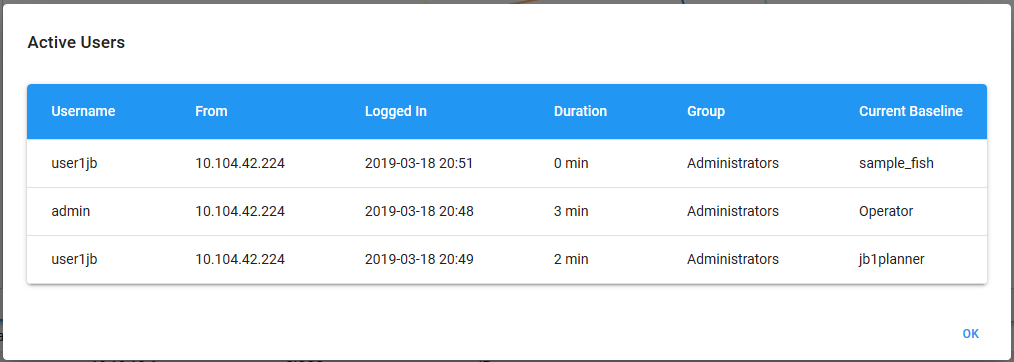
Select View Active Users to display a list of users currently logged into the Planner as shown in Figure 3.
The Current Baseline column shows the name of the network each user has open.
Note:At this time, there is no user management in the NorthStar Planner web UI. New users must be created in the NorthStar Controller. See User Management.
View Console
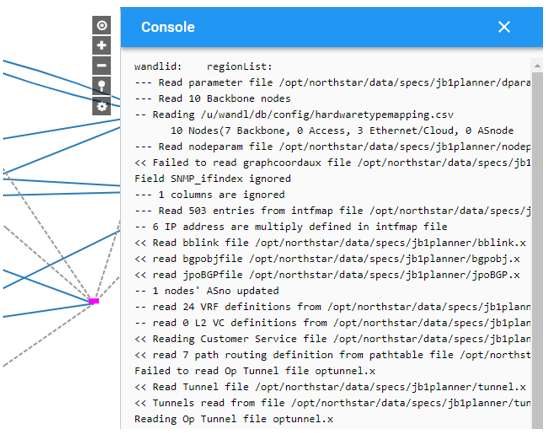
View Console is only available in Topology View. When you select this option, the console opens on the right side of the Planner window as shown in Figure 4.
The console displays information when loading a network, reading files, running failure simulation, generating reports, and various other functions. You can use the console to trace through information in detail.
Traffic Aggregation
Selecting this option opens the Traffic Aggregation window in which you can specify parameters for extracting performance data from the analytics database for use in modeling, simulation, and trending. See Web Planner Traffic Aggregation for more information.
About
Selecting this option displays the current version of NorthStar Planner, along with license information.


