Import Configlet
Import a configlet and specify where to apply it in the blueprint.
You've created a configlet in the design (global) catalog. Now you'll import it into your blueprint catalog, set conditions and specify where to apply it in the blueprint.
-
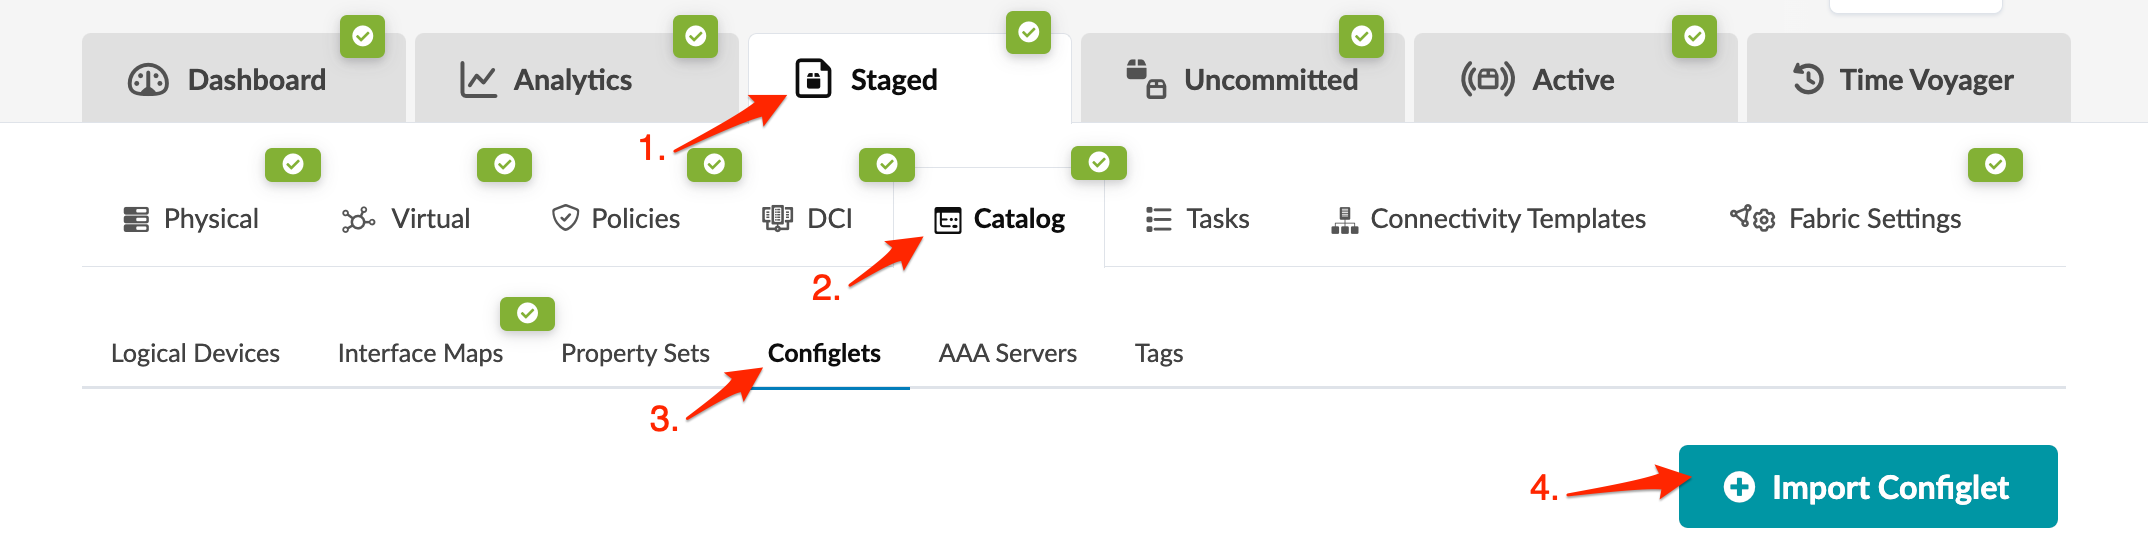
Go to the configlets catalog in the blueprint. You can get to it in a couple of
ways:
-
From the blueprint, navigate to Staged > Catalog > Configlets to go to the configlets catalog.
-
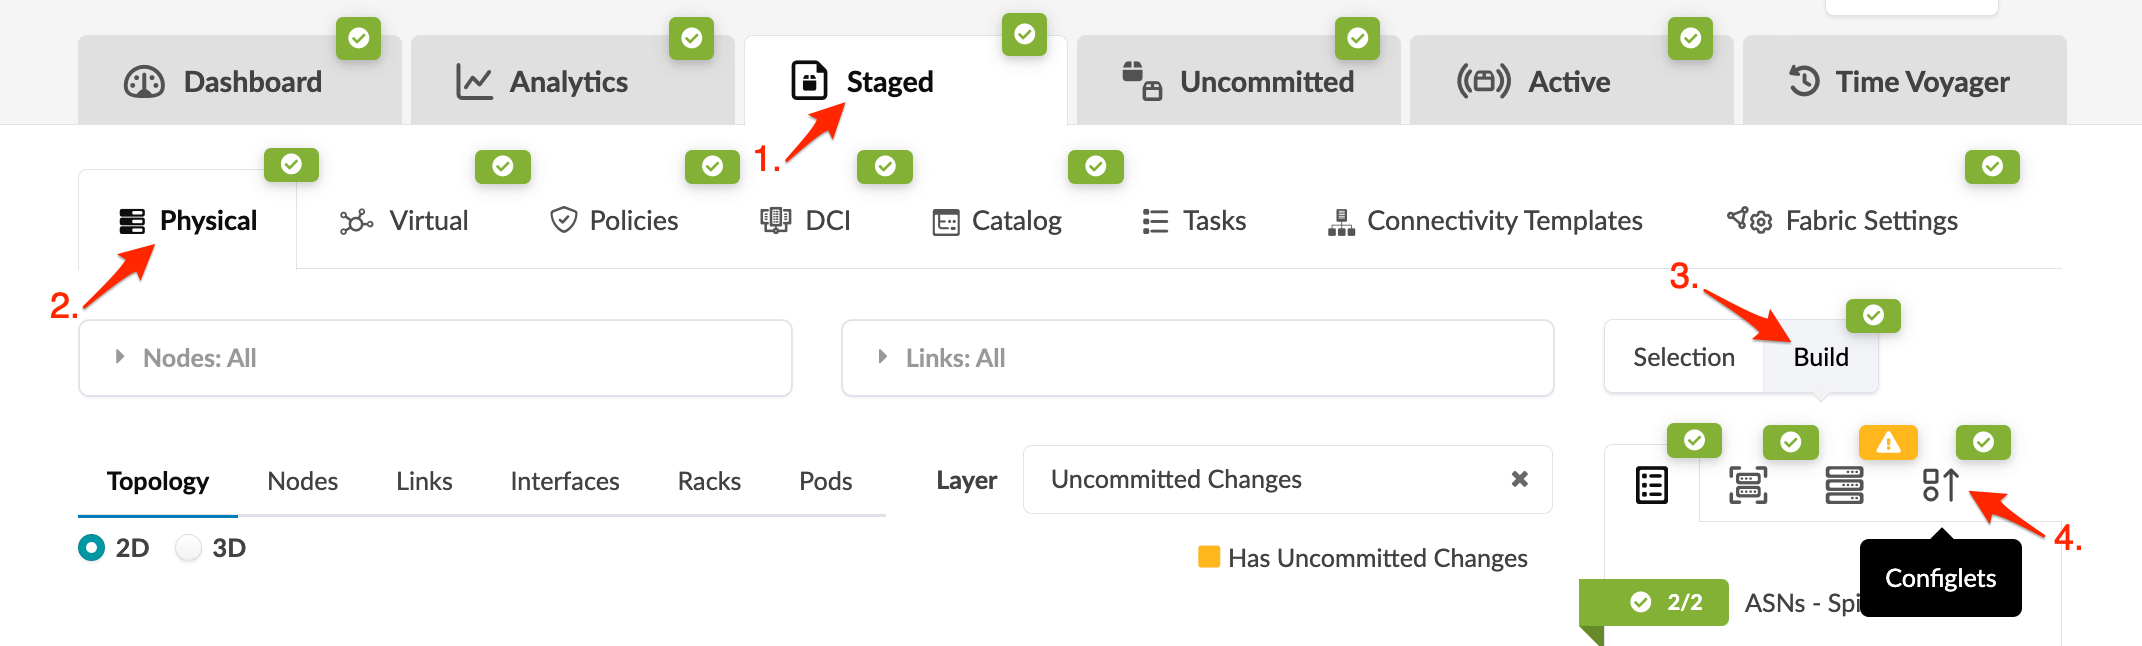
Or, navigate to Staged > Physical > Build > Configlets, then click Manage Configlets to go to the configlets catalog.
-
-
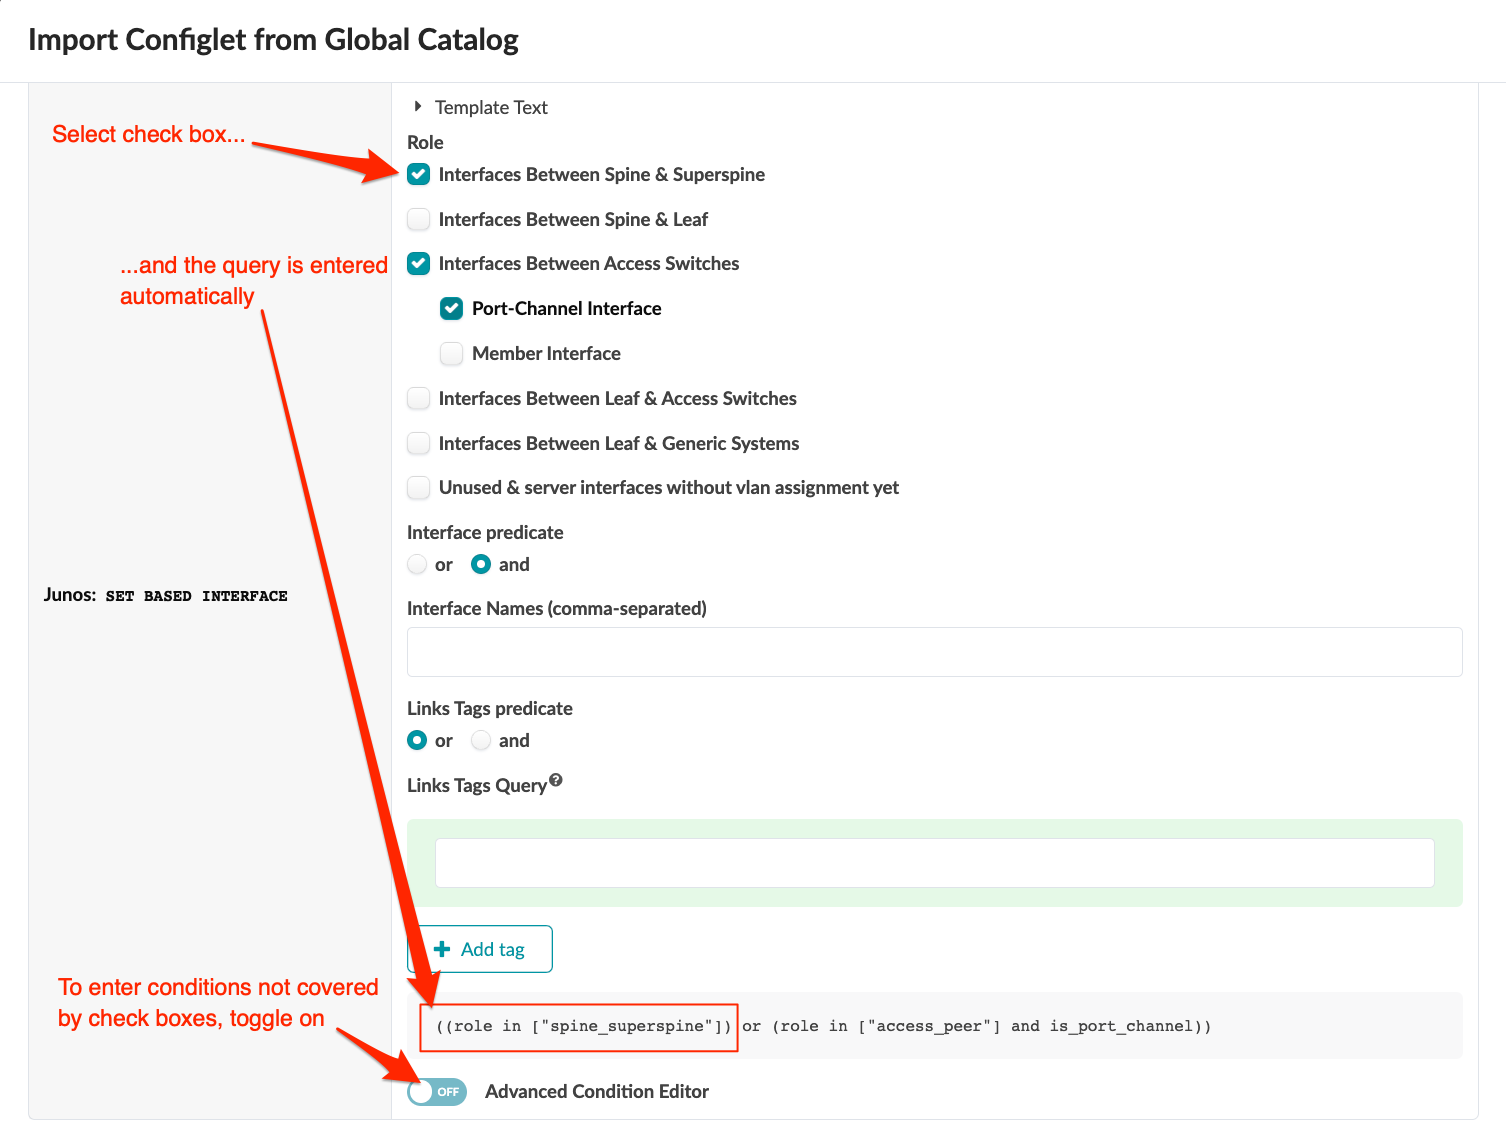
If you're importing a configlet with a section for interfaces, you can define the
conditions for applying the configlet. Select check boxes for one or more interface roles,
enter specific interface names and/or link tags. If conditions are not covered by the
check boxes, toggle on the Advanced Condition Editor. The
conditions field becomes editable and you can enter specific conditions.
-
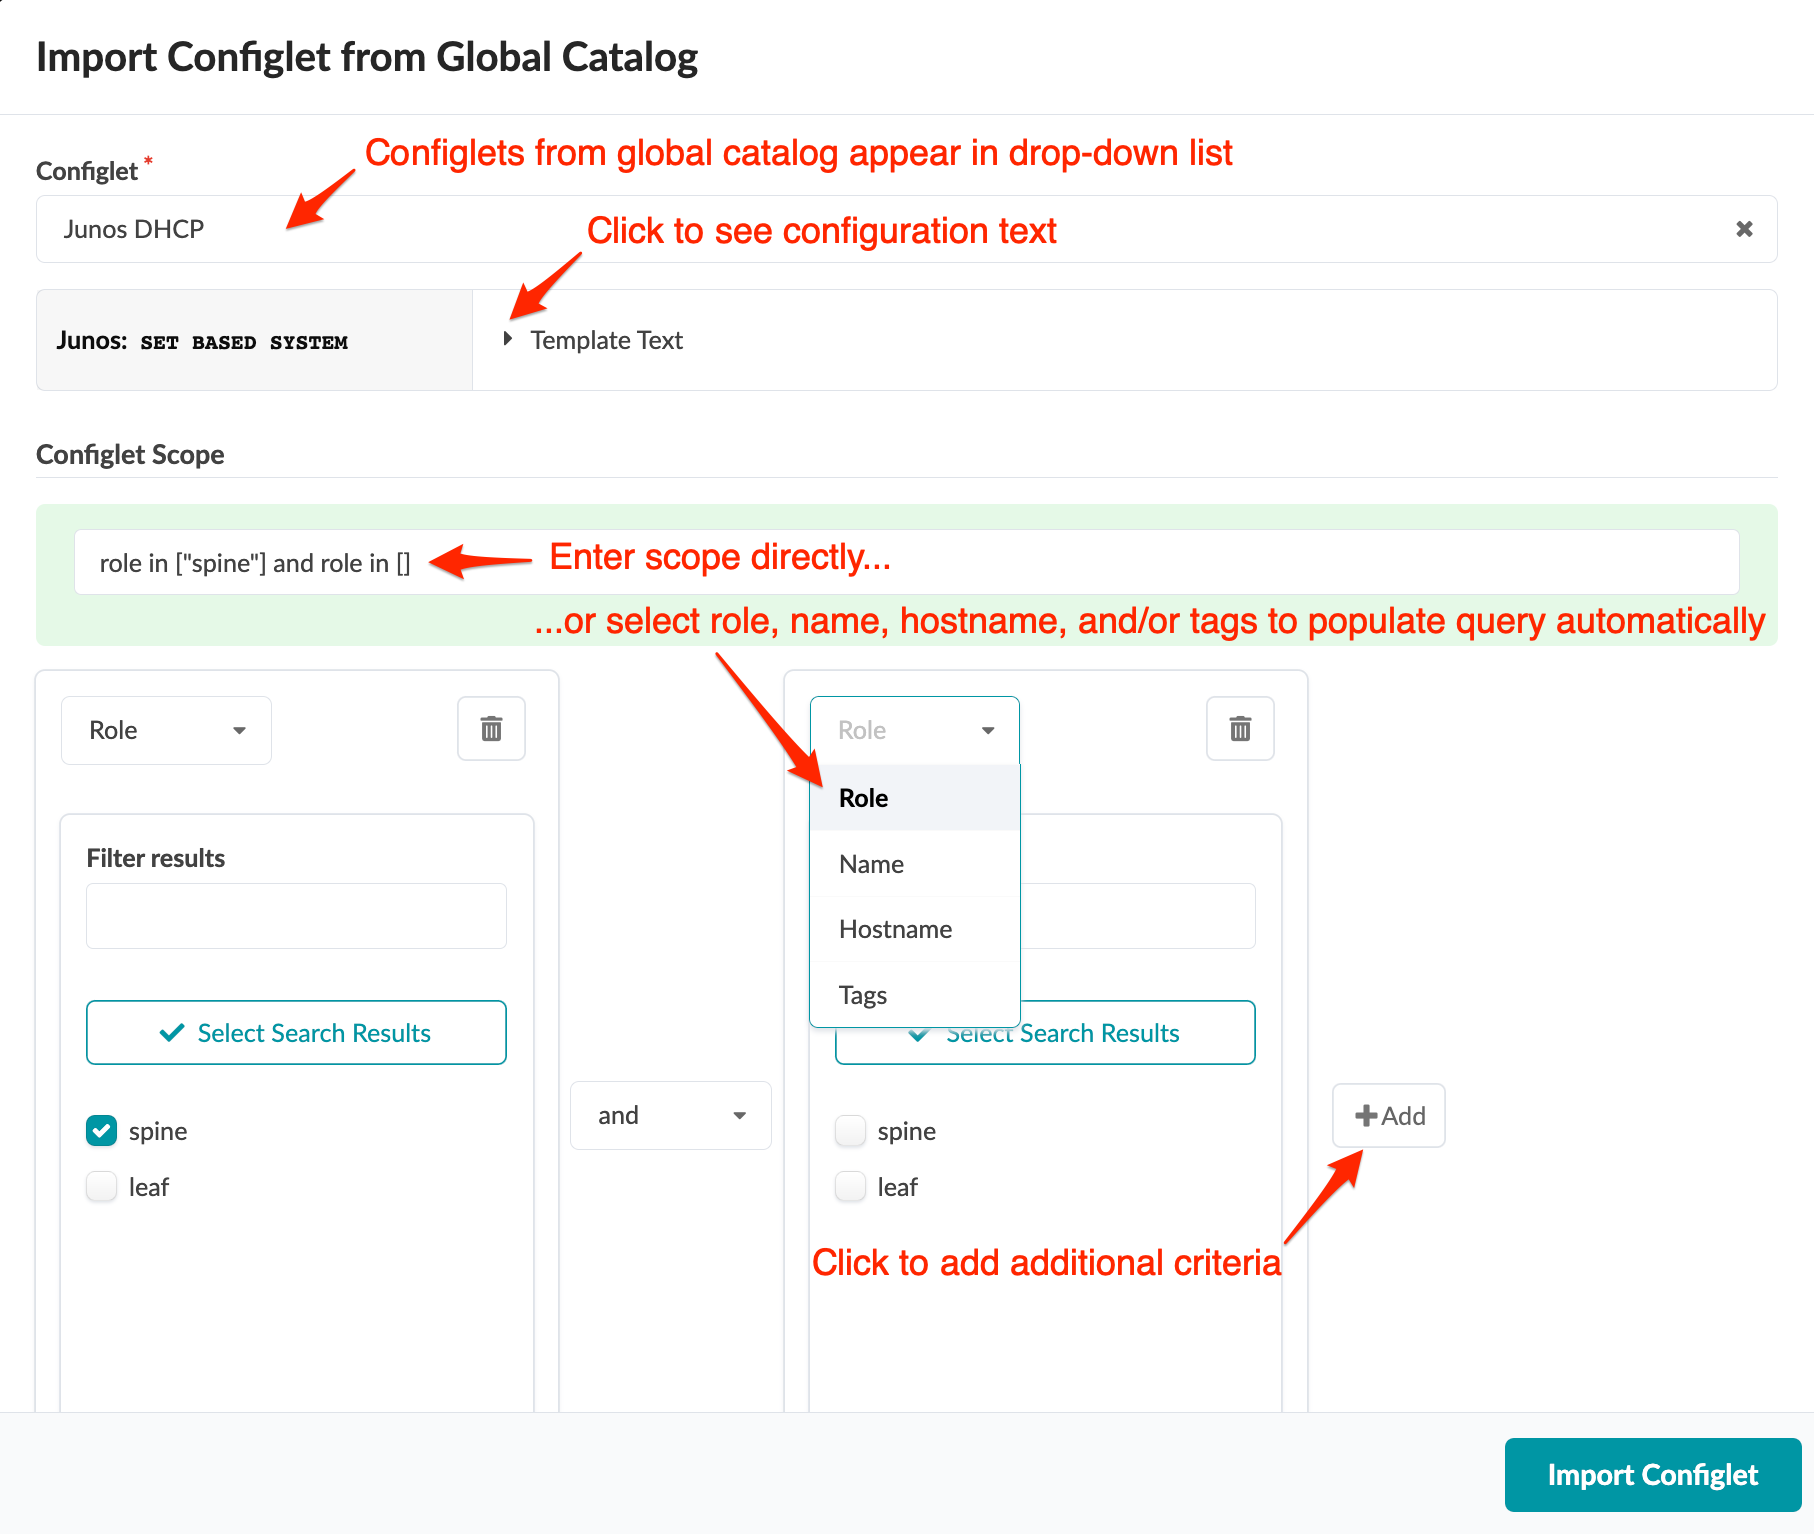
For all configlet types, specify the application scope. For example, you may want to
apply the configlet to all generic systems that you've tagged as firewalls. Instead of
listing all applicable generic systems, you can just add one tag to the scope. You can
define the scope in a couple of different ways:
-
Enter scope (query) directly. Auto-complete assists you as you type.
-
Select Role, Name, Hostname or Tags from the drop-down list, then select the check boxes that apply. (You can apply tags to interfaces as of Apstra version 4.2.0.) To add an additional definition, click +Add.
-