Update Interface Tag (Datacenter)
You can add tags to interfaces and use them for configuration.
You can manage interface tags from various locations in the Apstra GUI.
Update from Topology Neighbors View
-
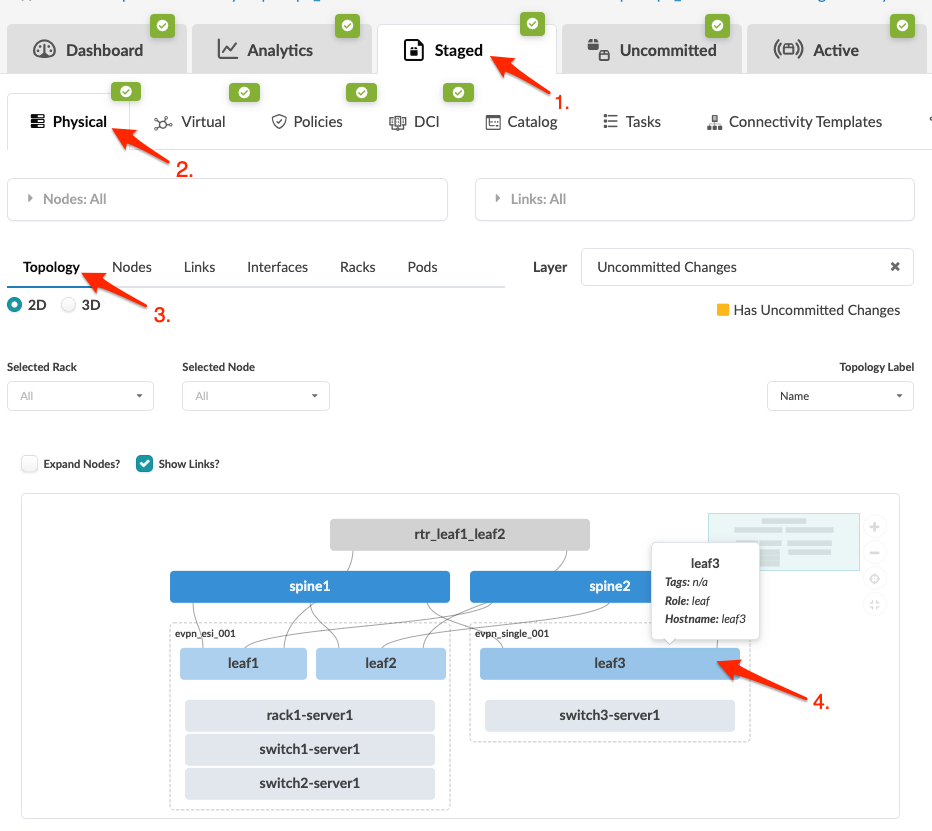
From the blueprint, navigate to Staged > Physical >
Topology and select the leaf with the interface to
tag.
-
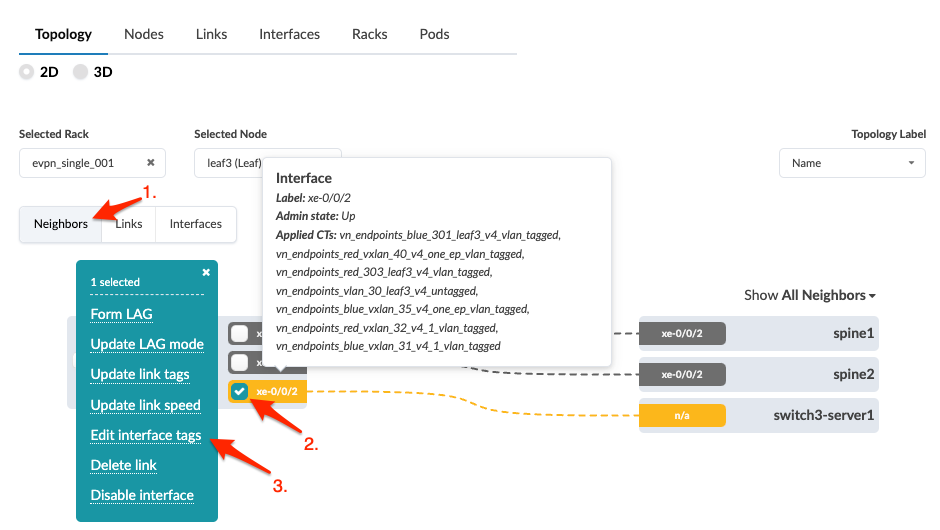
Select the check box for the applicable interface, then click
Edit interface tags.
-
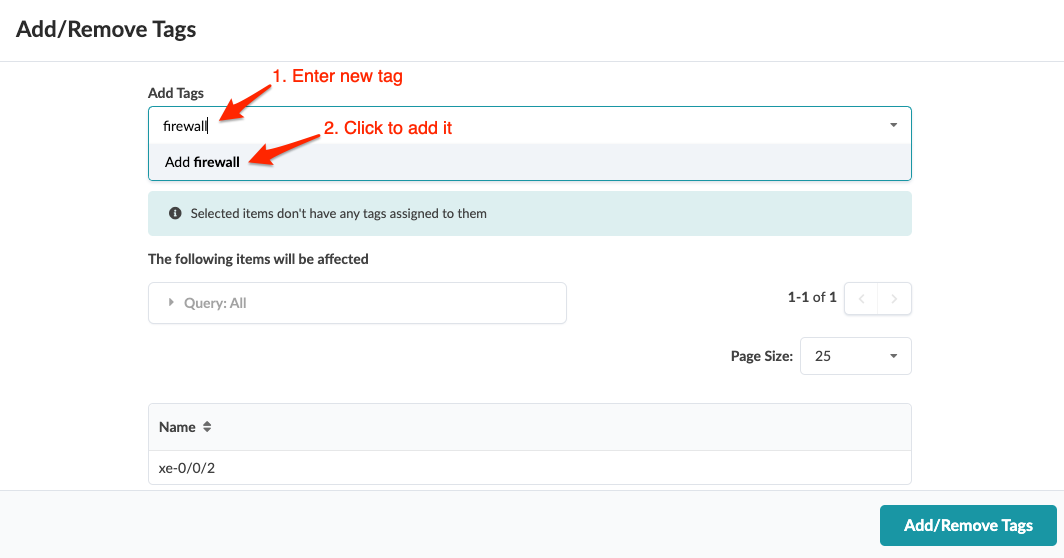
Select or deselect existing tags from the drop-down lists and/or add new
tags, as needed.
To deploy the change to the active blueprint, commit
from the Uncommitted tab.
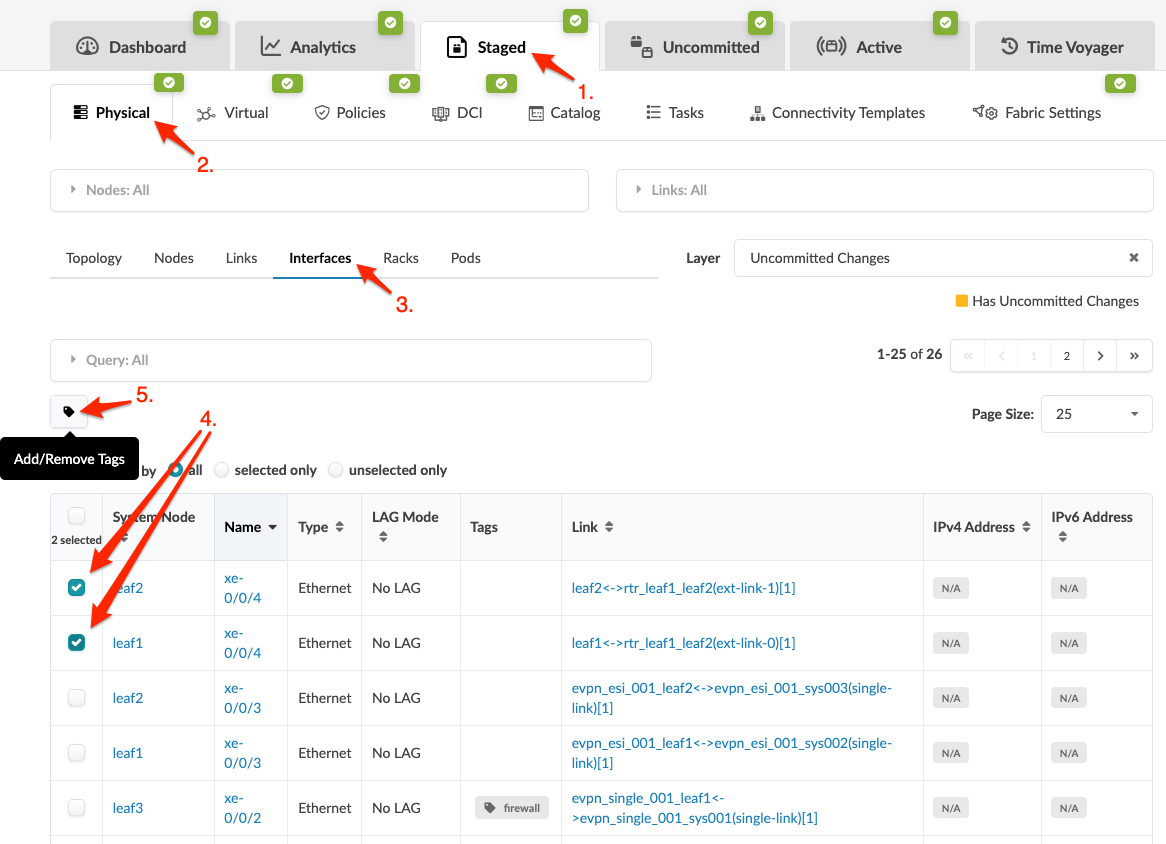
Update from Topology Interfaces View
-
From the blueprint, navigate to Staged > Physical >
Topology and select the leaf with the interface to
tag.
-
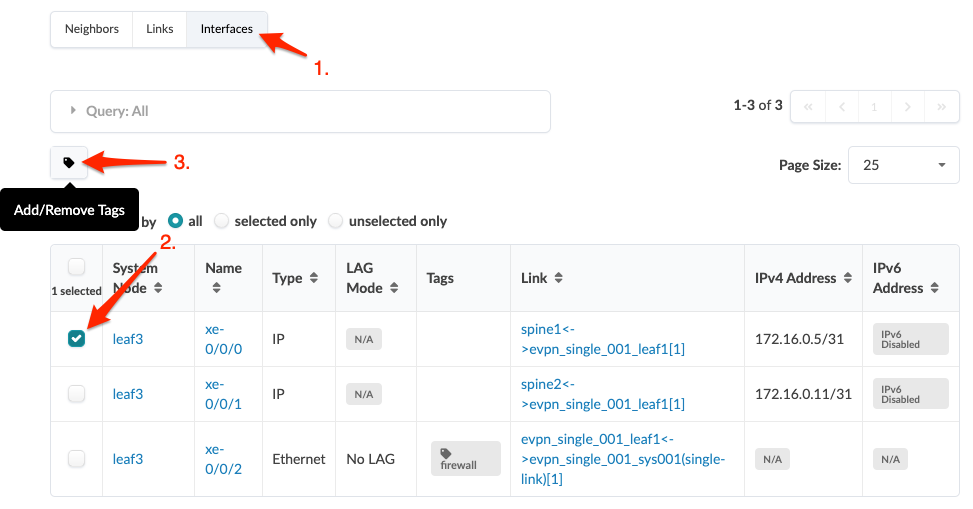
Click Interfaces view, select one or more check
boxes for the interfaces to tag, then click the Add/Remove
Tags button that appears above the table.
To deploy the change to the active blueprint, commit
from the Uncommitted tab.
Update from Interfaces Table
-
From the blueprint, navigate to Staged > Physical >
Interfaces and select one or more check boxes for the
interfaces to tag.
To deploy the change to the active blueprint, commit
from the Uncommitted tab.