Create a Greenfield Deployment For a New Data Center Network
This section shows how to perform zero-touch provisioning to build a new data center fabric from scratch (sometimes called a greenfield deployment) To do so, we are using Contrail Command, the user interface for CEM.
Figure 1 shows the edge-routed bridging topology that we will use in this example.

Before You Begin
Before you begin building a new fabric, you need to do a few tasks.
- Information to Obtain
- Cable Your Devices
- Cable Your Management Network
- Install Contrail Software
- Create YML File
- Put Fabric Devices in a Factory-Default State
Information to Obtain
IP address ranges for your management network, fabric interfaces, and loopback interfaces.
Autonomous system (AS) number for the iBGP fabric overlay
AS number range for eBGP in the fabric underlay.
Serial numbers of the devices in your fabric.
You can use 4-byte AS numbers. To do so, select Intrastructure > Cluster > Advanced Options. Then select the pencil to edit the system configuration. Changing this value to enabled causes all BGP sessions to use 4-byte ASNs.
Cable Your Devices
Connect the interfaces between the fabric devices. Make sure to connect all leaf devices to all spine devices, and all spine devices to all leaf devices.
Do not connect similar devices to each other. For example, do not connect a cable between one leaf device and another leaf device, nor between two spine devices.
Cable Your Management Network
Cable the management network including all of the devices that will be in the data center fabric. The resulting out-of-band (OoB) management network should include the fabric devices and the Contrail Cluster components.
Install Contrail Software
You need to connect a server to your management network and install Contrail software. See Installing Contrail Command and Installing a Contrail Cluster Using Contrail Command.
Create YML File
You must create a file in .yml format that is uploaded to Contrail as part of the process of creating a fabric. You can use Contrail Command to first download a generic template to edit with the specifics of your installation.
The .yml file must contain the serial numbers of all devices to which ZTP is performed.
You can also include hostnames in your file, and the hostnames are assigned for your devices during ZTP. If you don’t specify hostnames, Contrail Software uses the serial number of the device.
You also have the option to include loopback addresses and the ASN of the underlay.
There is a field called to_ztp that you can set to true or false. You can use it to include or ignore devices in the ZTP workflow.
A device information .yml file is in the following format:
device_to_ztp:
  - serial_number: 'WS3718030113'
    hostname: 'DC1-Access-Leaf-1'
    supplemental_day_0_cfg: ["Interface-Speed","Base-Config"]
    device_functional_group: 'Lean-Spine-with-Route-Reflector'
    loopback_ip: "172.17.254.241"
    underlay_asn: "64641"
    mgmt_ip: "10.87.110.111"
    to_ztp: "True/False"
You can also specify a JunOS image release version, and devices will be upgraded to that version during ZTP.
Put Fabric Devices in a Factory-Default State
Make sure the fabric devices have not been configured and are in a zeroized, factory-default state and bring them online.
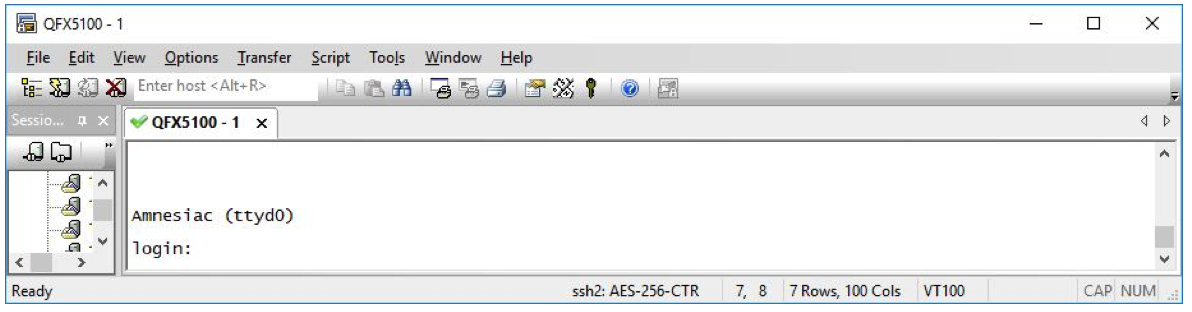
To place devices in a factory-default state, enter the request system zeroize command at the Junos OS CLI.
Junos OS devices display Amnesiac on the login screen
when in the proper state.
Creating the New Fabric and Discovering Devices
Once you complete the tasks in Before You Begin you can use zero-touch provisioning to create a new data center fabric and launch the device discovery process. To begin:
- Open a web browser, navigate to the Contrail Command URL,
enter your user name and password, and click Log in.
The format for the Contrail Command URL is
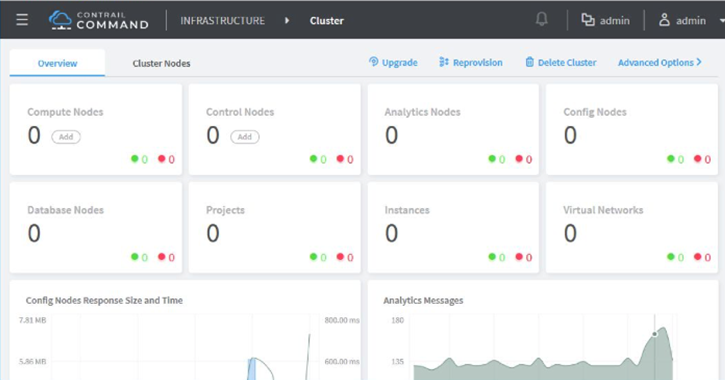
https://contrail-command-server-ip-address:9091. 9091 is the port that gives you access to Contrail Command.Contrail Command displays a status dashboard as the home page.
- Navigate to Infrastructure > Fabrics and click Create.
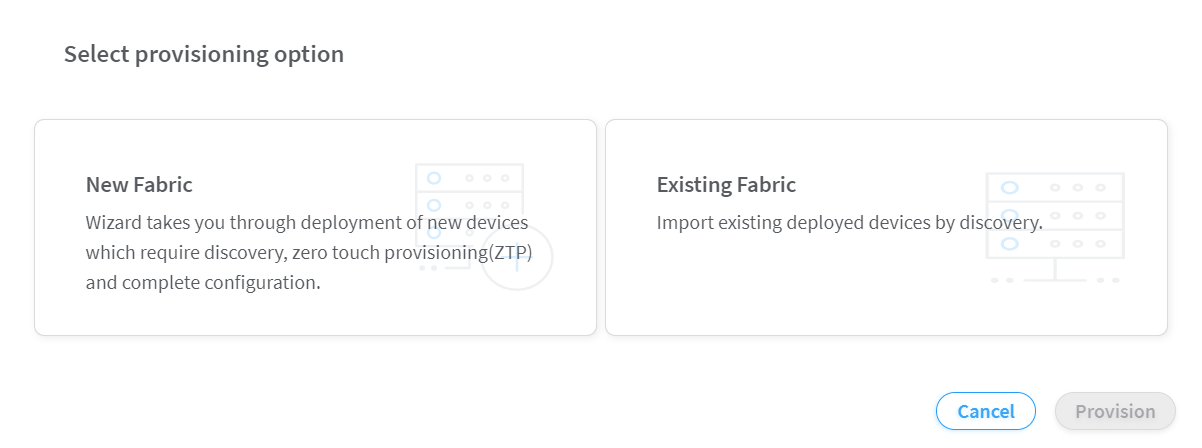
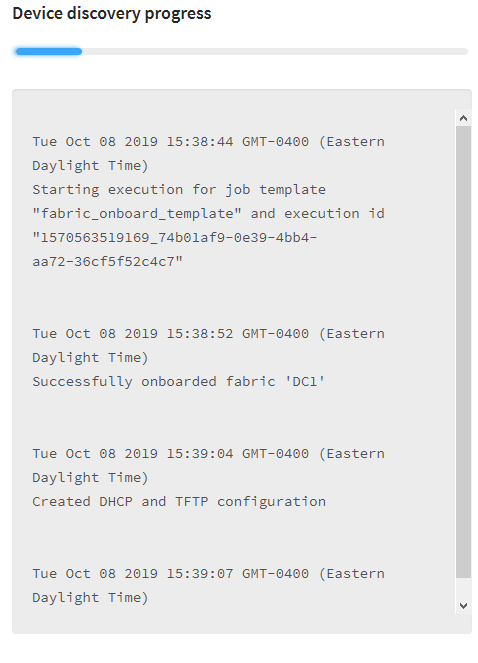
- Click Next. The device discovery process begins.
The device discovery process discovers devices, physical interfaces, and logical interfaces. Expect this process to take 10 minutes or more to complete.
Assigning Roles to Devices
After the new fabric devices are discovered, you need to assign the roles that the devices will perform in the fabric. Assigning roles to devices tailors the data center design and determines whether there is distributed or centralized routing.
To assign device roles:
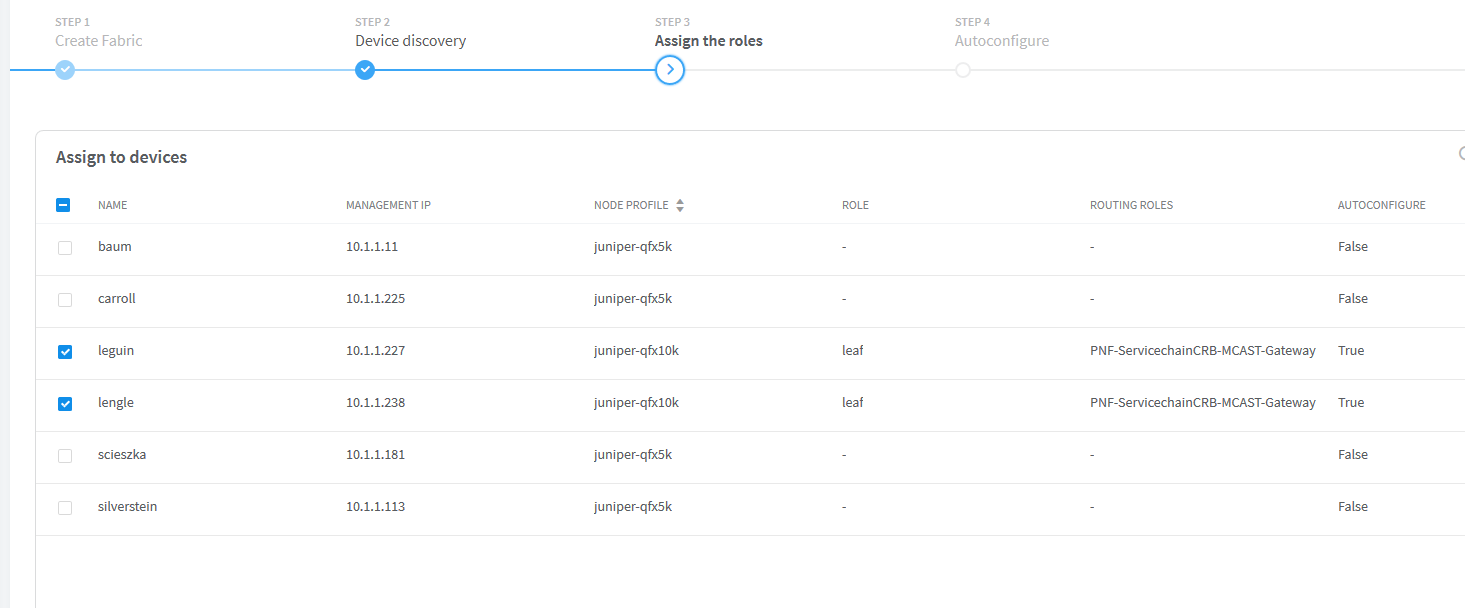
See Device Roles for information about configuring roles.
Applying the Role-Based Configurations to the New Fabric Devices
After you have assigned roles to the fabric devices, it is time to generate role-based configurations and push them to the devices. The autoconfigure process handles this task and simplifies the process of configuring the fabric devices.
To autoconfigure the fabric devices with their role-based configurations:
- Click Autoconfigure.
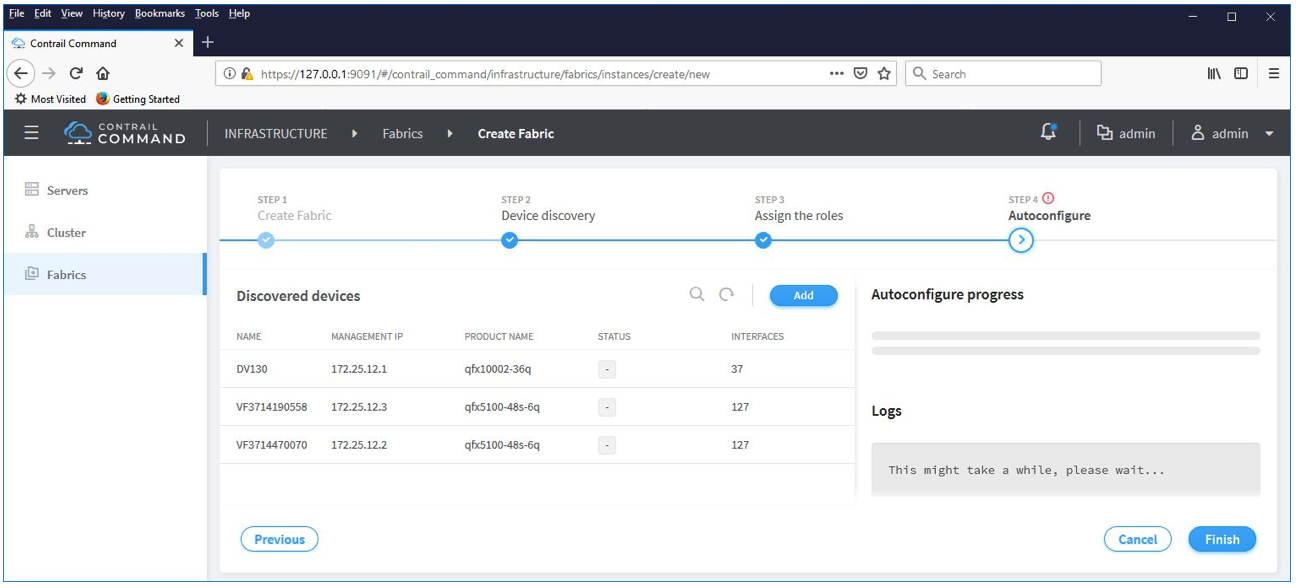
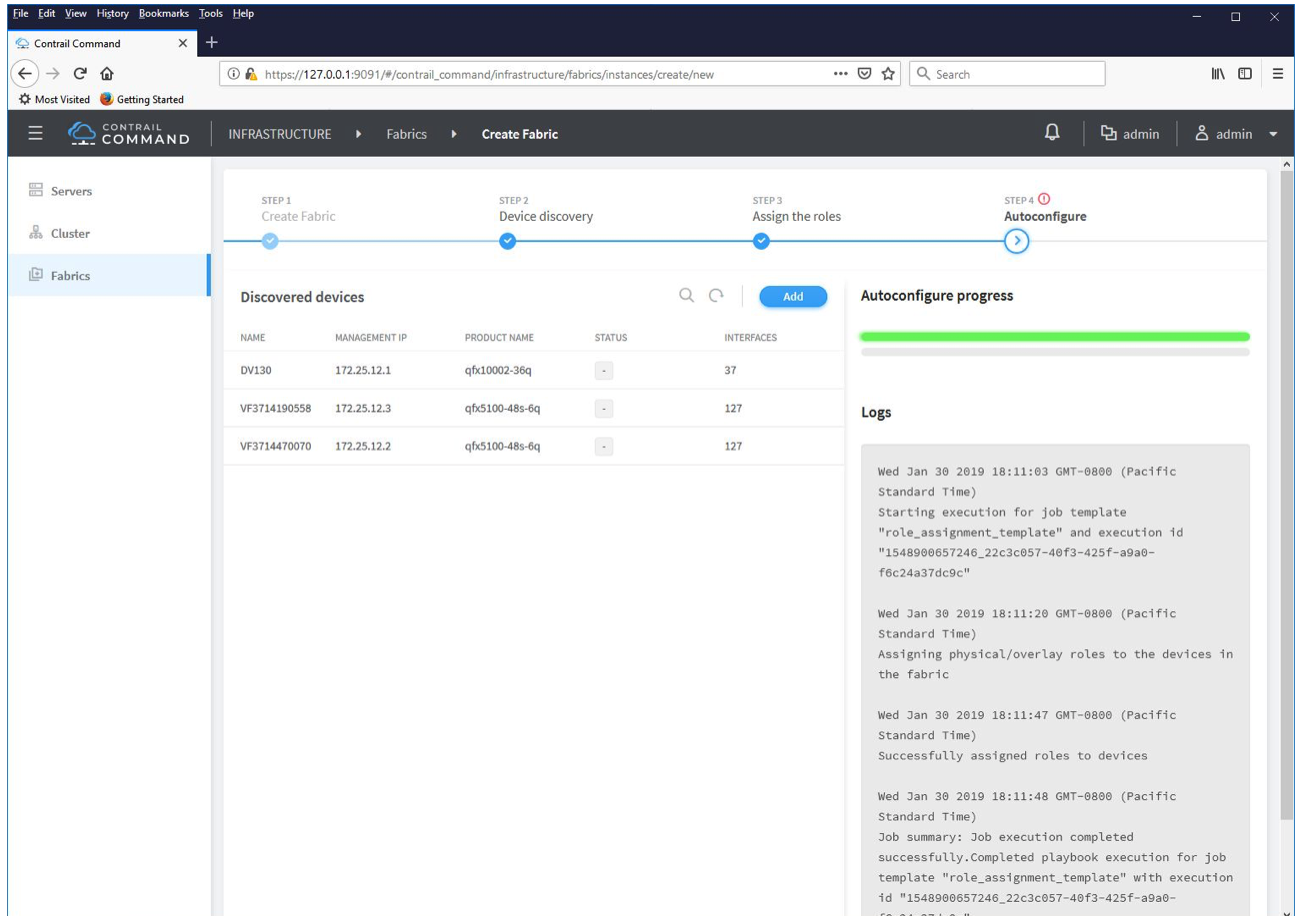
- Monitor the status of the autoconfiguration process. The Logs section of the screen and the Autoconfigure progress status bar display the progress of this process.
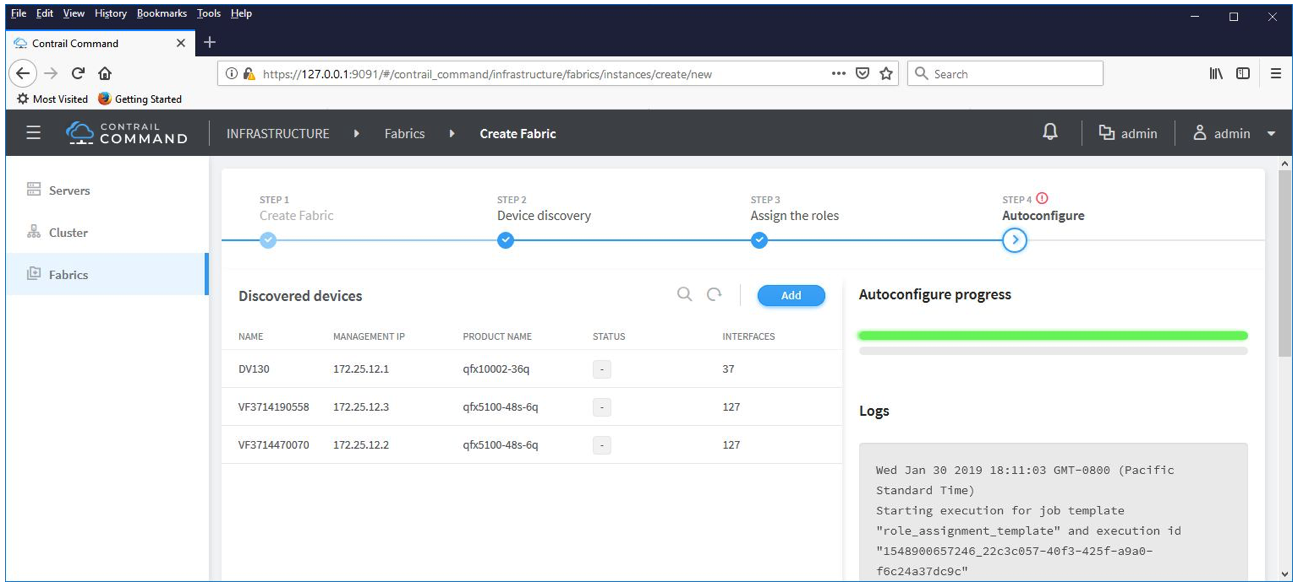
- The autoconfiguration process completes when the device
configurations are pushed to each fabric device based on their role.
When the Autoconfigure progress bar turns green and Job execution completed successfully appears in the Logs section (as shown below), you’ll know that the process is done.
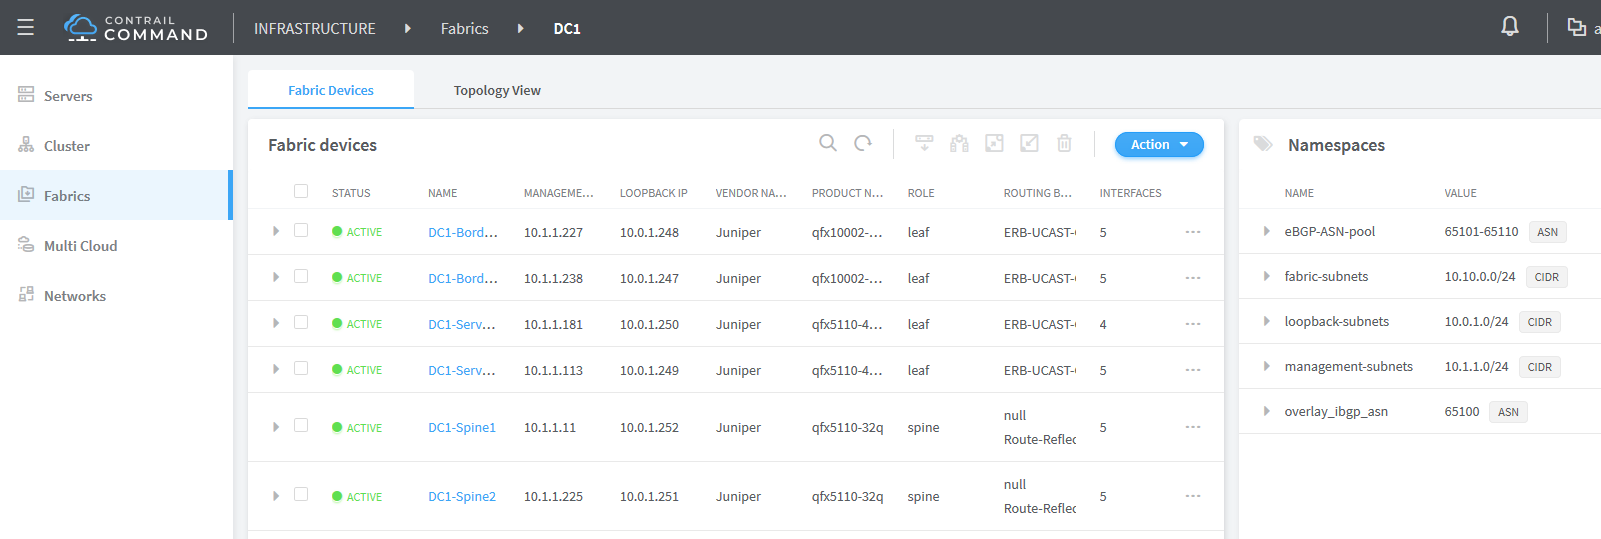
- On the resulting screen, you can view the completed status
of the new fabric. This includes the subnets for the fabric devices,
loopback interfaces, and management network; along with the device
roles and interfaces. To navigate to this page manually, go to Infrastructure > Fabrics > Fabric
Name.