Add Wayfinding Paths to a Floorplan
Follow these steps to ensure successful wayfinding experiences by including wayfinding paths on your floorplans.
In a Juniper Mist™ implementation, indoor location wayfinding paths are just like roads in a GPS navigation application. The wayfinding paths are the routes that users travel to reach their indoor destination, usually in the form of hallways, corridors, or intersections. You should be familiar with the physical space before you add wayfinding paths to the floorplan.
Wayfinding paths are not required for indoor location wayfinding. However, we strongly recommend that you configure these paths so that the blue dot on the user’s mobile app will snap to the path that you want users to follow. The blue dot will separate from the path when a user strays away.
When creating a wayfinding path, follow these best practices:
-
Minimize the number of wayfinding paths on the floorplan. Draw a single, long path for a single hallway, for example. This approach reduces error and prevents gaps between paths. It also reduces the chance of the blue dot moving around jumpily while the user is on the path.
-
If you have multiple paths, make sure that they are truly connected and that no gaps exist. To avoid potential issues, draw paths so that they intersect one another.
-
Delete any excess segments or nodes by selecting them and then clicking Delete on your keyboard.
-
Add paths for narrow walkway areas such as hallways, corridors, or any areas where your users need guidance.
You do not need to add paths to open areas, such as a cafeteria. As users move around the area, the blue dot guides them toward nearby paths.
Adding wayfinding paths to the floor plan is strongly recommended, as this ensures that the blue dot on the user's mobile app will snap to a path when a user is in close proximity.
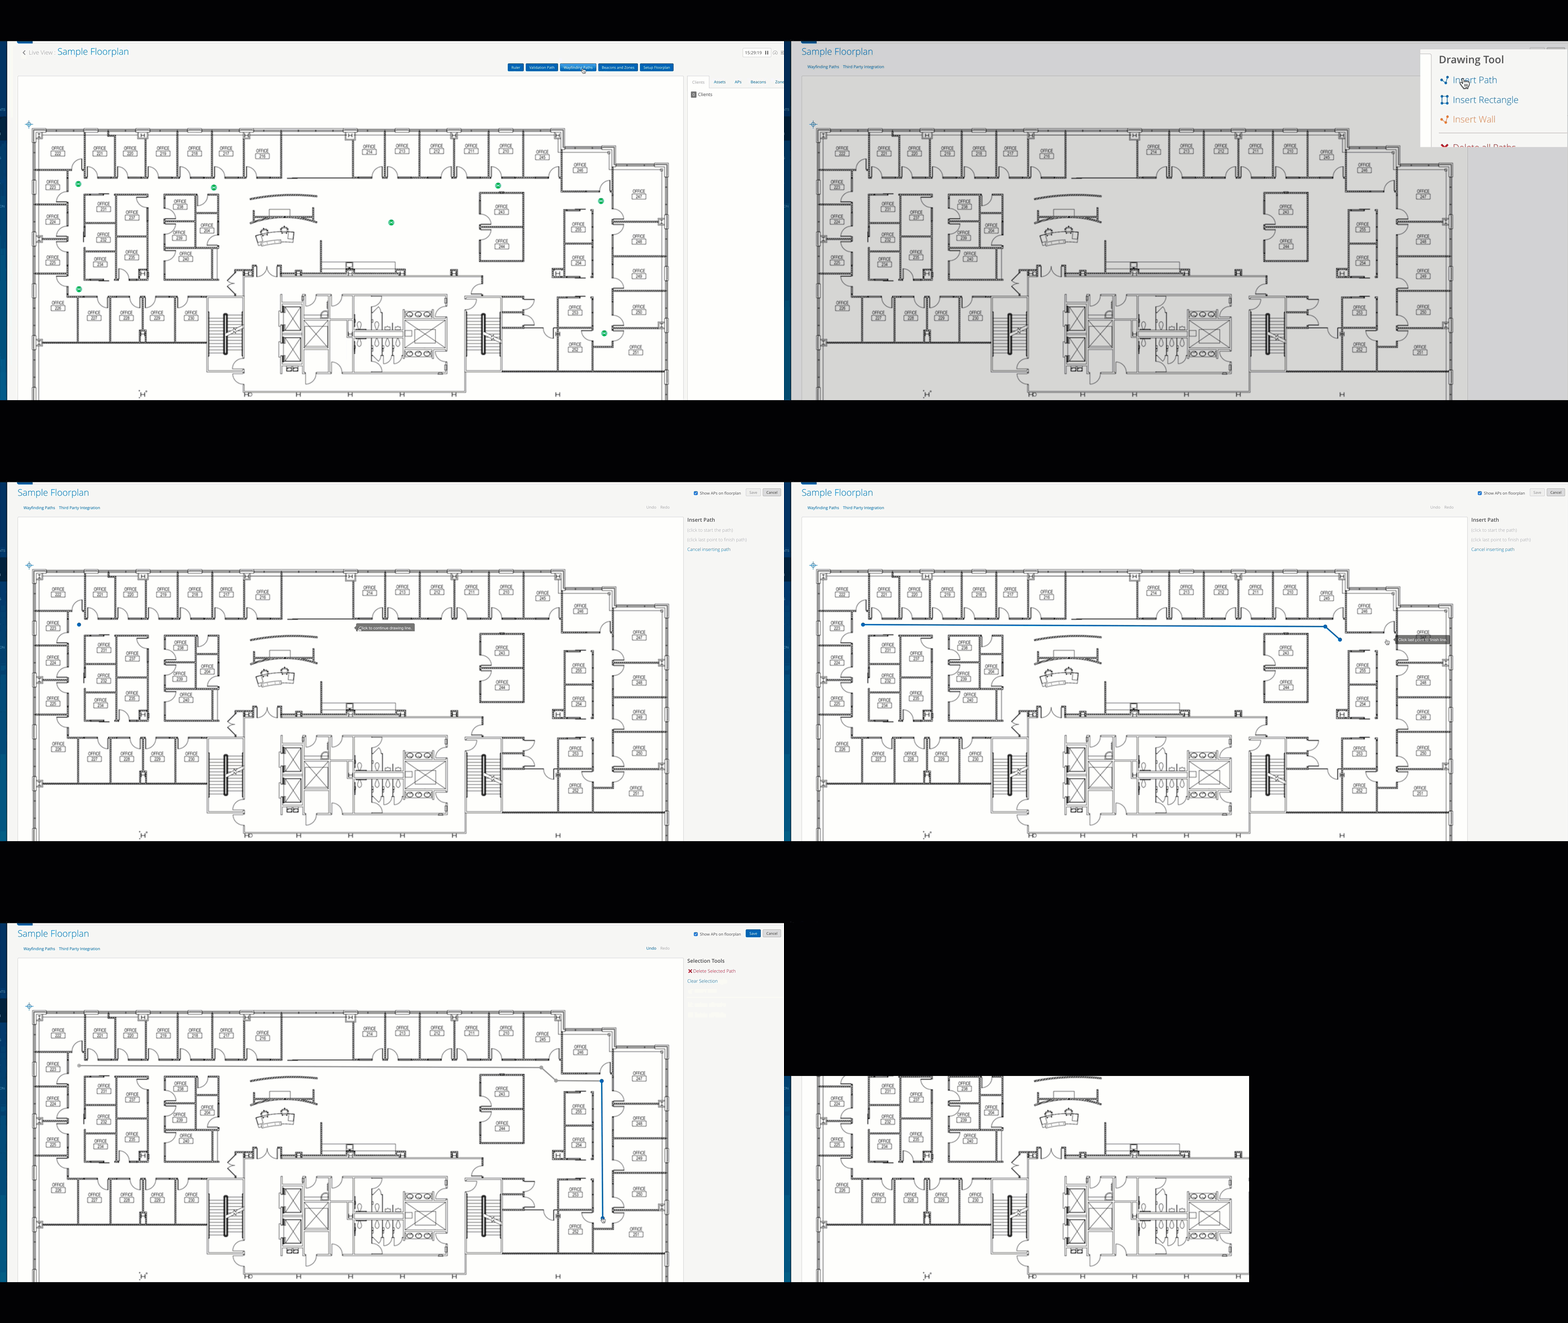
In the Mist portal, after you've gone to Location > Live View and clicked on the floor plan that you want to add wayfinding paths to, click the wayfinding paths button.
Under Drawing tool on the right, click insert path click inside the floor plan to indicate the starting point of the path. Then, click the next point to continue drawing the path. Make sure the lines of your path are truly connected.
On larger floor plans, you may need to zoom in to ensure this. Finally, click save to save the changes.

