Use Digital Certificates
Follow these steps to generate and use certificates for the RADIUS server that is integrated with Juniper Mist Access Assurance for each organization.
When using EAP authentication, both the client and server must verify each other’s identity. The client must trust the server it is communicating with, and the server must authenticate the client. The server certificate is the first step in this mutual authentication process, and the client must validate or trust it before proceeding with the communication.
If we take a look at any EAP transaction (say EAP-TLS or EAP-TTLS), regardless if it is wireless or wired authentication, the first step is for the server to identity itself by sending a "Server Hello" message to the client device.
When a client device receives a server certificate, it looks at the list of trusted Certificate Authorities (CAs) in the Wi-Fi or LAN profile and check if the server certificate is signed by one of the trusted CAs. Optionally, if configured, checks if the server name matches the list of trusted server names in the client configuration.
We recommend not bypassing validation step and trust server certificate. This is a high security risk and can open MITM (Man in the middle) attacks.
You can use one of the following methods to generate and use certificates for the RADIUS server that is integrated with Juniper Mist Access Assurance for each organization.
- CA Certificate—Juniper Mist requires specific CA certificates to establish trust with your client devices. These certificates, issued by trusted Certificate Authorities (CAs), enable Juniper Mist Access Assurance to grant network access to client devices. The validation of client devices by Juniper Mist is based upon the presentation of certificates by the devices, which must be signed by the same CA.
- Default Juniper Mist Access Assurance Certificate—Mist organization maintains its unique, private Mist Certificate Authority (CA) responsible for issuing the Access Assurance server certificate. In the absence of specific configurations, clients will receive a default certificate authenticated by their respective Mist Org CA. This certificate corresponds to the domain "auth.mist.com".
- Custom Server Certificate—Custom server certificate is favored when you prefer not to modify the current client configuration, and you want clients to trust server certificates issued by the same Certificate Authority (CA) that provided the client certificates. You must enter the Private Key and the Signed Certificate that you obtained from your RADIUS server.
Read following procedures to understand how to use the above certificates.
Use Certificate Authority (CA) Certificate
For Extensible Authentication Protocol–Transport Layer Security (EAP-TLS) certificate-based authentication to work, you must add the trusted CA certificate on the Juniper Mist portal.
This step enables the Juniper Mist Access Authentication to trust client certificates signed by your added CAs.
You can obtain the certificate from an external CA. The CA can be a well-known, public CA or an enterprise CA.
Watch the following video to learn how to generate a certificate for testing or lab use:
How to create certificates both CA certificates and client certificates that you could use for lab testing to repeat all the steps in our tutorials. So in order to do things easily and quickly, assuming there is no existing infrastructure, assuming there is nothing you can use that you're available on-hand, you could use some open source tools that are out there on the internet. I will use degree-based certificate authority and key management called XCA.
You can Google it. You can download it. It's available for everyone to use. So now, when we will use XCA tool, first thing we will need to do, we'll need to create a new database. You could think of this creating a specific BQ infrastructure right on your laptop. So we can just say missed access insurance tutorial. Database, save it in there, it will ask you to encrypt it, which is a good thing. Click OK. So now we have the database created.
So the first thing we will need to create our certificate infrastructure is the certificate authority. That's the thing that will sign all the certificates of all your client devices that you will be using for testing. And that's the ultimate source of trust in your BQ infrastructure. So I'm going to click on new certificate. I'm going to select that, this is going to be a self-signed certificate because technically, every certificate authority, the root certificate authority is a self-signed.
Has a self-signed certificate. We'll select the template called CA from this list, will then go to subject. We can give it some internal name but doesn't matter, we could just say lab mist CA. You can fill in some of the data in there. Again, it doesn't really matter what you will put in there. But for testing purposes, just use anything you really like, organization name. Common name is important. This is how you identify certificates in real life. So one of the important attributes is common name. And we will take a look at the other one later, which is called the subject alternative name.
So common name, let's just call it lab-mist-ca@justify.com. Maybe something like this. I'm going to click that. We'll need to create a private key. A private key is what will prove that the certificate-- oh, owned and certificate holder is actually that same device or it's same CA. So we'll generate a new key, we'll set it to be 4,000 bytes, create. It will automatically selected here. It's good. We'll go to extensions. The type will be certification authority. It will add a few attributes in the certificate saying this is a CA cert.
This is where we will add the subject to alternative name. So typically what you'll do is you click edit, you will say I want to copy common name and there. Click apply. That's it. This will typically go and take your common name and copy it into a assign attribute.
Nowadays, many clients are using SAN to validate-- certificate validity. And the key usage, what do we need there? We need certificate signs, CRL sign. That's pretty much it. So we'll click OK. This now created our certificate authority in here. So we have the certificate. This is a CA cert, it has a common name.
The expiry date is, well, next year, but typically CA cert would be valid for like 10 years or something like that. For our intents and purposes, this is just a lot testing one year is more than enough.
So what will then need to do is will create a client cert. So click select our CA, will click new certificate. Now see under signing section, we are going to use this CA cert for signing certificates. It's not going to be self-signed anymore. So now our certificate authority will sign a new certificate that will be issued by the client. This is how we will establish this chain of trust. So create, select the template-- TLS client. We'll go to subject. That just say this is going to be a test lab client. Doesn't matter.
So common name is important. So this is where I would recommend you to use something that is an actual username that you want to use later on with your testing, whether you have an identity provider with your test username or things like that. So in my case, I will use one username I have in my Okta IdP that I will use later on. So I'm going to just use my Juniper email address. I'm going to copy it. We'll need to generate a private key, again, 4,000 bits.
We'll go to extensions, we'll select end entity. We'll click on subject, alternative name. Again, we'll just say copy common name. We'll go to key usage, will now need to select that this is a client certificate not the service certificate. And we will need key encipherments, digital signature, it should be OK. Now we click OK. We now have a client certificate.
So now we see there is a little dropdown in there. So we have a CA but now sign the client certificate. So now we have a CA and now we have a client certificate. What we'll do will need to export the CA. I will click on export. The CA cert, we are only exporting the public certificate, we are not touching the private key. Private Key stays untouched. It it is never exported anywhere. This is the only thing that protects the ownership of that certificate.
So we are exporting the private key in our test folder-- .mistCRT that's all we need. Click OK. The next thing we'll need is we'll need to export the certificate and the private key that we will use for client testing. Again, normally in production environment, you're not going to export private keys, they will be automatically pushed and distributed through MDM securely so they're never exposed to the network or anybody. But in our case, since we're testing, that's OK to do for now. So we'll click export.
In this case, the export format is pfx. That's the format that will include the client certificate, the client private key, and the CA cert in one package. So you can later on imported to one of your testing clients. And generally, this format is well understood by different operating systems.
It will ask you to encrypt that package. So just do a very secure password of 1234. Now we have to search, export it. We have a CA cert and we have a client cert. For now, this is good enough for our testin
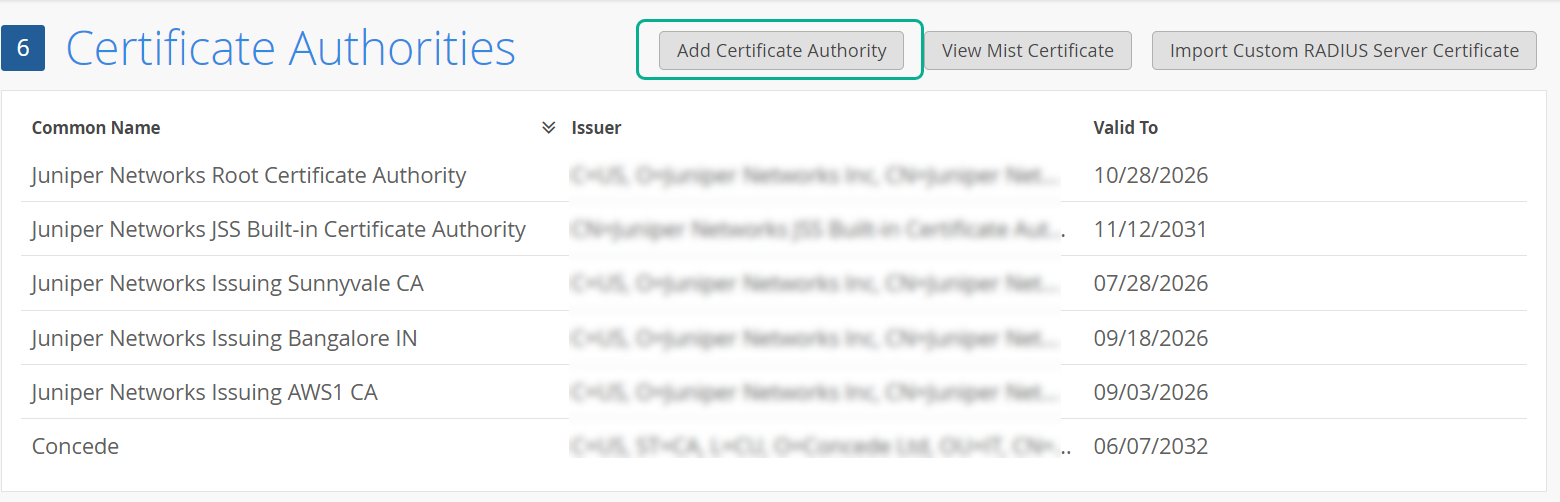
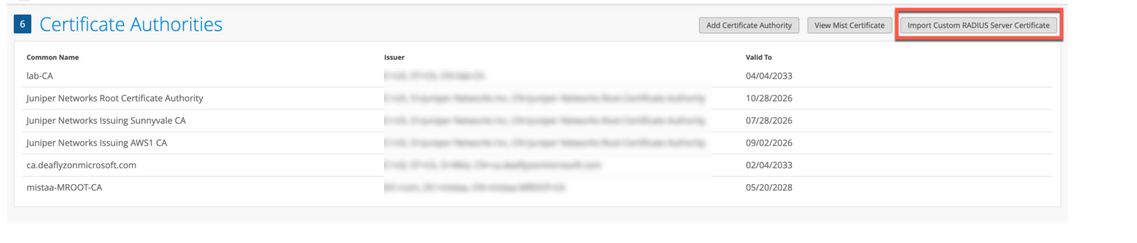
To add a CA certificate:
-
Click Add Certificate Authority.
-
Paste your CA certificate in the Signed Certificate field.
Figure 1: Add Certificate Authority
The text must include the
—–BEGIN CERTIFICATE—–and—–END CERTIFICATE—–lines.The system parses and decodes the imported CA certificate and displays the certificate properties under the Properties pane. We recommend that you add your Root CA, as well as all your intermediate CAs or issuing certificates.
Use Default Server Certificate by Juniper Mist Access Assurance
Juniper Mist cloud acts as a private certificate authority (CA) for each organization added on the Juniper Mist cloud. Juniper Mist issues a server certificate. If no certificates are configured, the Juniper Mist portal presents a default server certificate signed by Juniper Mist CA to the client devices.
Certificate will be issued for the name auth.mist.com and displays the information similar to what you see in Figure 2.

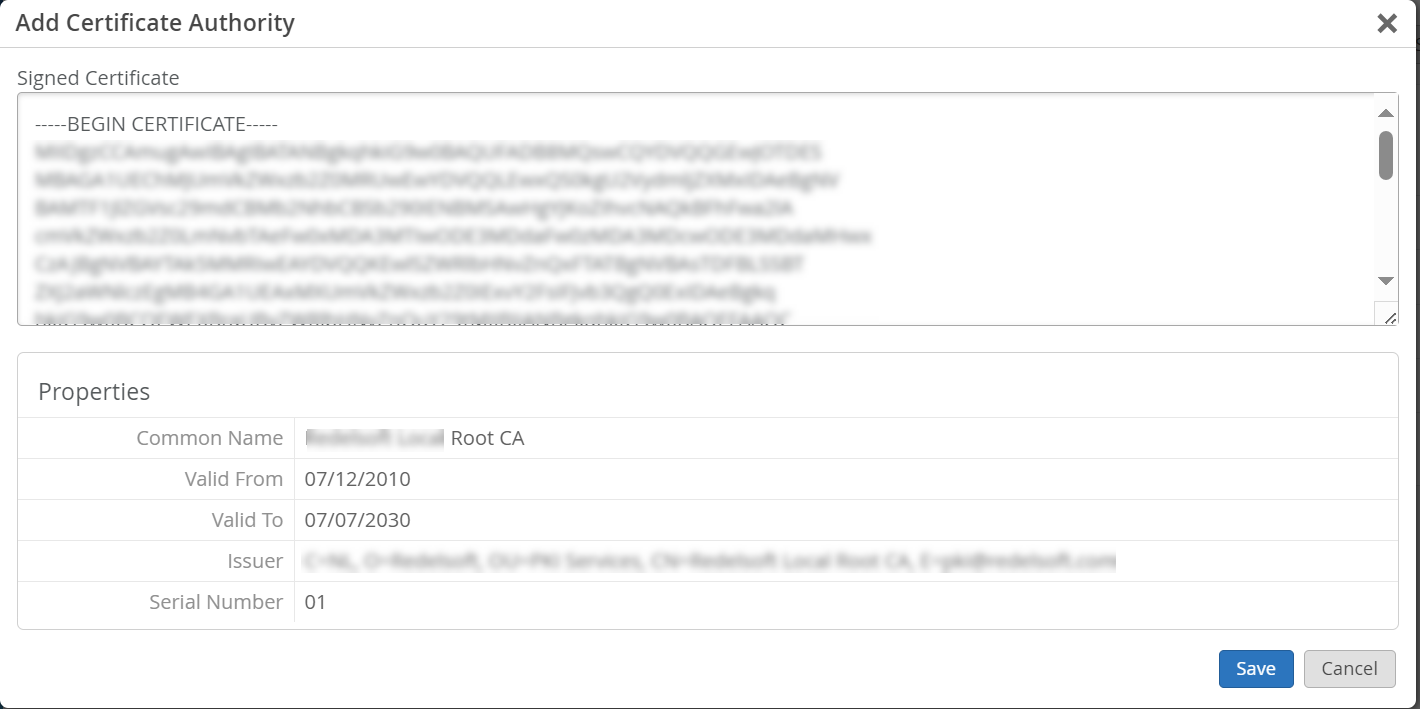
To download the Juniper Mist server certificate:
-
Click View Mist Certificate.
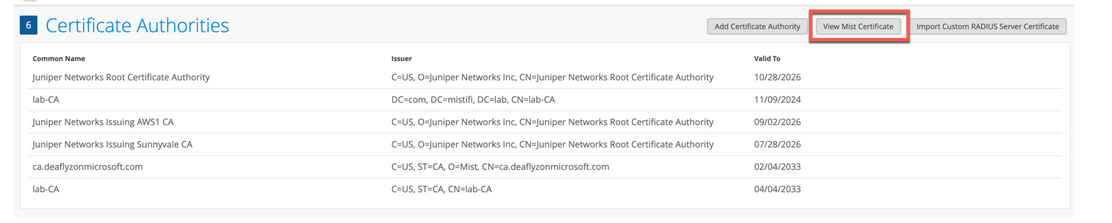 The screen displays the Signed Certificate details. Copy the certificate content from the Signed Certificate field.Figure 3: View and Copy Mist Certificate
Use Custom Server Certificates
You may already have a PKI and want to keep the existing configuration undisturbed. In such a scenario, you must upload the public certificate of your root CA and the public/private key pair of the RADIUS server on the Juniper Mist portal.
Ensure that your client devices also use the same certificates so that the RADIUS server validates each client's (supplicant's) certificate. Perform this task if you want to keep the current setup of your clients unchanged, and you want the clients to trust the server certificate that’s issued by the same CA that issued their certificates.
To upload your certificate to the Juniper Mist portal:
-
Click Import Custom Radius Certificate to open the
certificate page.
Figure 4: Import Custom RADIUS Server Certificate
-
On the Import Custom RADIUS Server Certificate page,
enter your CA certificate details:
Figure 5: Enter Custom Server Certificate Details
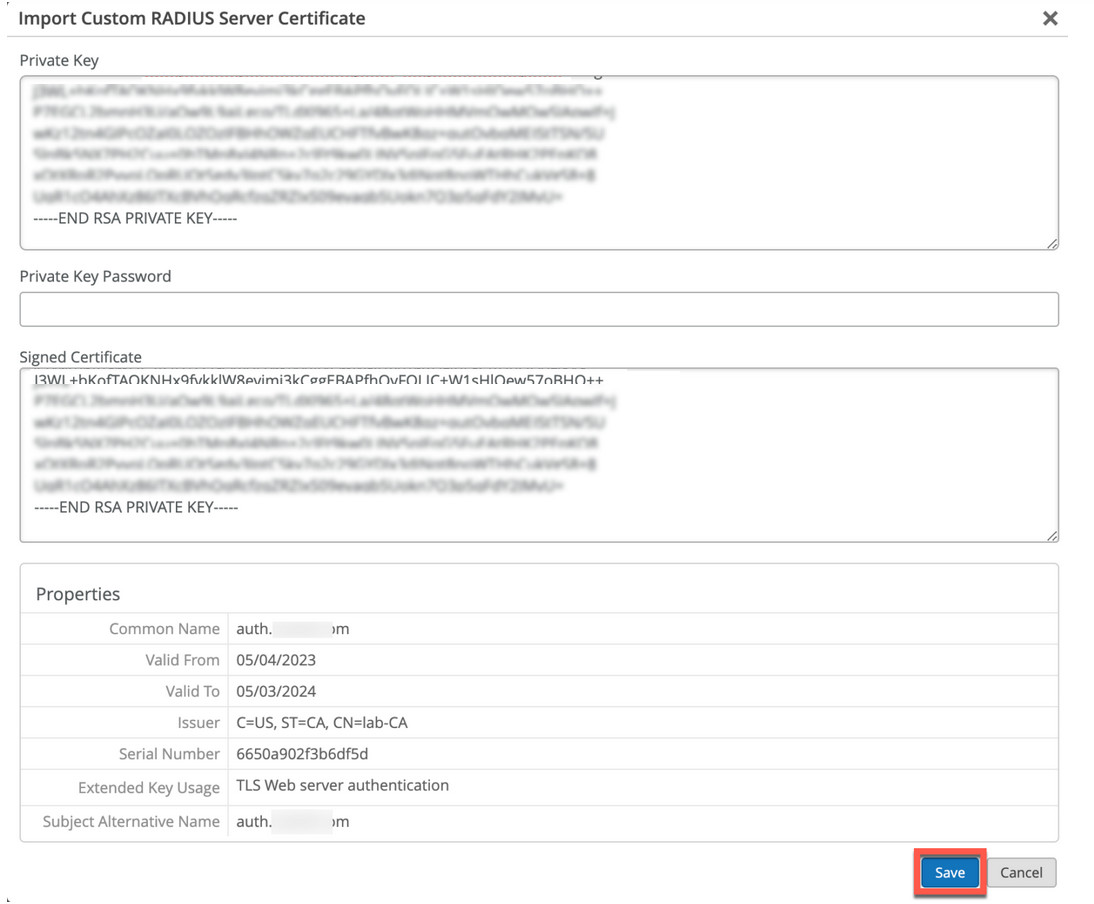
- Private Key—Copy and paste the private key
information. The text must include the
BEGIN RSA PRIVATE KEYandEND RSA PRIVATE KEYlines. - Private Key Password—Enter the passphrase of the private key (if available).
- Signed Certificate—Copy and paste the
certificate as text. Ensure that you include all the intermediate
CAs and the Root CA certificate. The text must include the
—–BEGIN CERTIFICATE—–and—–END CERTIFICATE—–lines.
- Private Key—Copy and paste the private key
information. The text must include the
Guidelines for using custom server certificates:
- Do not use a wildcard certificate, for example: *.abc.com for 802.1X authentication.
- You can use a certificate that contains a common name (CN) or a subject alternative name (SAN) for 802.1X authentication..
- We recommend the following x509 extension attributes. The majority of the
client device operating systems support these extensions.
- Use certificate version 3 or v3 (not legacy v1)
- If the server name is being used as a validation criterion on the client side, then the certificate should include the SAN extension with the DNS name of the server.
- Include Extended Key Usage as a TLS web server authentication criterion (required for most Android devices).
Now you can move forward with the certificate-based authentication process.
See Also
Client Certificate Requirements
When implementing certificate-based authentication with Juniper Mist Access Assurance, client certificates must meet specific requirements to ensure proper functionality across features like IdP lookups and MDM integration.
- Security Requirements
- Requirements for Identity Provider Lookups
- Identity Provider Lookup behavior for Machine Certificates
- MDM Integration Considerations
Security Requirements
Client certificates should meet these minimum security standards:
- Certificate Type: X.509 v3 certificate
- Key length: 2048 bits or greater (4096 bits recommended) or ECDSA (P‑256 or stronger)
- Signature algorithm: SHA-256 or stronger (SHA-384, SHA-512)
- Required extensions: Extended Key Usage with Client Authentication (1.3.6.1.5.5.7.3.2)
Requirements for Identity Provider Lookups
For successful user identity matching with your IdP, ensure your client certificates include one of the following fields. Lookup needs to occur using user principal name in the cloud IdP (format user@domain.xyz). The following fields are checked in the order outlined below:
- Subject Common Name (CN)
- Subject Alternative Name - UPN (SAN:UPN)
- Subject Alternative Name - Email (SAN:Email)
Identity Provider Lookup behavior for Machine Certificates
For successful machine identity matching with your IdP (primarily concerns Entra ID, as other cloud IdP do not have machine identities), ensure your client certificates include one of the following fields.
Lookup needs to occur using device name (excluding the domain name) in your EntraID. The following fields are checked in the order outlined below:
- Subject Common Name (CN)
- Subject Alternative Name - DNS (SAN:DNS)
MDM Integration Considerations
When using certificates with MDM solutions:
- Include device identifiers in the certificate (such as DeviceId or UDID in the SAN:DNS field) for device-based lookups.
- Consult with relevant integration documentation for each MDM vendor on the Juniper Documentation Portal: Juniper Mist Access Assurance NAC
Test your certificate configuration with a small set of devices before deploying organization-wide to ensure proper functionality across Access Assurance features.