Configure Authentication Policy
Create authentication policies to control which users can access which resources on your network.
You must configure Juniper Mist Access Assurance with an authentication policy to authenticate end users or devices that attempt to access the network or applications.
The policy consists of a set of rules that devices and users must fulfill to get access to the network and use the network resources. Juniper Mist Access Assurance evaluates the authentication requests based on the specified policy conditions. If a user or device satisfies the conditions, Juniper Mist Access Assurance applies actions that either allow or deny access to the user or the device. These actions also apply attributes (VLAN. role) to the allowed users.
Juniper Mist Access Assurance uses "labels" as the policy matching criteria and also as a policy action for allowed users. You can create labels on the Authentication Policy Labels page or on the Authentication Policy page. See Configure Authentication Policy Labels for details.
Create Authentication Policy
To create an authentication policy:
-
Click the field in the Name column and enter a policy name. Then click the
blue check mark to apply your changes.
The following figure shows the options that you use to configure an authentication policy.
Figure 1: Authentication Policy Configuration OptionsSelect Policy Label, Site, or Site Groups as the the match criteria. Click Add (+) to see the available options.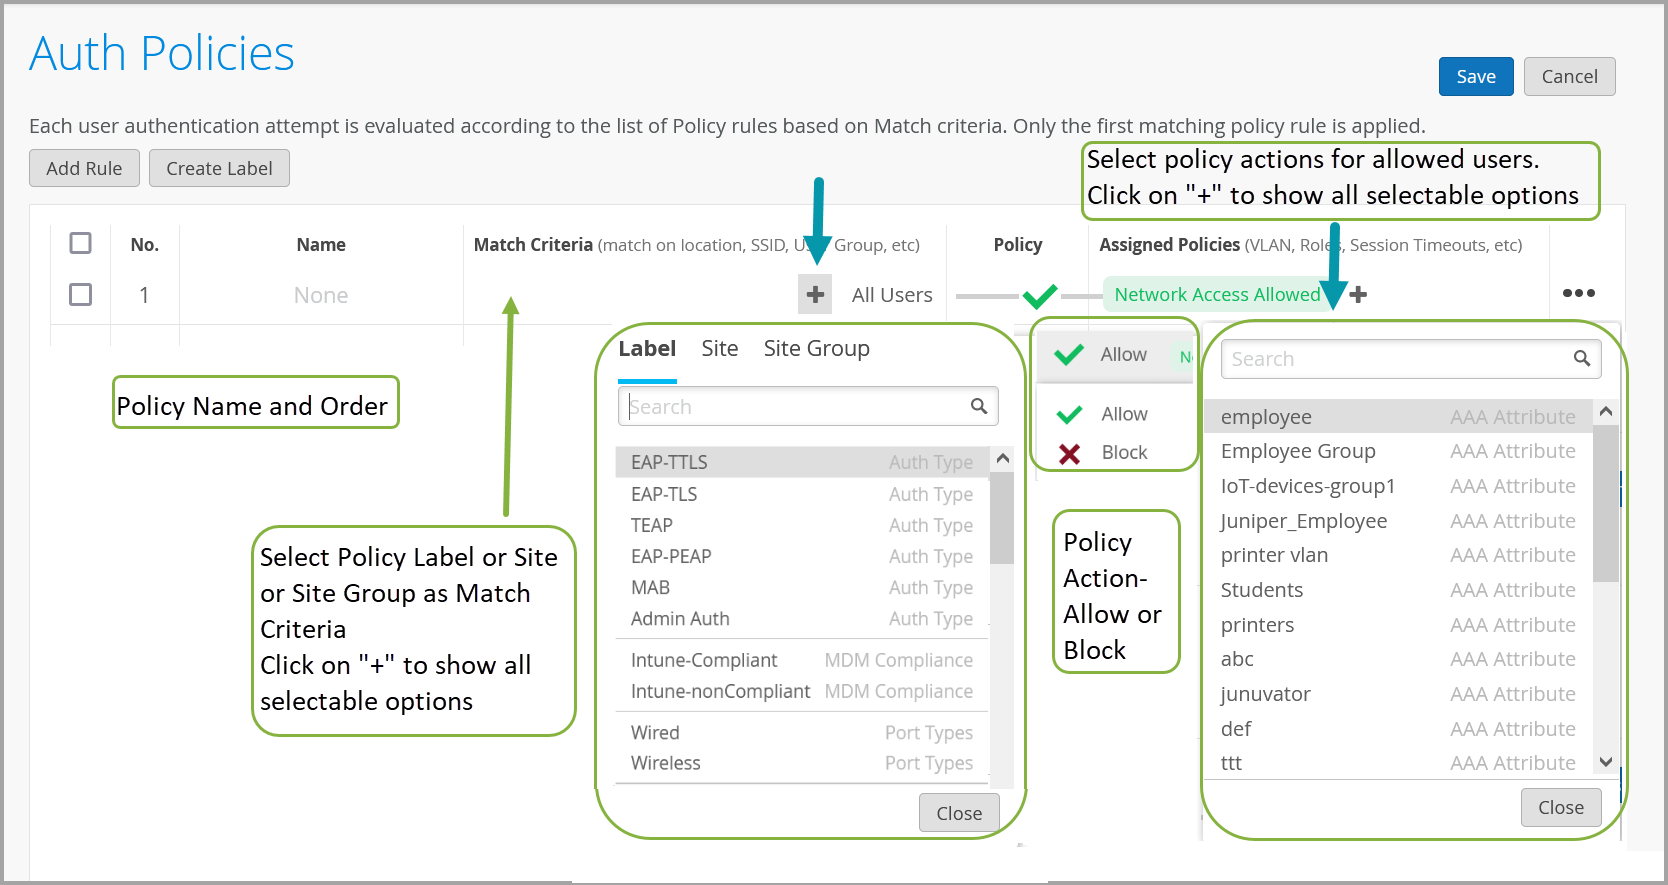
Select Allow or Block to specify the policy action.
Specify the assigned policy for the allowed users. Click Add (+) to see the available options.
The following table explains the options that you use to configure an authentication policy.
Table 1: Authentication Policy Options Field
Description
No.
Abbreviation for number. The authentication policy number. This entry indicates the position of the authentication policy.
Name
You can use up to 32 characters including alphanumeric characters and special characters underscore and dash.
Match Criteria
Match criteria for the policy. You can select labels, sites, or site groups from the available list. Click the + icon to display the list. If you have created policy labels, the Juniper Mist portal displays the detail in the drop-down menu.
Policy
Policy actions. Select one of these policy actions:
-
Allow
-
Block
Assigned Policy
Apply policy actions for the allowed users. With policy actions, you can assign additional attributes such as roles or VLANs to the allowed users. If you have created policy labels, the Juniper Mist portal displays the labels when you click the + icon.
-