Use Site Variables to Streamline Configuration
Follow these steps to add site variables that you can then use to streamline the configuration process for your WAN deployment.
Site variables help simplify your configuration process and provide flexibility for large-scale deployments.
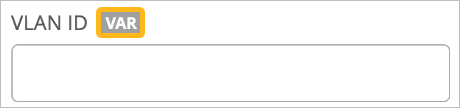
As you set up templates, profiles, and other configurations, you can insert a variable, such as {{SUBNET_1}} to represent a value such as a subnet address. You can use variables in the API and in the Juniper Mist portal. On various configuration screens, look for the VAR label to identify fields that accept variables.
You store the definitions for your variables in your site configuration. When you associate a template or profile with a site, Juniper Mist plugs in the site-specific values and pushes them to the devices.
With the API, you can easily see the organization-wide list of variables by using GET /api/v1/orgs/:org_id/vars/search?var=*.
To define site variables:
-
Continue until you've added all the variables that you need for this site.
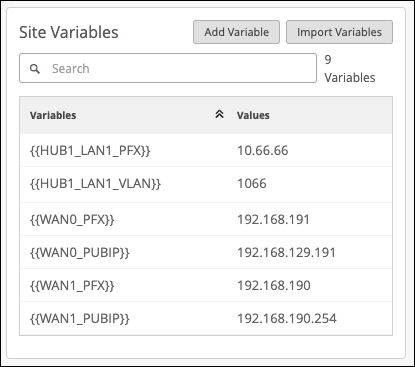
This table shows sample variables for five sites. Three of the sites are the locations for spokes (spoke1-site, spoke2-site, and spoke3-site.) Two are the locations for hubs (hub1-site and hub2-site). As you explore other topics in this chapter, you'll see additional examples involving these same sites and variables. You'll see how the variables are used to configure networks, applications, hubs, and hub-to-spoke traffic steering.
Table 1: Variables for Five-Site Configuration Example Site Name Variable Value spoke1-site {{SPOKE_LAN1_PFX}} 10.99.99 {{SPOKE_LAN1_VLAN}} 1099 {{WAN0_PFX}} 192.168.173 {{WAN1_PFX}} 192.168.170 spoke2-site {{SPOKE_LAN1_PFX}} 10.88.88 {{SPOKE_LAN1_VLAN}} 1088 {{WAN0_PFX}} 192.168.133 {{WAN1_PFX}} 192.168.130 spoke3-site {{SPOKE_LAN1_PFX}} 10.77.77 {{SPOKE_LAN1_VLAN}} 1077 {{WAN0_PFX}} 192.168.153 {{WAN1_PFX}} 192.168.150 hub1-site {{HUB1_LAN1_PFX}} 10.66.66 {{HUB1_LAN1_VLAN}} 1066 {{WAN0_PFX}} 192.168.191 {{WAN1_PFX}} 192.168.190 {{WAN0_PUBIP}} 192.168.129.191 {{WAN1_PUBIP}} 192.168.190.254 hub2-site {{HUB2_LAN1_PFX}} 10.55.55 {{HUB2_LAN1_VLAN}} 1055 {{WAN0_PFX}} 192.168.201 {{WAN1_PFX}} 192.168.200 {{WAN0_PUBIP}} 192.168.129.201 {{WAN1_PUBIP}} 192.168.200.254