Configure SNMP on Switches
Follow these steps to configure SNMP in switch templates, the site configuration, or the device settings.
SNMP configuration is part of the switch configuration workflow described in Configure Switches Using Templates. This topic provides more detailed information focused solely on SNMP configuration steps.
Simple Network Management Protocol (SNMP) enables network administrators to monitor and manage network-connected devices in IP networks (see SNMP Architecture and SNMP MIBs Overview).
In a switch, SNMP is disabled by default. If required, you can enable it at the organization level (from the organization level switch templates), site level (from the site level switch templates) at device level (from the switch details page.)
Mist allows you to configure SNMP V2 or SNMP V3 settings.
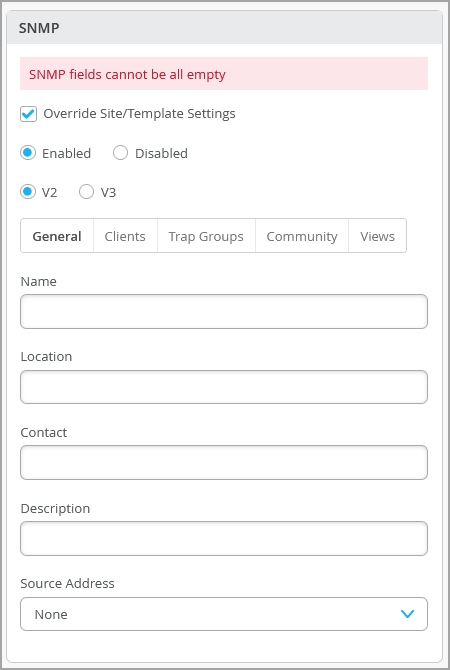
Configure SNMP at the Organization Level
If you want to apply SNMP to all the switches in the entire organization (all sites), you can do that at the organization level.
To configure SNMP at the organization level:
-
On the SNMP tile (in the All Switches Configuration section), click the
Enabled check box.
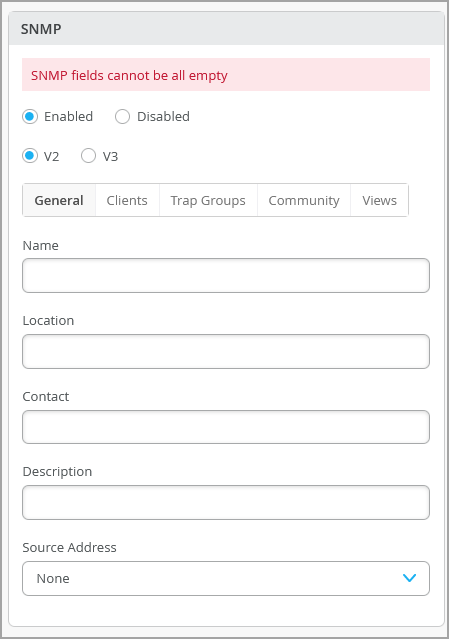
Configure SNMP at the Site Level
You can choose to have SNMP configuration to specific sites in an organization. If the SNMP is disabled at the organization level but you want to enable it at a particular site, you can override the organization templates settings inherited by that site. If you configure SNMP at the site level, the configuration gets applied to all the switches in that site. Any update in the site-level settings does not override the values in the associated organization template. The change is applied only to the selected site.
To configure SNMP at the site level:
-
Click the Enabled check box in the SNMP tile.
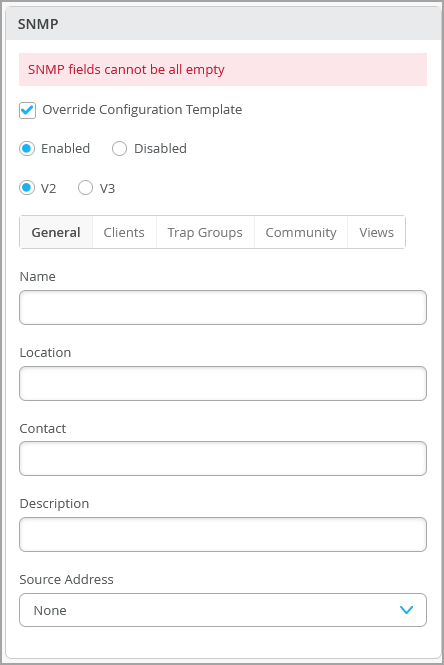
Configure SNMP at the Device Level
If you want to configure SNMP for specific switches in a site, you can do that from the switch details page. If the SNMP is disabled at the site level but you want to enable it for a specific switch, you can override the site templates settings inherited by that switch. Any update in the switch-level settings does not override the values in the associated site or organization template settings. The change is applied only to the selected switch.
Mist allows you to configure a portion of SNMP settings at the switch level and use the remaining portion from the template. This means you can merge the SNMP values configured at the switch-level with the SNMP values that the switch inherited from a site-level or organization-level template. This feature is helpful when you want the switch to use some SNMP values from the switch-level configuration and some from the associated template. For example, you can use the name and location from the switch-level configuration and everything else from the associated template.
Before you configure SNMP at the switch level, ensure that the switch is in connected state with stable connectivity to cloud.
To configure SNMP at the switch level:
-
Click the Enabled check box in the SNMP tile.