Configure a WLAN Template
Configure and use WLAN templates to streamline the configuration process and ensure consistency across various WLANs in your organization.
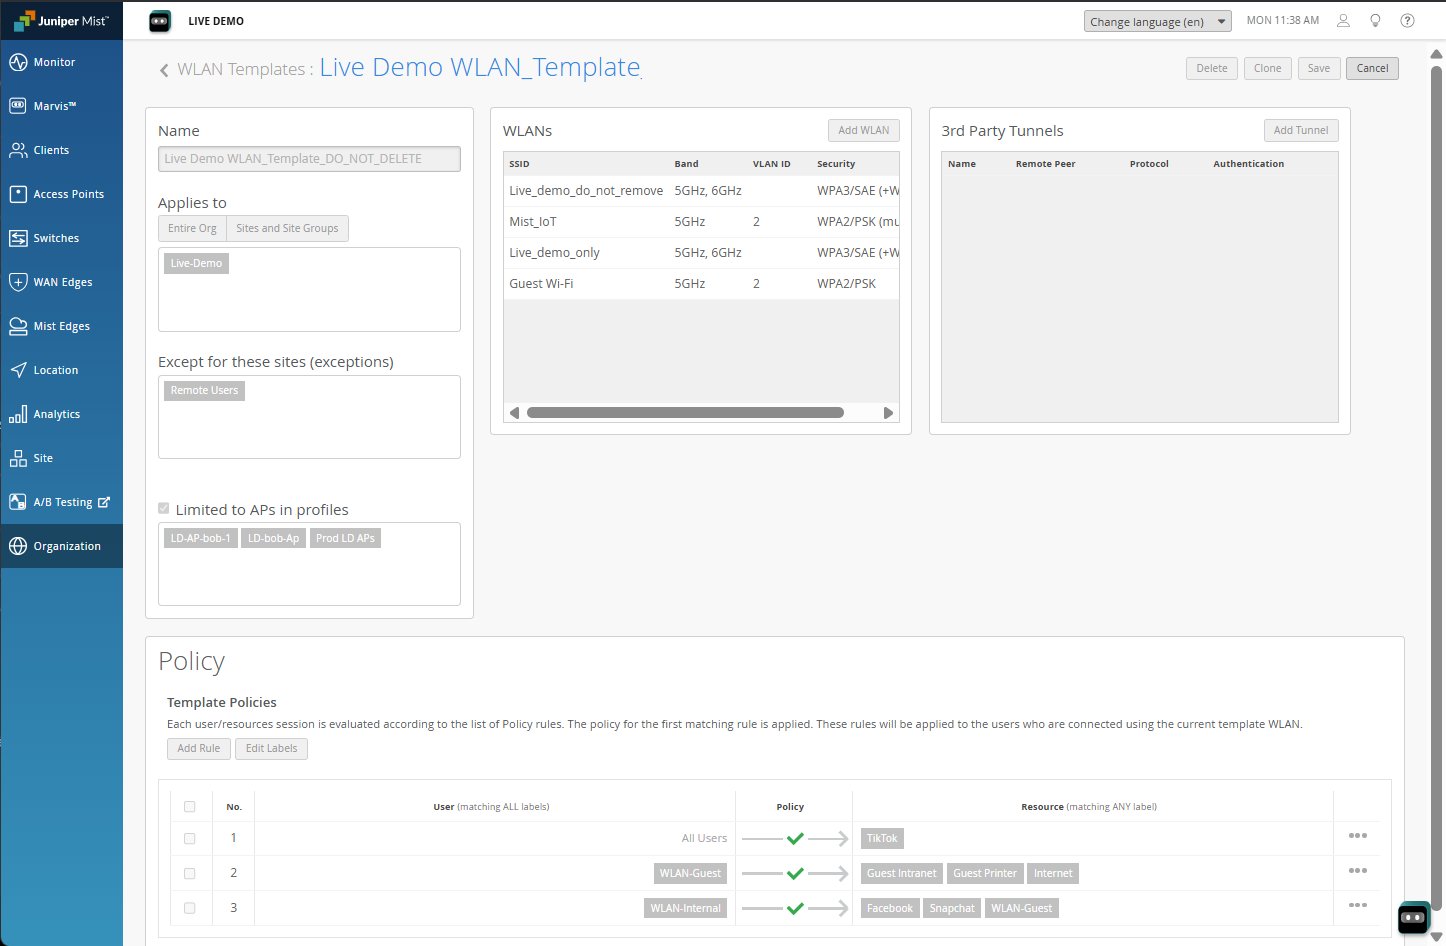
In the Juniper Mist portal, WLAN templates (Organization > Wireless > WLAN Template) give you a way to configure uniform user policies, and to selectively apply them to your organization, selected sites, and/or selected WLANs. Policies created in a WLAN template allow you to manage users' access to specified resources, such as social media sites. You can also use them for network segmentation, for example to keep IoT devices off the private network and thus limit exposure in the event of malicious actors gaining access to a device.
In large deployments, we recommend that you create one WLAN template for each WLAN (SSID). To assist with automation, we also recommend that you define all WLANs within WLAN templates. WLAN templates are useful for automation and ensuring policy application to:
- multiple sites
- site groups
- entire organization
- exclude specific sites
- APs within specifi device profiles.
- any combination of the above
See WxLAN Access Policies for details about how to create and use policies.
Note that you can also create site-specific user access policies at the site level: Site > Wireless | Policy.
From the site policy page, you can see a policy's usage statistics, that is the hit count, or how many times the policy has been applied, for both site policies and those created as part of a WLAN template.

To create a WLAN template: