Initialize Your Device - Web Workflow
This is the part where configuring your device gets really easy!
As a first step, connect your laptop or other device to any of the designated LAN ports and connect to https://192.168.128.1 to access the SSR onboarding UI.
The laptop or other client device must be assigned a static IP address within the range of 192.168.128.2 to 192.168.128.254 along with a subnet mask of /24 or 255.255.255.0.
Using your browser, choose the workflow below that best suits your needs:
Installing a Conductor-managed network? Start with Initialize a Conductor, then Initialize a Conductor-managed Router.
Onboarding your device to Mist? Start with Initialize a Mist-managed Router.
Initialize a Conductor
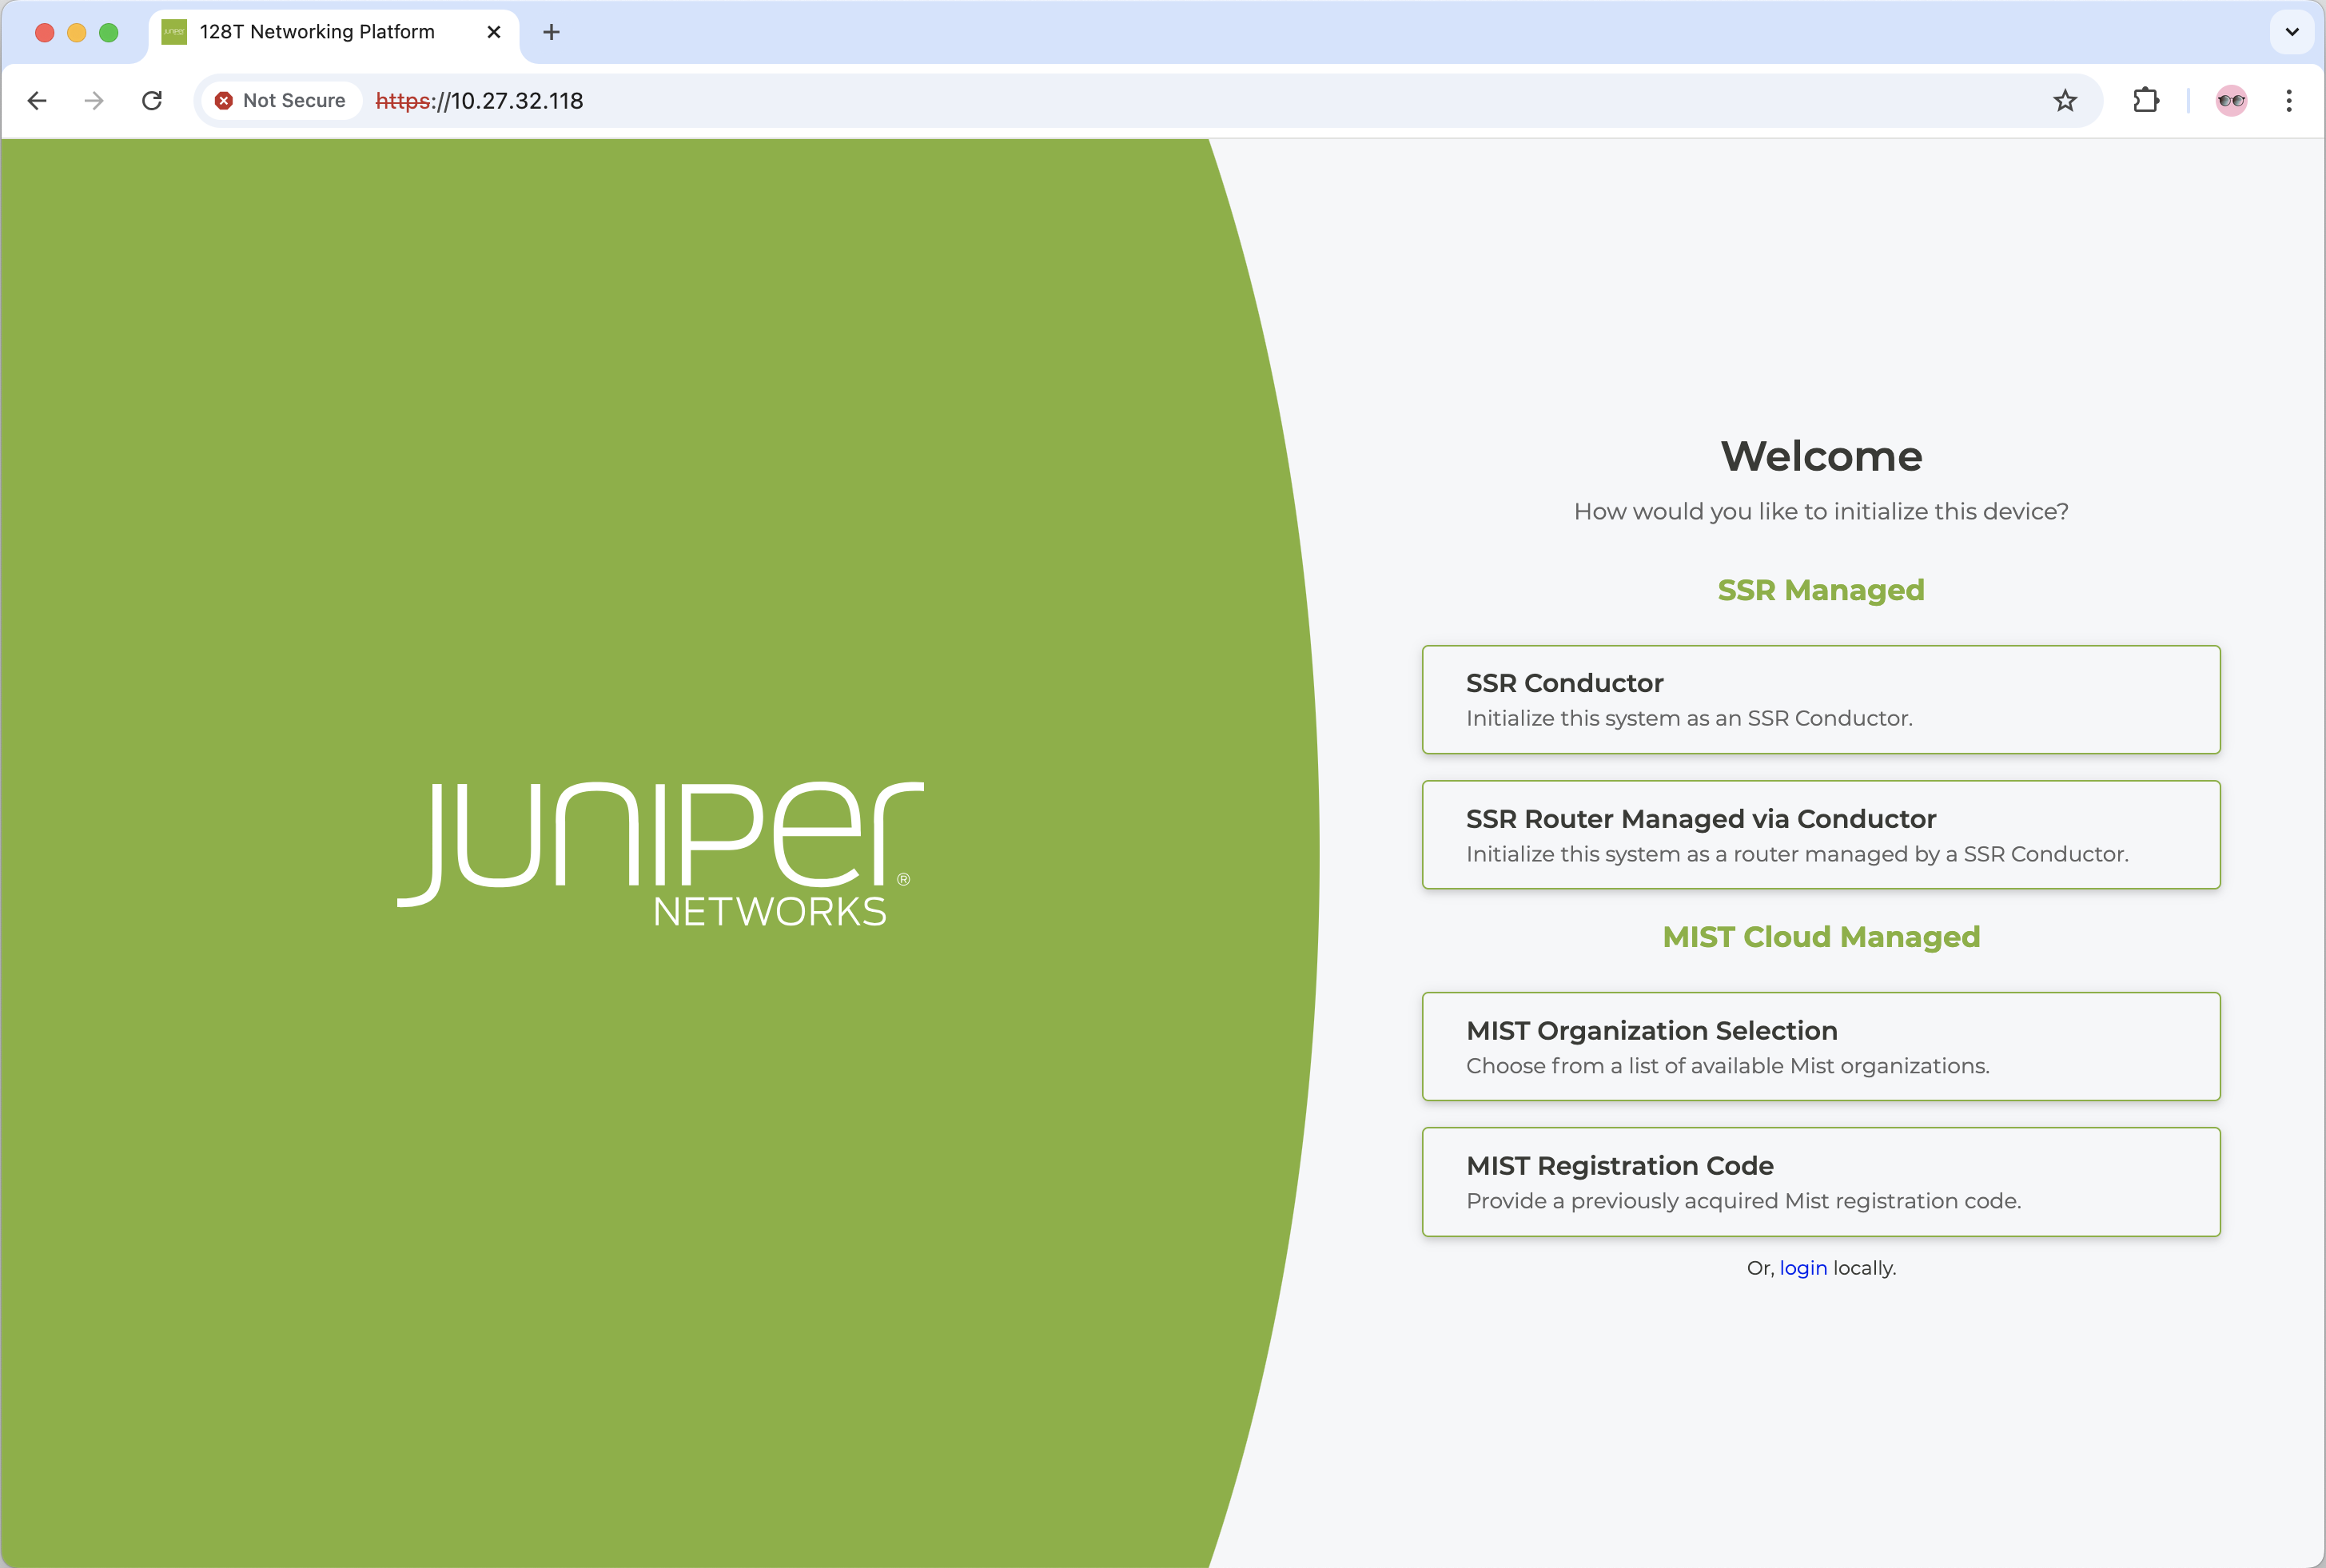
Use the following process to initialize your device as a Conductor.
- Select SSR Conductor under SSR Managed.

- To initialize a standalone conductor, select STANDALONE. To initialize the first conductor of an HA pair, select HA NODE 0. Select the address type (DHCP or STATIC).
In an HA configuration, HA NODE 0 must always be configured before HA NODE 1. Configuring Node 1 first prevents Node 0 from starting.
Enter the following information:
- Conductor name
- Node IP Address (Static)
- Node Gateway (Static)
- Interface Name (Static)
- DNS Server address (Optional)
- Admin and system accounts password
- Artifactory username and password (if available)
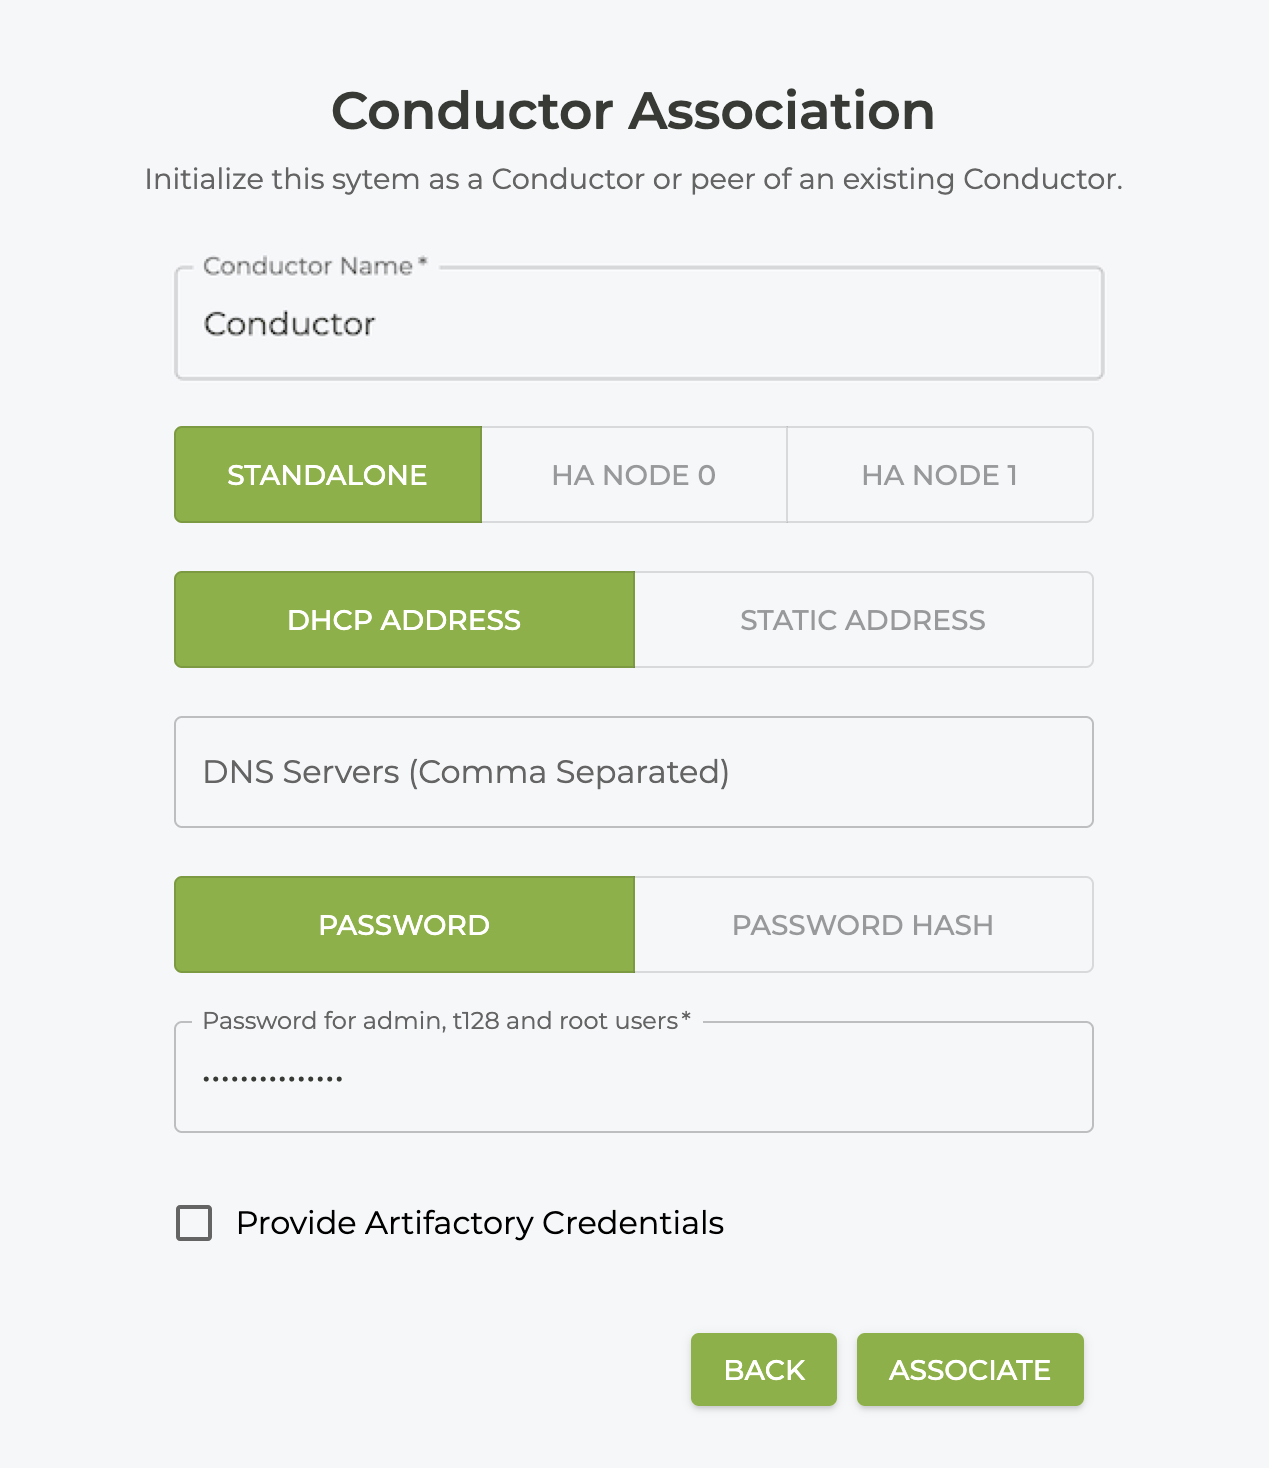
Setting the password for the system accounts (admin, root, and t128) is performed during initialization from either the web interface or the conductor command line. All system account passwords are set to the same value.
-
Click ASSOCIATE
-
The device reboots and comes online as a Conductor.
-
To initialize the second conductor of an HA Pair, select HA NODE 1, and select the address type (DHCP or STATIC). Enter the following information:
- Conductor name
- Node IP Address (Static)
- Node Gateway (Static)
- Interface Name (Static)
- DNS Server address (Optional)
- Admin and system account passwords
- Artifactory username and password (if available)
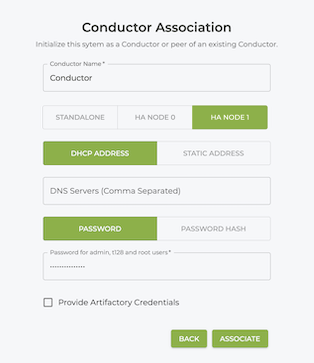
- Click ASSOCIATE when you have completed the required information. The device reboots and comes online as the second Conductor.
For information about deploying and configuring a conductor, see Conductor Deployment and Import Configurations to the Conductor. Otherwise, continue with Initialize a Conductor-Managed Router.
Initialize a Conductor-Managed Router
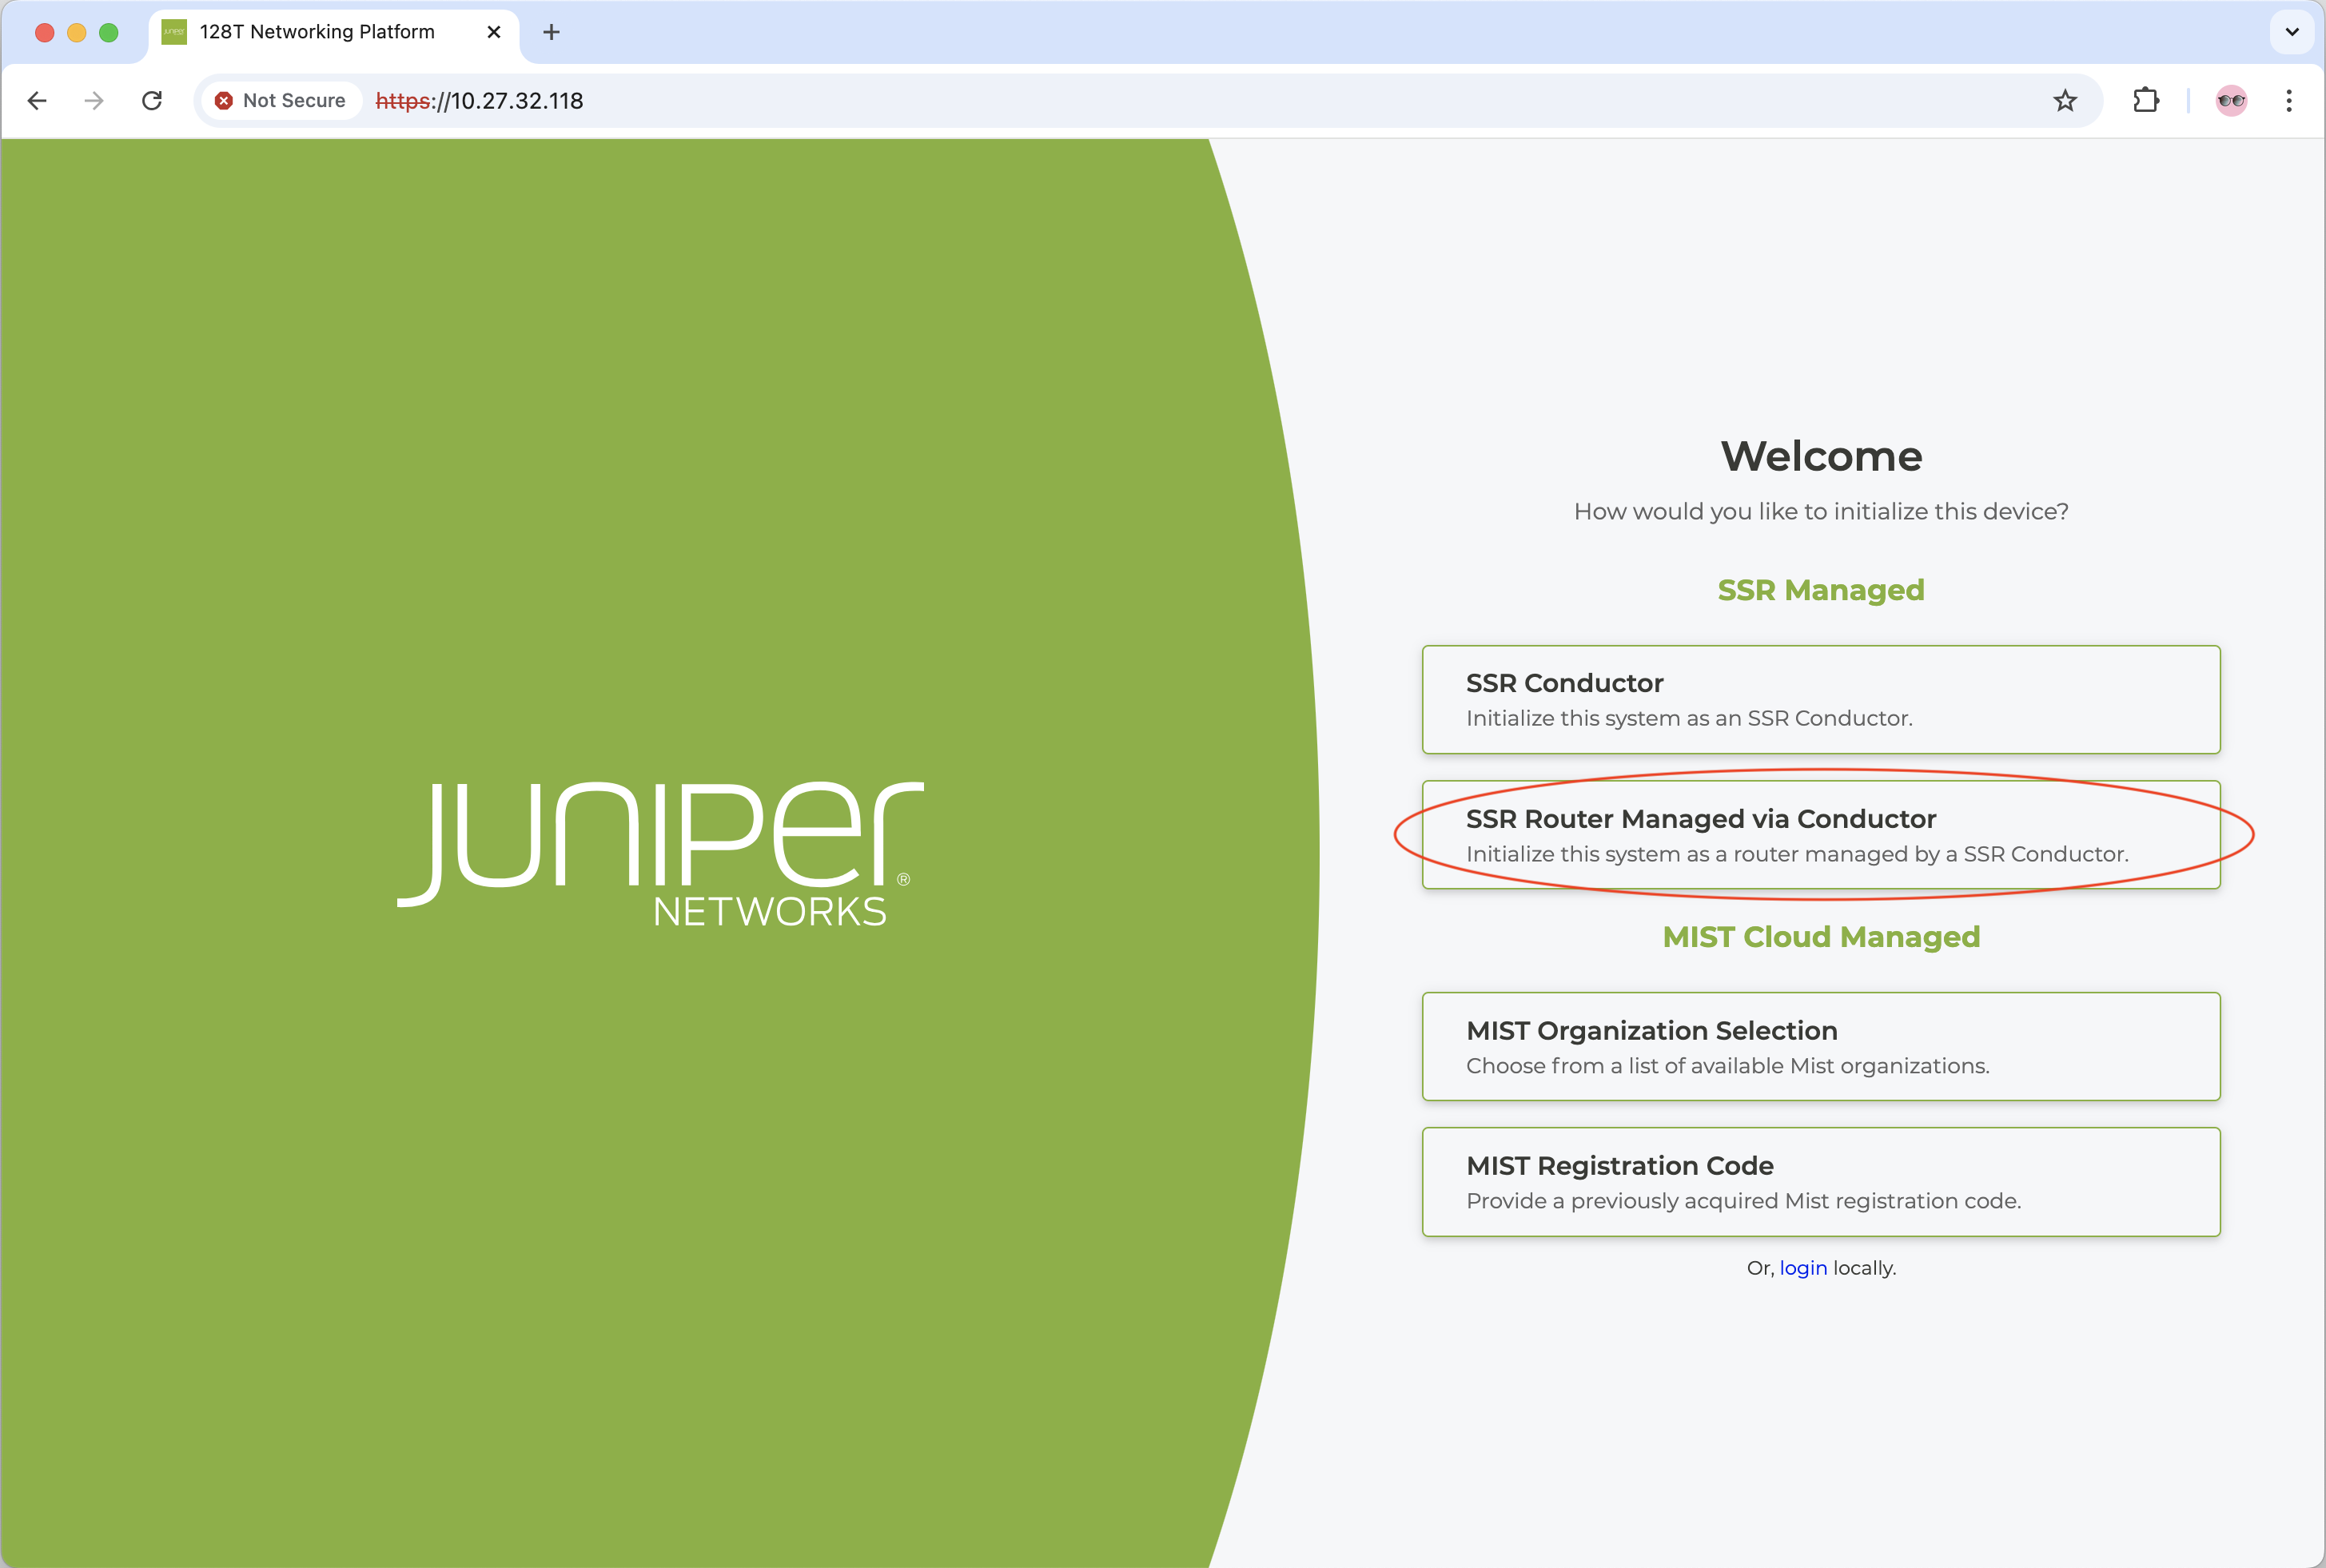
Use the following process to initialize your device as a Conductor-managed router.
- Select SSR Router Managed via Conductor under SSR Managed.
- Enter the router name, the associated Conductor IP address, and the Admin and system account passwords.
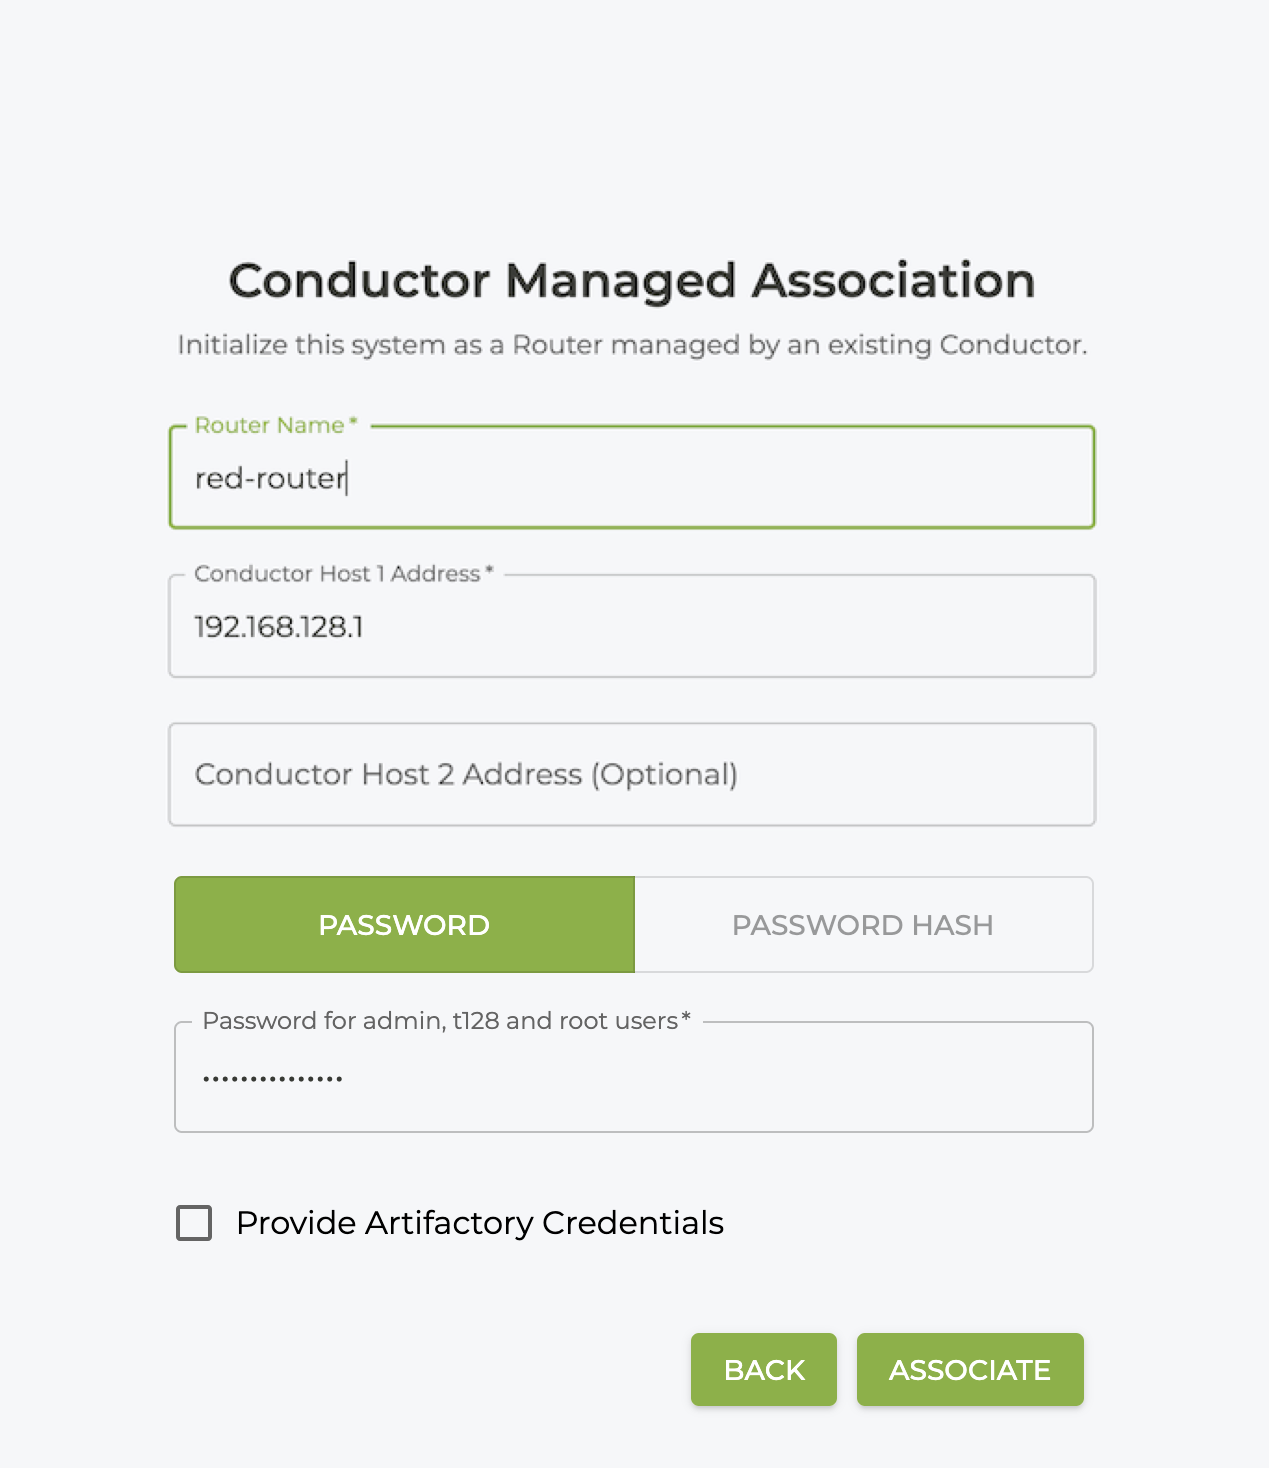
- Click ASSOCIATE when you have completed the required information.
The Router will onboard itself to the Conductor. Router configuration is performed from the Conductor. See Basic Router Configuration for more information.
Initialize a Mist-Managed Router
There are two ways to initialize a Mist-managed router; selecting the Mist organization and adopting the router through the Mist UI, or entering the Mist registration code.
You can use either of the following processes to initialize your device as a Mist-managed router.
Mist Organization Selection
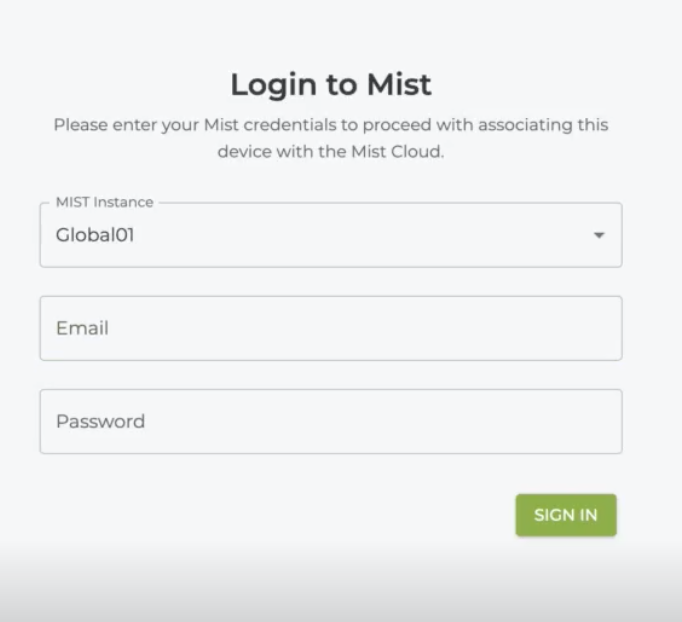
- Select Mist Organization Selection under Mist Cloud Managed.

- Enter your login credentials to log in to Mist.
-
Select the Organization, and enter the router name.
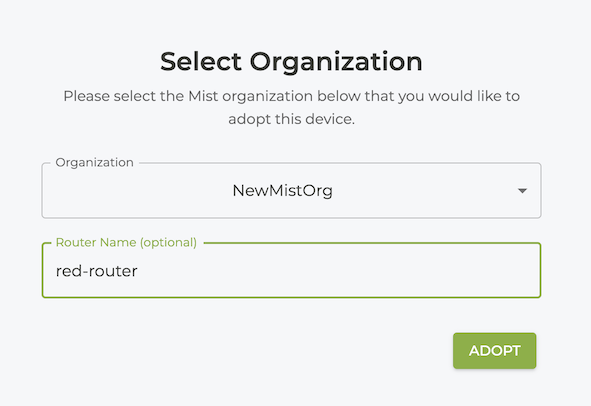
-
Click ADOPT. The router information is displayed on the SSR GUI. Your router is adopted into your Mist Organization, and is now available in your inventory ready to be assigned to a site.

Mist Registration Code
- Select Mist Registration Code under Mist Cloud Managed.

- Enter your Mist Registration Code for your organization. If you do not have your registration code, refer to the steps below.
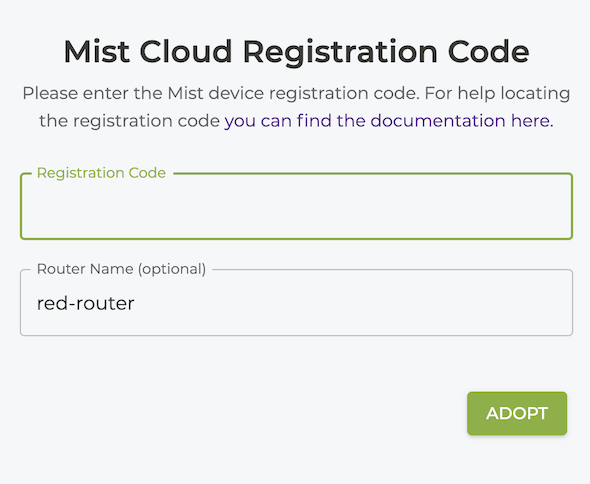
- Click ADOPT. Your router is adopted into your Mist Organization, and is now available in your inventory ready to be assigned to a site.
Retrieve the Mist Registration Code
Use the following procedure to retrieve the Mist registration code from your Mist Organization.
-
Using a separate browser, log in to your Mist Organization.
-
From the Mist menu on the left, select Organization > Inventory.

-
In the Inventory panel, click on the WAN Edge selection on the top of the screen.

- Click on the Adopt WAN Edges button in the top right corner. The WAN Edge Adoption dialog appears, displaying the registration code.

-
Click on Copy to Clipboard.
-
Return to the Initialization page and paste the registration code into the Registration Code field.
Mist Site Assignment
-
Log into your Mist Organization.
-
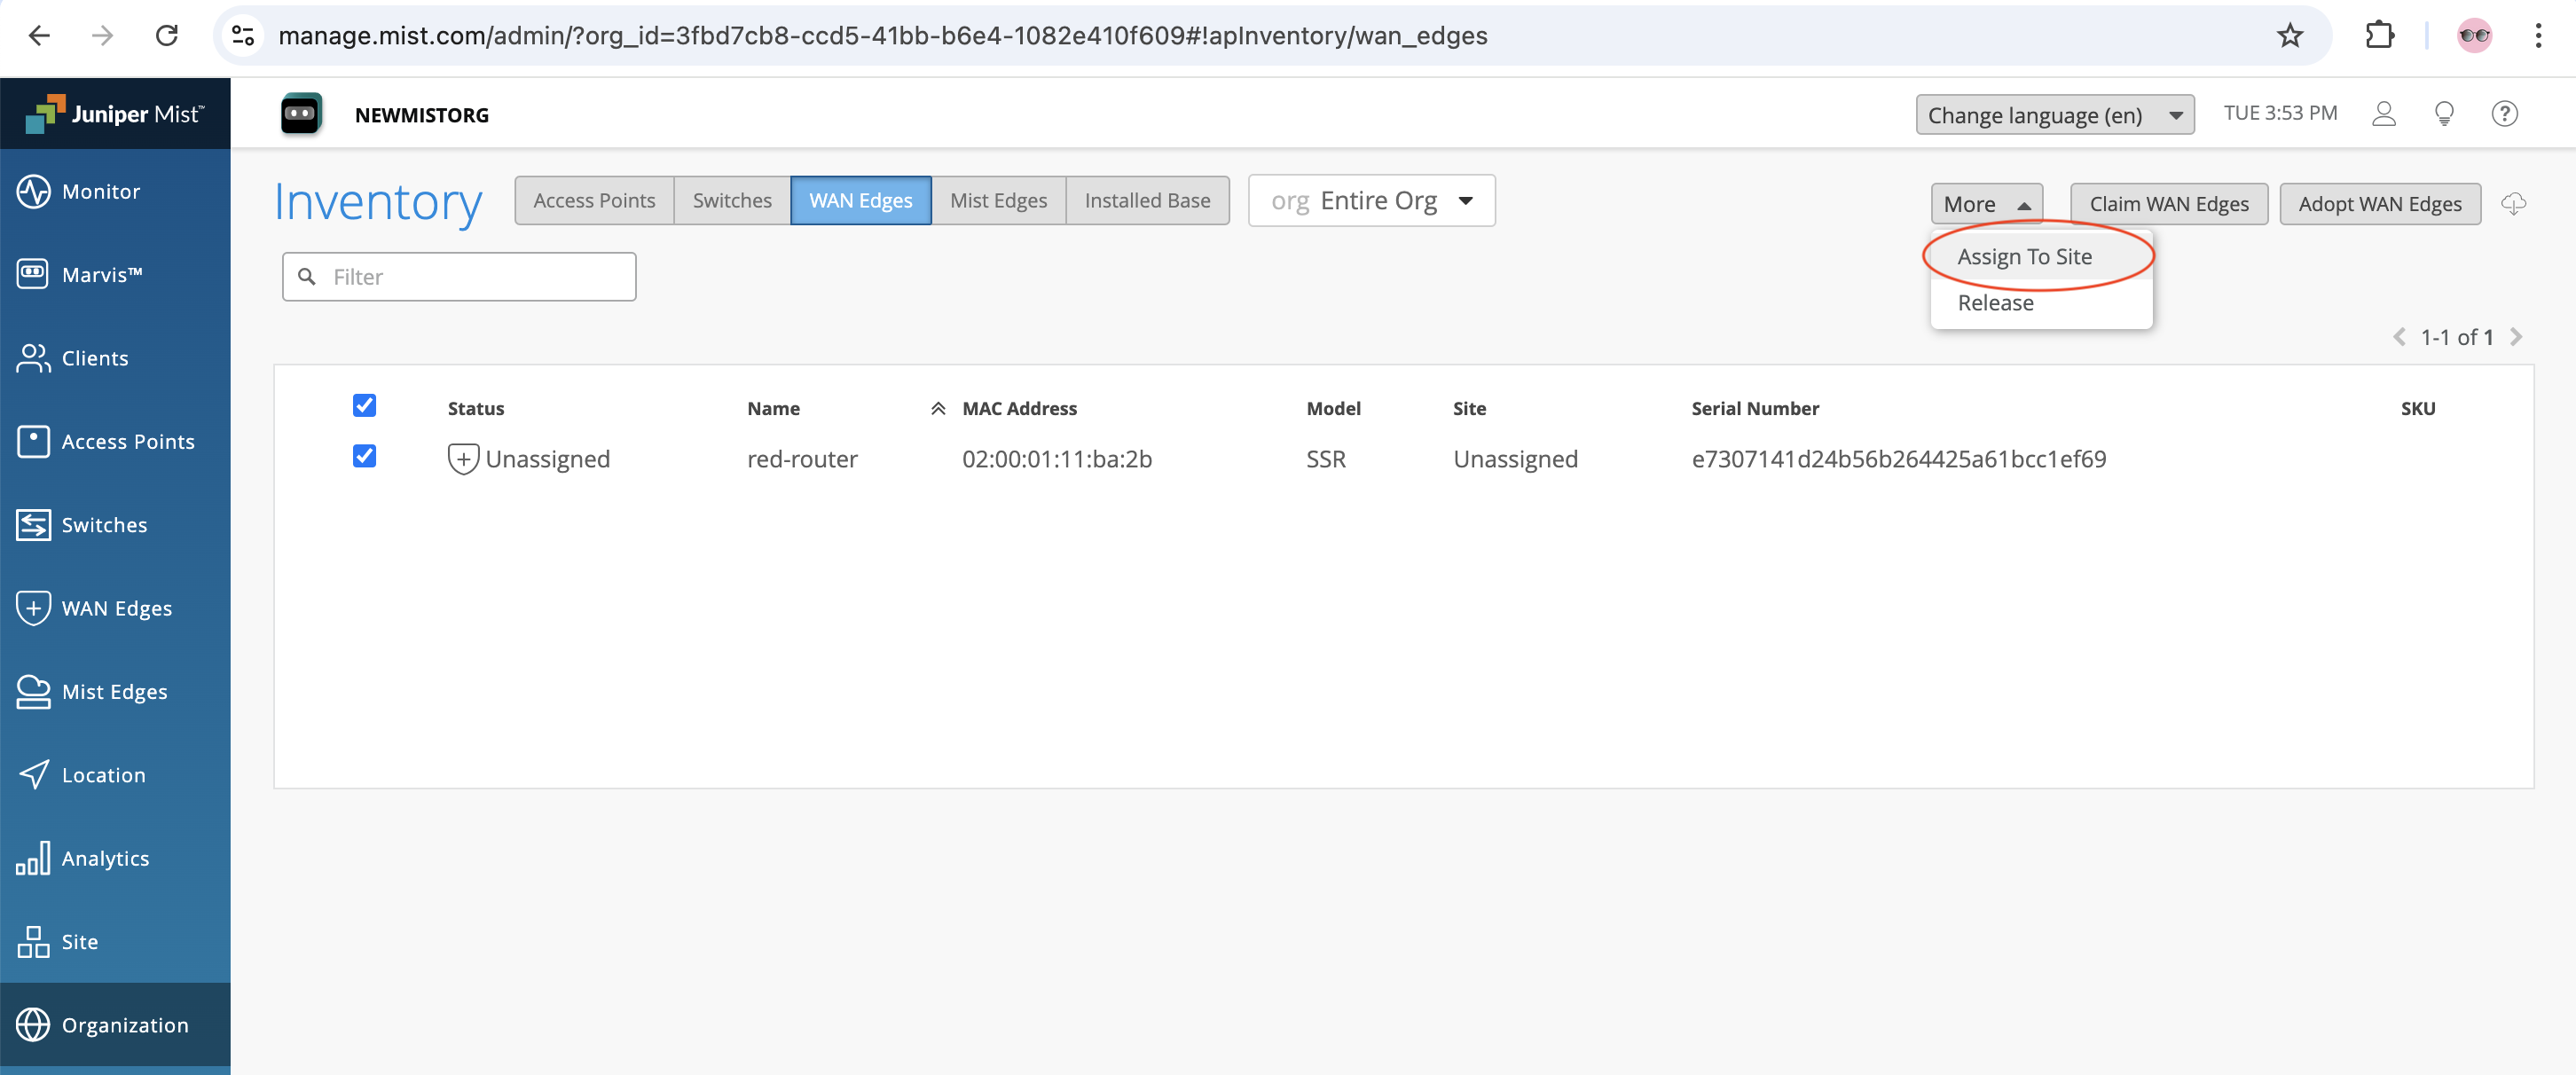
Once you are in your Mist Organization, select Organization from the left side menu, and then select Inventory.
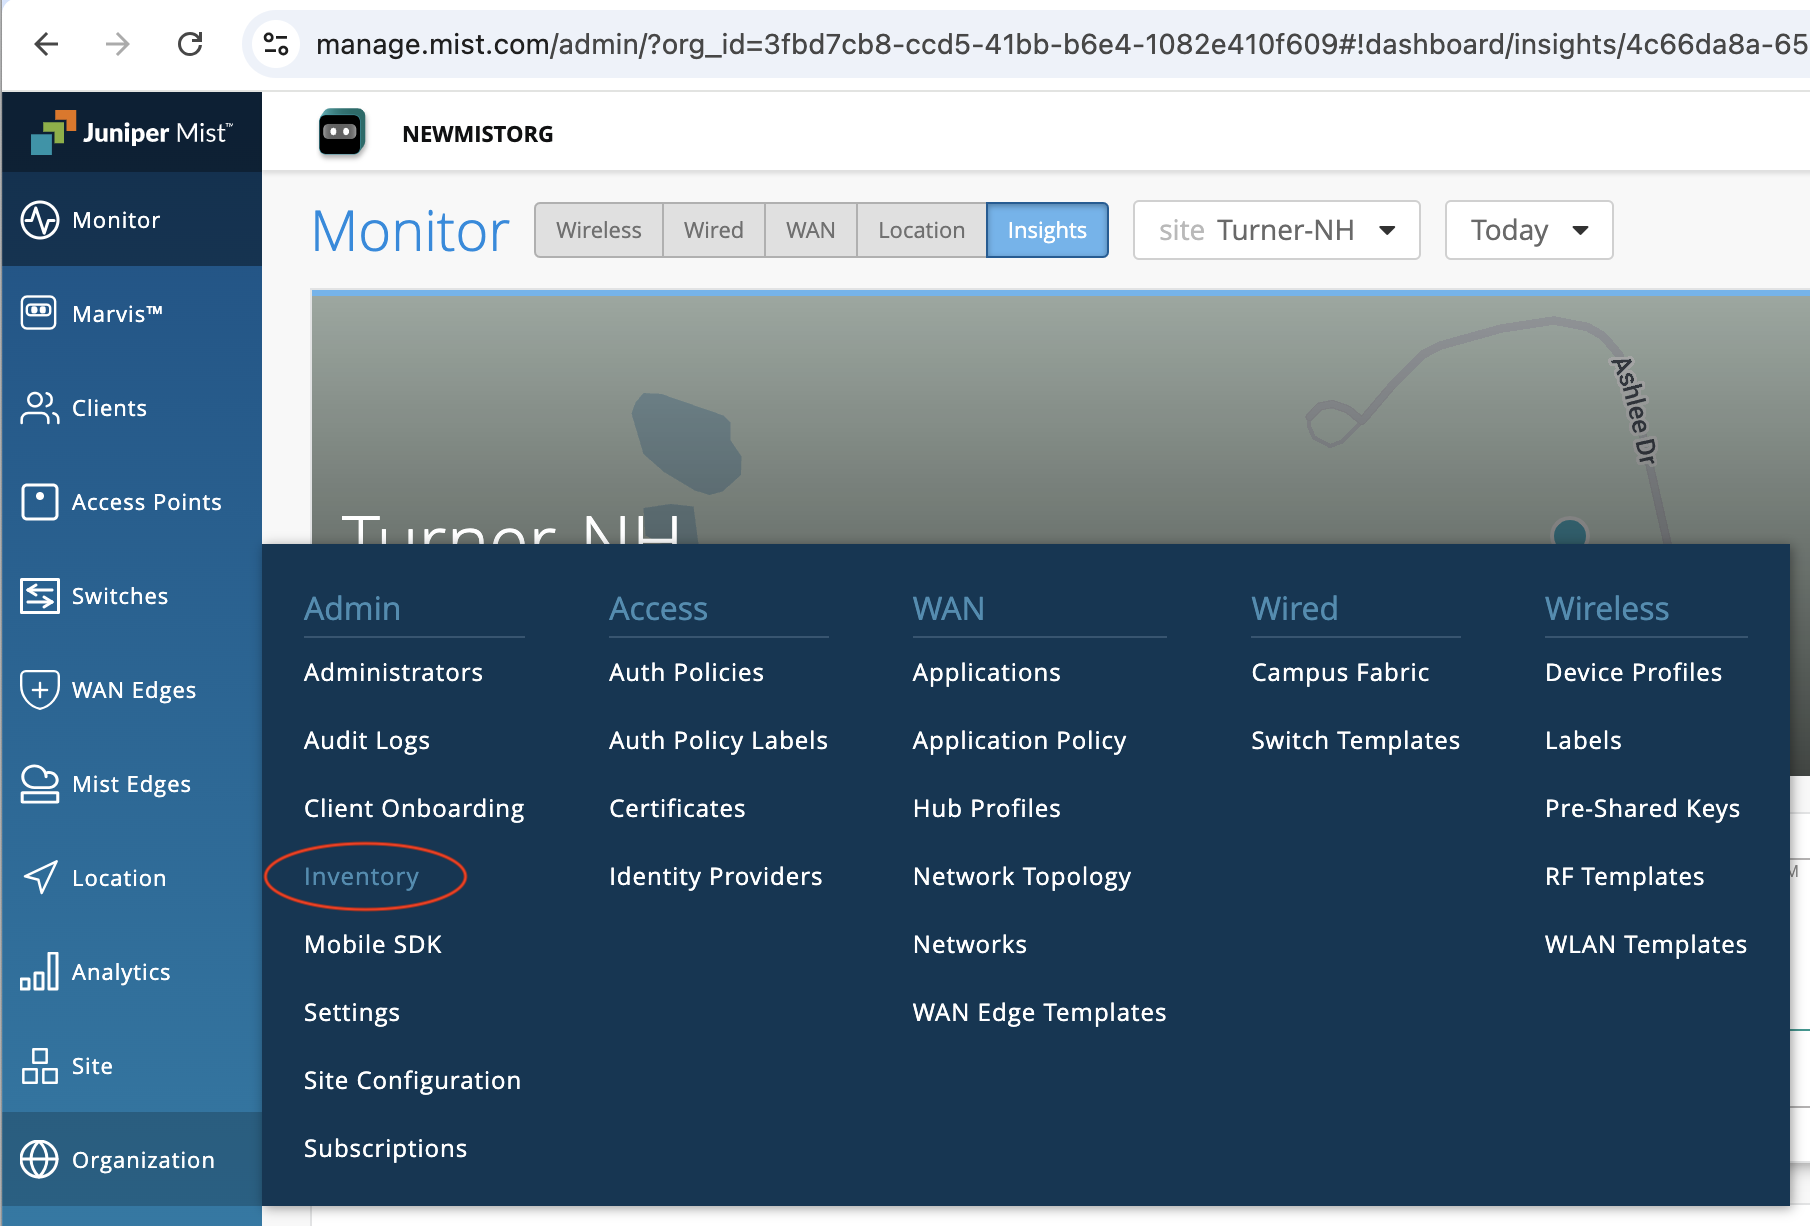
-
On the Inventory list for the Organization, select the newly installed router.
-
Use the Site dropdown and select Assign To Site.
- Place a check in the Manage configuration with Mist checkbox.
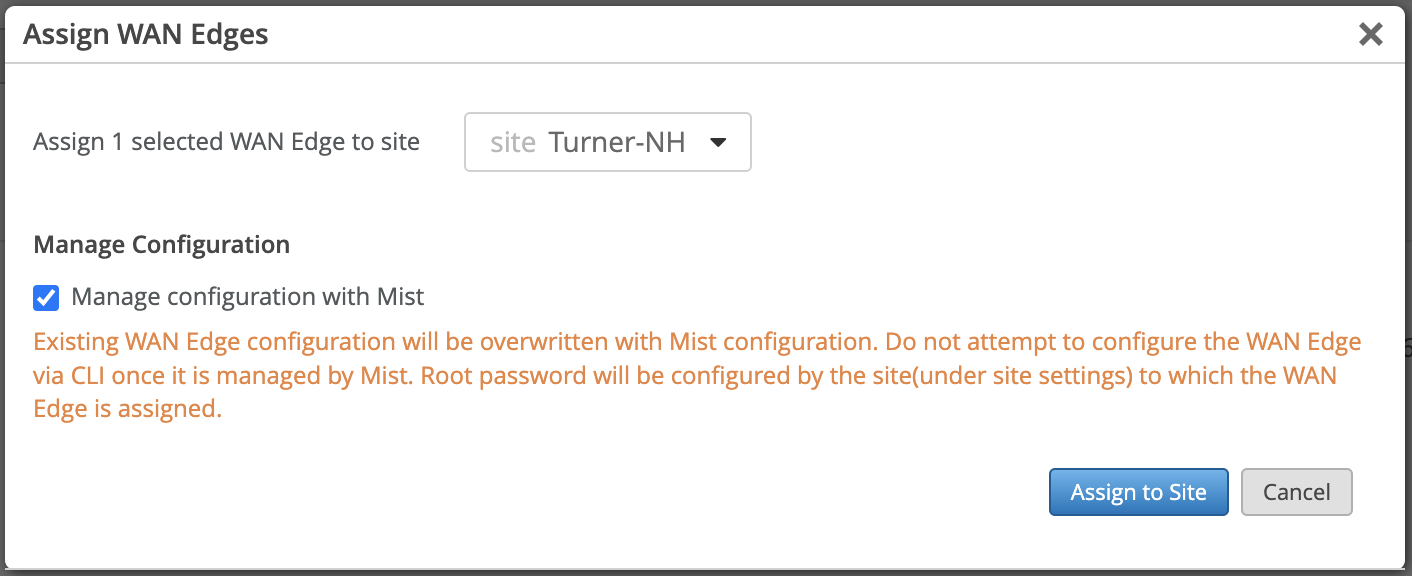
- Click Assign to Site.
The router is now assigned to the selected site, and managed by Mist.