Mount the AP12 Access Point
You can mount the AP12 either on a wall or on a desk.
We recommend that you claim your access point (AP) before you install it. The claim code is located on the rear of the AP and it might be difficult to access the claim code after you mount the AP. For information about claiming an AP, see Claim a Juniper Access Point.
Mounting Brackets for AP12
Table 1 lists the brackets available for the AP12.
| Part Number | Description |
|---|---|
| APBR-WP1 | Wall plate bracket for mounting the AP12 on a wall. The bracket ships with the AP and is compatible for installation on single-gang and double-gang junction boxes. |
| APBR-DS1 | Desktop stand that you can order separately |
Mount the AP12 on a Single-Gang Junction Box
You can mount the AP12 on a single-gang junction box by using the wall plate bracket (APBR-WP1) that we ship along with the AP12.
To mount an AP12 on a single-gang junction box:
-
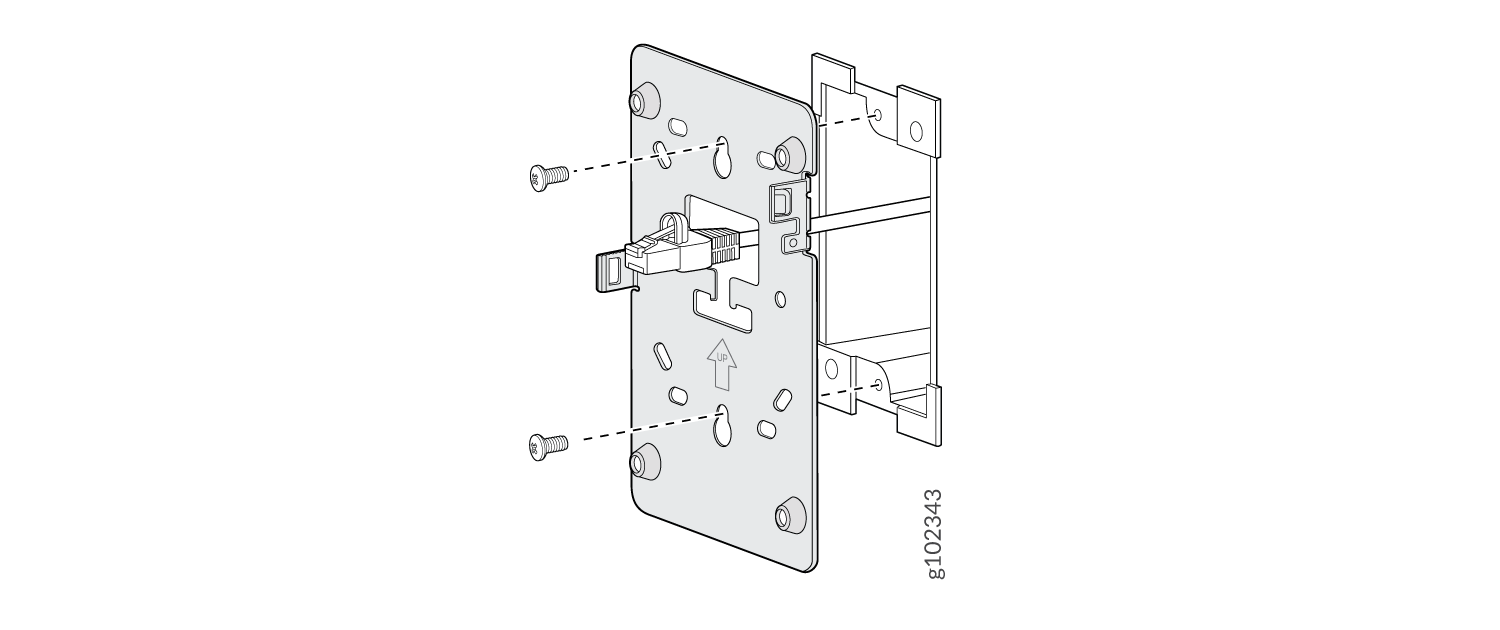
Attach the wall plate to the single-gang junction box, as shown in Figure 1.
Figure 1: Attach the Wall Plate Bracket to the Single-Gang Junction Box
-
Slide the AP onto the wall plate until the lock is engaged. Then, tighten
the security screw.
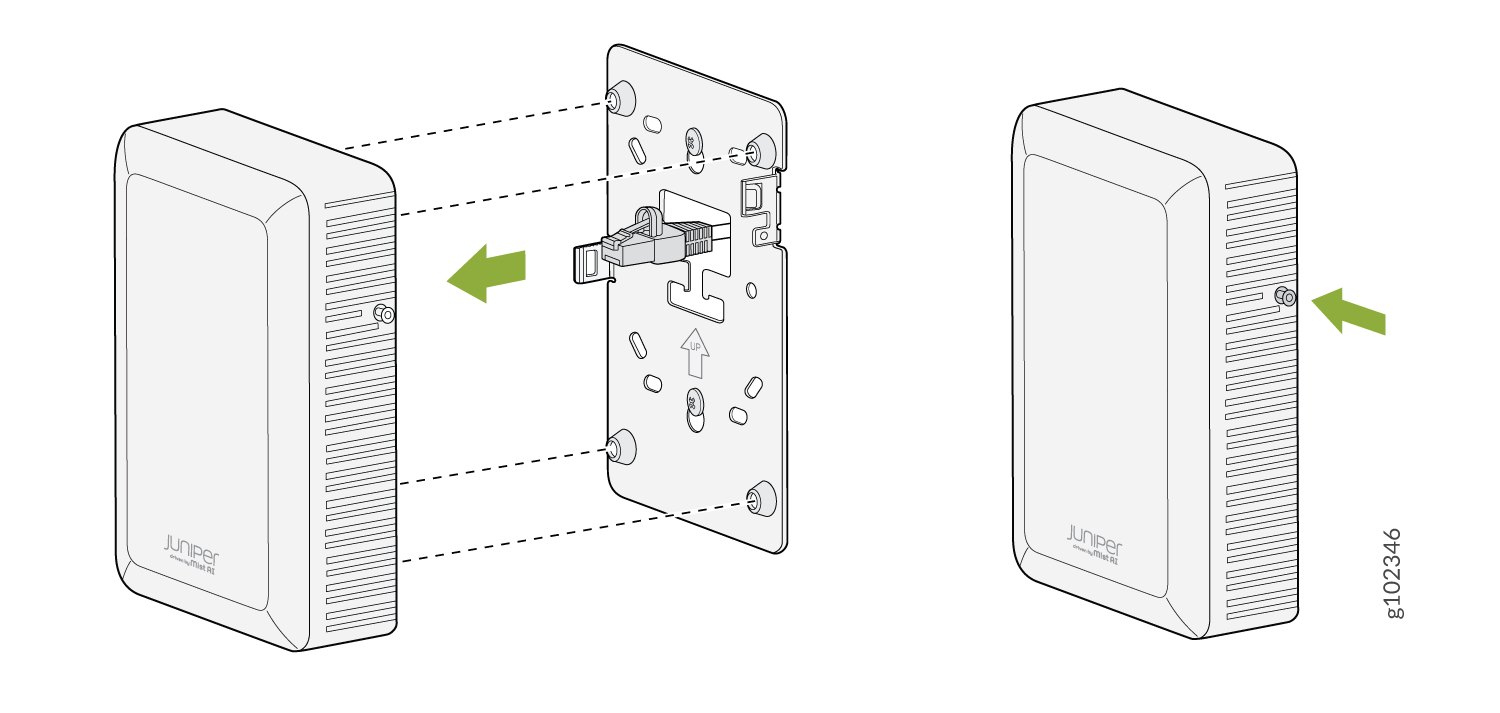
This is a US single gang box and it attaches as shown here. And the AP would be installed normally.
Mount the AP12 on a Double-Gang Junction Box
-
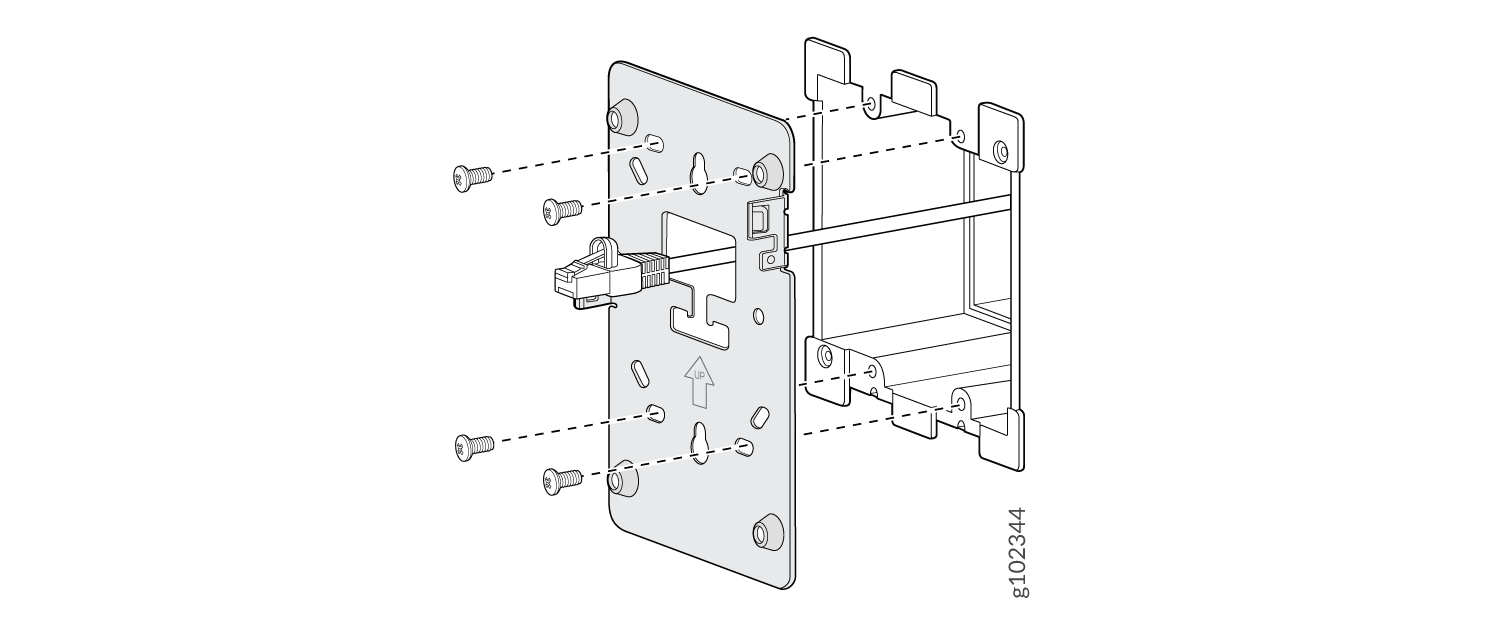
Attach the wall plate to the double-gang junction box as shown in Figure 2.
Figure 2: Attach the Wall Plate Bracket to the Double-Gang Junction Box
-
Slide the AP onto the wall plate until the lock is engaged. Then, tighten
the security screw.
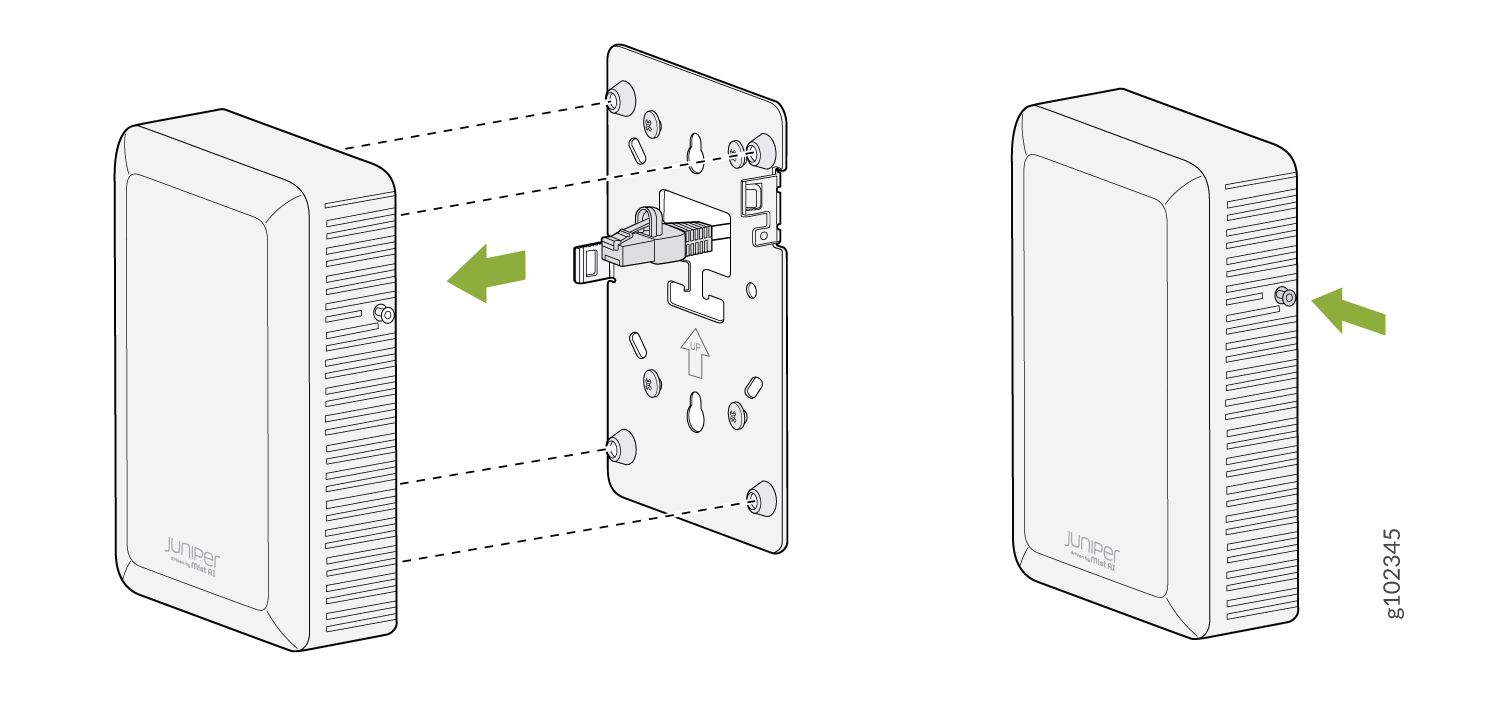
This is a US double gang box, and it attaches as shown here. And the AP would be installed normally.