ON THIS PAGE
Fast Track to Rack Installation and Power
This procedure guides you through the simplest steps to install your SRX300 Firewall in a rack and connect it to power. Have more complex installation needs? See Installing the SRX300 Firewall in a Rack.
Install the SRX300 in a Rack
Before you install, review the following:
-
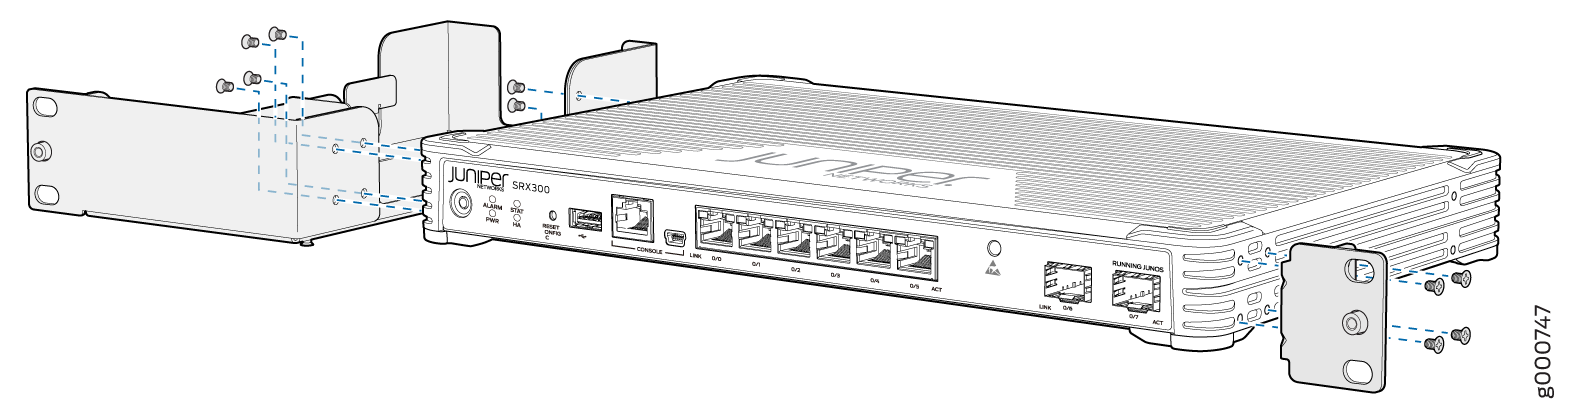
Attach the mounting bracket and power supply adapter tray to the sides of
the SRX300 using the screws that came with the rack mount kit and the number
two Phillips (+) screwdriver.
-
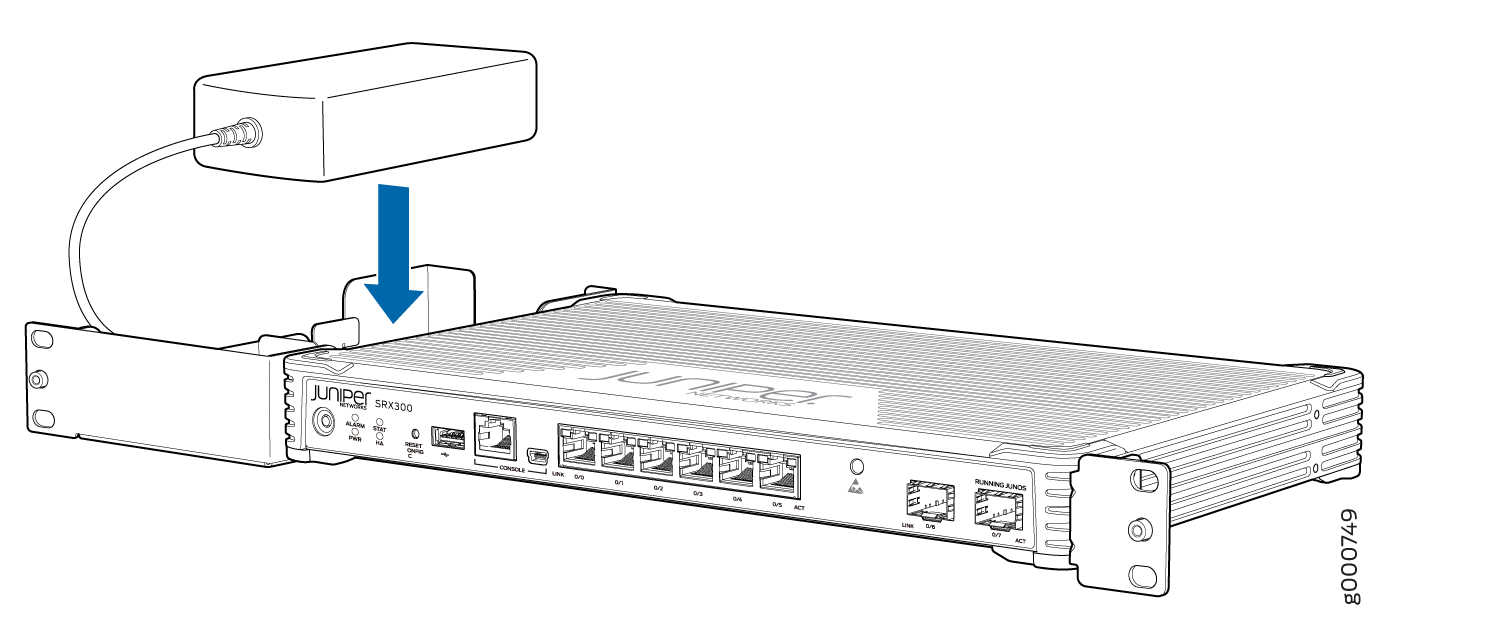
Place the power supply adapter in the tray.
-
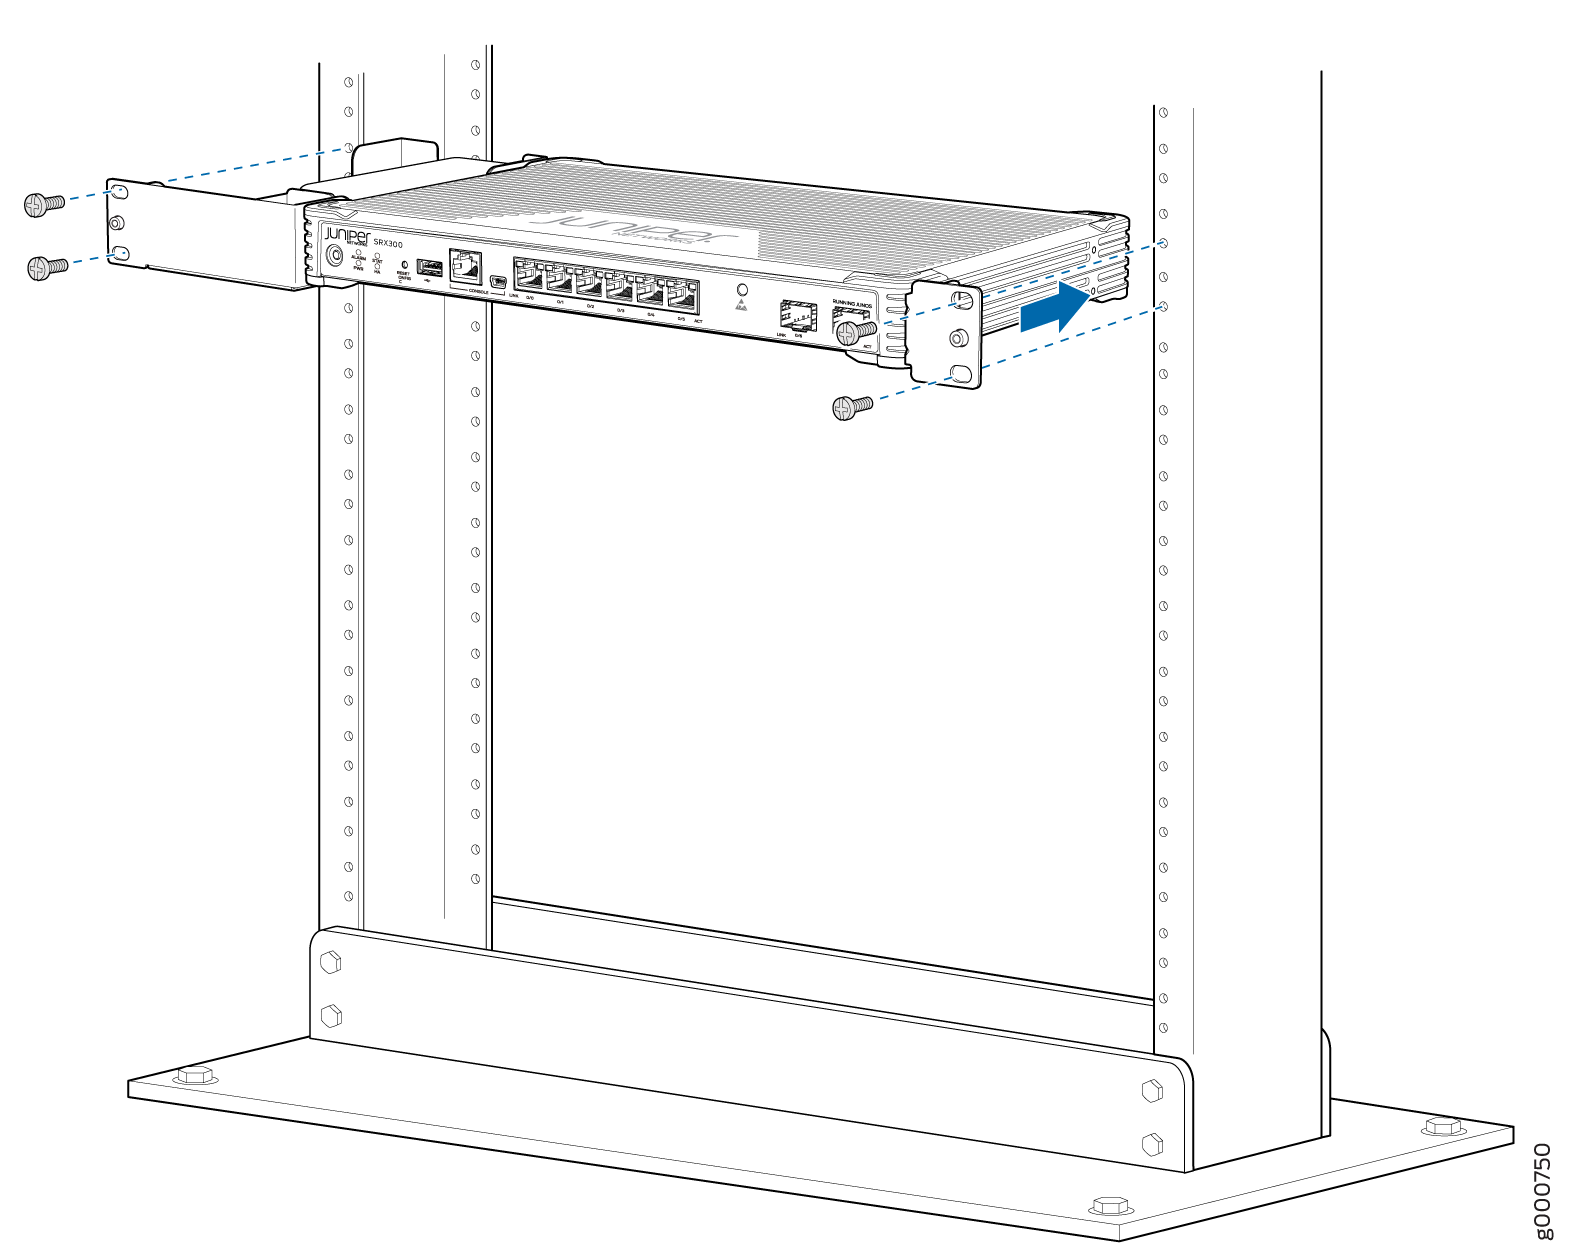
Lift the SRX300 and position it in the rack. Line up the bottom hole in the
mounting brackets with a hole in each rack rail, making sure the SRX300 is
level.
Connect to Power
To connect the SRX300 Firewall to AC power, you must do the following:
Connect the Power Cord and Power On the Firewall
To connect the power cord, do the following:
Wrap and fasten one end of the electrostatic discharge (ESD) grounding strap around your bare wrist, and connect the other end to a site ESD point.
Plug the DC connector end of the power cable into the power connector at the back of the SRX300.
Plug the AC adapter end of the power cable into the power supply adapter.

If the AC power source outlet has a power switch, turn it off.
Plug the power cord into an AC power source outlet.
If the AC power source outlet has a power switch, turn it on. The firewall doesn't have a power switch and powers on as soon as you plug it in.