


- play_arrow Overview
- play_arrow Onboarding
- play_arrow Additional Features and Services
- play_arrow Troubleshooting
Deploy Juniper Mist Edge at the Organization Level
This chapter provides information about the various tasks that you perform to deploy the Juniper Mist™ Edge at the organization level..
Create a Mist Cluster
After you onboard a Juniper Mist Edge on the Juniper Mist portal, you must add the device to a Mist Cluster. A cluster can comprise a single edge device or multiple edge devices. You can use multiple clusters in an active/active or in an active/passive configuration.
To create a cluster:
- Select the
cluster from the Mist Edges Clusters page. In the
Tunnel Termination Services page, specify the hostname or IP
address to configure the Mist Edge cluster.
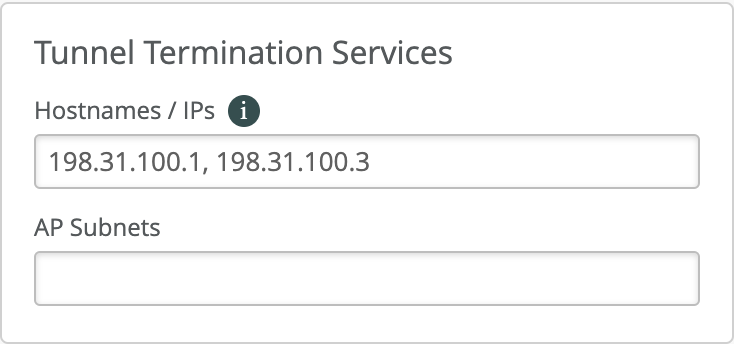 If multiple Juniper Mist Edges are part of the cluster, list the IP address of each device, separated by a comma. The hostname or IP addresses you specify in this page must be the same as the Tunnel IP address that you have configured for each Juniper Mist Edge.
The Hostnames/IPs field gets automatically populated as per the IP address you enter in the Tunnel IP Configuration field in the Mist Edge inventory page. Whenever you add or delete a Mist Edge from a Cluster, make sure to verify the entries in this section. For more information, see Tunnel Termination Services.
If you add multiple Juniper Mist Edges to a single cluster, you can create an active/active setup for all the Juniper Mist Edges in the same cluster.For an active/standby setup, you must create a second cluster for the Juniper Mist Edge you want to be on standby. If the Juniper Mist Edges in the primary cluster are down, the AP fails over to the Juniper Mist Edges in the secondary cluster.For Remote Teleworker solution, ensure that the firewall is configured to allow the connection from remote AP. Consider the following guidelines:
Allow port 500/4500 for IPSec and port 2083 for RadSec from remote APs
Firewall must translate the destination IP of the packets from remote AP to the tunnel IP
Obtain the external IP for the Mist Edge tunnel IP where a remote AP connects (usually a firewall IP). Append that IP to the hostname/IPs under tunnel termination services
No additional configuration is required on Mist Edge or AP, other than selecting the tunnel type as IPSec and Radius to proxy through Mist Edge.
Create Mist Tunnel (Organization Level)
After you create a cluster, you must configure a tunnel and bind the tunnel to the cluster. Typically, the tunnel is where you list all your user VLANs (client VLANs) that you want to extend from your corporate network to the APs.
To create a Mist Tunnel at the organization level:
- In the
Cluster
pane, assign the tunnel to a primary or a secondary Mist Edge Cluster
created
using the steps described in
Create a Mist Cluster
earlier. In either the Primary Cluster or the
Secondary Cluster field, select the required cluster from the
drop-down list. You can retain the default entry or selection in the other
fields on the page.
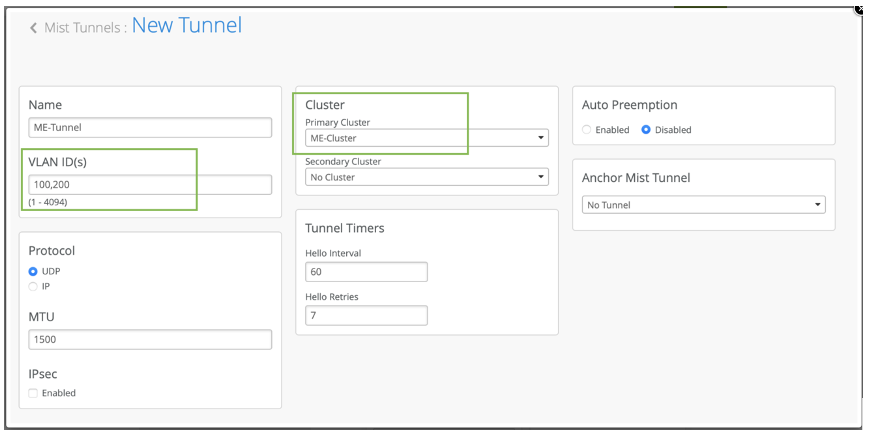 After you map the Mist Edge and tunnel to a cluster, the tunnel termination service is instantiated from the cloud on the Mist Edge.
Configure WLAN Template
A WLAN template is a collection of WLAN policies, tunneling policies and WxLAN policies. Instead of repeating a given configuration across multiple service set identifiers (SSIDs), with WLAN templates you can set it once and then attach APs to the template to automatically inherit the setting. Both the APs and WLAN must belong to the same site.
You must use the WLAN Templates to enable the corporate SSID. You can create a WLAN template and use the template assignment for:
Specific sites or a collection of individual sites that are mapped to a
Site-Group.Entire organization with actual office sites added as exceptions.
To configure a WLAN template:
- On
the
new template page,
select Entire Org or
Sites
and Site Groups to assign the
template to an
organization or to Sites and Site groups. Figure 1: WLAN Template Assigned to Sites and Site Groups
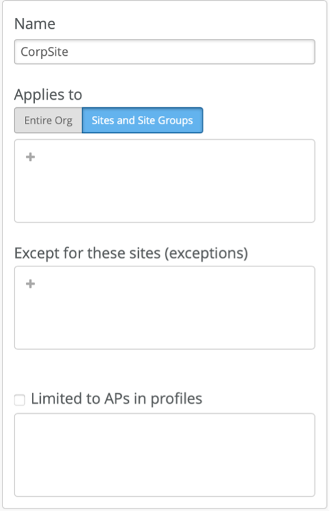 Figure 2: WLAN Template Assigned to Entire Organization with Some Exceptions
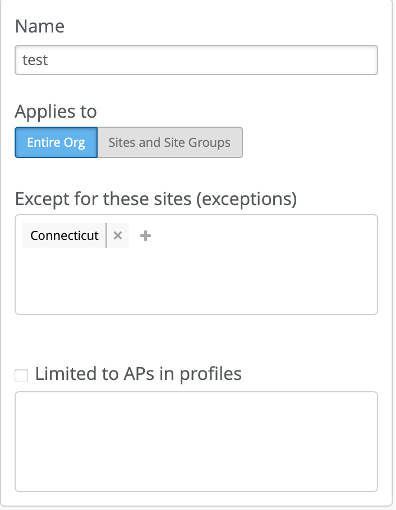
- On
the WLAN templates page,
in the WLANs pane,
select Add WLAN
.
The Create WLAN page appears.
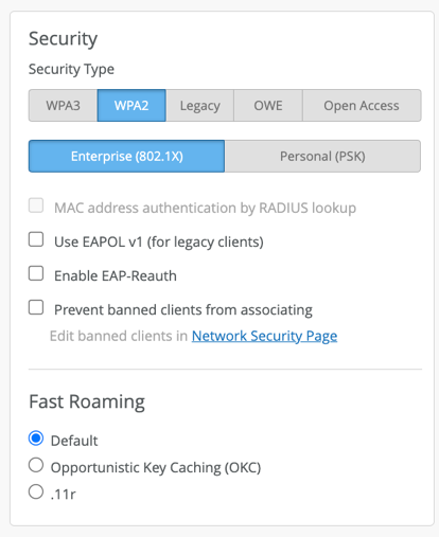
- In the Create WLAN page, you can specify the security
settings.
- In the Create WLAN page, specify the number of VLANs to be
tunneled through the Juniper Mist Edge in the VLAN ID
field.
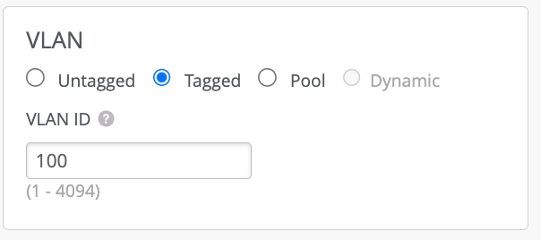 Note that Juniper® Series of High-Performance Access Points do not tunnel any WLAN configured with an untagged VLAN. You can choose the APs that are tunneled as per the deployment type.
 - Select tunnel profiles from the Tunnel drop-down
list.
Click + if you want to add multiple tunnels. Note that the specified Mist tunnel must have the same VLAN that you want to tunnel.
Note: You must ensure that a VLAN is not duplicated on multiple tunnels.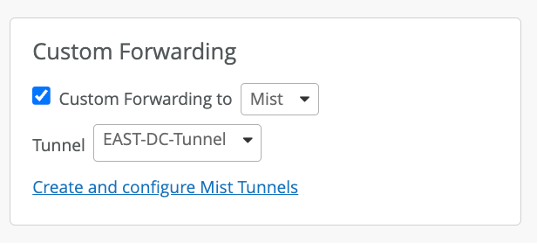
You can also set Mist to:
Disable the WLAN when the Mist tunnel goes down by selecting the Disable WLAN when Mist Tunnel goes down check box.
Force clients to reconnect when the AP’s Mist Edge tunnel fails over to a Mist Edge in a different Mist Edge cluster by selecting the Reconnect clients when Mist Edge Cluster changes check box. This will be useful to gracefully disconnect the clients if the same IP subnet is not used across Mist Edge clusters.
- In the Create WLAN page, you can specify the security
settings.
