Onboard Session Smart Routers for WAN Configuration
In a Juniper Mist™ network, you must onboard your Juniper® Session Smart™ Routers by assigning them to sites. Complete the onboarding by attaching hub profiles and spoke templates to the respective hub sites and spoke sites. This final step brings the topology together.
Before You Begin
We assume that you have your Session Smart Router already onboarded to the Juniper Mist™ cloud. We also assume that the physical connections such as cabling are already in place and that you are using valid interfaces and VLANs in your sandbox.
For details on getting your Session Smart Router up and running in the Mist cloud, see SSR Series Devices.
Assign Spoke Templates to Sites
The template that you created in Configure WAN Edge Templates now exists in the Juniper Mist cloud as an object that you can assign to one or more sites. WAN edge templates are a quick and easy way to group the common attributes of WAN edge spoke devices. You can apply a single template to multiple sites. Any changes to the WAN edge template are applied to all the sites without any additional steps.
If a site already has a template assigned to it, assigning another template will replace the existing template. That is, one site cannot have two templates, and the newer template will overwrite the older template.
To assign a WAN edge spoke template to a site:
-
Scroll to the top of the WAN Edge Templates page, and click
Assign to Sites.
Figure 1: Assign Spoke Templates to Sites

-
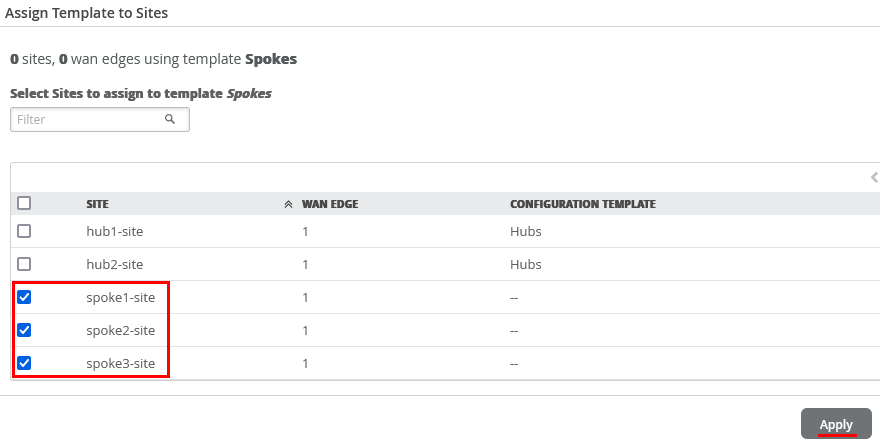
In the Assign Template to Sites window, select the required sites and click
Apply.
Figure 2: Select Sites to Assign Spoke Templates
Assign a Session Smart Router to a Site
To assign your Session Smart Router to sites, the devices must be present in the Juniper Mist inventory. You can claim or adopt your Session Smart Router to onboard it in the Juniper Mist cloud. After the device is on board, the organization inventory shows the device. For details on onboarding, see Getting Started.
To assign a Session Smart Router to a site:
-
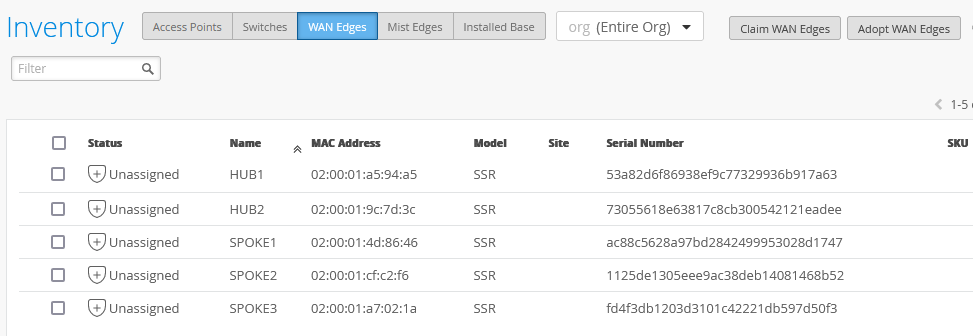
Refresh your browser and check under WAN Edges to
find out if your Session Smart Router is part of the inventory.
Figure 4: Session Smart Router in Inventory
-
Assign Session Smart Router to an individual site using Assign
to Site option.
Figure 5: Assign Session Smart Router to Sites

-
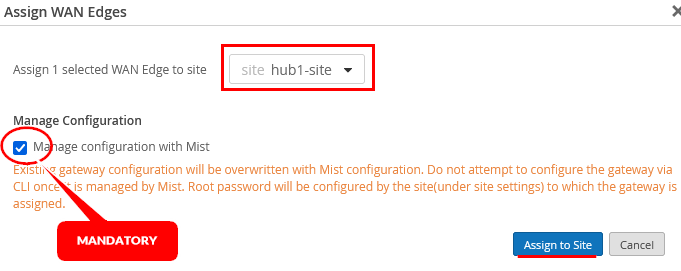
On the Assign WAN Edges page, select the site you want to assign from the
list of available sites.
Figure 6: Selecting Sites for SSR Assignment
-
Enable the Manage configuration with Mist
option.
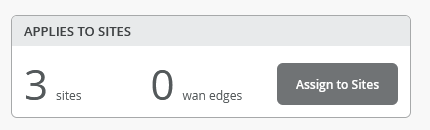
Figure 7 shows changes in the inventory once you assign the device to the site.
Figure 7: Site Assignment Summary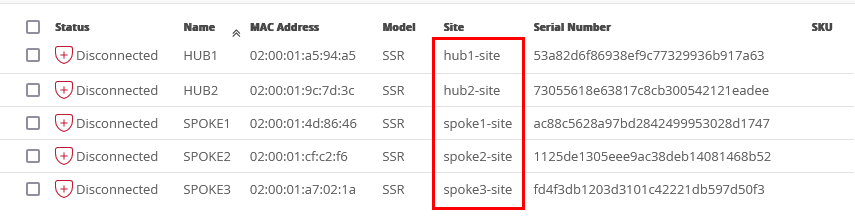
Assign a Hub Profile to the Session Smart Router
A hub profile comprises the set of attributes that are associated with a particular hub device. Each hub device in a Juniper Mist™ cloud topology must have its own profile. You apply the hub profile to an individual device that’s at a hub site.
To assign a hub profile to the Session Smart Router, which is part of a hub site:
-
Under the Applies To option, select the site from the list of
available sites.
Figure 8: Select Devices on Sites

-
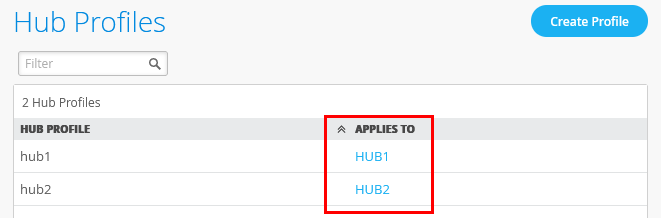
Repeat the same steps to add more hub sites. You can see the result on the
Hub Profiles page.
Figure 9: Hub Profile Assignment Summary
Revert Configuration Automatically for Session Smart Router
Once the Session Smart Router is adopted or claimed, it automatically receives new configurations from the Juniper Mist portal. If a new configuration is invalid, the device rejects it and returns to the last valid configuration. If valid, the configuration is applied to the router. The router then waits five minutes and checks the connection to the Mist cloud. If it loses connectivity after this period, the Mist portal rolls back to the previous configuration. This auto-rollback feature ensures the system quickly returns to a working configuration.