ACX7348 Fan Tray Maintenance
Learn how to remove and install a fan tray.
The ACX7348 router has four independent, field-replaceable fan trays installed on the rear of the chassis. Each fan tray is a hot-removable and hot-insertable field-replaceable unit (FRU), which means that you can remove and replace the fan trays while the router is running. You remove and replace the fan trays without turning off power to the router or disrupting routing functions.
Remove a Fan Tray from the ACX7348 Router
Before you remove a fan tray:
-
Ensure that you understand how to prevent electrostatic discharge (ESD) damage.
-
Ensure that you have the following parts and tools available to remove a fan tray from the ACX7348 router:
-
ESD grounding strap
-
Replacement fan tray
-
Do not remove the fan tray unless you have a replacement fan tray available.
You can access the fan tray on an ACX7348 router from the front or the rear of the chassis.
Remove a Fan Tray from the Rear of the Chassis
To remove a fan tray from the rear of the chassis:
-
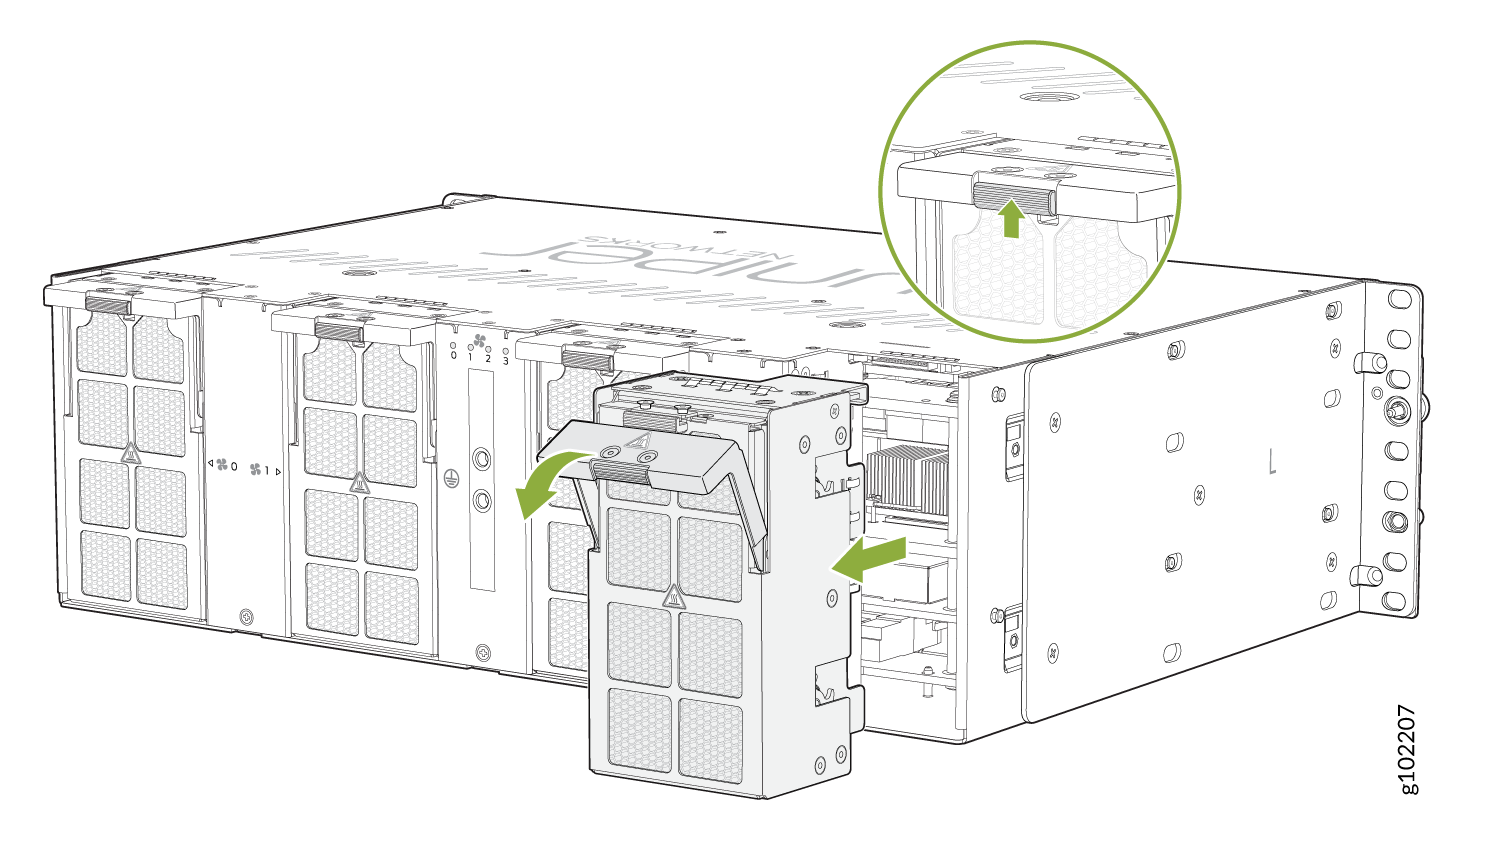
Press the button on the fan tray ejector handle to unlock the fan tray.
Pull down the ejector handle and pull the fan tray completely out of the
chassis.
Figure 1: Remove a Fan Tray from the Rear of an ACX7348 Router
Remove a Fan Tray from the Front of the Chassis
To remove a fan tray from the front of the chassis:
-
Press the button on the fan tray ejector handle to unlock the fan tray.
Pull down the ejector handle and pull the fan tray completely out of the
chassis.
Figure 2: Remove the Fan Tray from the Front of the Chassis

Install a Fan Tray in the ACX7348 Router
Before you begin to install a fan tray:
-
Ensure that you understand how to prevent electrostatic discharge (ESD) damage.
-
Ensure that you have the following parts and tools available to install a fan tray in an ACX7348 router:
-
ESD grounding strap
-
A replacement fan tray
-
To install an ACX7348 fan tray:
