ACX7348 Flexible PIC Concentrator Maintenance
Learn how to remove and reinstall Flexible PIC Concentrators (FPCs).
The ACX7348 router has a fixed Flexible PIC Concentrator (FPC) and two pluggable FPCs. The ACX7K3-FPC-2CD4C and ACX7K3-FPC-16Y are the pluggable FPCs that are installed horizontally in the front of the chassis. You can remove and replace the pluggable FPCs without powering off the router.
Before you replace an FPC from the router chassis:
-
Ensure that you have taken the necessary precautions to prevent electrostatic discharge (ESD) damage.
-
If there are any optical cables (including transceivers) installed in the FPC, remove them before you replace the FPC.
-
Ensure that you have the following equipment available before replacing an FPC:
-
Antistatic bag or antistatic mat
-
Replacement FPC or a blank for the empty slot
-
ESD grounding strap
Figure 1: ESD Point on an ACX7348 Router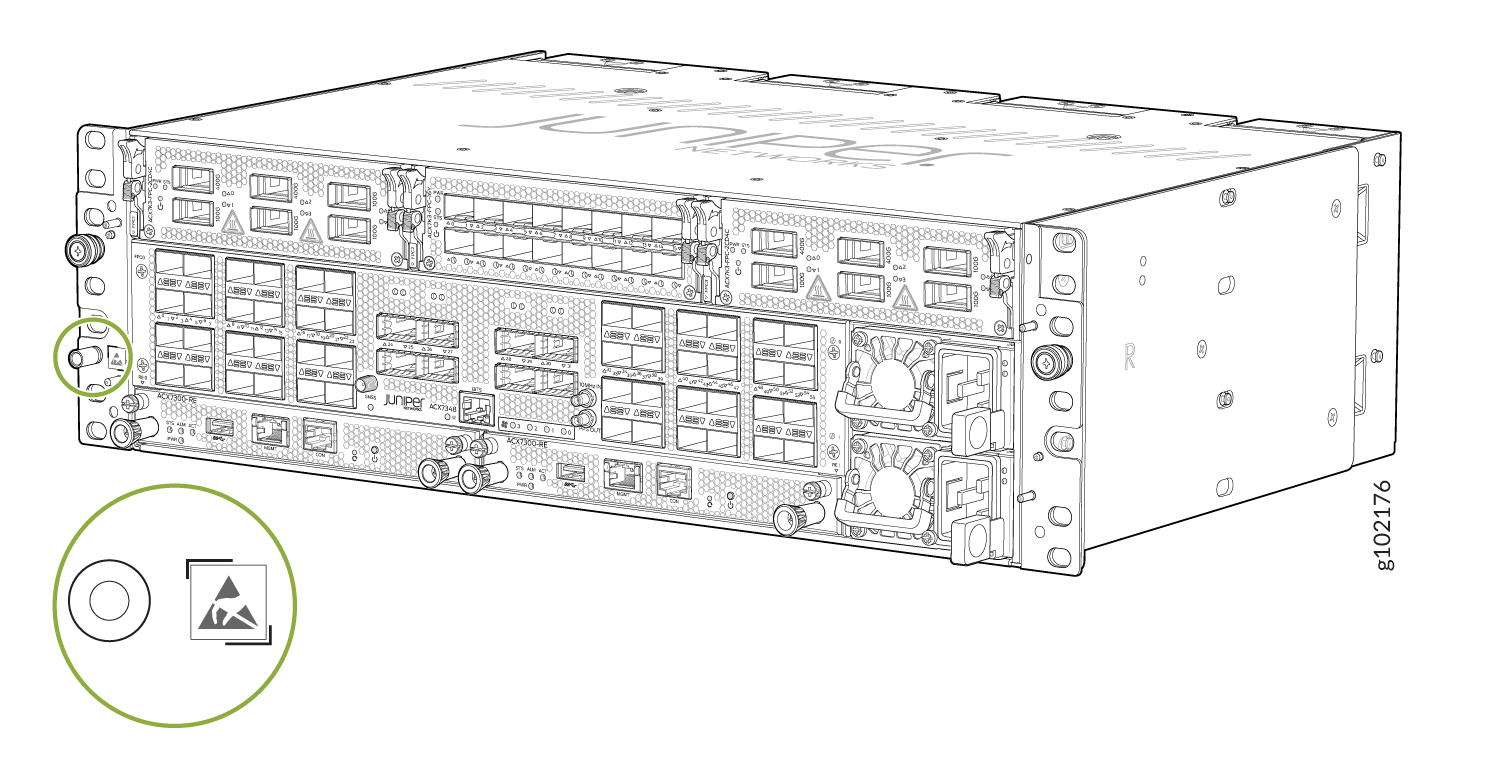
-
Remove a Flexible PIC Concentrator from the ACX7348 Router
To remove an FPC from an ACX7348 router chassis:
-
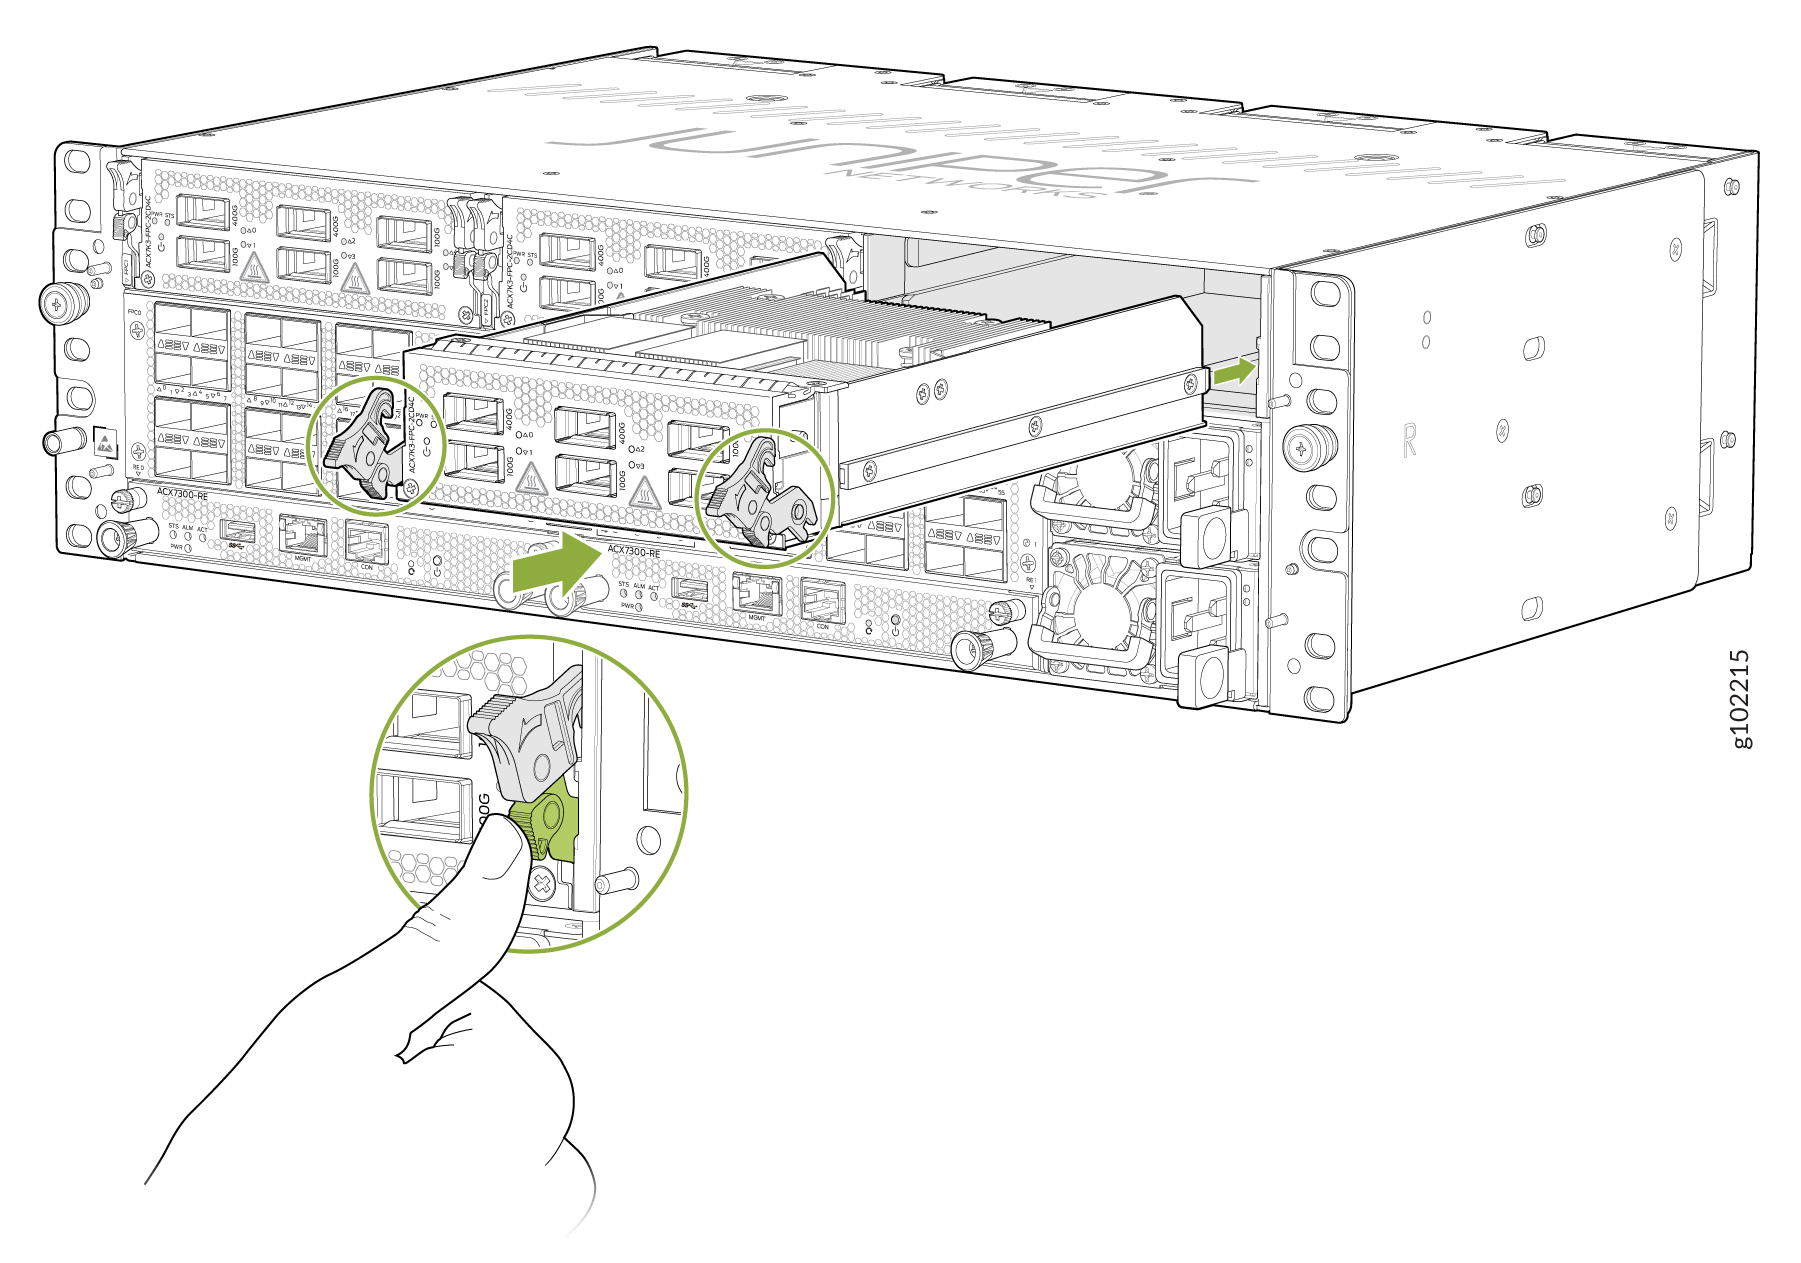
To unlatch the ejector handles, grasp both the ejector handles using your
hands by placing your thumb on top of the ejector handle and your index
finger below the ejector handle. Pull down the ejector handles
simultaneously and slide the FPC out of the slot (see Figure 2).
Figure 2: Remove an ACX7348 FPC

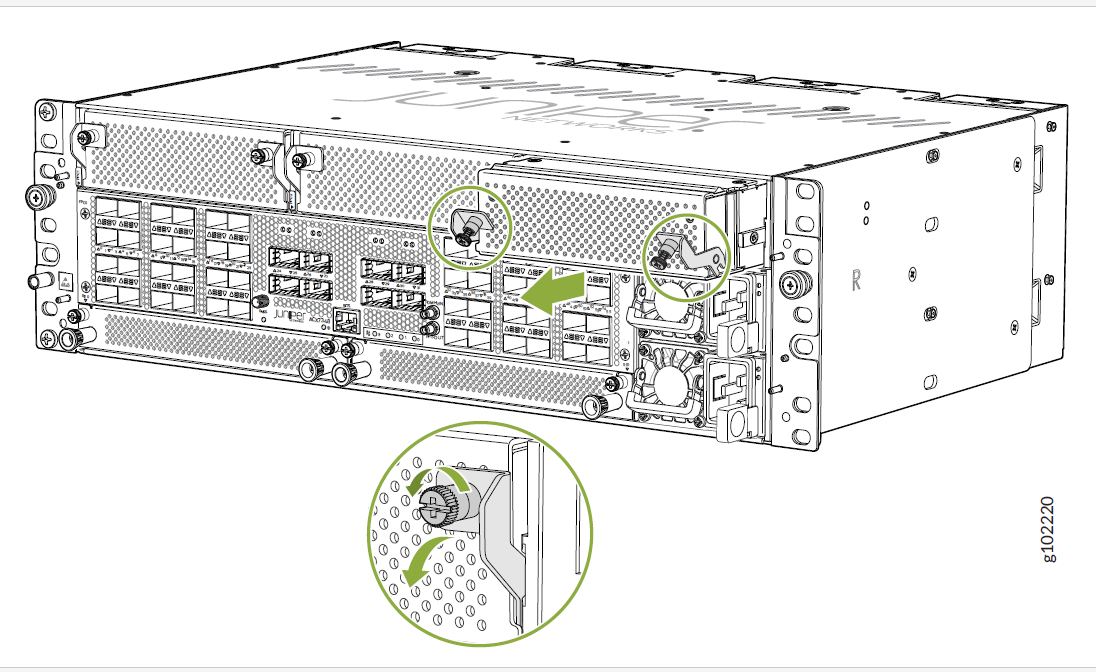
-
If you are not replacing the FPC immediately, install a blank panel in the
empty slot.
Figure 3: Install the FPC Blank
Install a Flexible PIC Concentrator in the ACX7348 Router
To install an FPC in the ACX7348 router chassis:
-
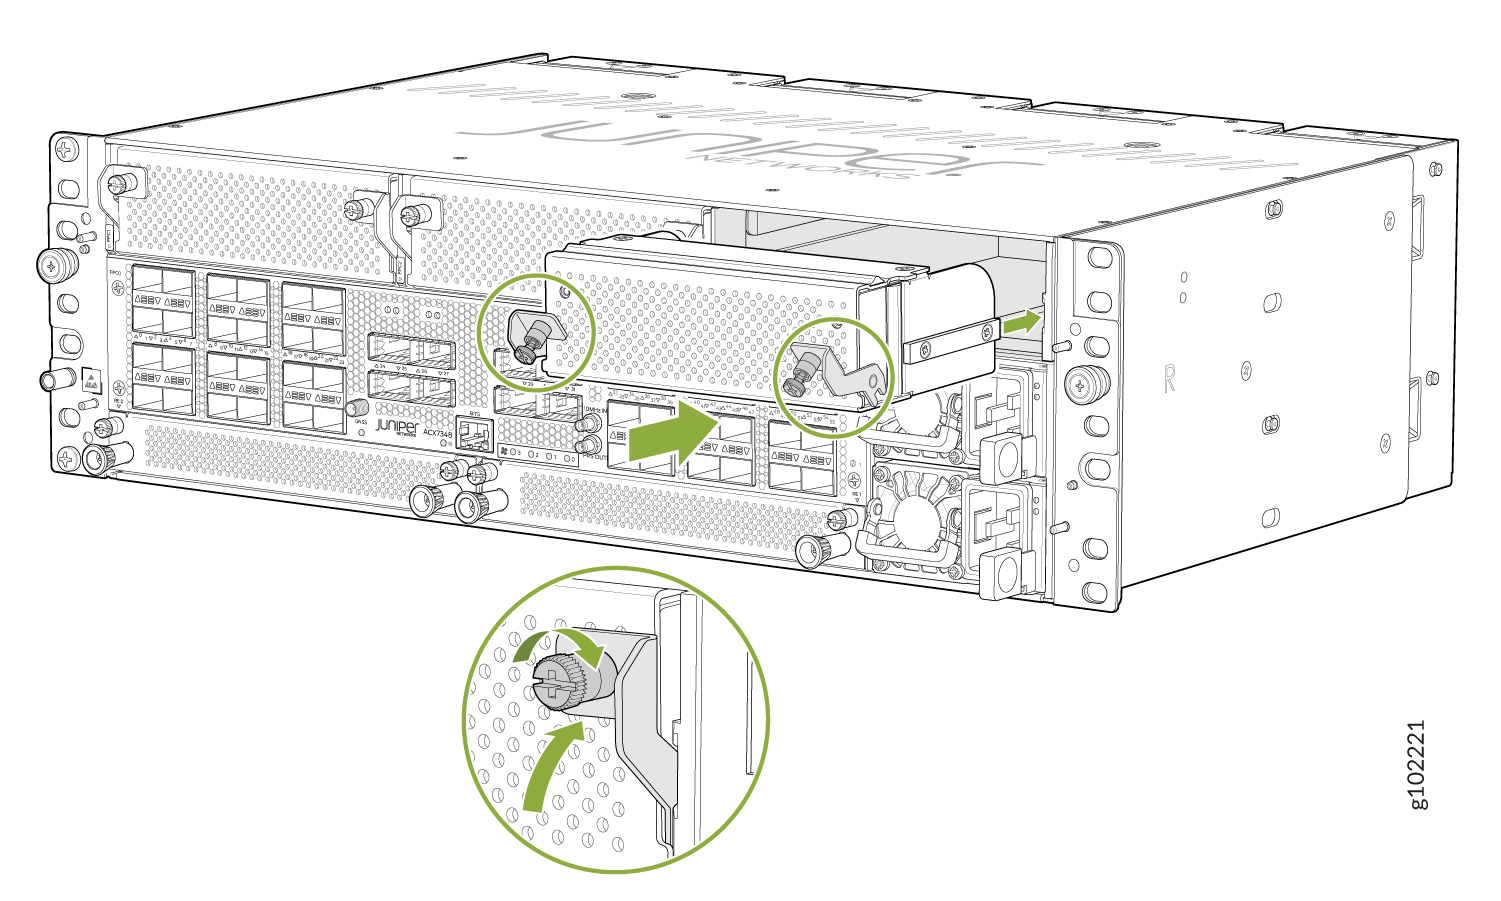
Either remove the failing FPC (see Figure 2) or, if an FPC
blank is installed, turn the thumb screws counter-clockwise on the handles
on the blank and gently pull the blank out of the slot (see Figure 4).
Figure 4: Remove the FPC Blank
-
Using both hands, push the lower end of both the ejector handles until they
latch to seat the FPC (see Figure 5).
Figure 5: Install an ACX7348 FPC