Create a Brownfield Deployment to Add an Overlay to an Existing IP Fabric
When you add an overlay onto an existing data center network (sometimes called a brownfield deployment), you need to make sure the IP fabric is fully in place.
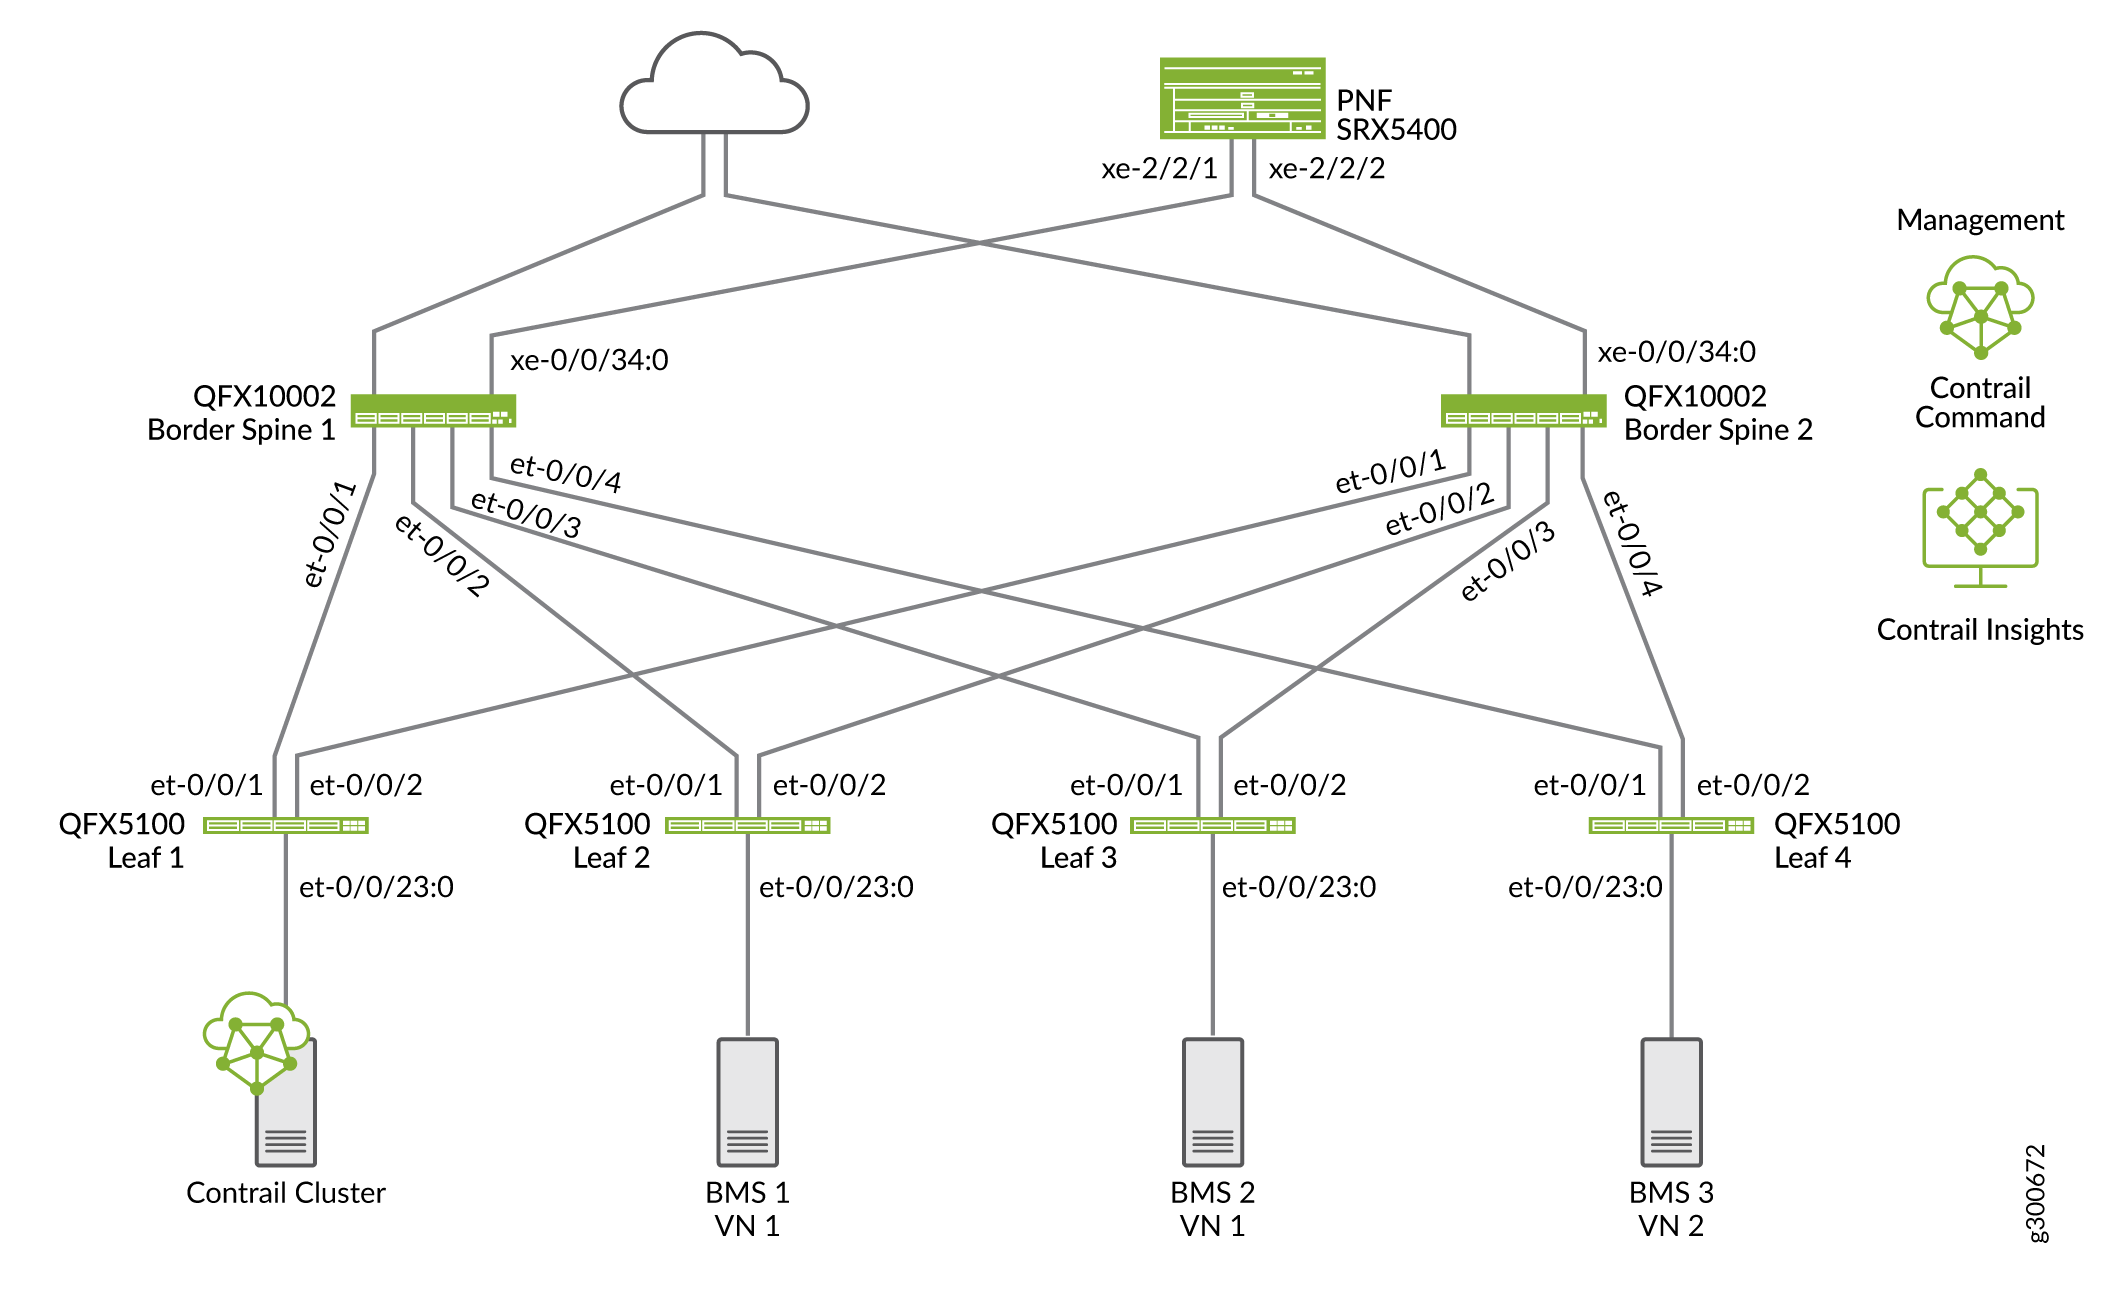
We are adding an overlay to a centrally-routed bridging (CRB) fabric as shown in figure Figure 1.
Once the underlay is in place, Contrail Command does the following to add the overlay:
Discovery of the underlay (devices, interfaces, and management network)
BGP configuration and EVPN-VXLAN baselined for the overlay based on configured device roles.
Before You Begin
The brownfield overlay procedure assumes that the following are established before you provision the overlay.
Management network
Hostname and router ID
Remote access to fabric devices using SSH or NETCONF
IP addresses configured on all the fabric interfaces
Physical interfaces with LLDP between fabric devices and an MTU of at least 2000
Loopback interfaces with IP addresses
Underlay routing protocols
For the most successful results, we recommend that you use EBGP for the underlay and configure it as follows:
Configure each spine and leaf device with its own AS number
EBGP peering between all fabric devices (using local-as)
EBGP policy to advertise BGP and direct and connected routes
It is considered good practice to tag routes with a community based on local EBGP AS number
Routing information base (RIB) and forwarding information base (FIB) multipath with per-packet load balancing and fast reroute functionality enabled.
For more information about configuring an IP fabric, see IP Fabric Underlay Network Design and Implementation in the Data Center Fabric Architecture Guide.
Adding an Existing Underlay into a Fabric and Discovering Devices
- Navigate to Infrastructure > Fabrics and click Create.
The provision option box appears.
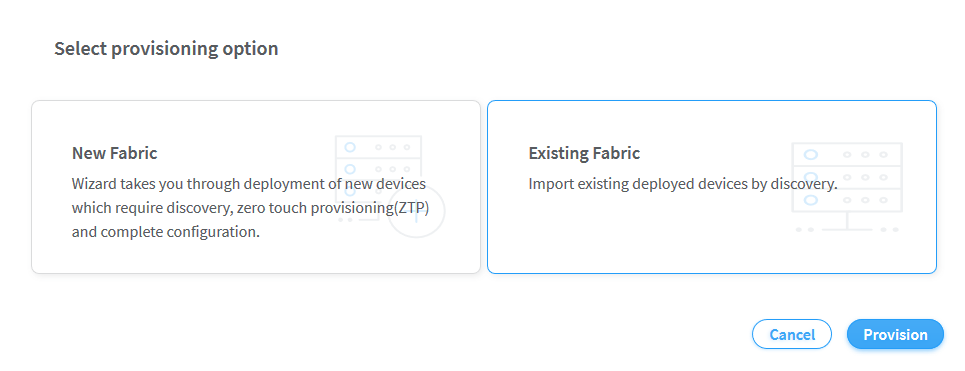
- Select Existing Fabric and click Provision.
The Create Fabric screen displays.
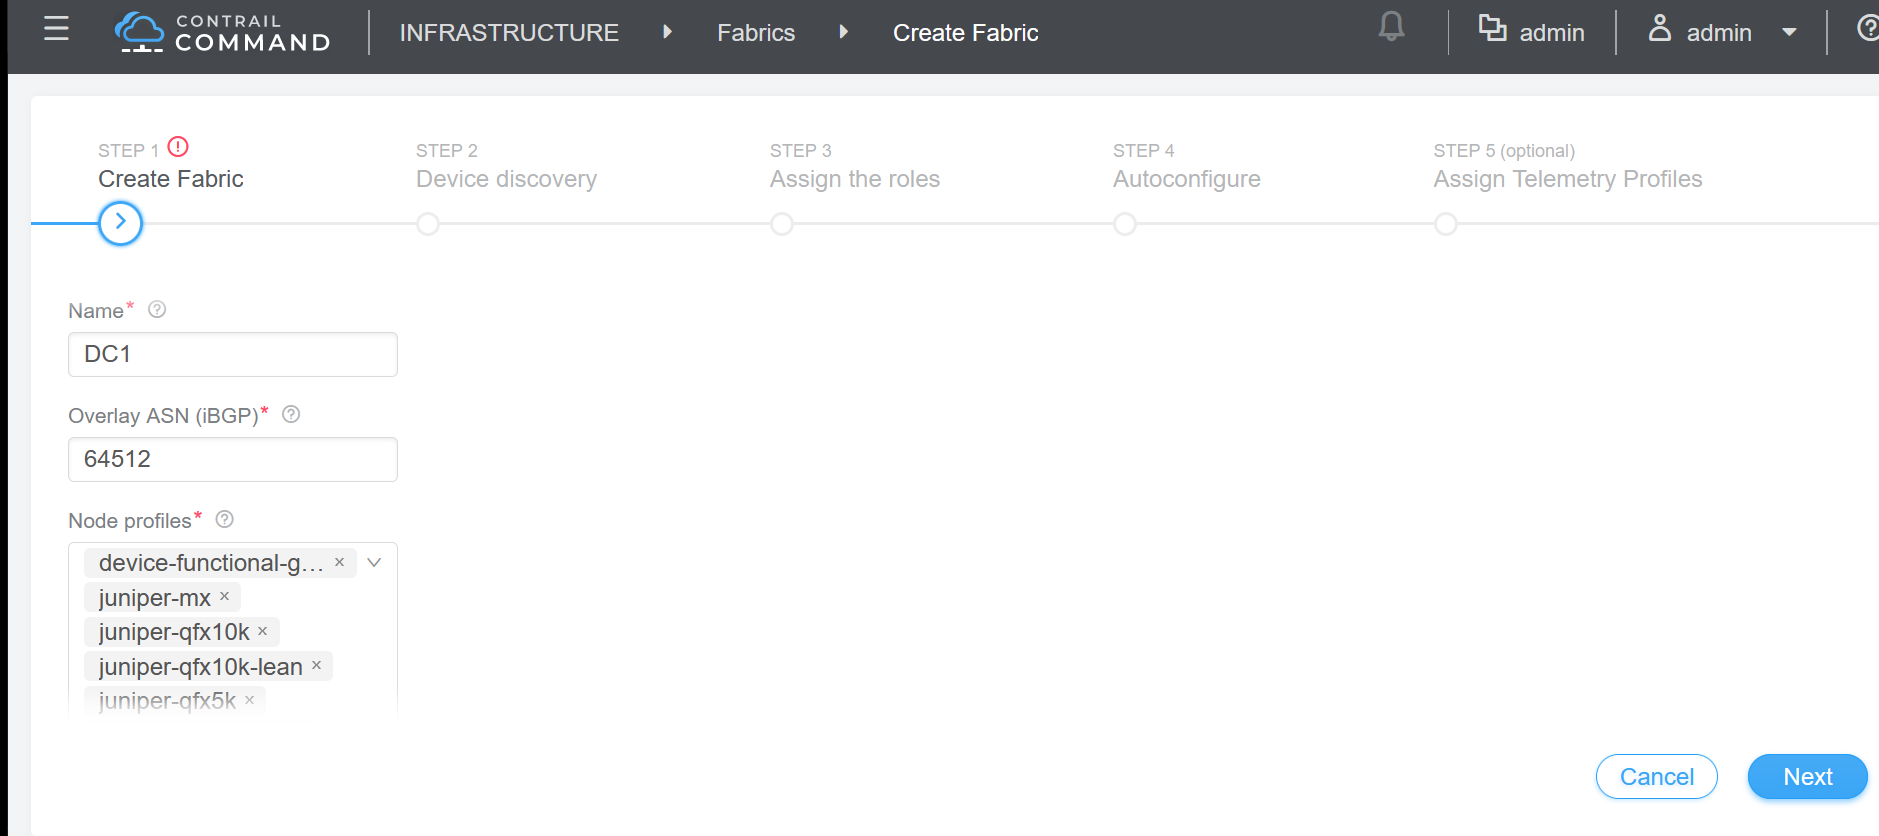
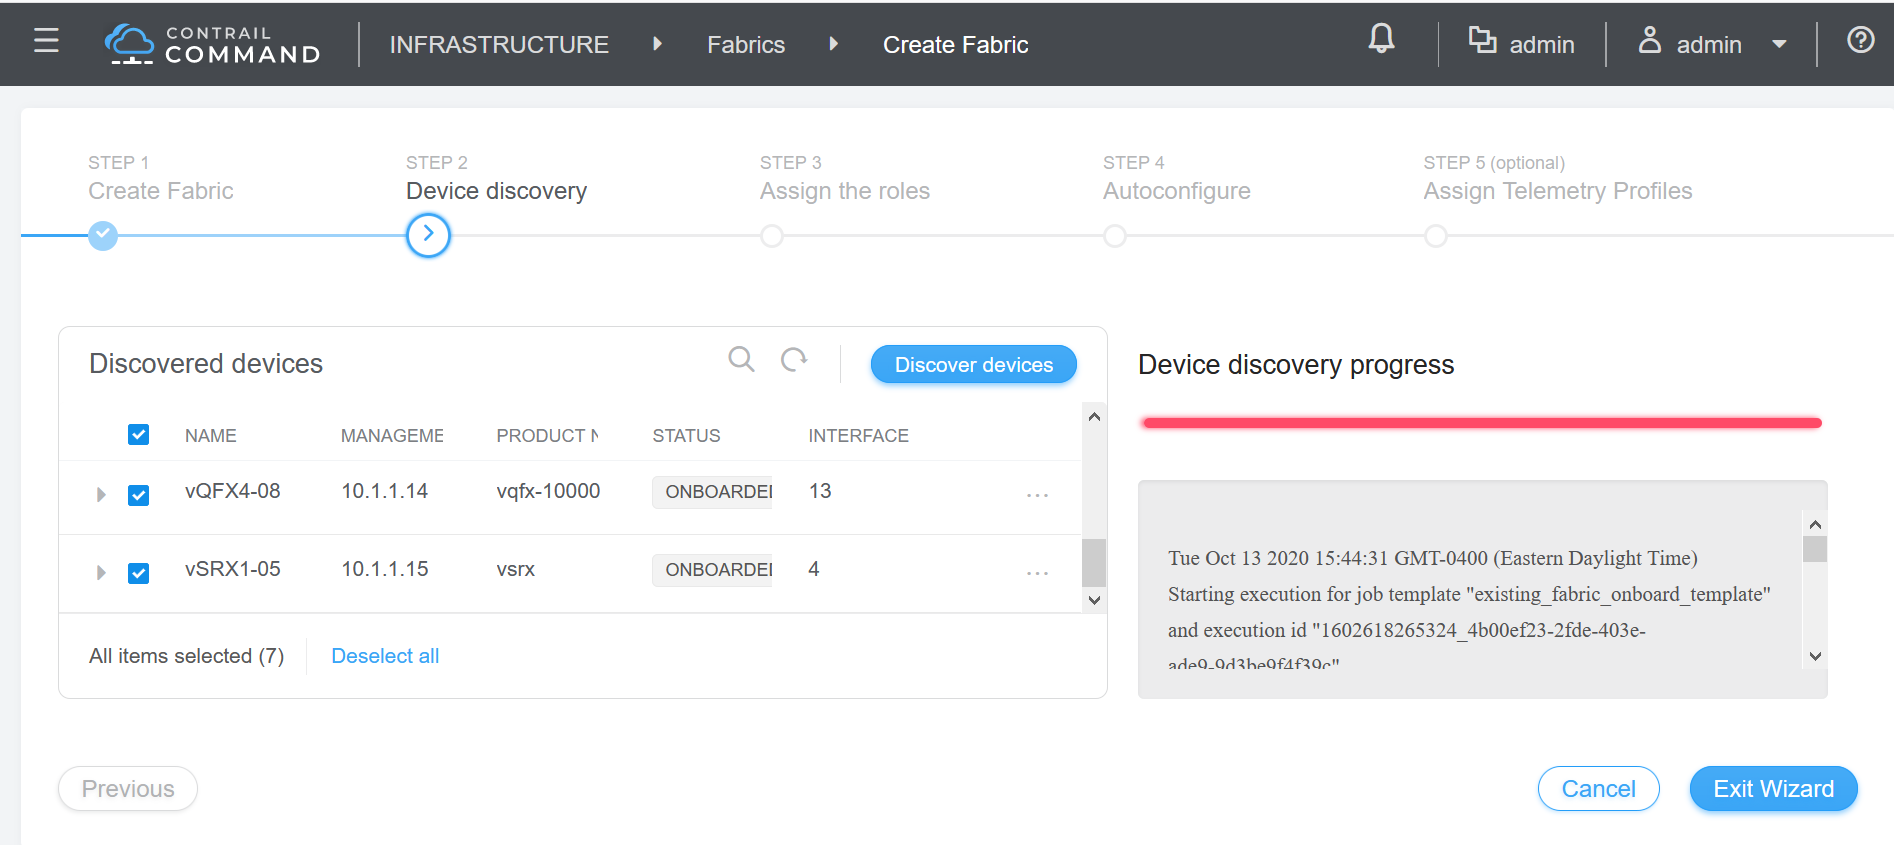
- Click Next, and the Device Discovery process
begins.
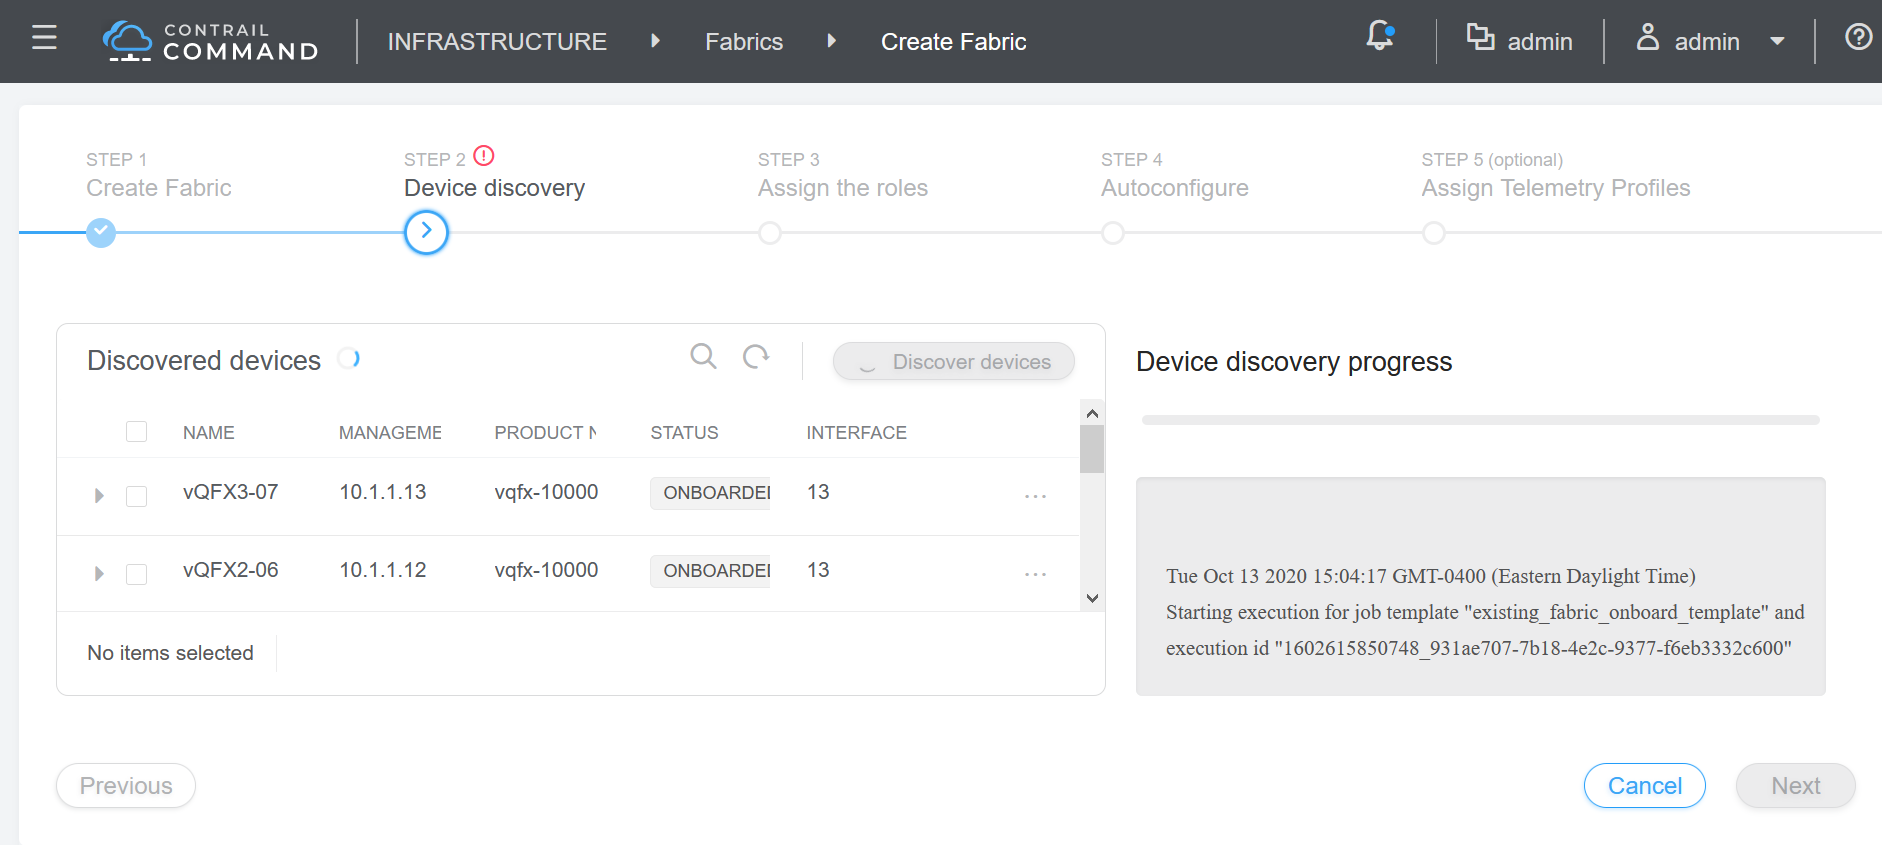
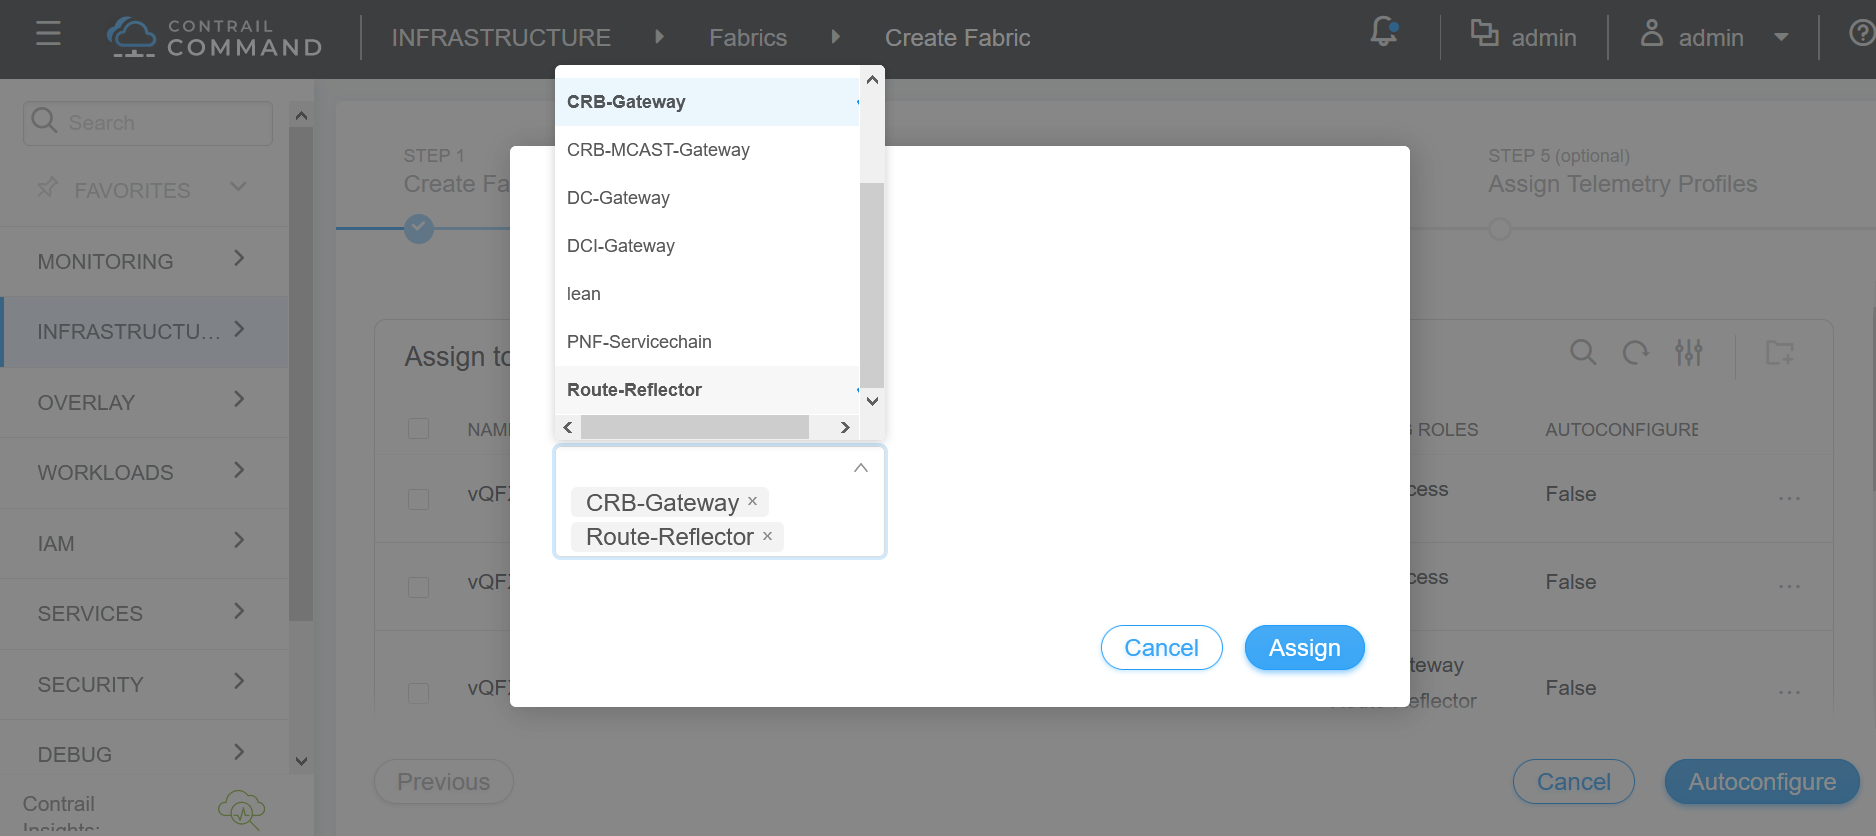
- After the new fabric devices are discovered, the Assign
the roles screen displays. You need to assign the roles that the devices
will perform in the fabric.
- Add the following roles to the spine devices and click Assign.