ON THIS PAGE
Fast Track to Rack Installation and Power
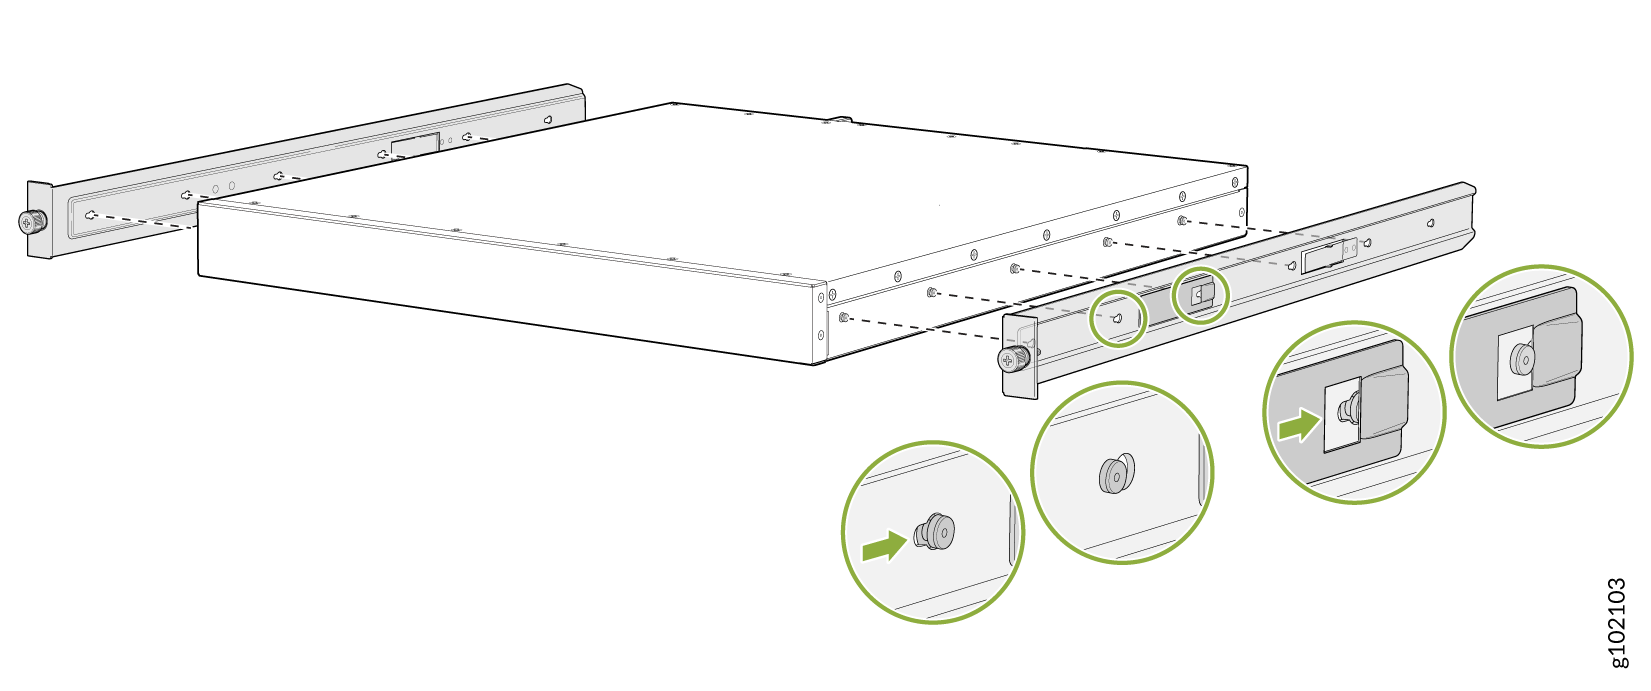
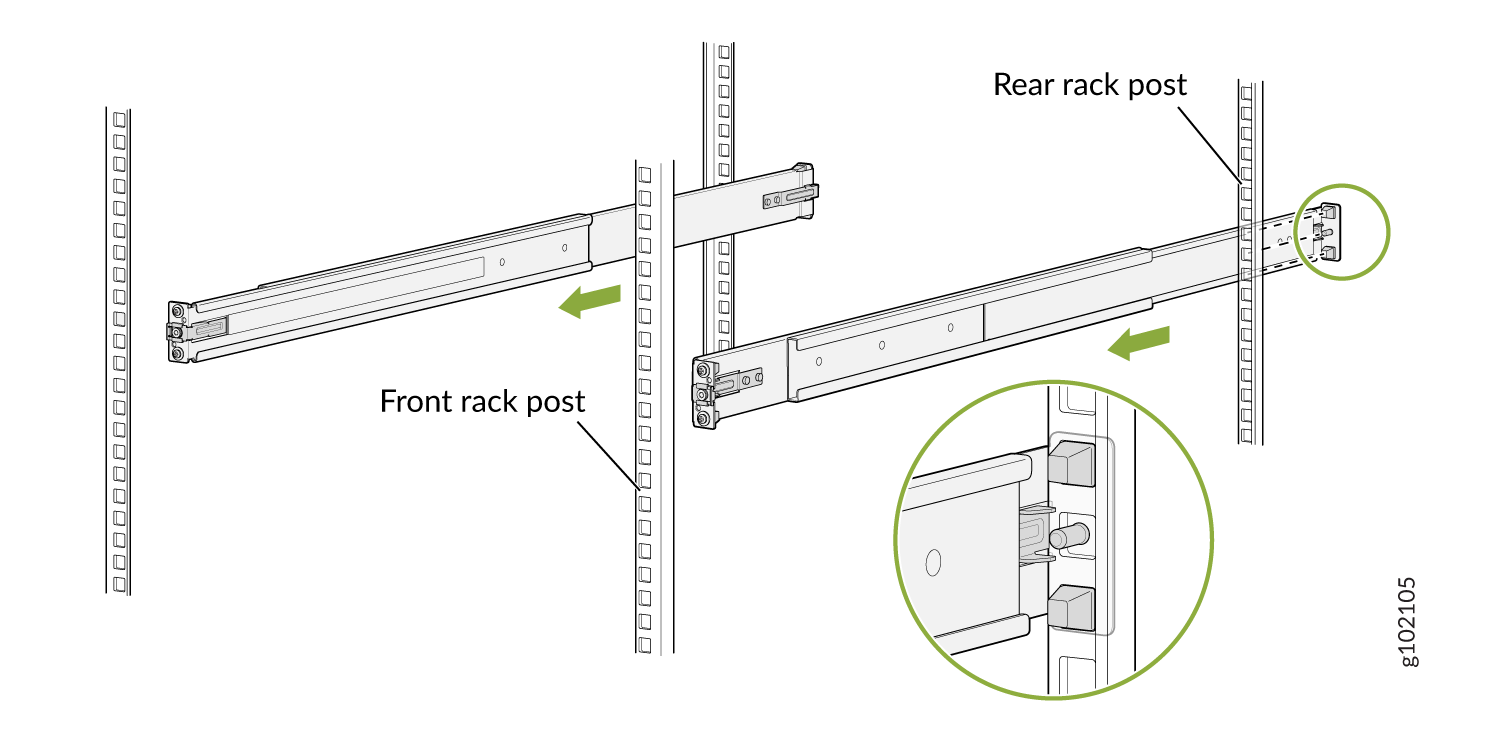
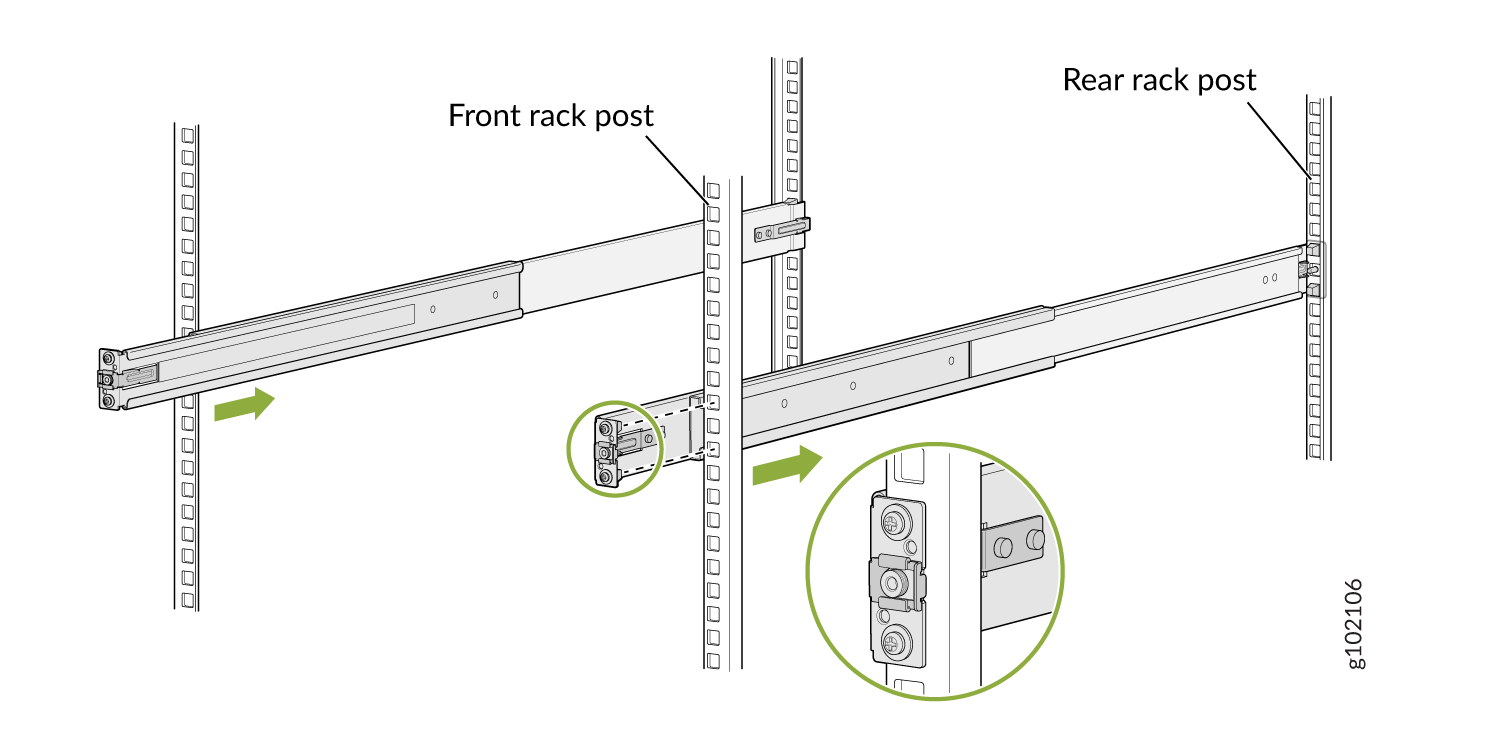
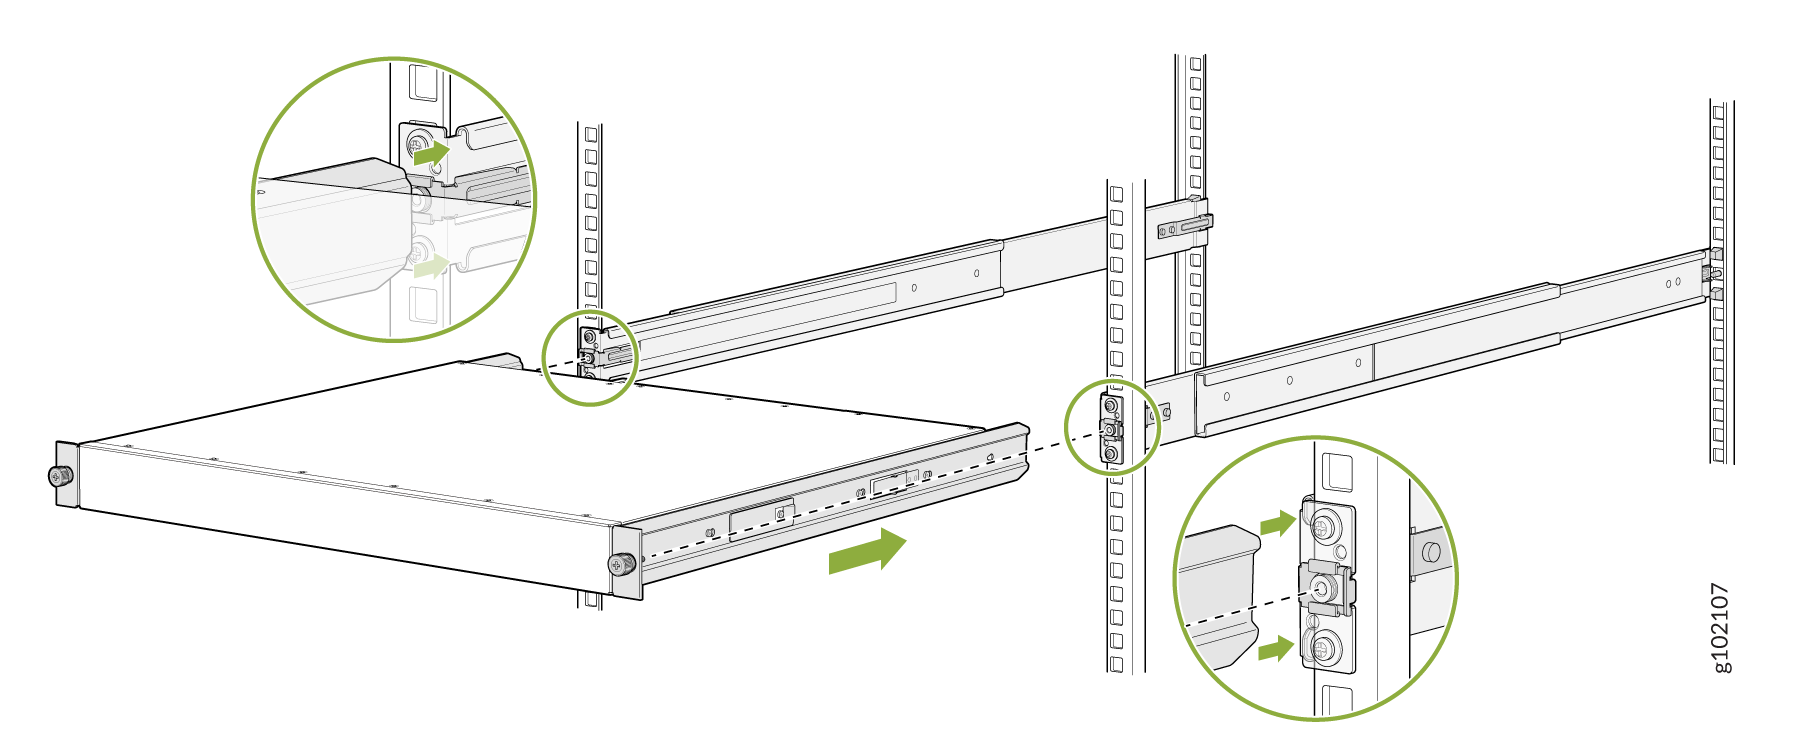
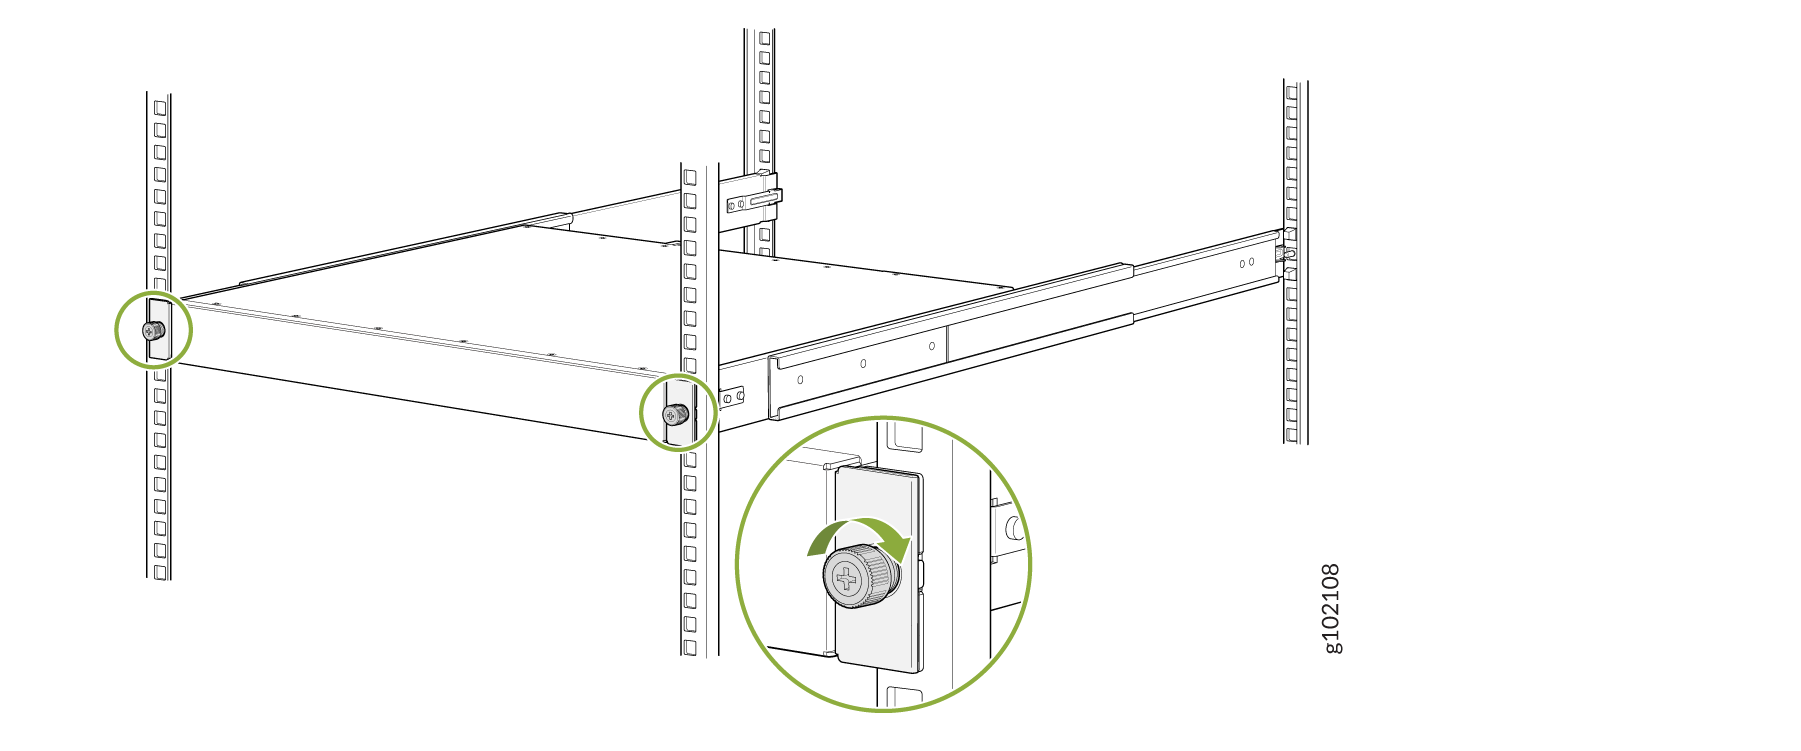
This procedure guides you through the simplest steps to install your Juniper Networks® SRX4700 Firewall in a rack and connect it to power. For more complex installation needs, see Install the SRX4700 in a Rack.
Install the SRX4700 in a Rack
Before you install, review the following:
Connect to Power
To connect the SRX4700 Firewall to AC power, you must do the following:
Ground the SRX4700 Firewall
To ground the SRX4700 Firewall:
Wrap and fasten one end of the electrostatic discharge (ESD) cable grounding strap around your bare wrist, and connect the other end to a site ESD point or to the ESD point on your device.
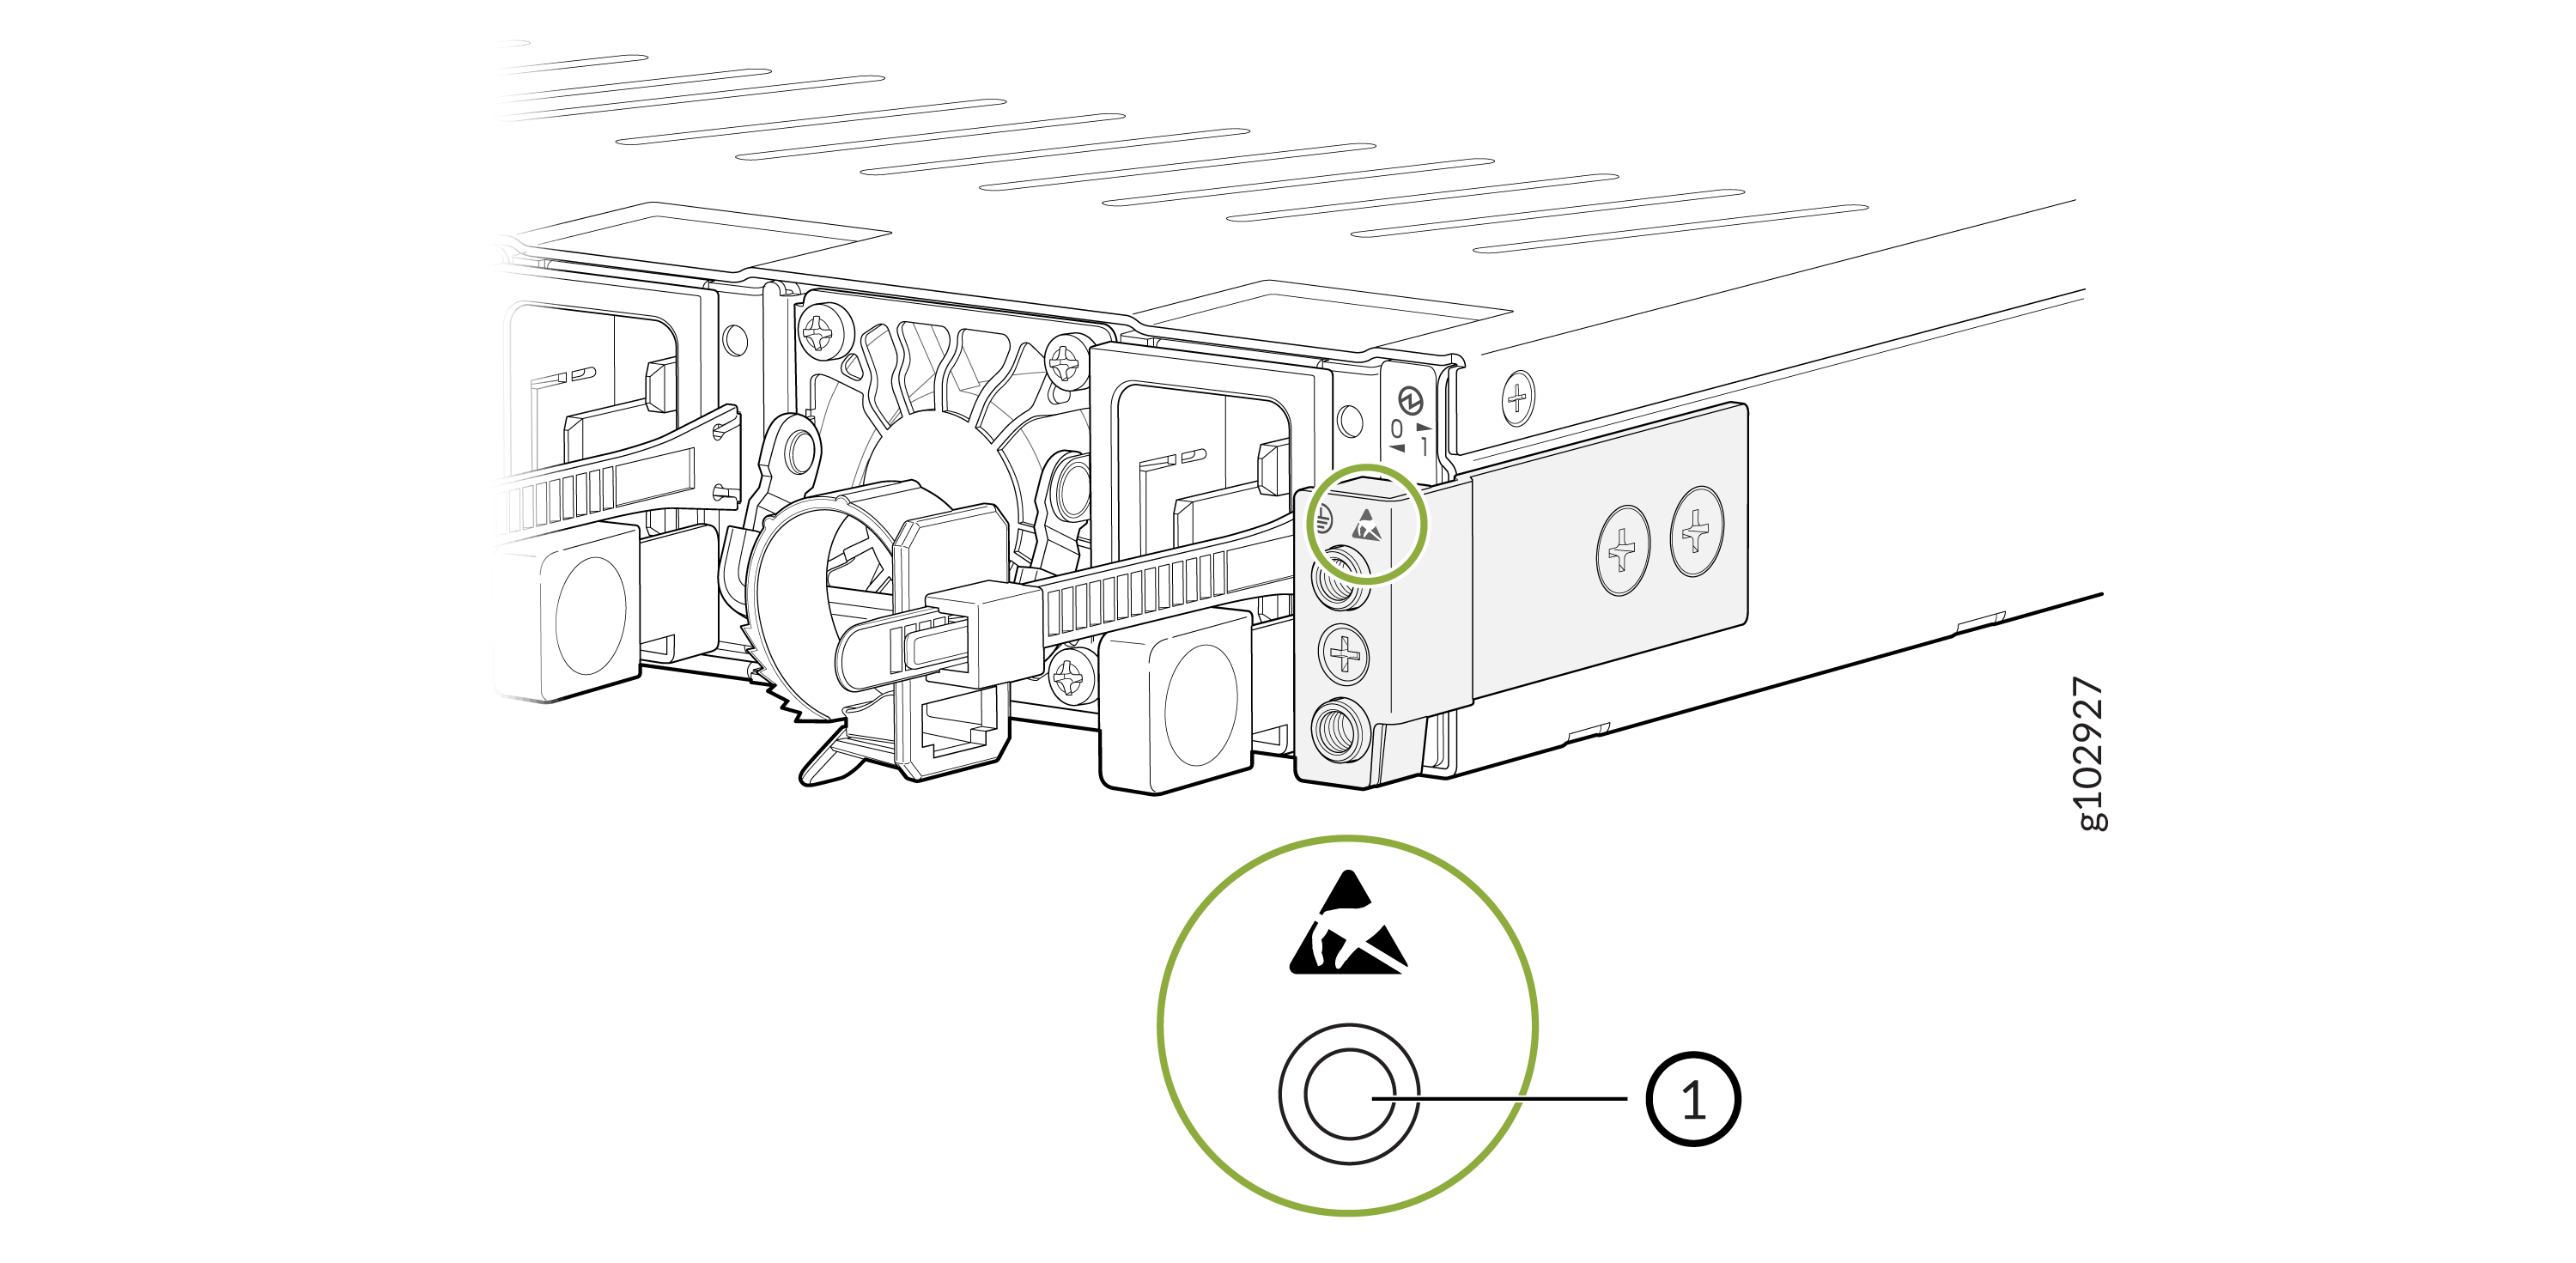
1
Chassis ESD point
Connect the grounding cable to a proper earth ground, such as the rack in which you will mount the device.
Place the grounding cable terminal attached to the grounding cable over the grounding point.
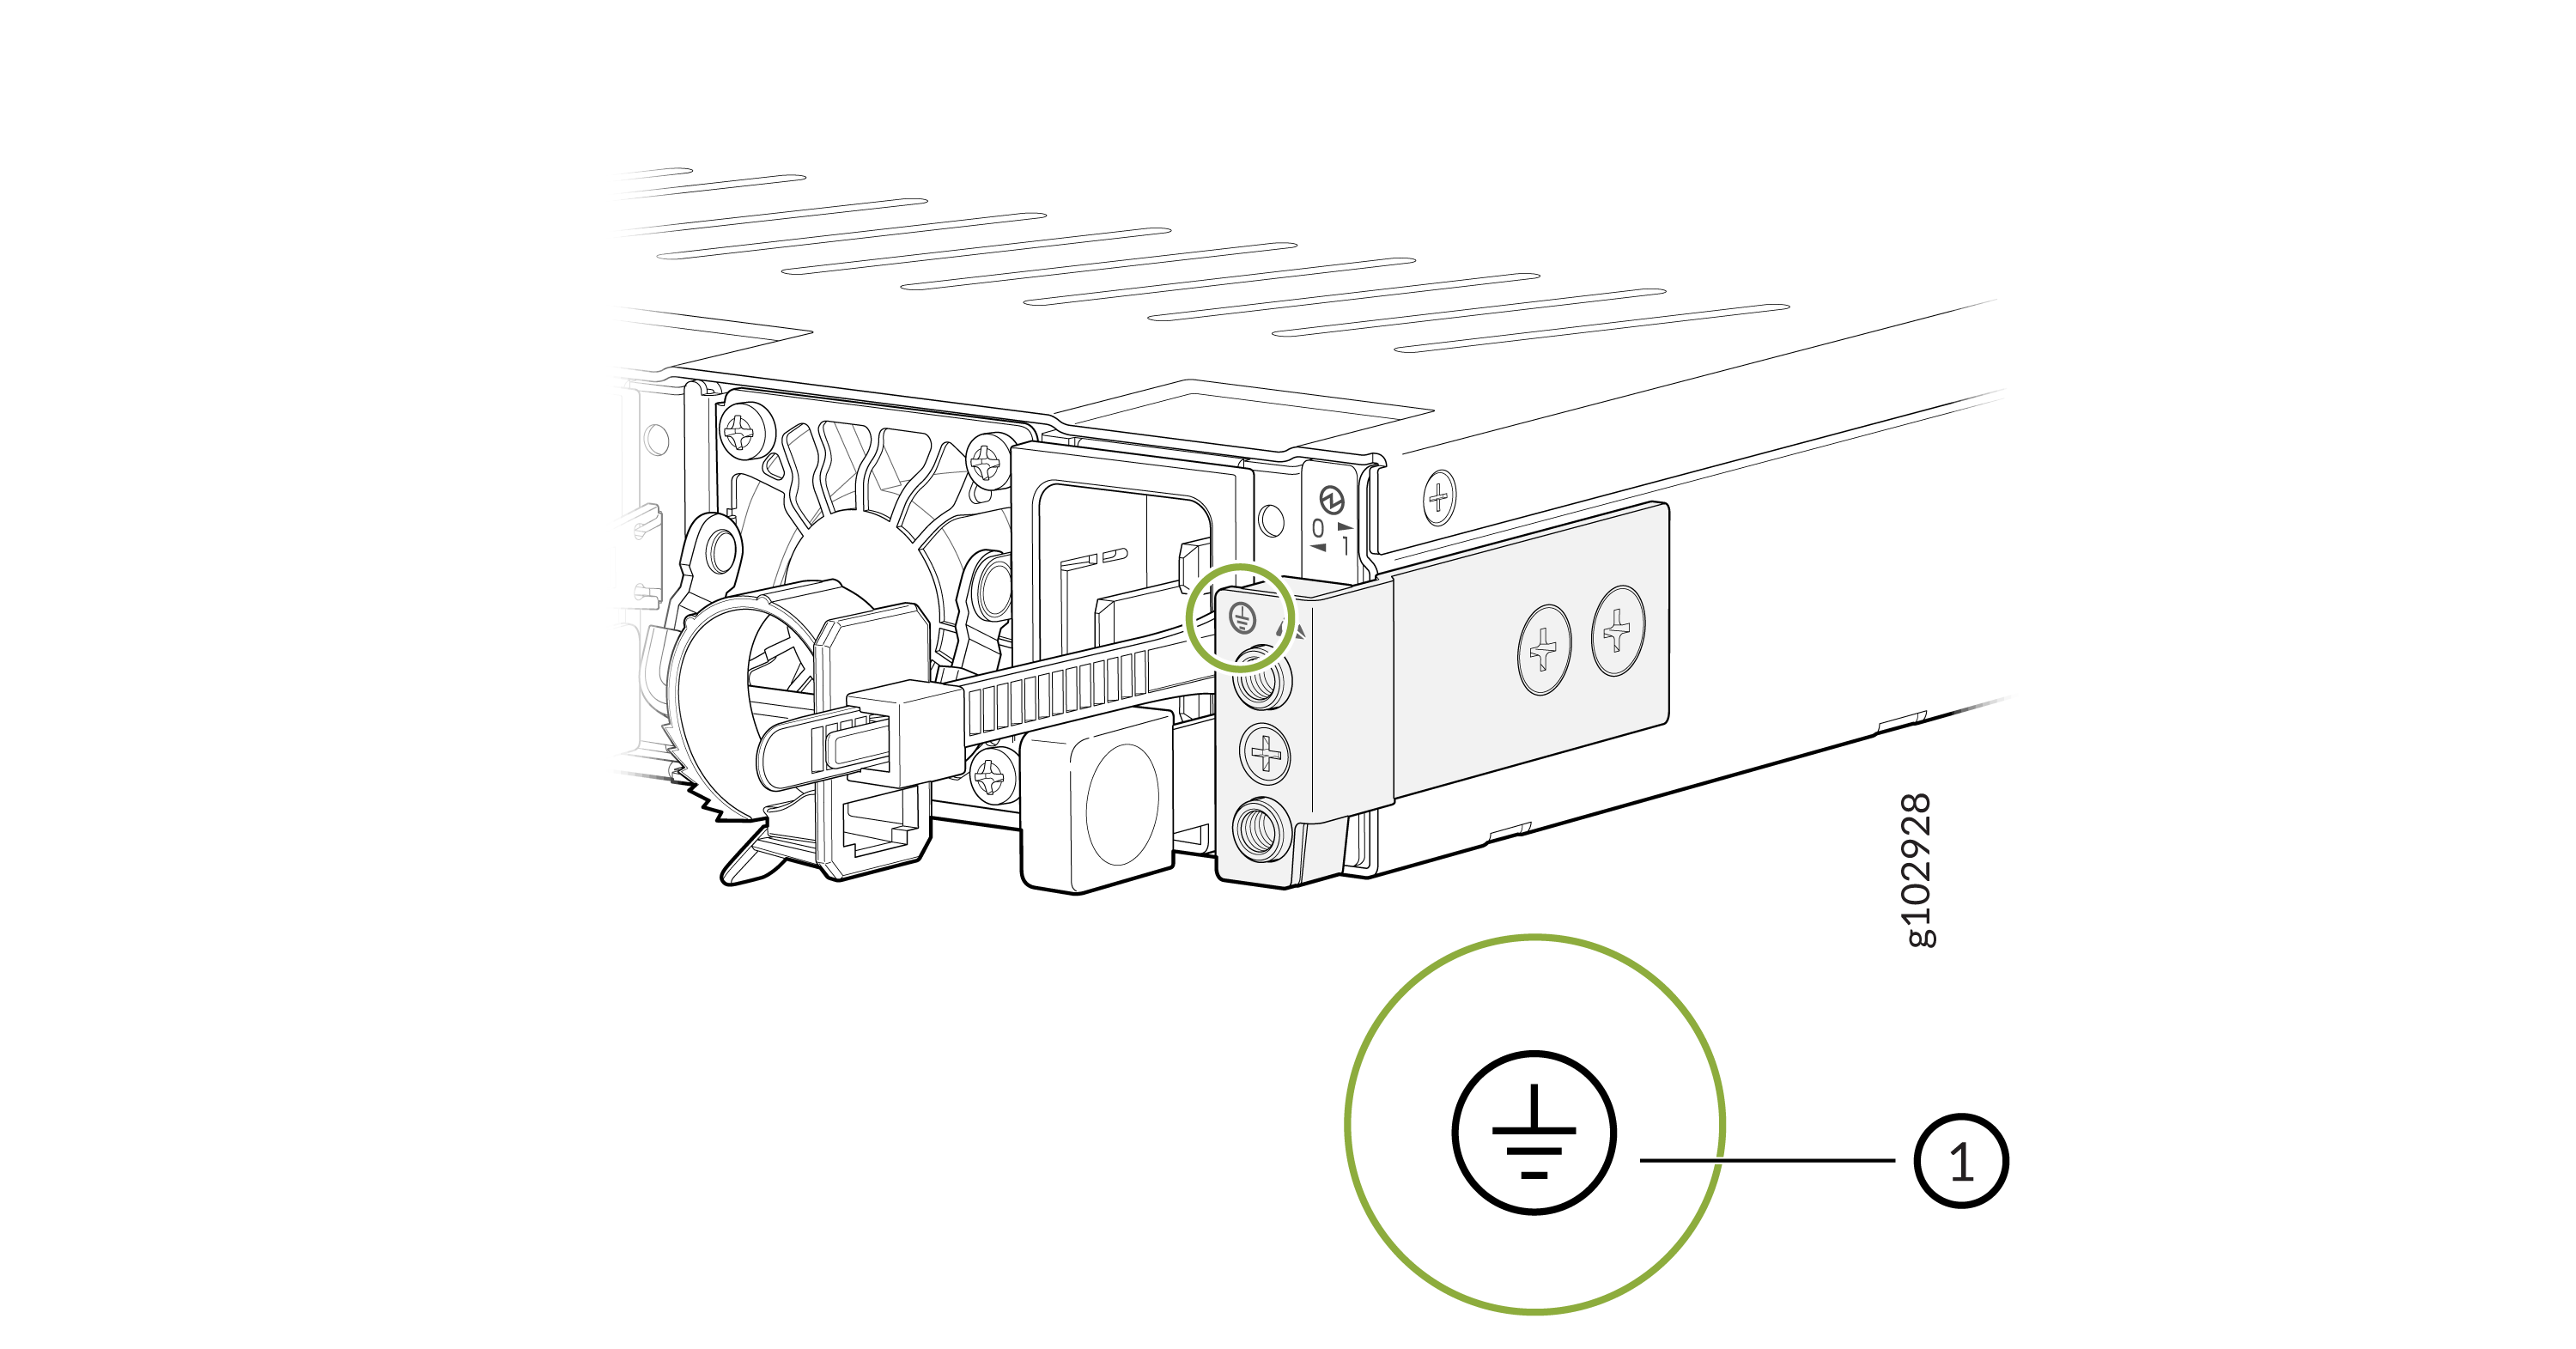
1
Chassis grounding point
Secure the grounding cable terminal to the grounding point using the M5 screws.
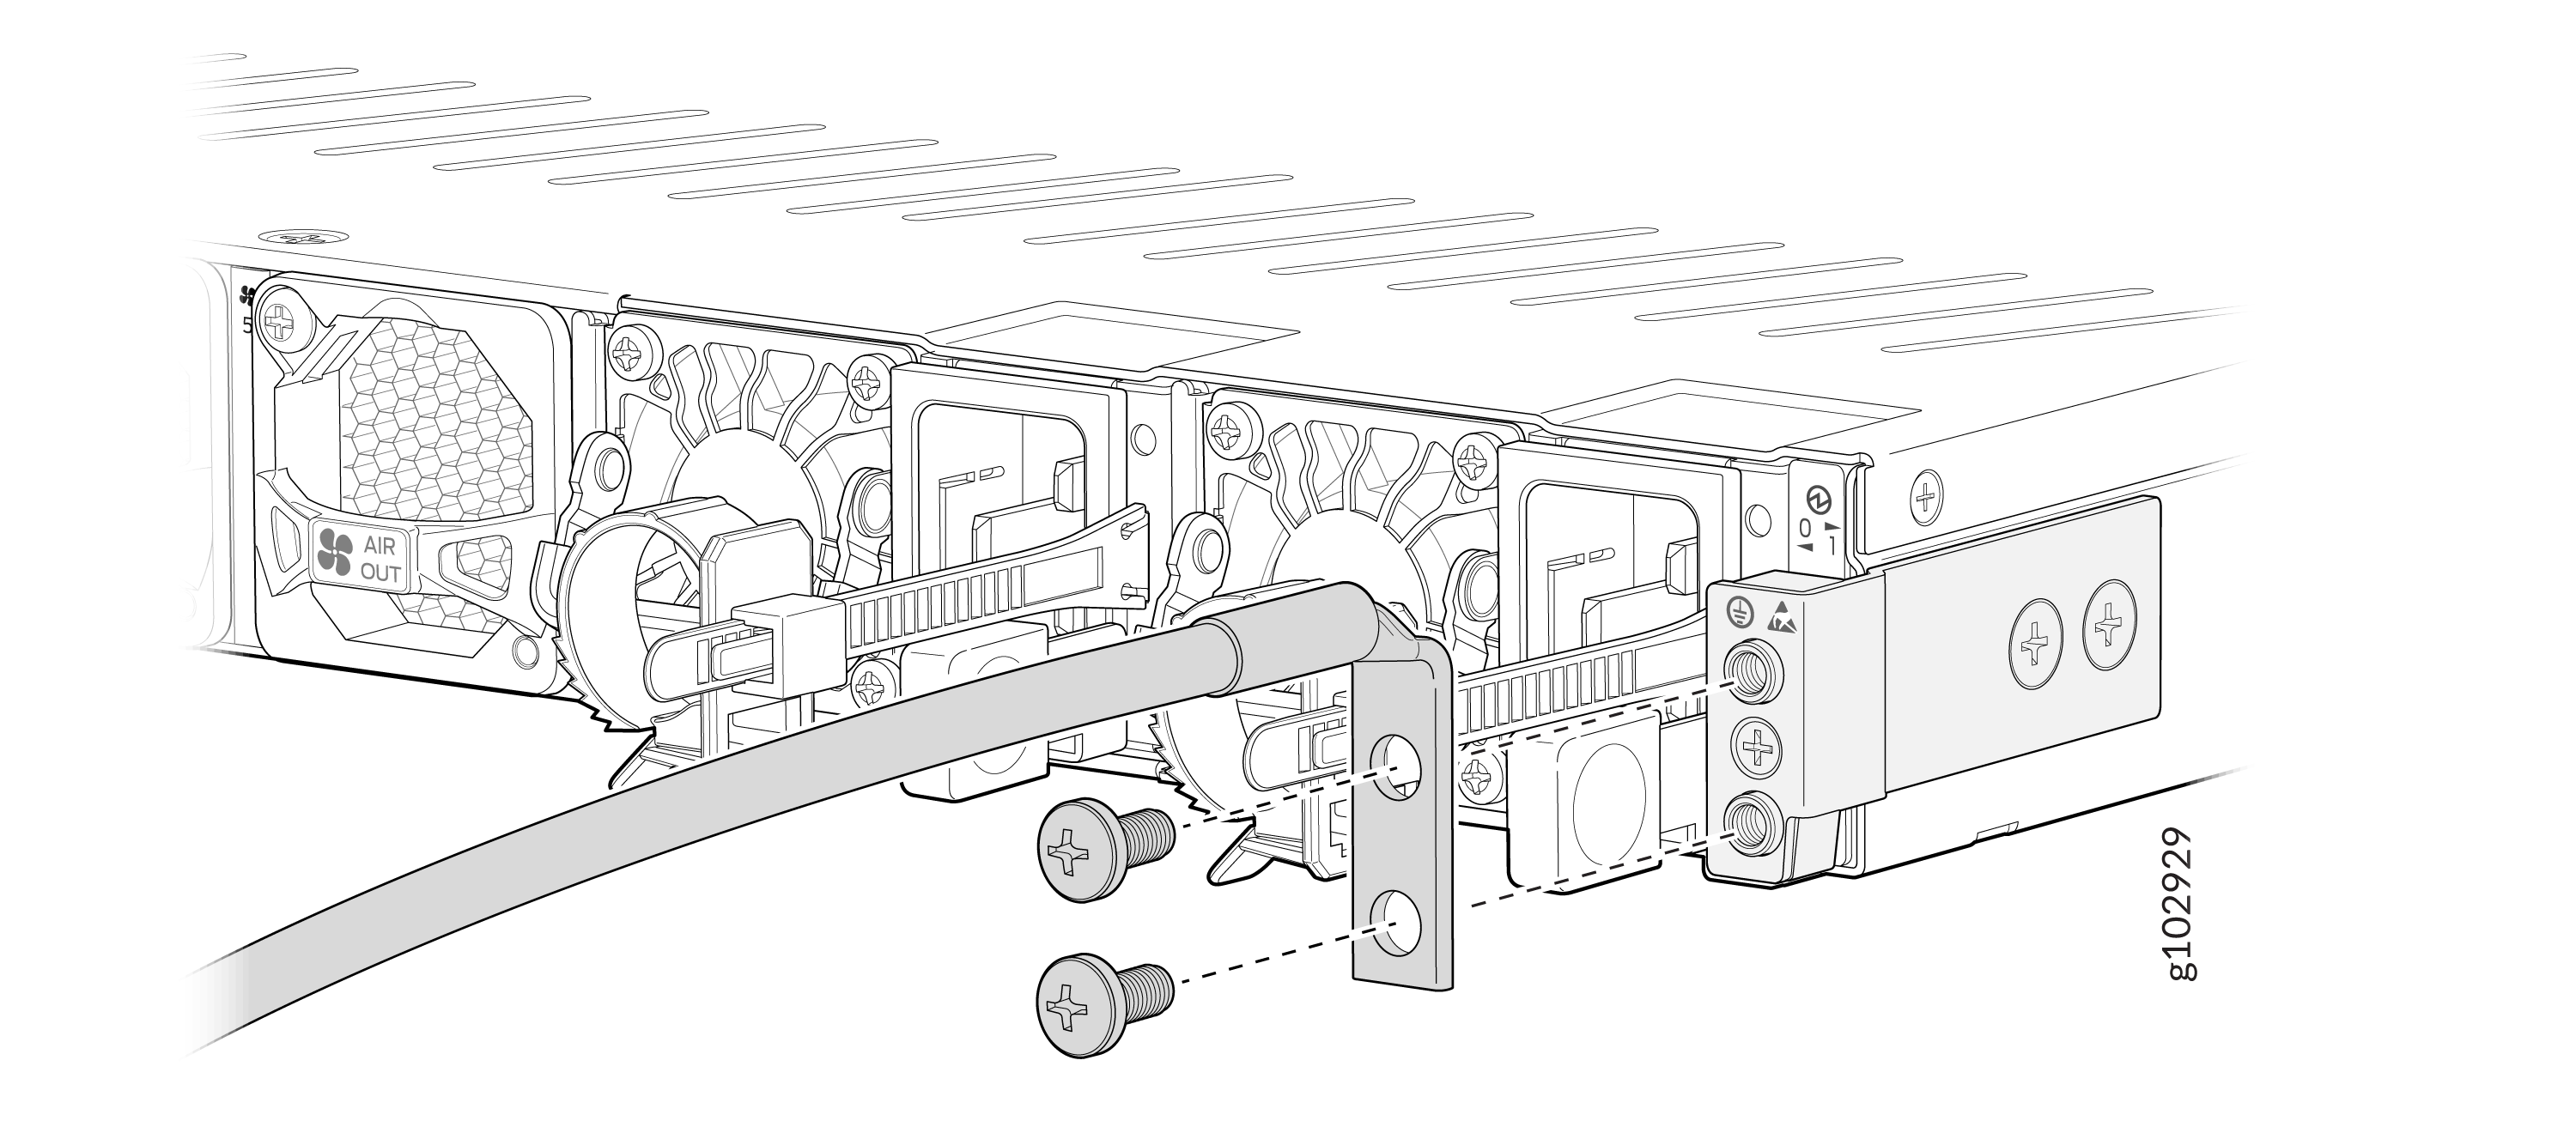
Dress the grounding cable. Ensure that the cable doesn’t block access to or come in contact with other device components and that it doesn’t drape where people could trip over it.
Connect the Power Cord and Power On the Firewall
The AC-powered SRX4700 firewall comes with two AC power supply units (PSUs) preinstalled on the rear panel.
Each PSU must be connected to a dedicated AC power feed and a dedicated customer-site circuit breaker. We recommend using a circuit breaker rated for 16 A (250 VAC) minimum, or as required by local code.
For information about the supported AC power cord specifications, see Supported AC Power Cords.
To connect the power cord and power on the firewall:
-
Ensure that the PSU is fully inserted in the rear panel of the firewall.
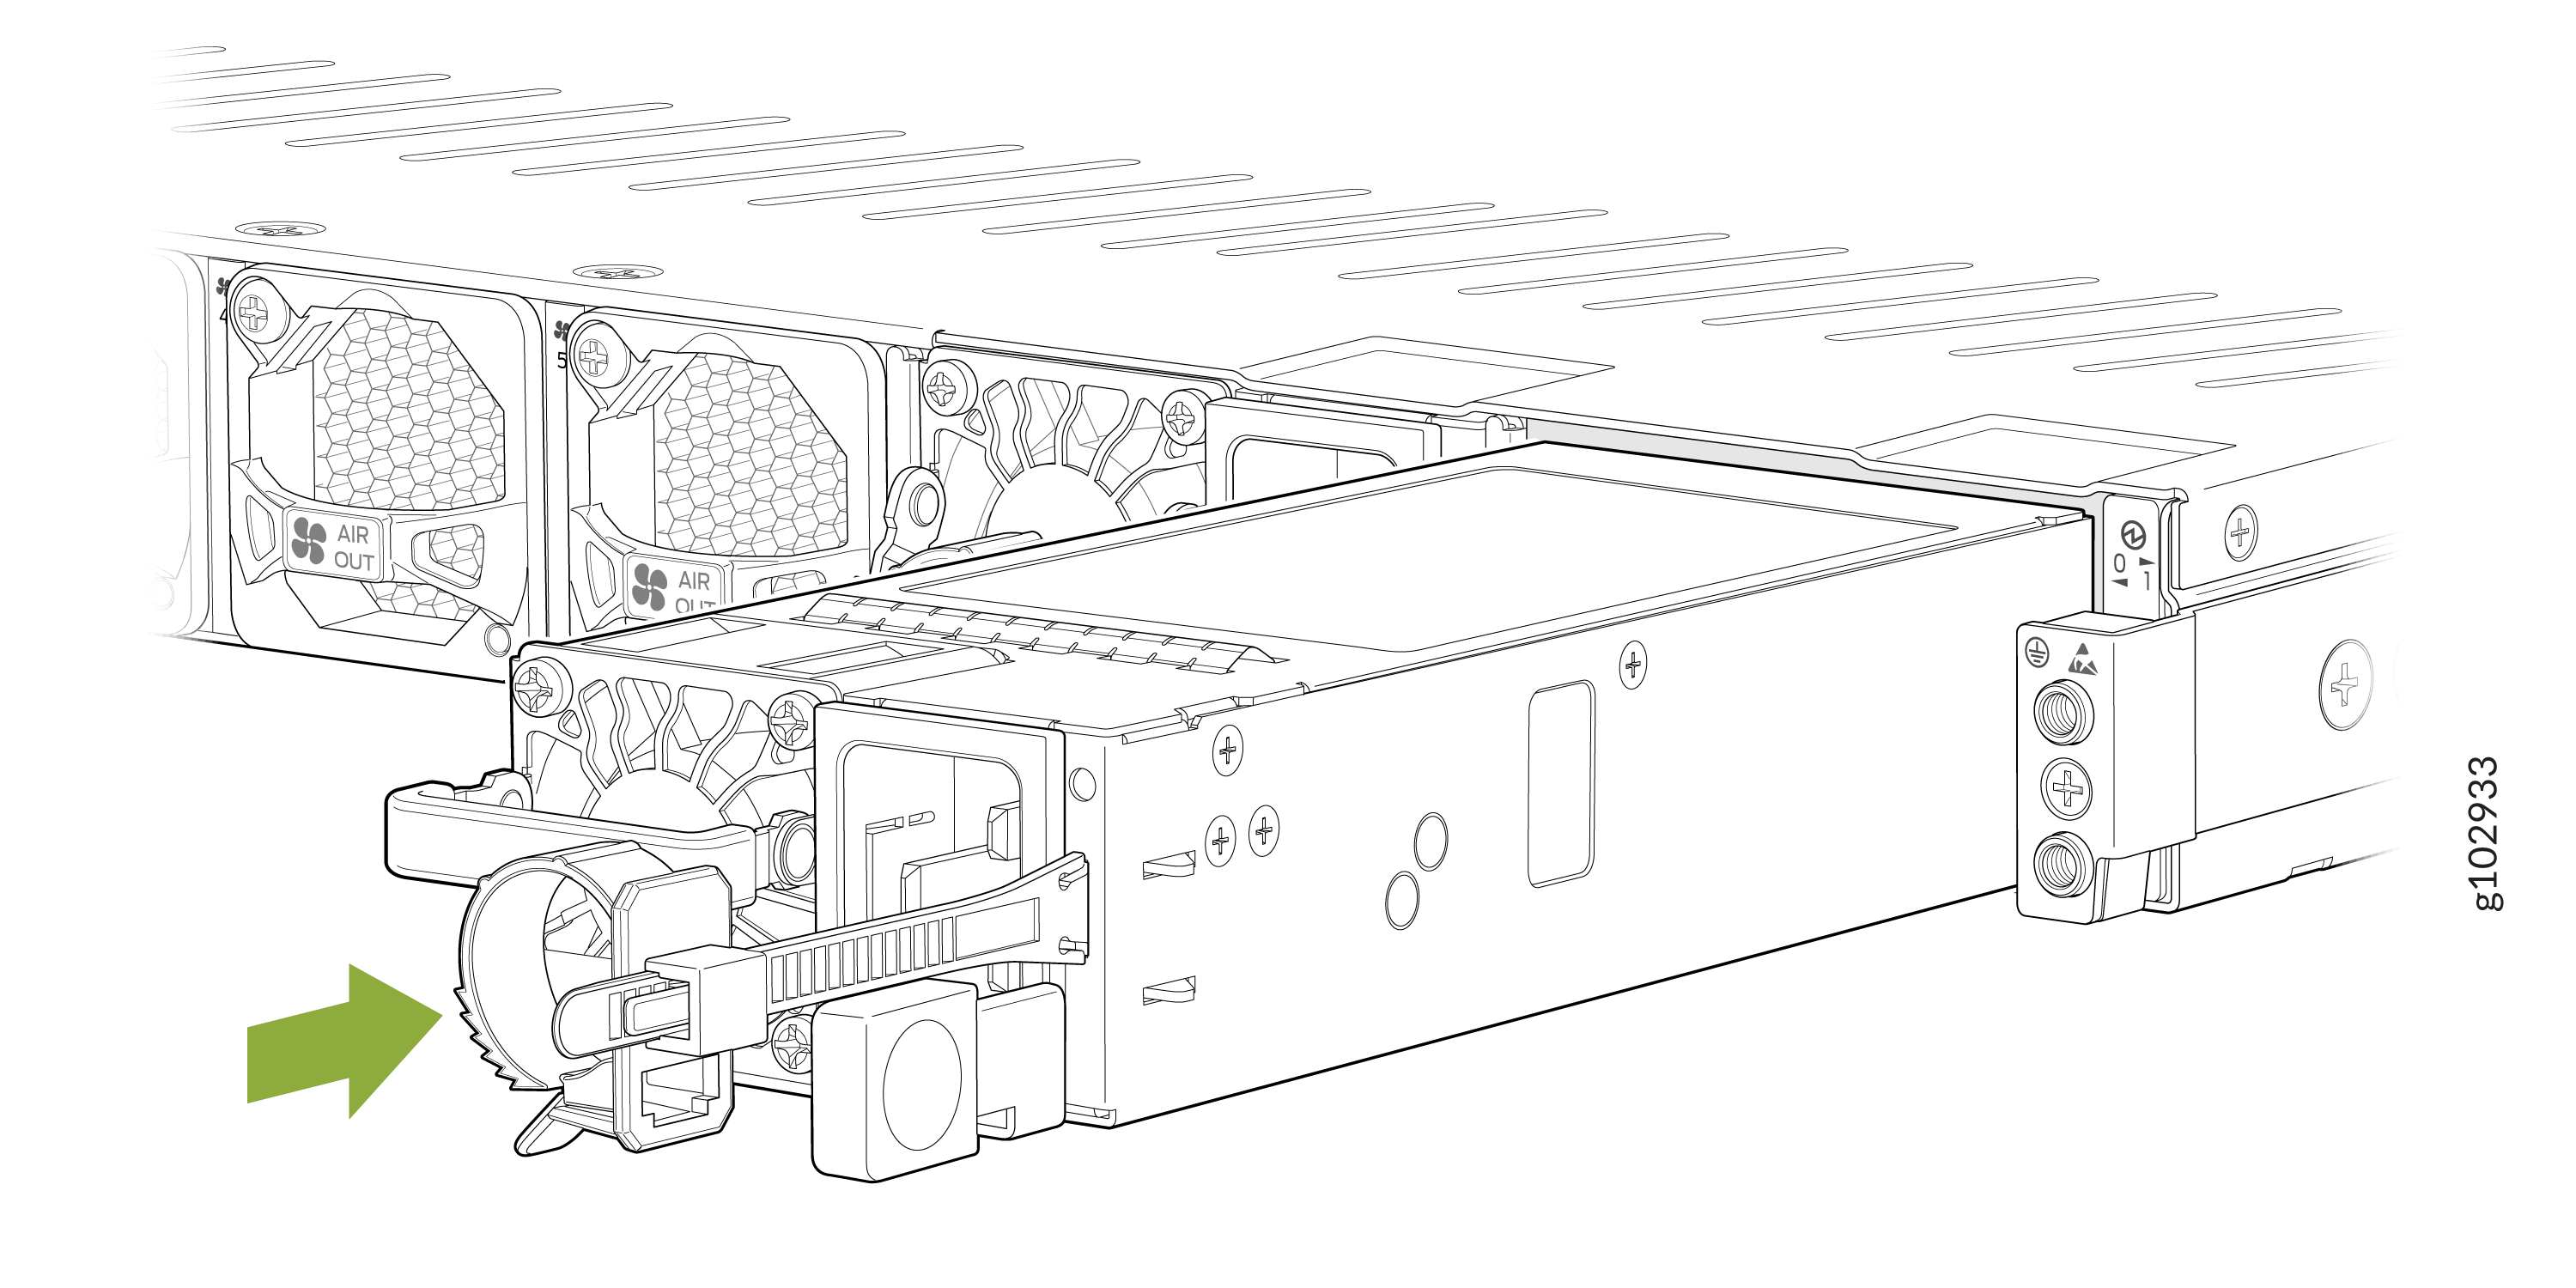
Insert the coupler end of the power cord into the AC power cord socket.
Push the retainer clip through the loop and tighten it until it fits snug around the power cord.
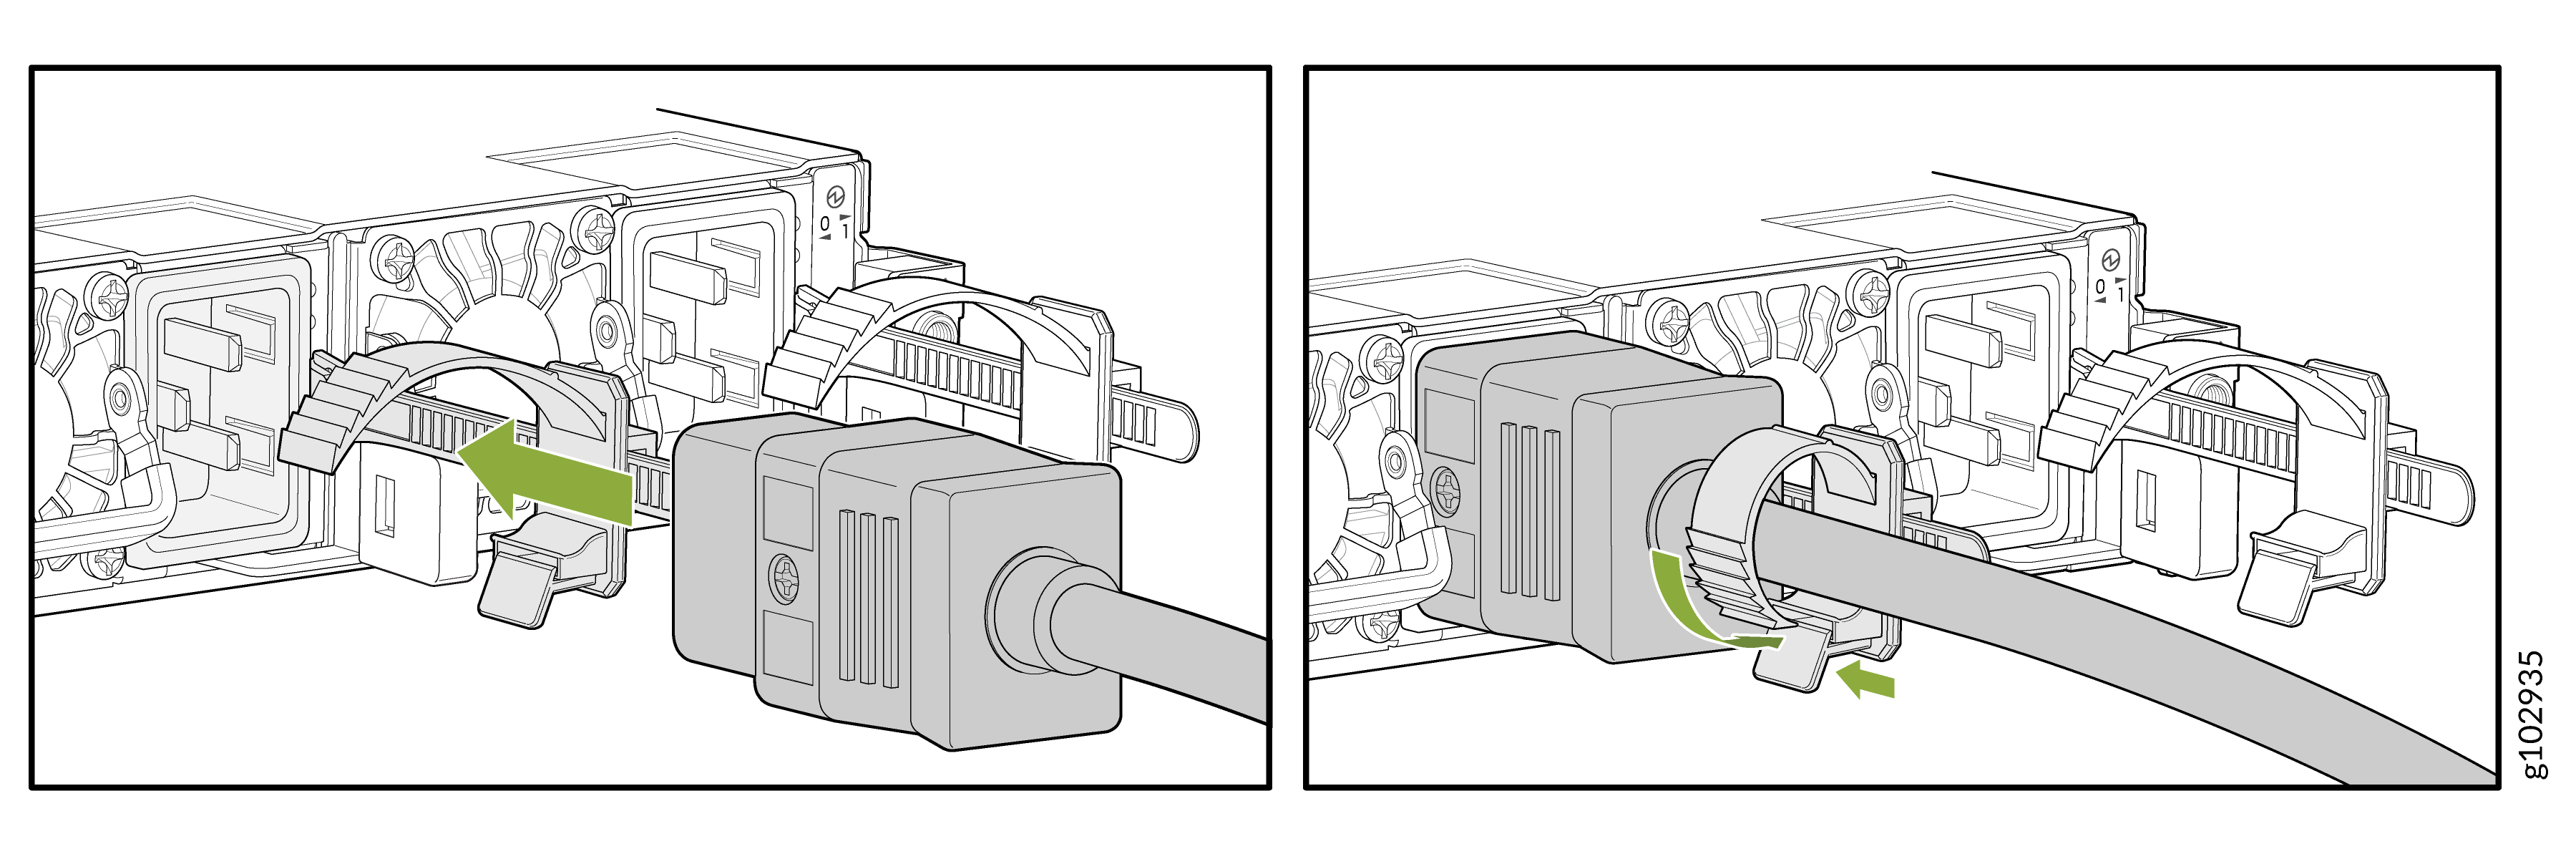
Route the power cord so that it doesn't block the air exhaust and access to firewall components, or drape where people could trip on it.
If the AC power source outlet has a power switch, turn it off.
Plug the power cord into an AC power source outlet.
If the AC power source outlet has a power switch, turn it on. The firewall doesn't have a power switch and powers on as soon as you plug it in.

