Return an SRX4700 Chassis or a Component
How to Return a SRX4700 Chassis or a Component for Repair or Replacement
If you need to return a firewall or hardware component to Juniper Networks for repair or replacement, follow this procedure:
For more information about return and repair policies, see the customer support page at https://www.juniper.net/support/guidelines.html.
Locate the Serial Number on a SRX4700 Chassis or Component
If you are returning a firewall or hardware component to Juniper Networks for repair or replacement, you must locate the serial number of the firewall or component. You must provide the serial number to the JTAC when you contact them to obtain the RMA.
If the firewall is operational and you can access the CLI, you can list serial numbers of the firewall and for some components with a CLI command. If you do not have access to the CLI or if the serial number for the component does not appear in the command output, you can locate the serial number ID label on the physical firewall or component.
If you want to find the serial number on the physical firewall component, you will need to remove the component from the firewall chassis, for which you must have the required parts and tools available.
- List the SRX4700 Firewall and Components Details using the CLI
- Locate the Chassis Serial Number ID Label on an SRX4700 Firewall
- Locate the Serial Number ID Labels on FRUs in an SRX4700
List the SRX4700 Firewall and Components Details using the CLI
To list the firewall and firewall components and their serial numbers, enter
the CLI command show chassis hardware extensive.
Locate the Chassis Serial Number ID Label on an SRX4700 Firewall
The serial number ID label is located on the top cover of the chassis on SRX4700 firewalls.
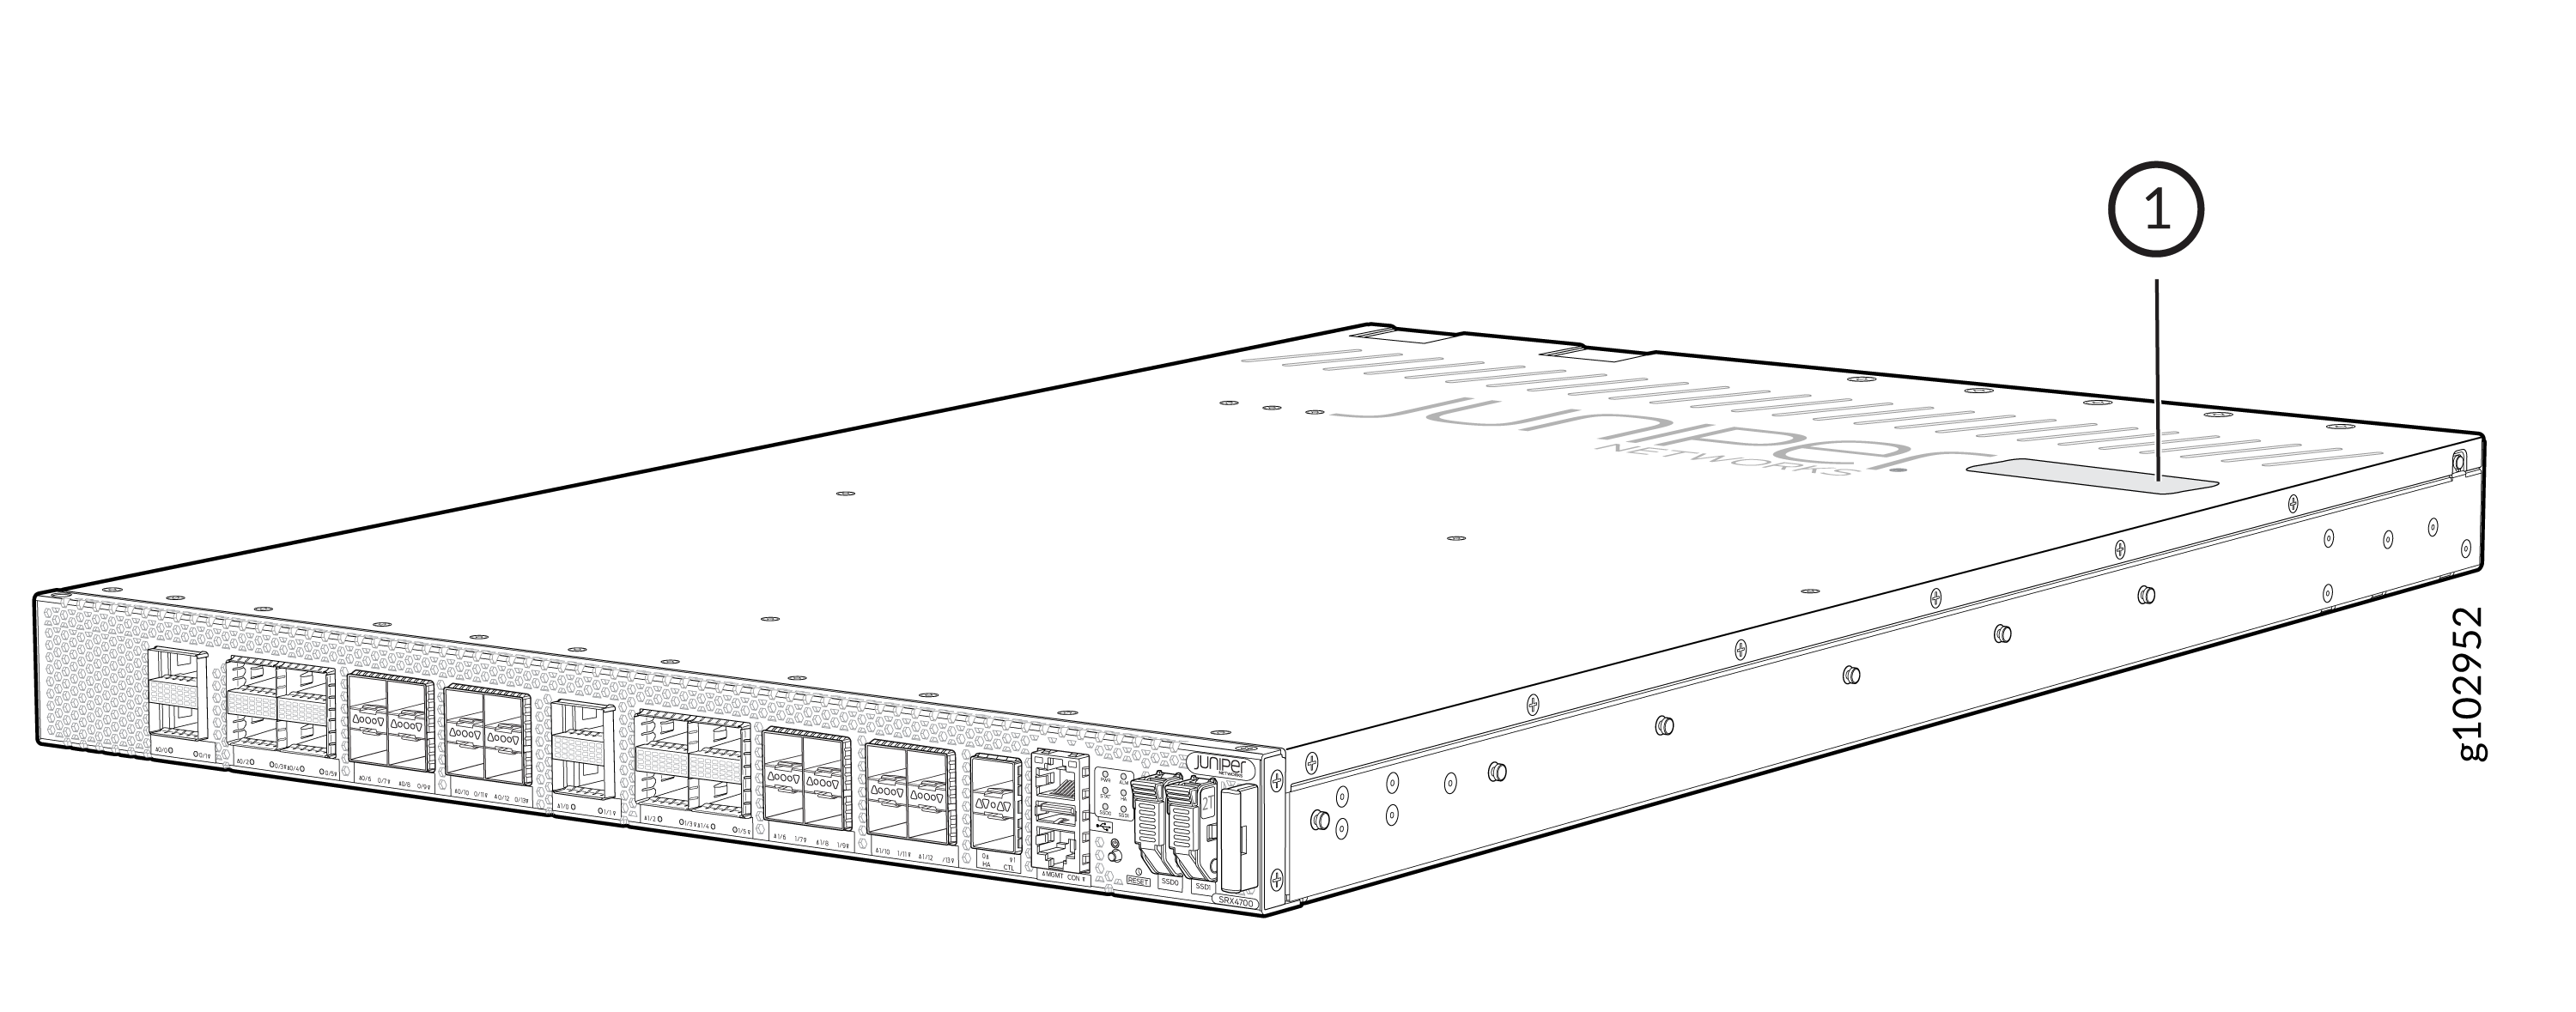
-
Serial ID Label
Locate the Serial Number ID Labels on FRUs in an SRX4700
The fan modules and power supply units (PSUs) installed in SRX4700 firewalls are field-replaceable units (FRUs). You must remove the FRU from the firewall chassis to see its serial number ID label.
-
Fan module—The serial number ID label is on the side of the fan module.
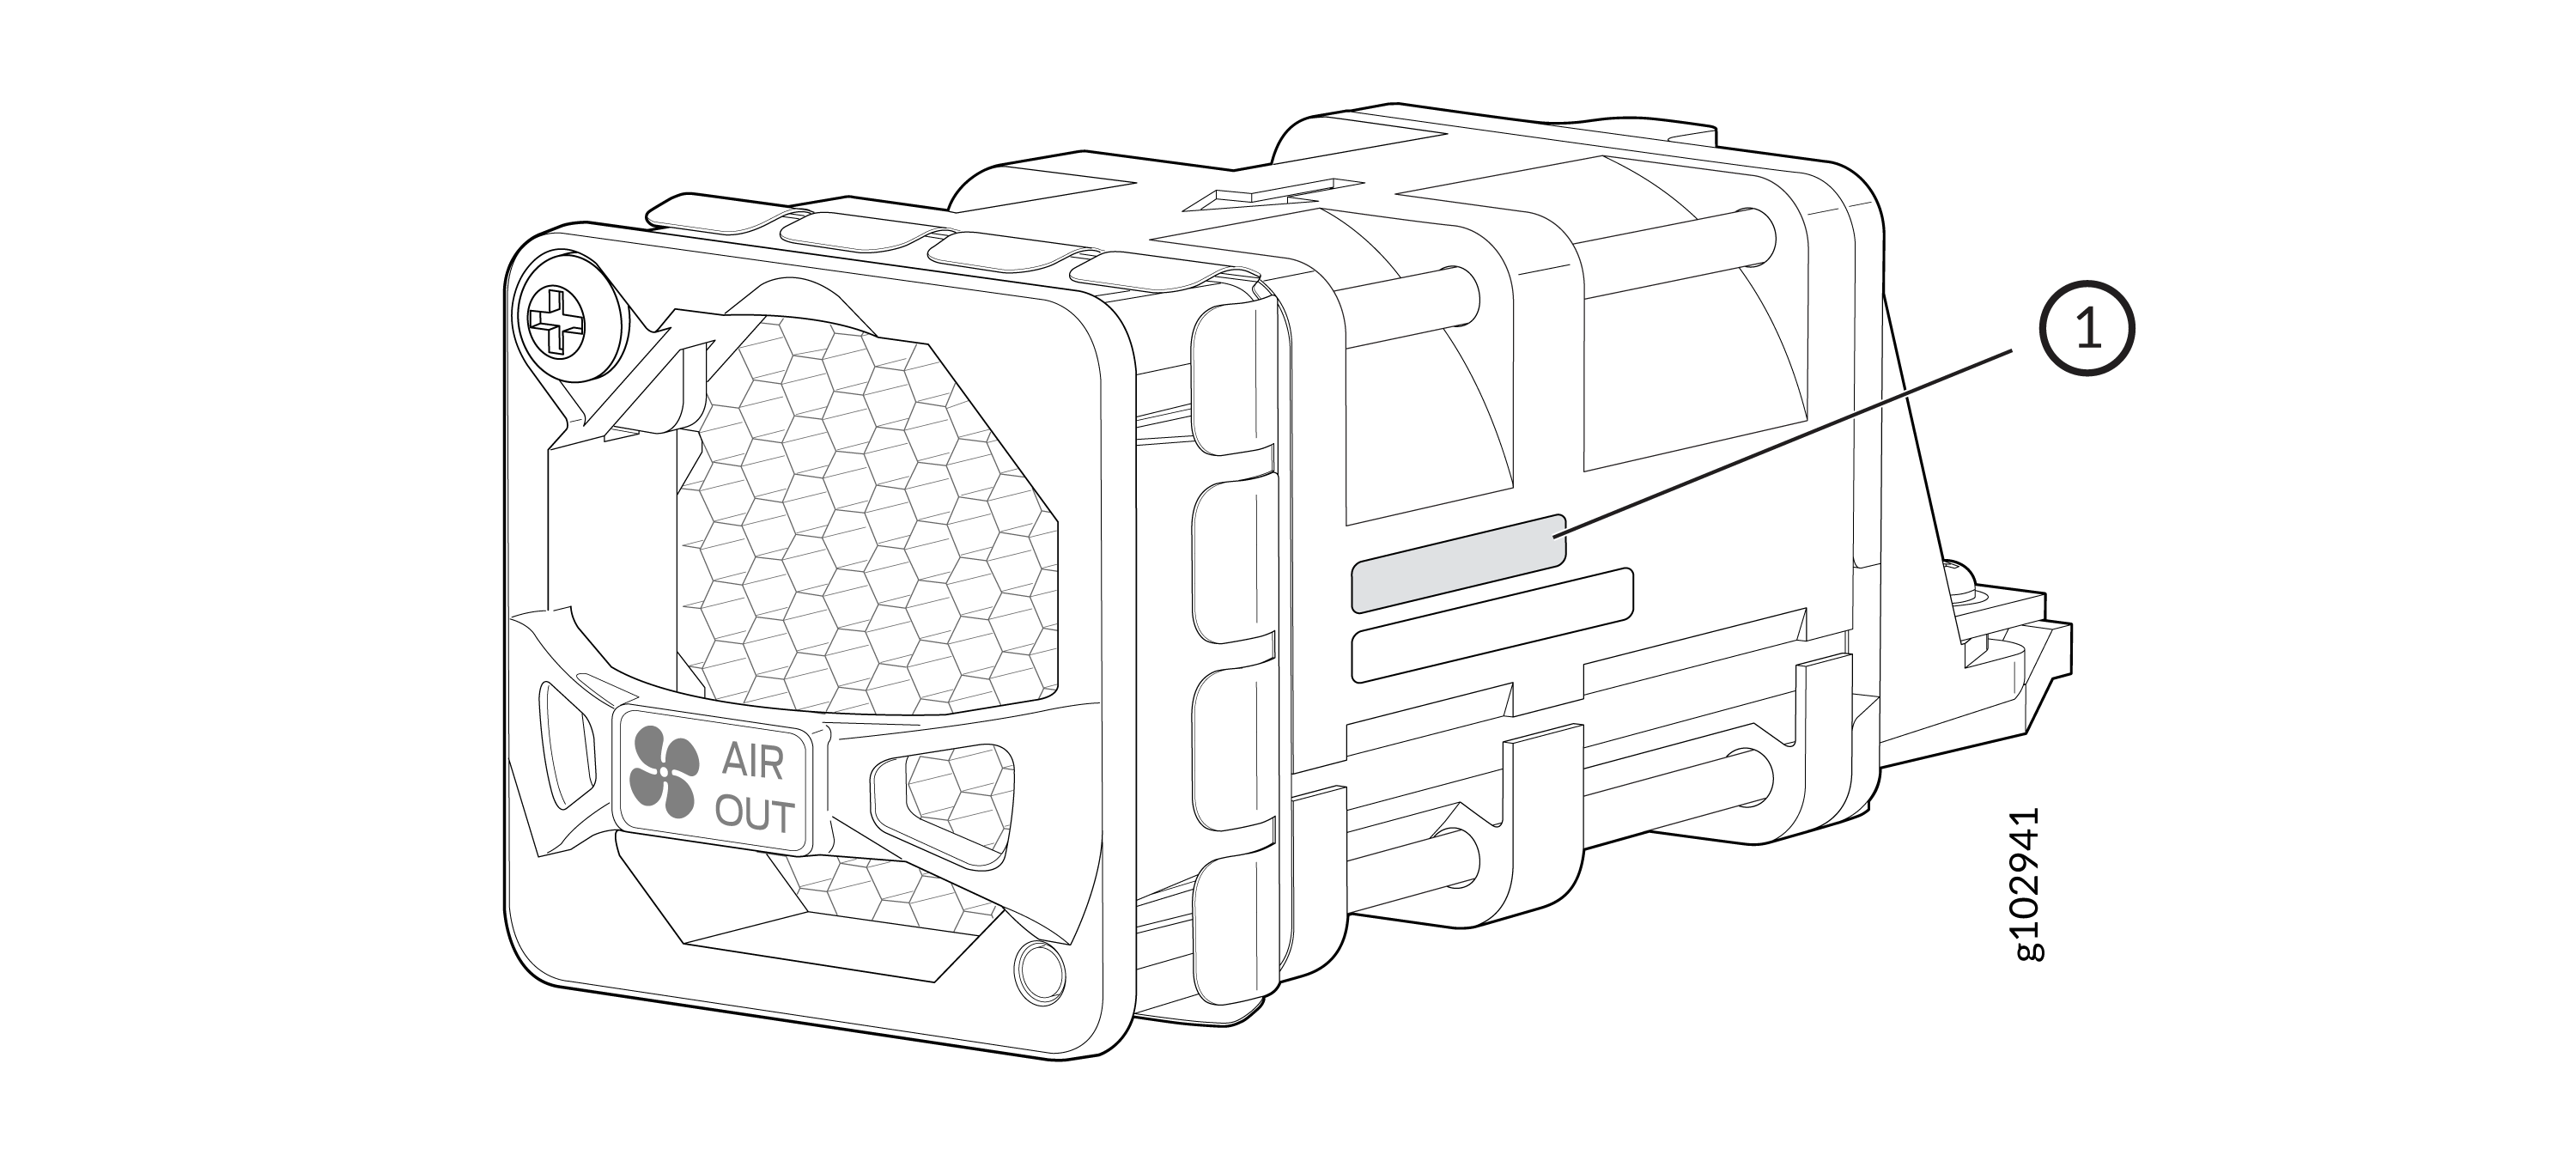
-
Serial number ID label
-
-
PSU—The PSUs installed in an SRX4700 are FRUs. You must remove each FRU from the firewall chassis to see the FRU serial number ID label.
-
AC PSU—The serial number ID label is on the top of the AC PSU.
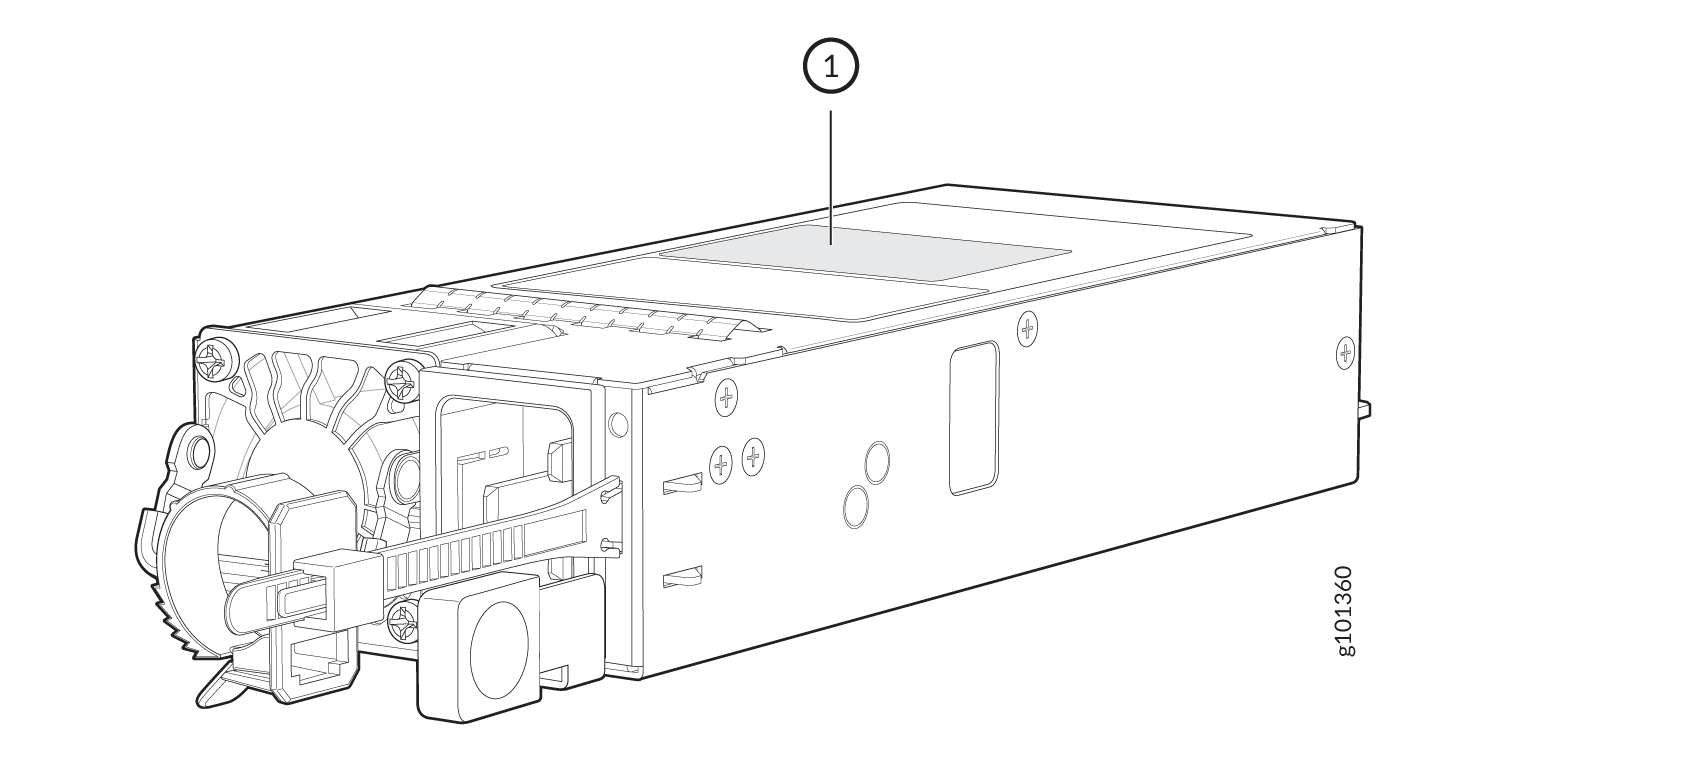
-
Serial number ID label
-
-
DC PSU—The serial number ID label is on the top of the DC PSU.
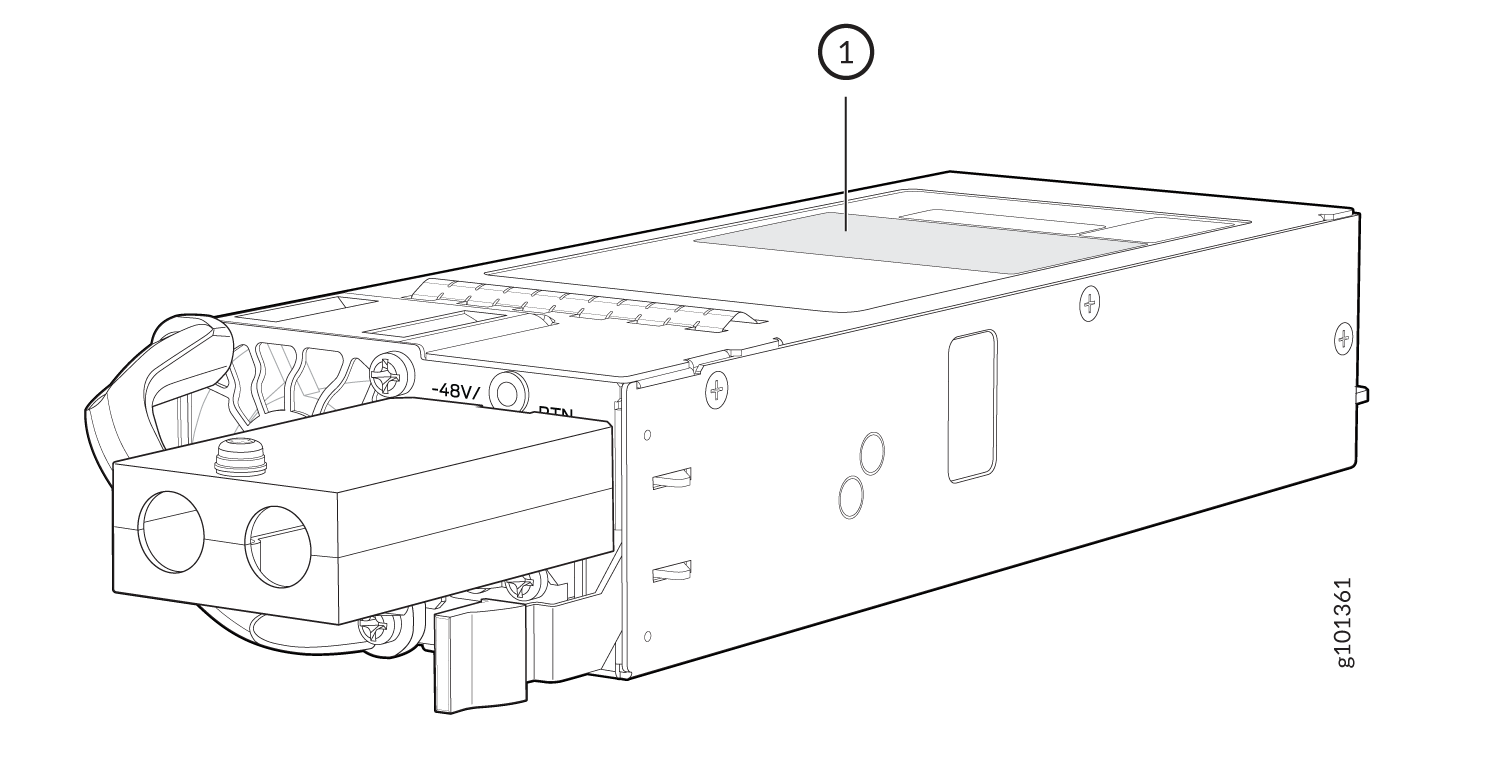
-
Serial number ID label
-
-
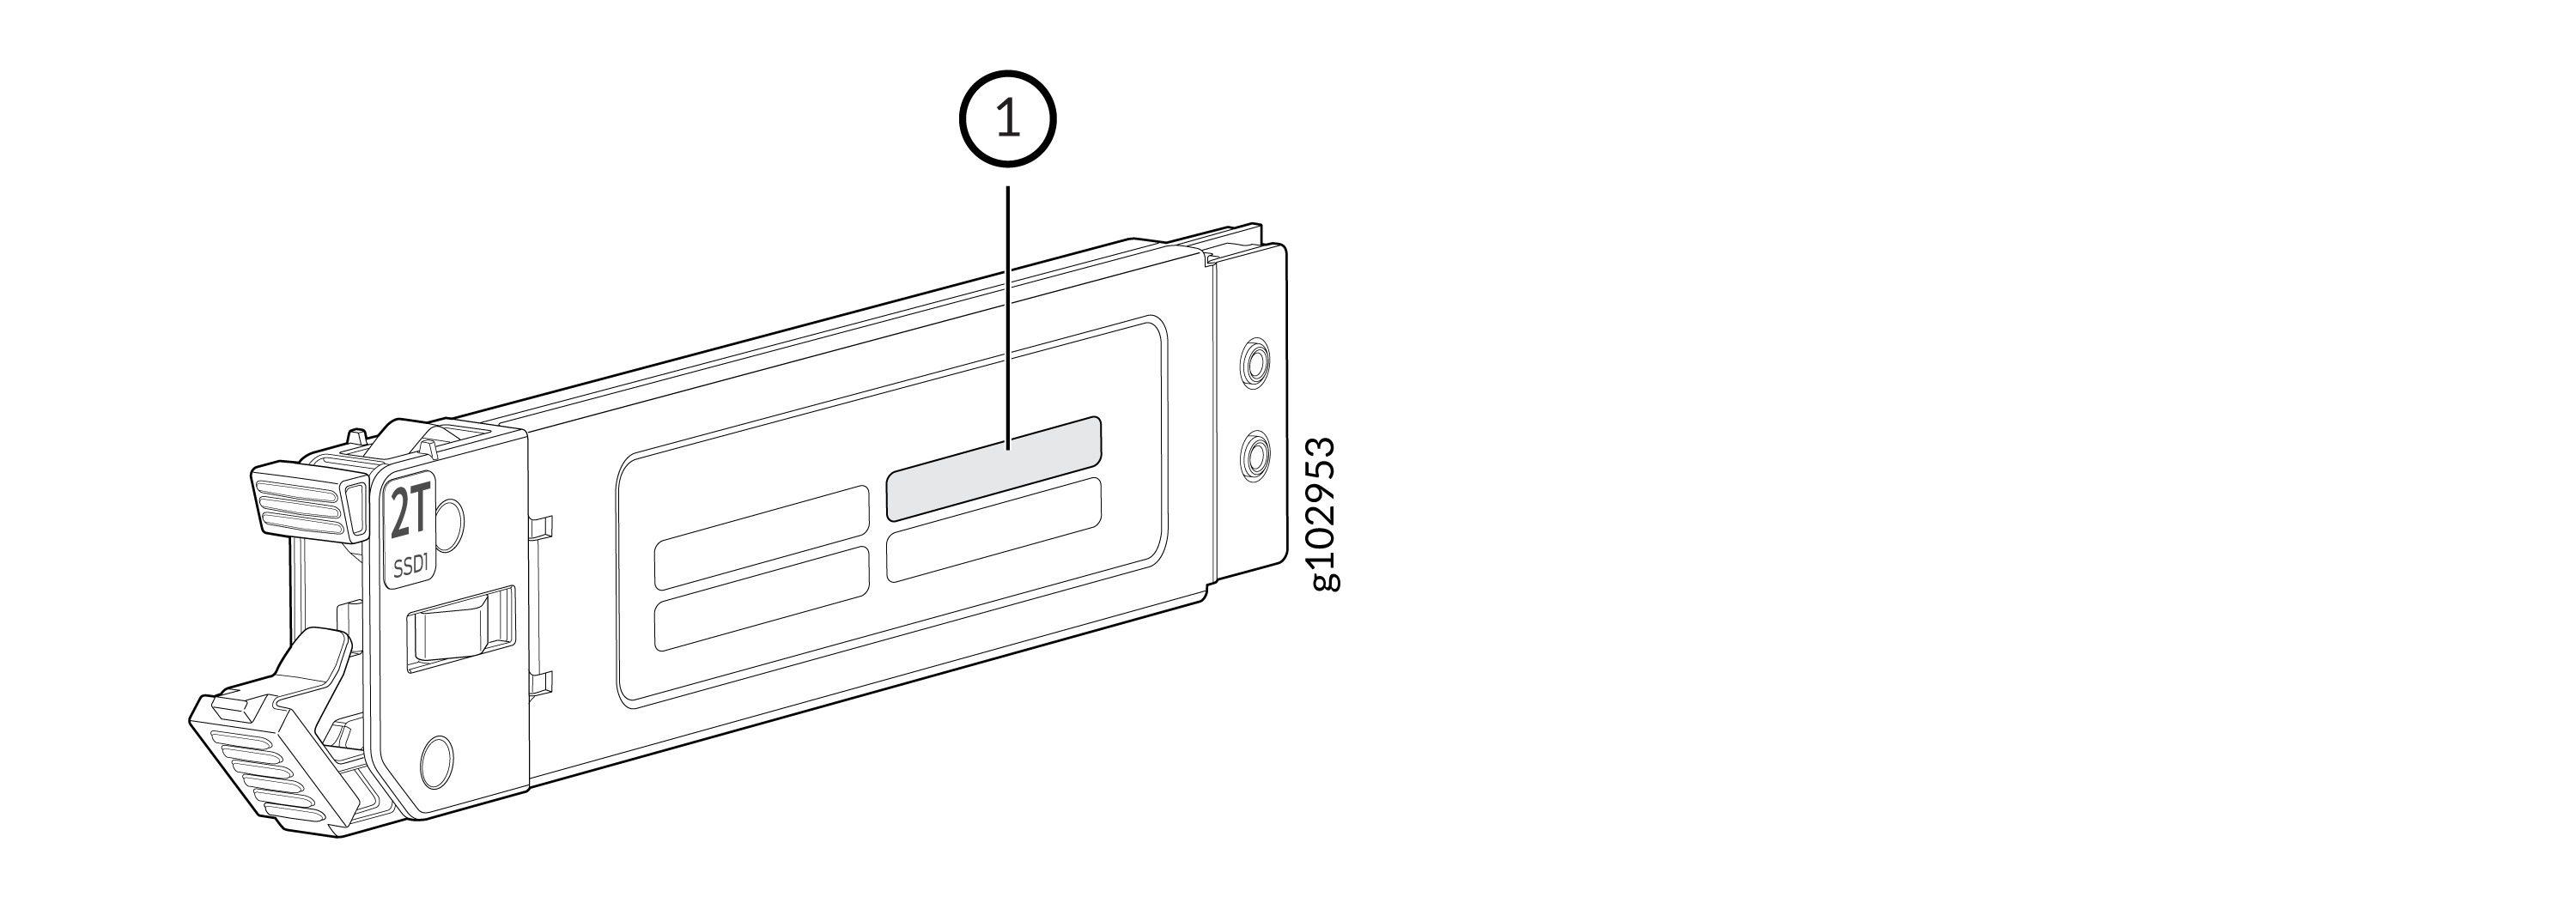
SSD—The serial number ID label is on the side of the SSD.
-
Serial number ID label
-
-
Contact Customer Support to Obtain a Return Material Authorization
If you need to return a device or hardware component to Juniper Networks for repair or replacement, obtain an RMA number from JTAC. You must obtain an RMA number before you attempt to return the component.
After locating the serial number of the device or hardware component you want to return, open a service request with the JTAC on the Web or by telephone.
Before you request an RMA number from JTAC, be prepared to provide the following information:
-
Your existing service request number, if you have one
-
Serial number of the component
-
Your name, organization name, telephone number, fax number, and shipping address
-
Details of the failure or problem
-
Type of activity being performed on the device when the problem occurred
-
Configuration data displayed by one or more
showcommands
You can contact JTAC 24 hours a day, seven days a week, on the Web or by telephone:
-
Service Request Manager: https://support.juniper.net/support
-
Telephone: +1-888-314-JTAC (+1-888-314-5822), toll free in U.S., Canada, and Mexico
For international or direct-dial options in countries without toll free numbers, see https://support.juniper.net/support.
If you are contacting JTAC by telephone, enter your 12-digit service request number followed by the pound (#) key for an existing case, or press the star (*) key to be routed to the next available support engineer.
The support representative validates your request and issues an RMA number for return of the component.
Pack an SRX4700 Firewall or Component for Shipping
If you are returning an SRX4700 firewall or component to Juniper Networks for repair or replacement, pack the item as described in this topic.
Before you pack the firewall or component, ensure that you have:
-
Followed all the steps listed in Contact Customer Support to Obtain a Return Material Authorization.
-
Retrieved the original shipping carton and packing materials. Contact your JTAC representative if you do not have these materials, to learn about approved packing materials (see Contact Customer Support to Obtain a Return Material Authorization).
-
Ensure that you understand how to prevent electrostatic discharge (ESD) damage.
-
An electrostatic discharge (ESD) grounding strap—not provided
Pack the Firewall for Shipping
Before you pack the firewall:
-
Shut down the firewall.
-
Wrap and fasten one end of the ESD grounding strap around your bare wrist, and connect the other end of the strap to one of the ESD points on the chassis.
-
Disconnect power from the firewall.
-
Remove the cables that connect the firewall to external devices.
-
Remove all optical transceivers installed in the firewall.
-
Remove the fan modules and PSUs from the firewall.
Ensure that you have the following parts and tools:
-
A Phillips (+) screwdriver, Number 2 —not provided
-
The original packing material (cardboard box, accessory box and its contents, and foam padding)
-
An ESD grounding strap—not provided
-
Antistatic bag—not provided
If you need to transport the firewall to another location or return the firewall to Juniper Networks, you need to pack the firewall securely in its original packaging to prevent damage during transportation.
Do not pack the firewall in anything except its original container, or the firewall might be damaged in transit.
To pack the firewall:
- Wrap and fasten one end of the ESD grounding strap around your bare wrist, and connect the other end of the strap to one of the ESD points on the chassis.
- If the firewall is installed in a rack or cabinet, have one person support the weight of the firewall while another person unscrews and removes the mounting screws.
- Remove the firewall from the rack or cabinet and place the firewall on a flat, stable surface.
- Use the screwdriver to remove the rack mounting brackets from the firewall chassis.
- Place the firewall in an antistatic bag.
- Place the bottom portion of the packaging foam in the shipping carton.
- Place the firewall inside the cavity in the bottom packaging foam.
- Place the top portion of the packaging foam on top of the firewall.
- If you are returning accessories or field-replaceable units (FRUs) with the firewall, pack them as instructed in Pack the Firewall Components for Shipping.
- Place the accessory box by the rear end of the chassis in the shipping carton.
- Close the top of the cardboard shipping box and seal it with packing tape.
- Write the RMA number on the exterior of the box to ensure proper tracking.
Pack the Firewall Components for Shipping
Ensure that you have the following parts and tools available:
-
Antistatic bag, one for each component—not provided
-
An ESD grounding strap—not provided
If you need to transport a firewall component to another location or return a component to Juniper Networks, you need to pack the component securely in its original packaging to prevent damage during transportation.
Do not stack firewall components. Return individual components in separate boxes if they do not fit together on one level in the shipping box.
To pack the firewall components:
-
Place individual components in antistatic bags.
-
Use the original packing materials if they are available. If the original packing materials are not available, ensure the component is adequately packed to prevent damage during transit. The packing material you use must be able to support the weight of the component.
-
Ensure that the components are adequately protected by wrapping them well with packing materials. Pack the component in an oversized box (if the original box is not available) with extra packing material around the unit so that the component is prevented from moving around inside the box.
-
Securely tape the box closed.
-
Write the RMA number on the exterior of the box to ensure proper tracking.
