Install the MX304
Tools Required to the Install MX304 Router in a Rack
To install the router, you need the following tools and parts:
Phillips (+) screwdriver, number 2
ESD grounding wrist strap
See Also
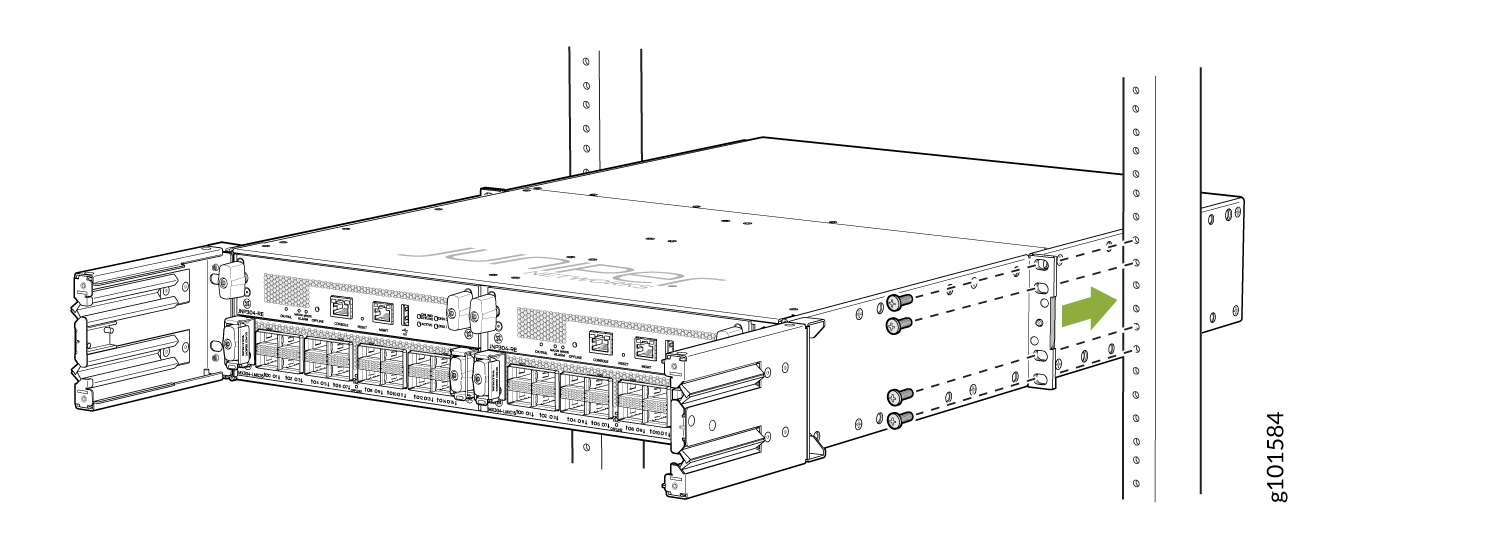
Install the MX304 Router in a Four-Post Rack
Here's how to install the router in a four-post rack or a cabinet:
The four-post mounting kit (JNP304-4PST-RMK) is included with the MX304. If the four-post kit is lost, you can order a replacement.
If you're installing more than one router in a rack, install them from the bottom up.
Before front-mounting the router in a rack, have a qualified technician verify that the rack is strong enough to support the router's weight and is adequately supported at the installation site.
Lifting the chassis and mounting it in a rack requires two people (one person to hold the router in place and a second person to install the screws). A fully loaded AC-powered, DC-powered, HVAC/DC-powered router weighs up to 70.54 lb (32 kg).
-
(Optional) Install the cable management brackets on each side of the front of
the chassis, and secure each bracket with screws at the bottom and top of the
bracket as shown below:
Figure 1: Install the Cable Manager
-
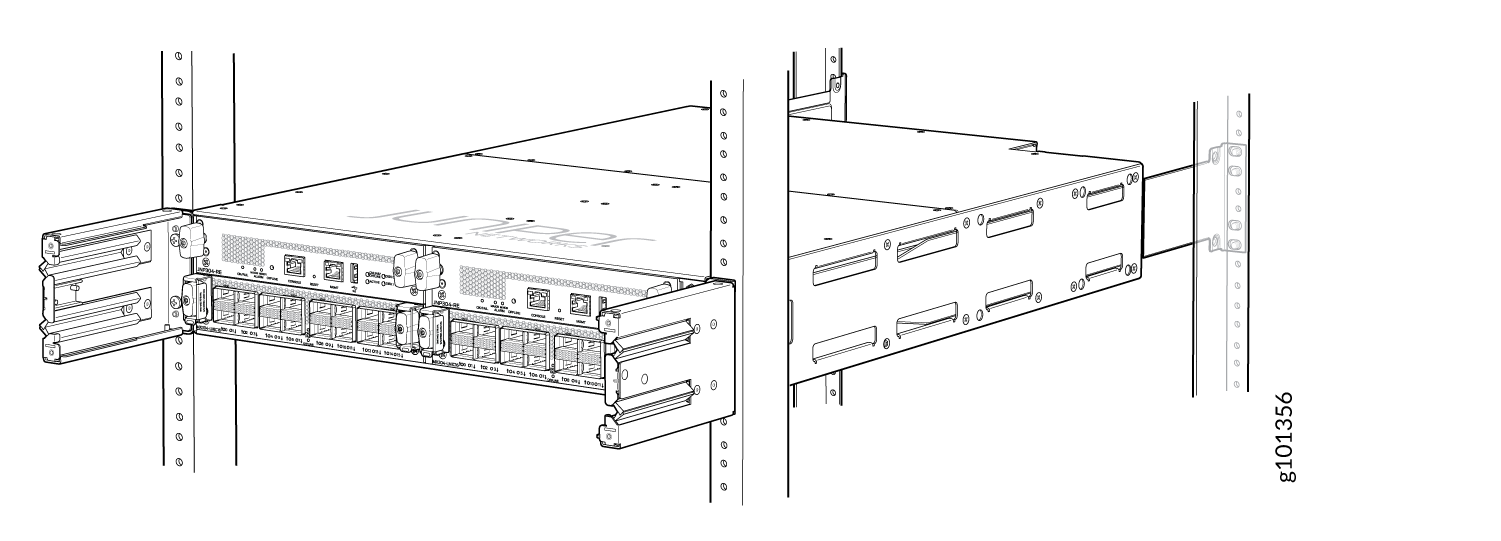
Attach the chassis to the front of the rack as shown below: Figure 2.
Figure 2: Attach the Chassis to the Rack Front Posts
-
On the rear of the chassis, slide the rear-mounting brackets on both sides of
the chassis until they contact the rack rails. Starting from the bottom of the
rack, insert the mounting screws through the mounting brackets and mounting
holes on the rack and tighten them. See Figure 3.
Figure 3: Attach the Rear Brackets
-
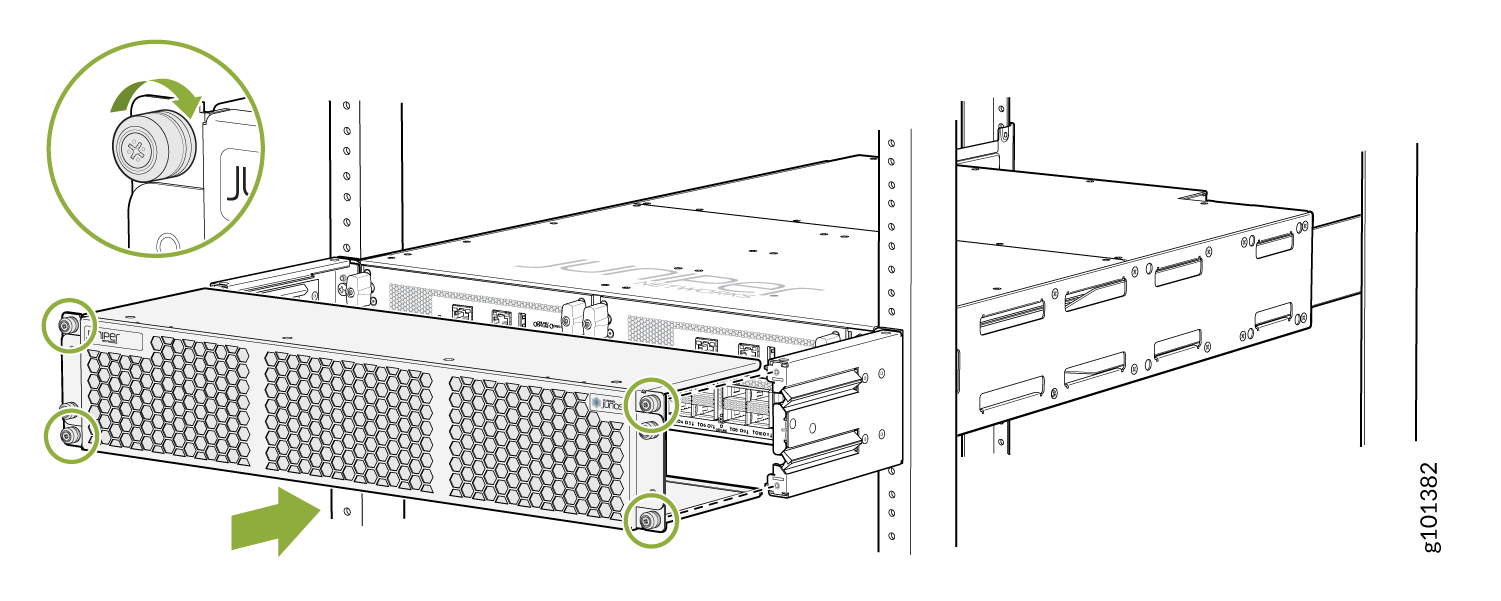
Verify that the mounting screws on each side of the rack are aligned and the
router is level.
Figure 4: Secure the Chassis in the Rack
-
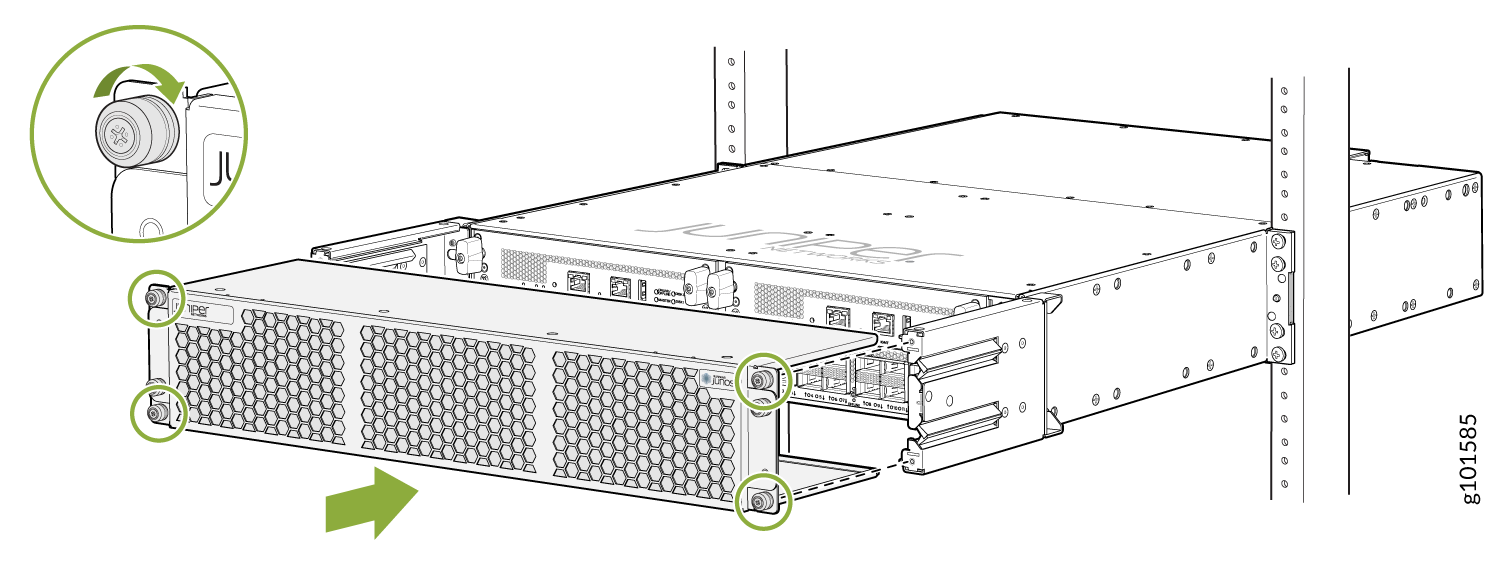
(Optional) Secure the front cover with the air filter to the chassis. Tighten
the four screws turning them clockwise. See Figure 5.
Figure 5: Installing the Cover with the Air Filter
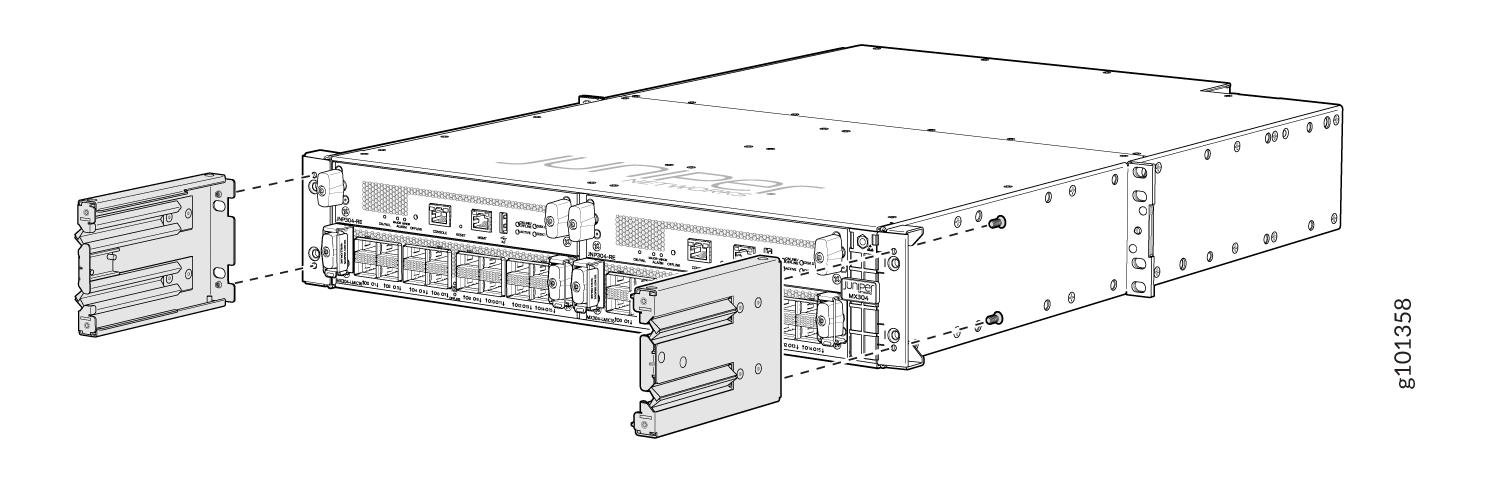
Install the MX304 Router in a Two-Post Rack
To install the router in a two-post rack or a cabinet:
The two-post mounting kit is not included with the chassis. You can order the two-post kit (JNP304-2PST-RMK).
If you are installing more than one router in a rack, install the lowest one first.
Before front-mounting the router in a rack, have a qualified technician verify that the rack is strong enough to support the router's weight and is adequately supported at the installation site.
Lifting the chassis and mounting it in a rack requires two people (one person to guide the router in place and a second person to install the screws). A fully loaded AC-powered, DC-powered, HVAC/DC-powered router weighs up to 70.54 lb (32 kg).
-
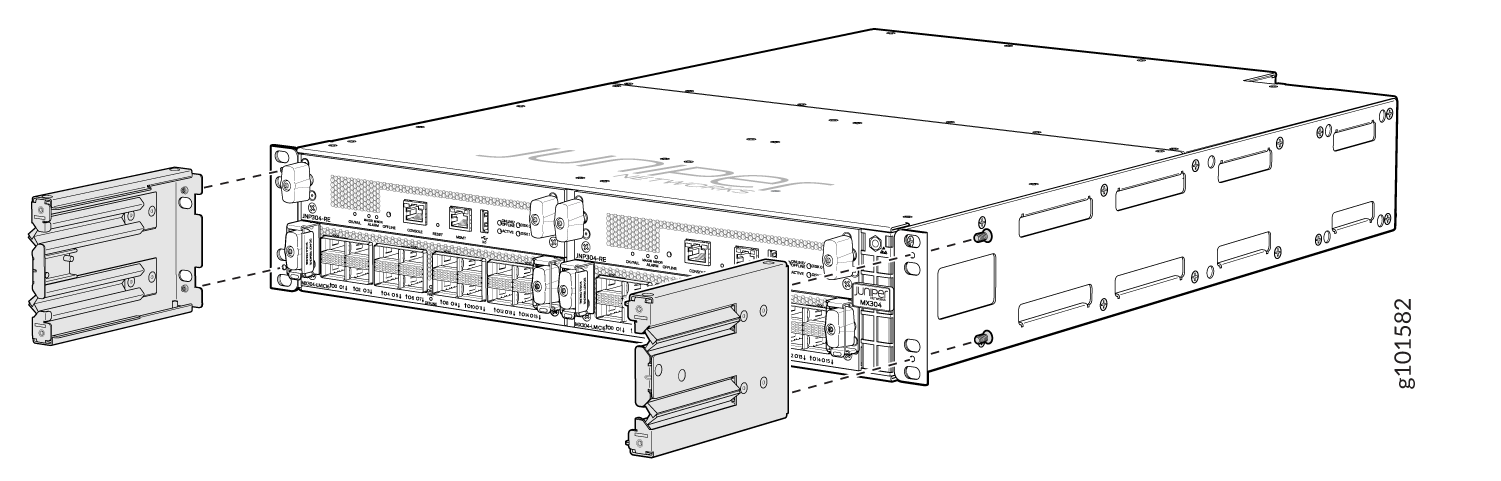
Remove the mounting bracket that is preinstalled on the chassis. See Figure 6.
Figure 6: Remove the Preinstalled Bracket
-
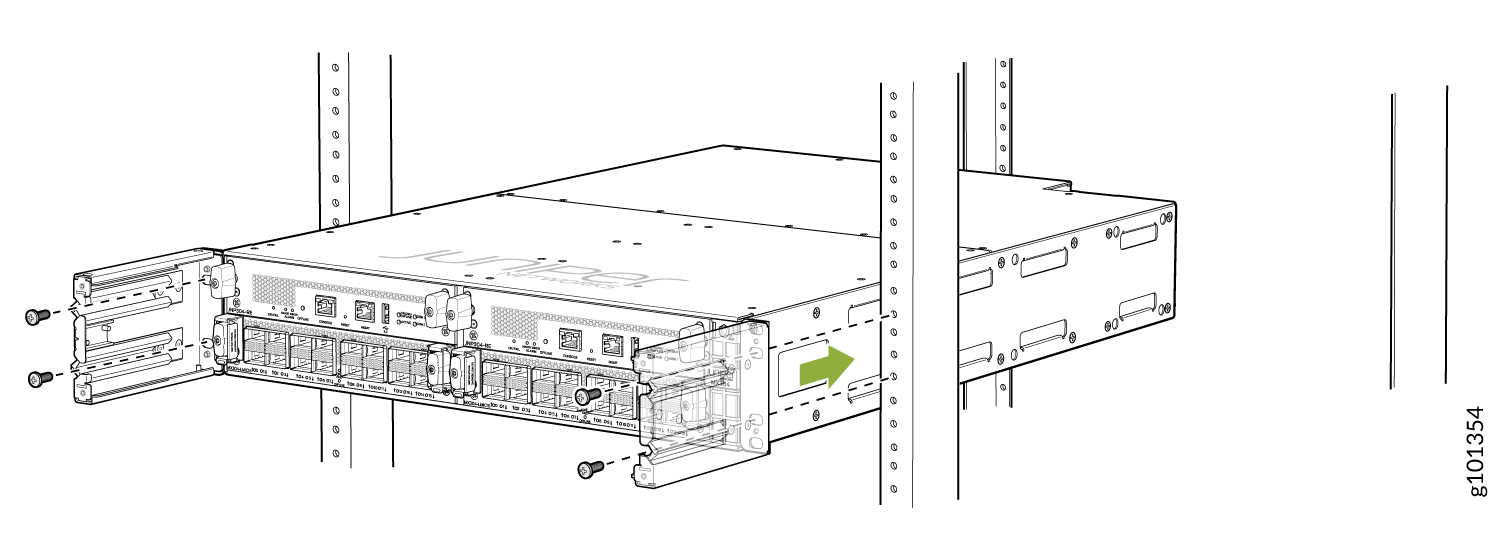
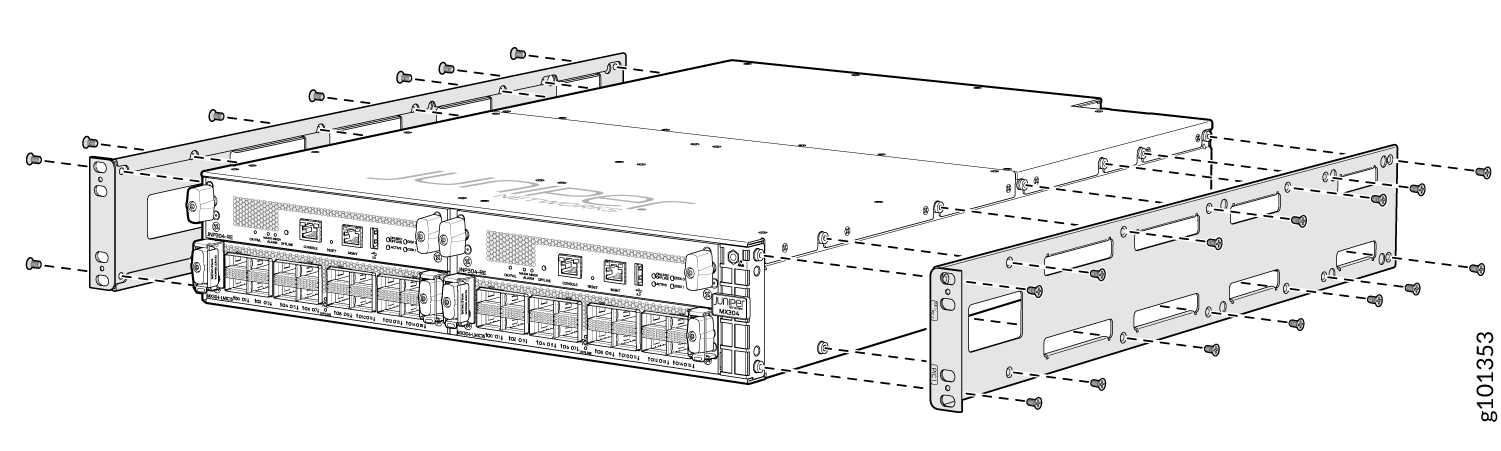
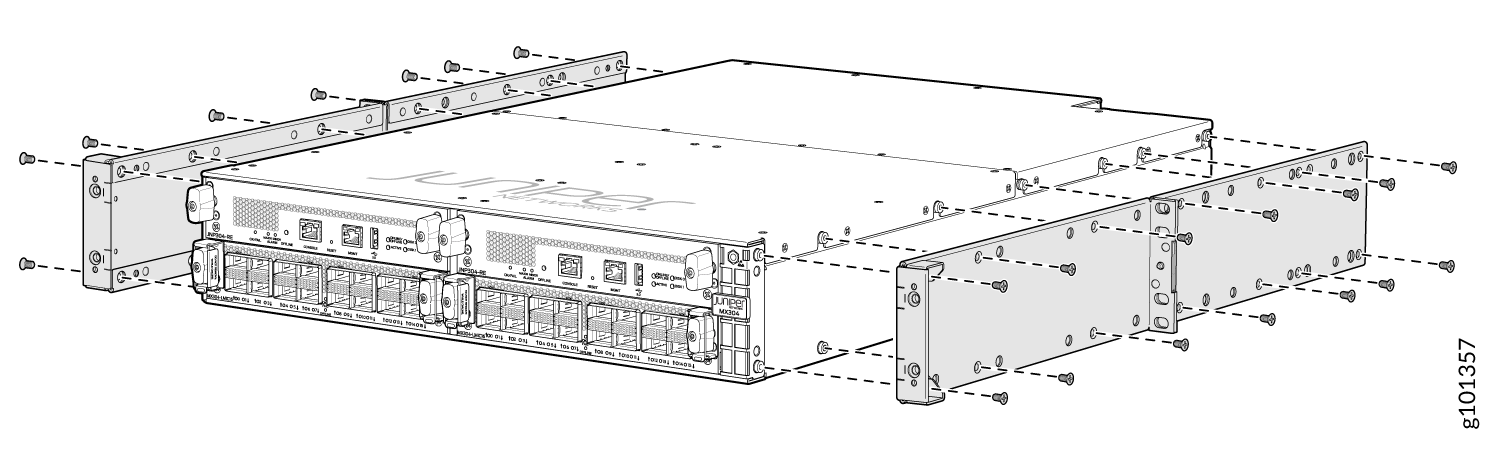
Align the holes in the mounting bracket with the screw holes on the side of the
chassis. Attach the mounting bracket to the device by using the mounting screws.
Tighten the screws. See Figure 7.
Figure 7: Attach the 2-Post Brackets
-
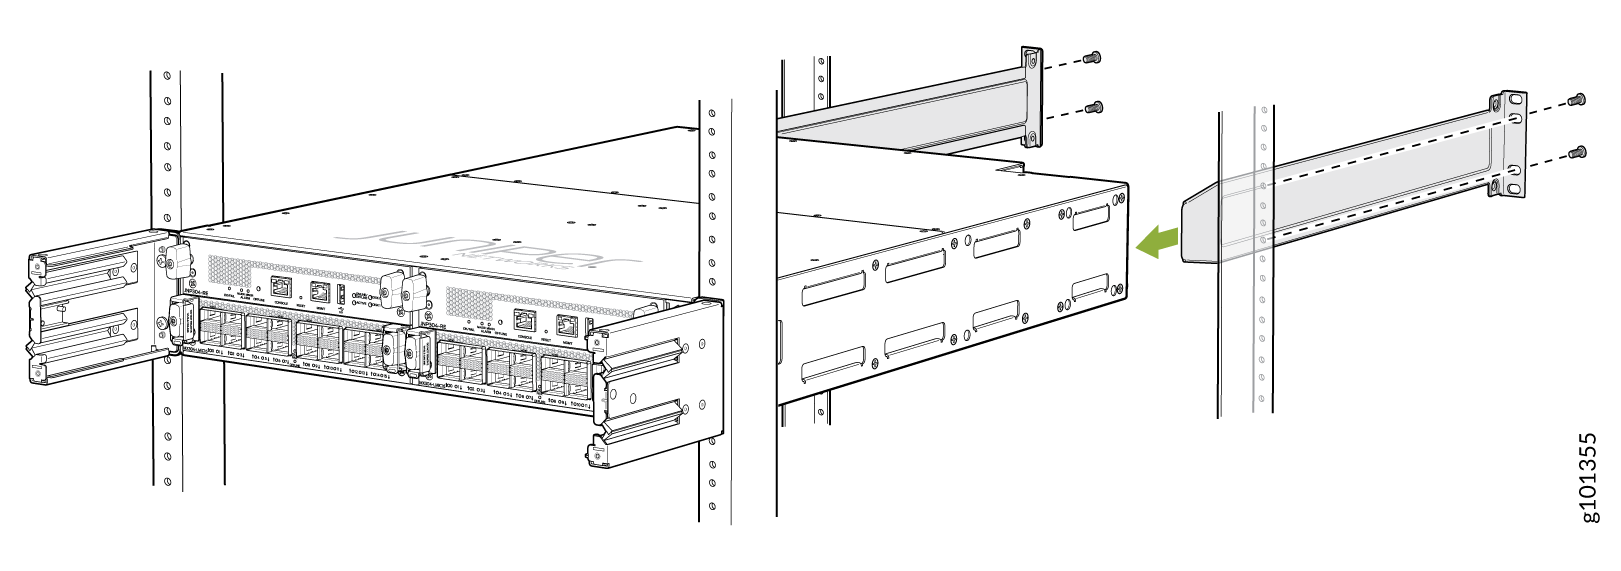
Install the cable management brackets on each side of the chassis, and secure
each bracket with screws at the bottom and top of the bracket.
Figure 8: Attach the Cable Manager
-
Have a second person secure the bracket to the rack by using four mounting
screws (and cage nuts and washers if your rack requires them. Tighten the
screws. See Figure 9.
Figure 9: Install the Chassis in the Two-post Rack
-
(Optional) Attach the front cover with the air filter to the chassis. Tighten
the four screws turning them clockwise.
Figure 10: Attach the Front Cover with the Air Filter